Model Context Protocol (Preview): Connect Dataverse to AI Tools
August 22, 2025
#Dataverse#Copilot Studio#AI
Harshitha Madem
Introduction:
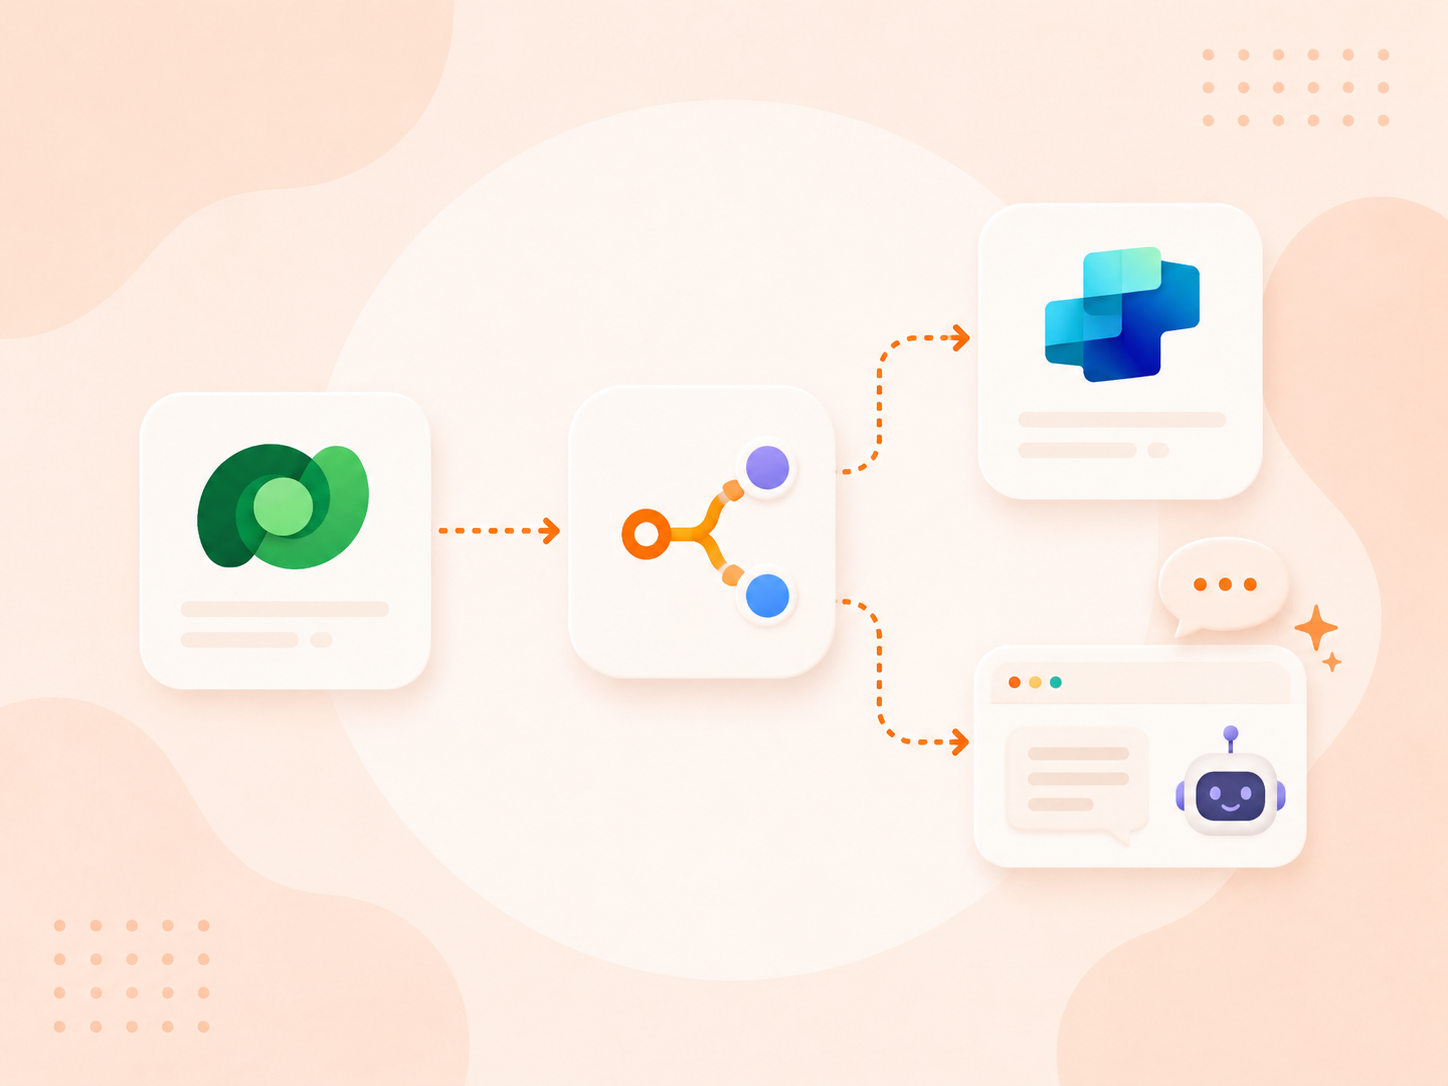
Microsoft has introduced a new way for AI apps to connect with Dataverse, called the Model Context Protocol (MCP). It's currently in preview, which means it’s available for testing but not yet ready for production use. Still, it offers a practical method for developers to connect large language models (LLMs) like Microsoft Copilot Studio, Claude Desktop, or GitHub Copilot in VS Code with Dataverse more directly and efficiently.
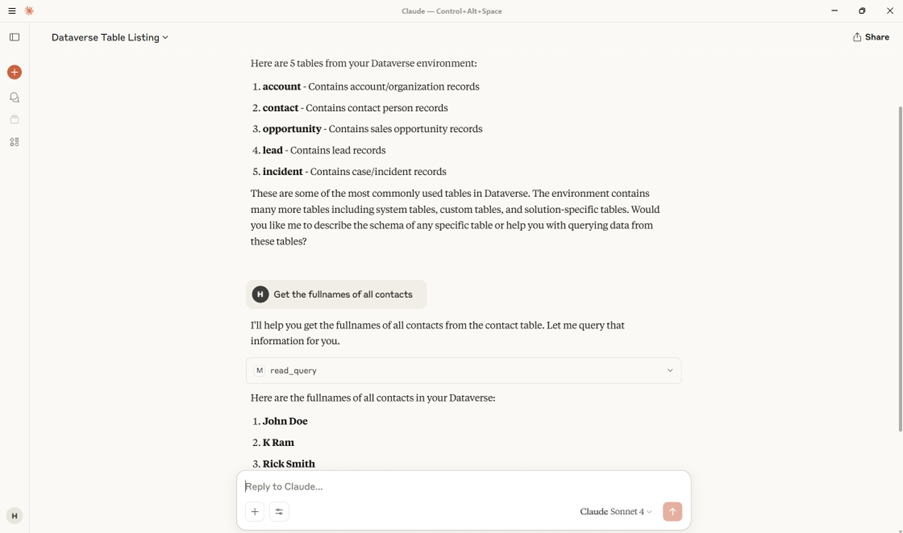
Once connected, these tools can interact with Dataverse using natural language commands like “Show me my contacts” or “How many accounts do I have?” and perform actions such as listing tables, describing a table, reading or updating data, creating new records, listing and executing prompts, as well as accessing and retrieving knowledge sources, all without needing to write traditional code or queries.
In this blog, we’ll walk you through how to set up and use the Model Context Protocol (MCP) with Dataverse and show you how tools like Copilot Studio can use it to fetch and manage data using simple natural language queries.
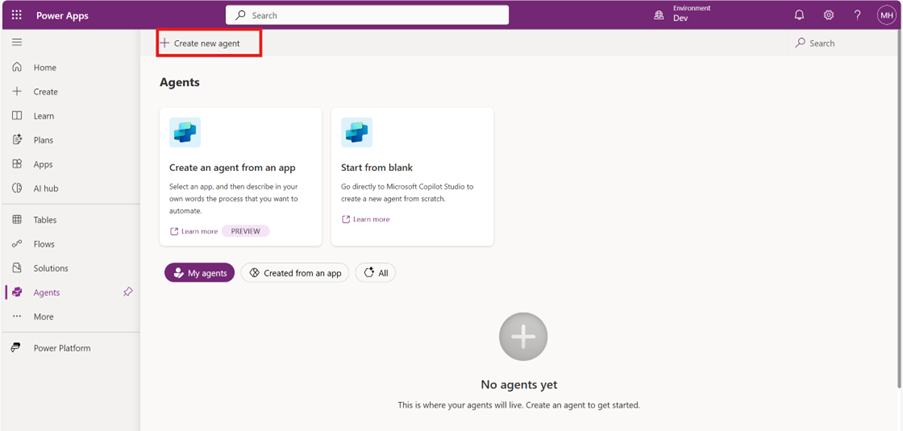
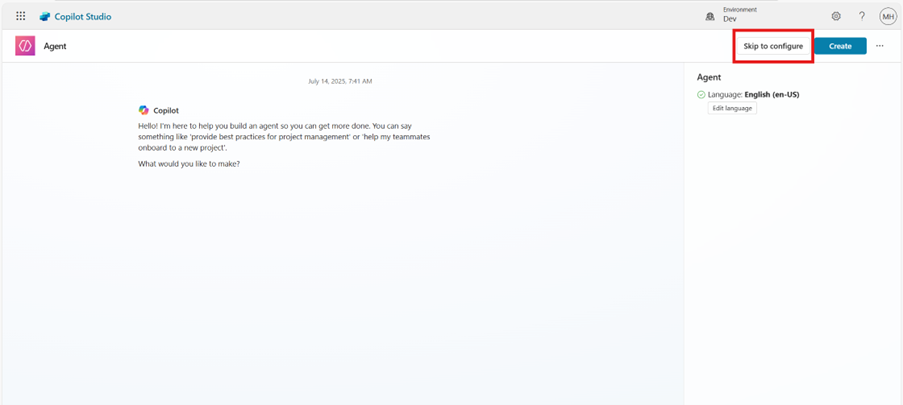
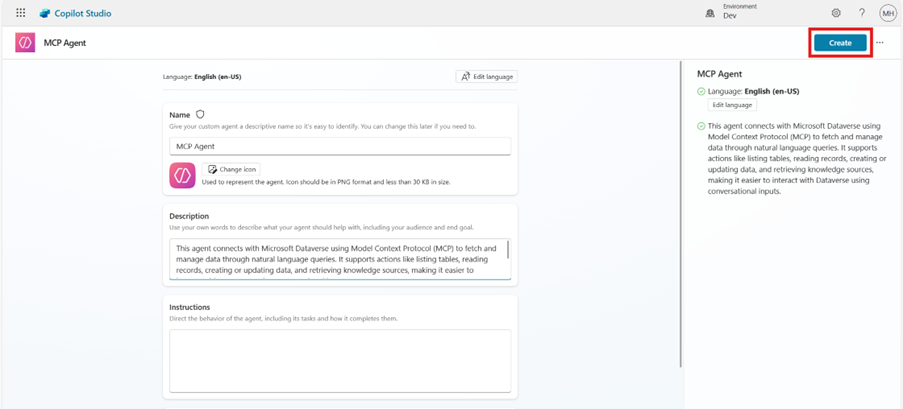
Enter the Agent Name and description, then click Create to finish setting up the agent.
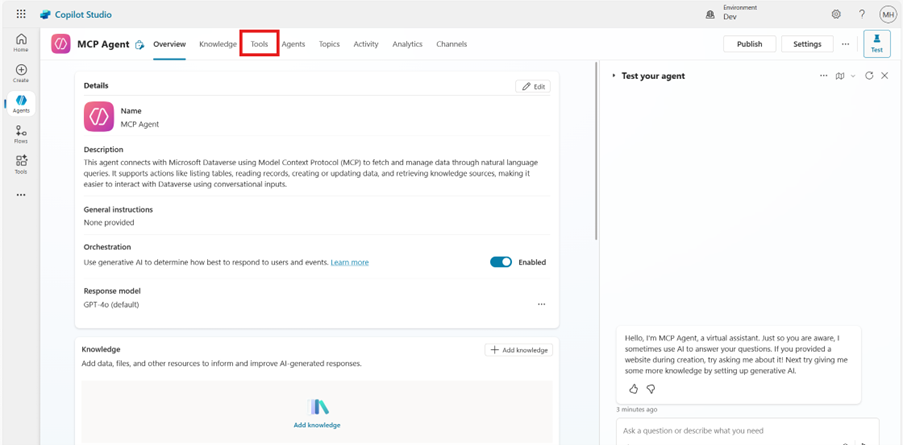
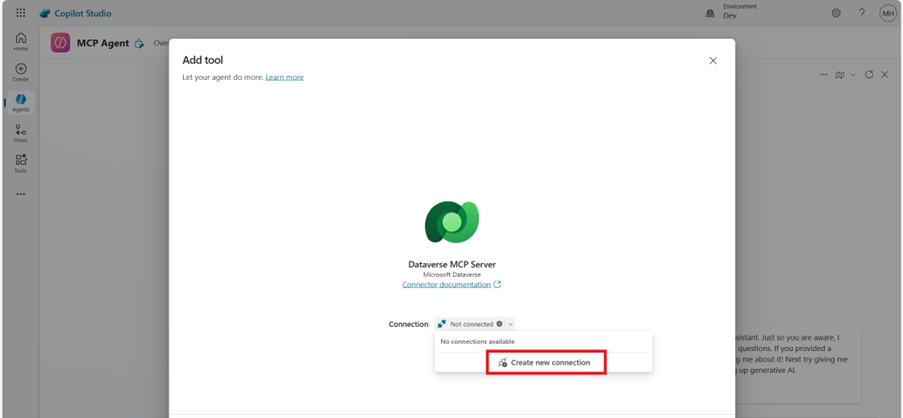
Step 2: Add the Dataverse MCP Tool to the Agent
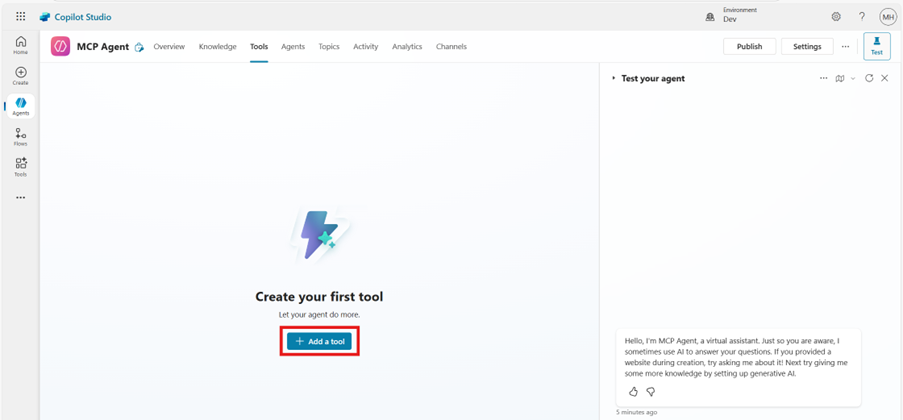
Navigate to the Tools tab on the agent setup page.
Click + Add tool to open the list of available tool types.
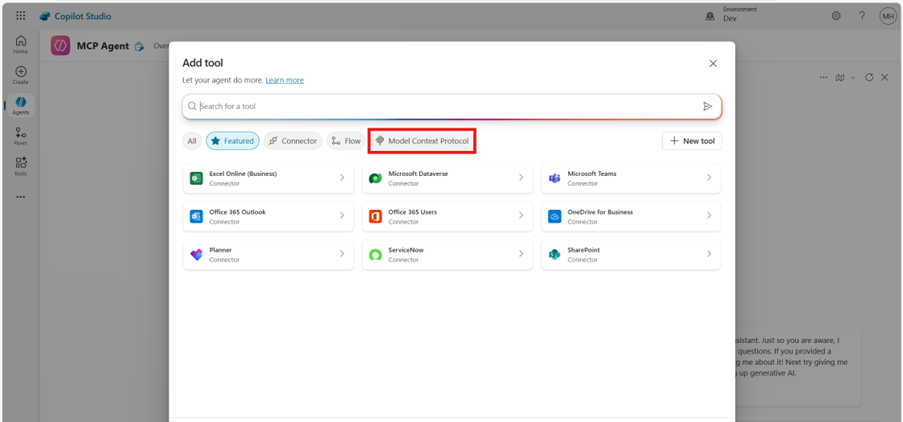
Select Model Context Protocol from the options.
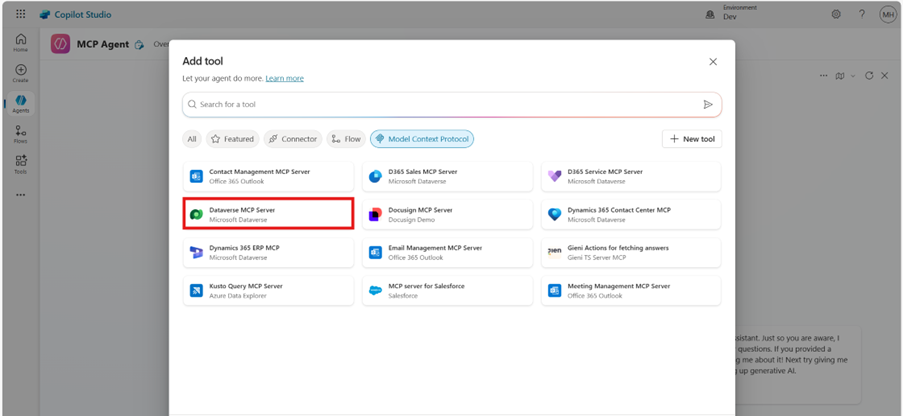
Then choose Dataverse MCP Server as the tool to connect your agent with Dataverse.
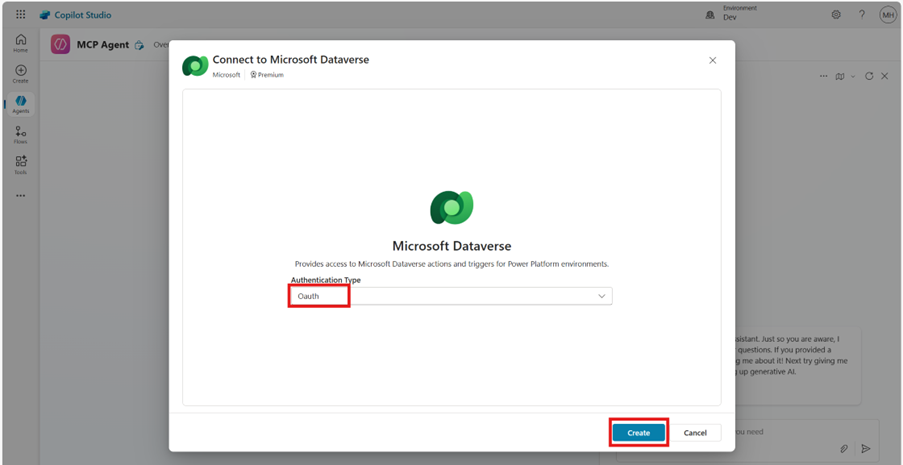
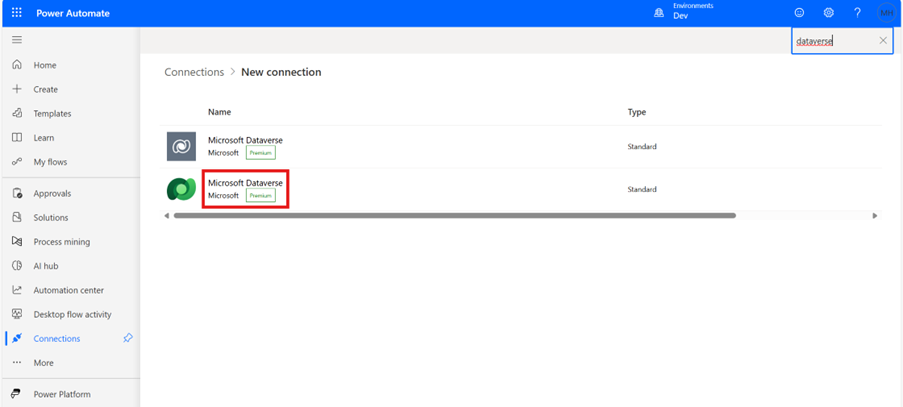
If no Dataverse connection exists, you’ll be prompted to sign in and create one.
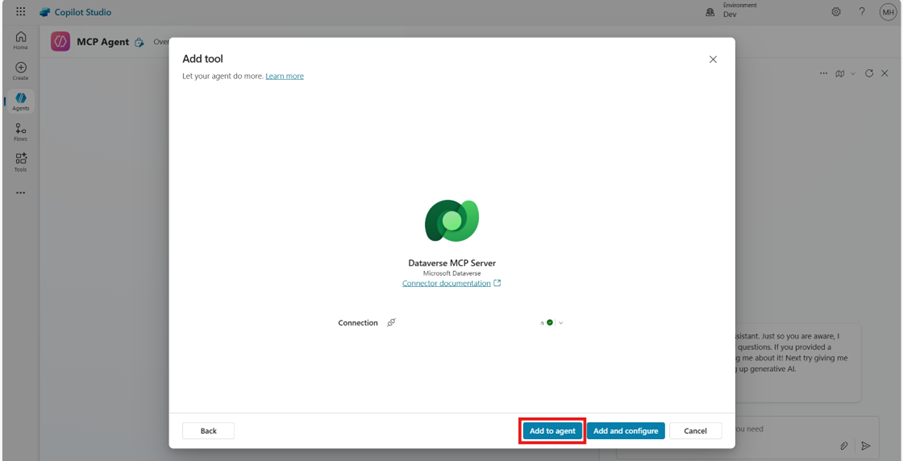
Once the connection is established, click Add to Agent to complete the setup.
Step 3: Test the Agent with Dataverse MCP
Navigate to the Test You’re Agent pane on the right side of the screen.
In the message box, enter a sample query such as “List tables in Dataverse” or “Describe table account.”
The agent should respond by fetching data directly from Dataverse using the MCP connection.
Verify that the responses are accurate and reflect your Dataverse environment.
Connect to Dataverse Using MCP Server in Claude Desktop.
This section guides you through how to set up and use the Dataverse MCP server with Claude Desktop and GitHub Copilot in VS Code. Before starting, make sure you meet the following prerequisites.
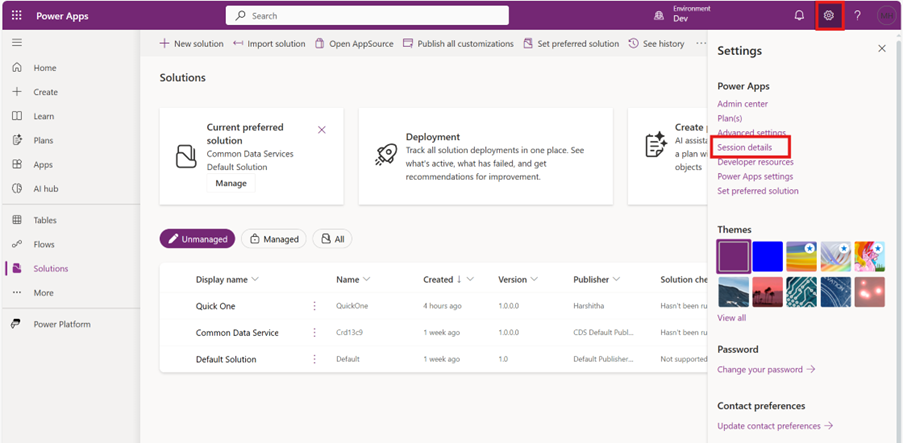
Click the gear icon on the top-right and select Session details.
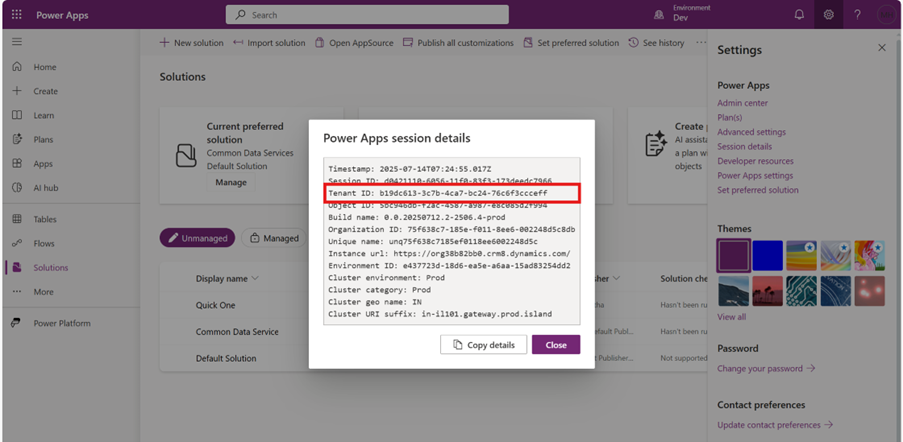
Copy the tenant ID and save it. You’ll need it for Claude and VS Code configuration.
Step 4: Configure the MCP Server in Claude Desktop
Download and install Claude Desktop.
Complete the login or sign-up process to proceed.
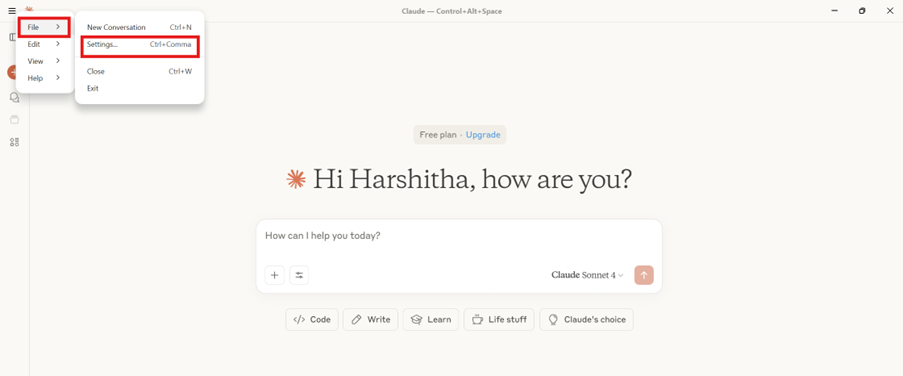
Go to File and select Settings.
Navigate to the Developer section and click Edit Config.
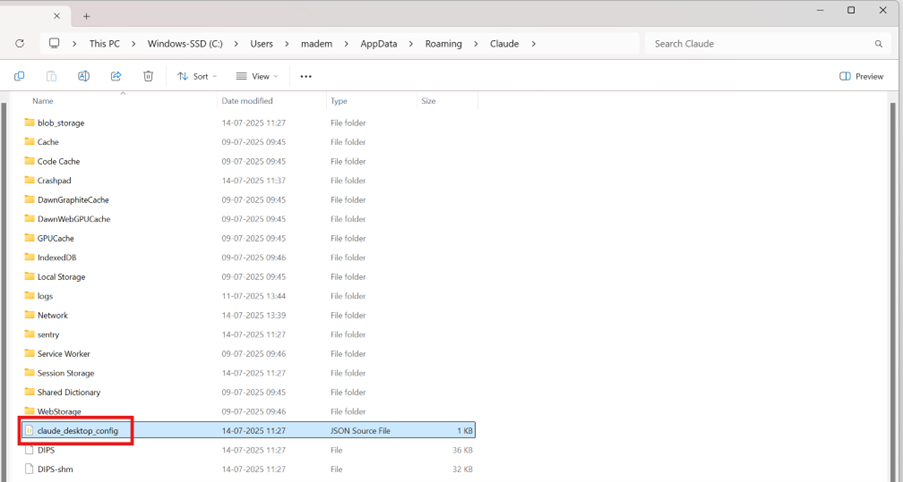
This will open the Claude desktop configuration folder in File Explorer.
Open the file named claude_desktop_config.json.
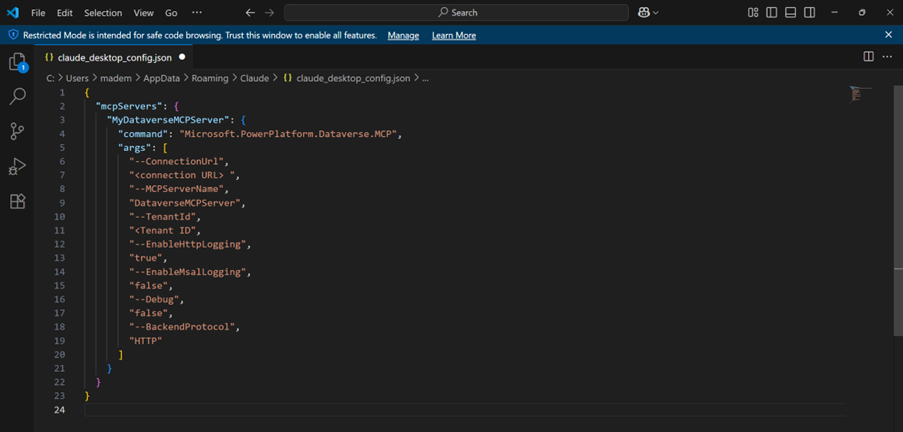
Replace <connection URL> and <tenant Id> with your connection URL and tenant ID.
Use a <friendly name> for your Dataverse MCP server, for example MyDataverseMCPServer.
Save the file and restart Claude desktop to apply the changes.
Step 5: Open Claude and Verify the MCP Server
After saving the claude_desktop_config.json file, reopen Claude desktop.
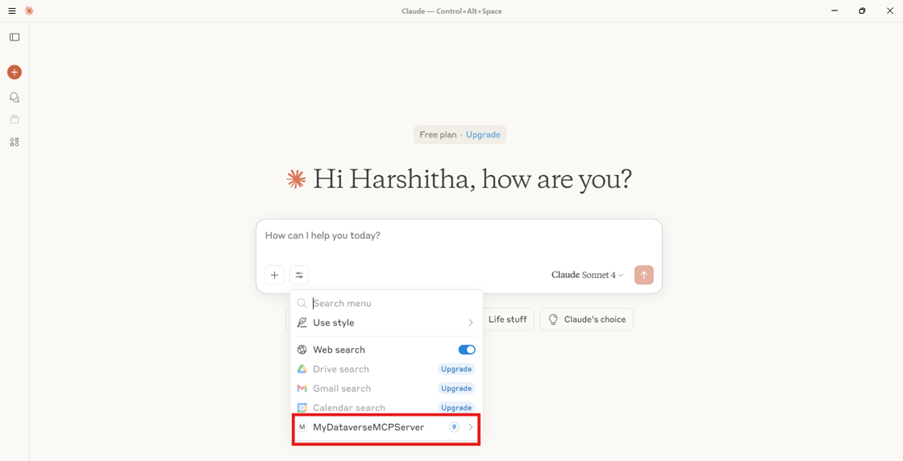
Verify that you can view the Dataverse MCP server by clicking Search and tools.
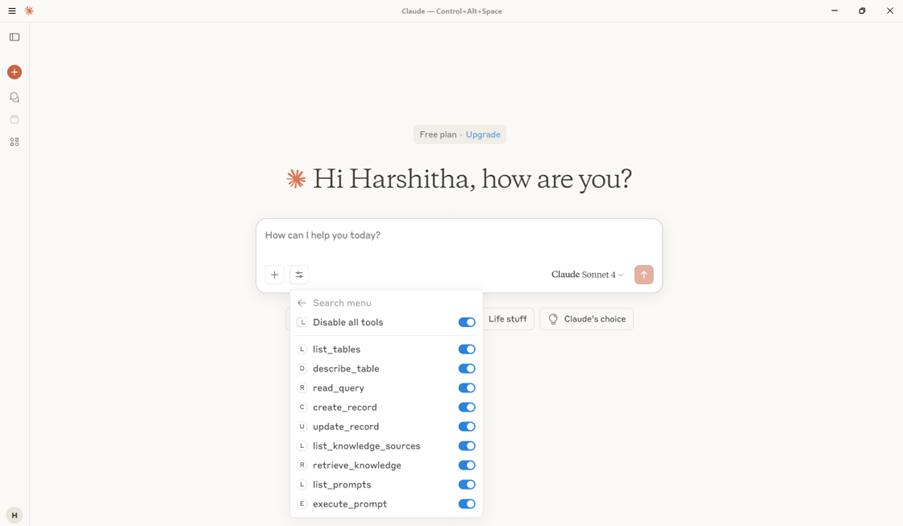
Click on your MCP server to view the list of available tools.
Test the MCP server in Claude.
Frequently Asked Questions:
1. Why am I facing an error even though my connection URL and tenant ID are correct?
Even if the format is correct, you might still face MCP proxy errors if you don’t have an active Power Apps license. The connection string used for MCP requires access through a valid license; free trials without appropriate licenses can sometimes fail silently or throw proxy errors.
2. Claude is not showing my MCP server under ‘Search and Tools’. What should I check?
This usually happens when:
The MCP proxy isn’t running or crashed.
You forgot to restart Claude after updating the config.
There's a syntax issue in your claude_desktop_config.json.
The connection string is invalid (missing apiName).
3. Can I connect to multiple Dataverse environments using MCP?
Yes, you just need to create separate MCP server configurations in your claude_desktop_config.json, each with:
A different --ConnectionUrl
A different --TenantId (if applicable)
A unique --MCPServerName or friendly name
Then, you can switch between them as needed.
4. Can I use Claude Web (browser version) instead of Claude Desktop for MCP?
No, currently only Claude Desktop supports MCP server integration. The browser version of Claude doesn’t provide access to the underlying configuration or allow MCP server connections.
5. How can I switch accounts in Claude if it doesn’t ask me to sign in again?
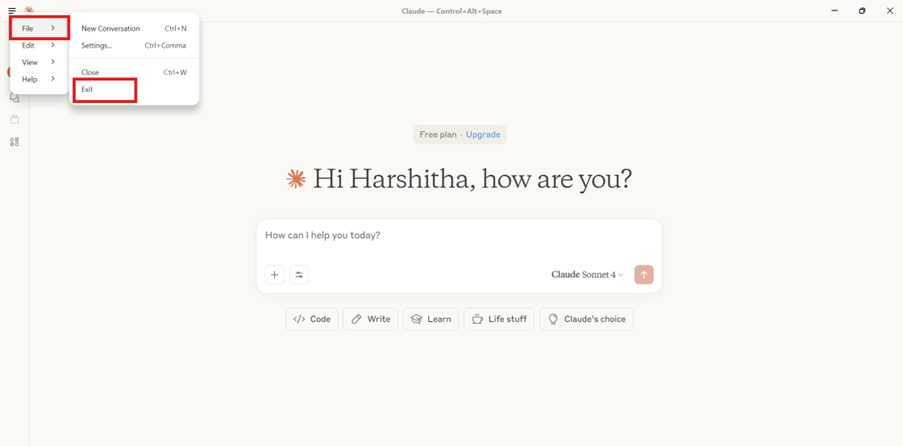
If Claude doesn’t prompt you to log in with a different account:
Exit Claude desktop completely (use
File > Exit
).
Delete the folder: C:\Users\<your-name>\AppData\Local\Microsoft.PowerPlatform.Dataverse.MCP\authCache
Reopen Claude desktop this time; it will ask you to authenticate again, allowing you to choose a different account.