Creating and Configuring Multilingual Agents in Copilot Studio
September 25, 2025
#Copilot Studio#Power Apps#AI
Harshitha Madem
Introduction
Microsoft has introduced a new way for AI apps to connect with Dataverse, called the Model Context Protocol (MCP). It's currently in preview, which means it’s available for testing but not yet ready for production use. Still, it offers a practical method for developers to connect large language models (LLMs) like Microsoft Copilot Studio, Claude Desktop, or GitHub Copilot in VS Code with Dataverse more directly and efficiently.
Once connected, these tools can interact with Dataverse using natural language commands like “Show me my contacts” or “How many accounts do I have?” and perform actions such as listing tables, describing a table, reading or updating data, creating new records, listing and executing prompts, as well as accessing and retrieving knowledge sources, all without needing to write traditional code or queries.
In this blog, we’ll walk you through how to set up and use the Model Context Protocol (MCP) with Dataverse and show you how tools like Copilot Studio can use it to fetch and manage data using simple natural language queries.
Business Scenario
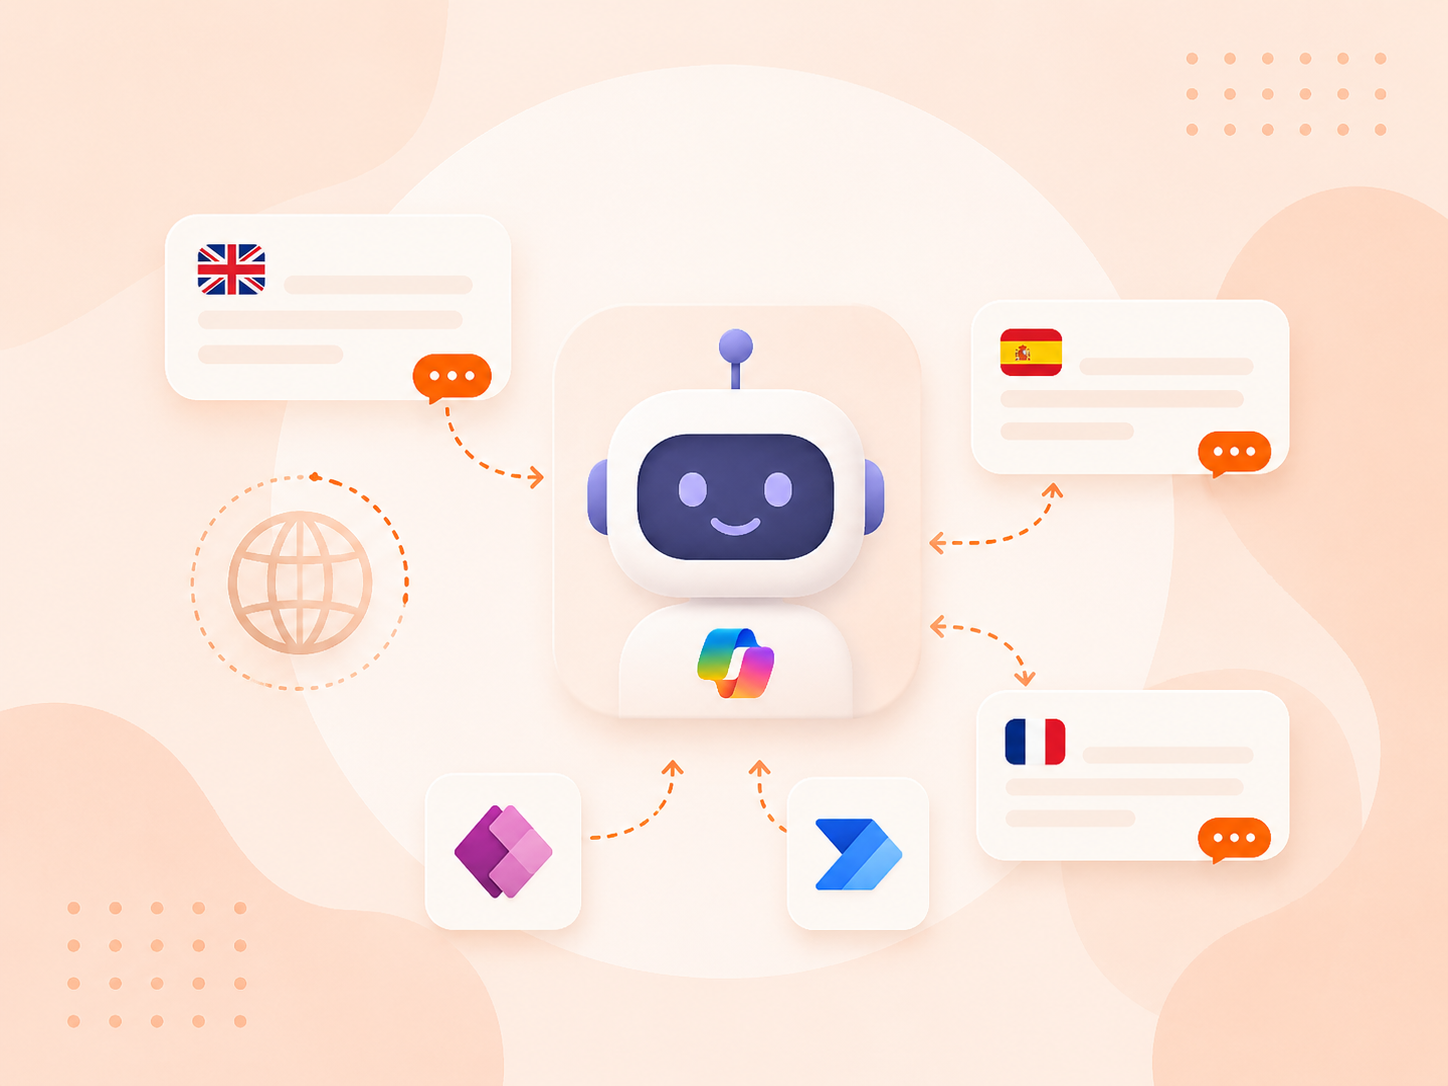
In many organizations, customers or users may interact with applications in different languages. If an agent supports only one language, users may not receive a smooth or personalized experience.
By creating a multilingual agent in Copilot Studio, businesses can provide support in multiple languages using a single agent. This helps improve user experience, reduces the need to create separate agents for each language, and allows customers to interact in their preferred language.
Prerequisites
Access to Microsoft Copilot Studio
Access to Power Apps
Basic knowledge of creating and configuring agents in Copilot Studio
Power Automate access to create flows
Step-by-Step Guide:
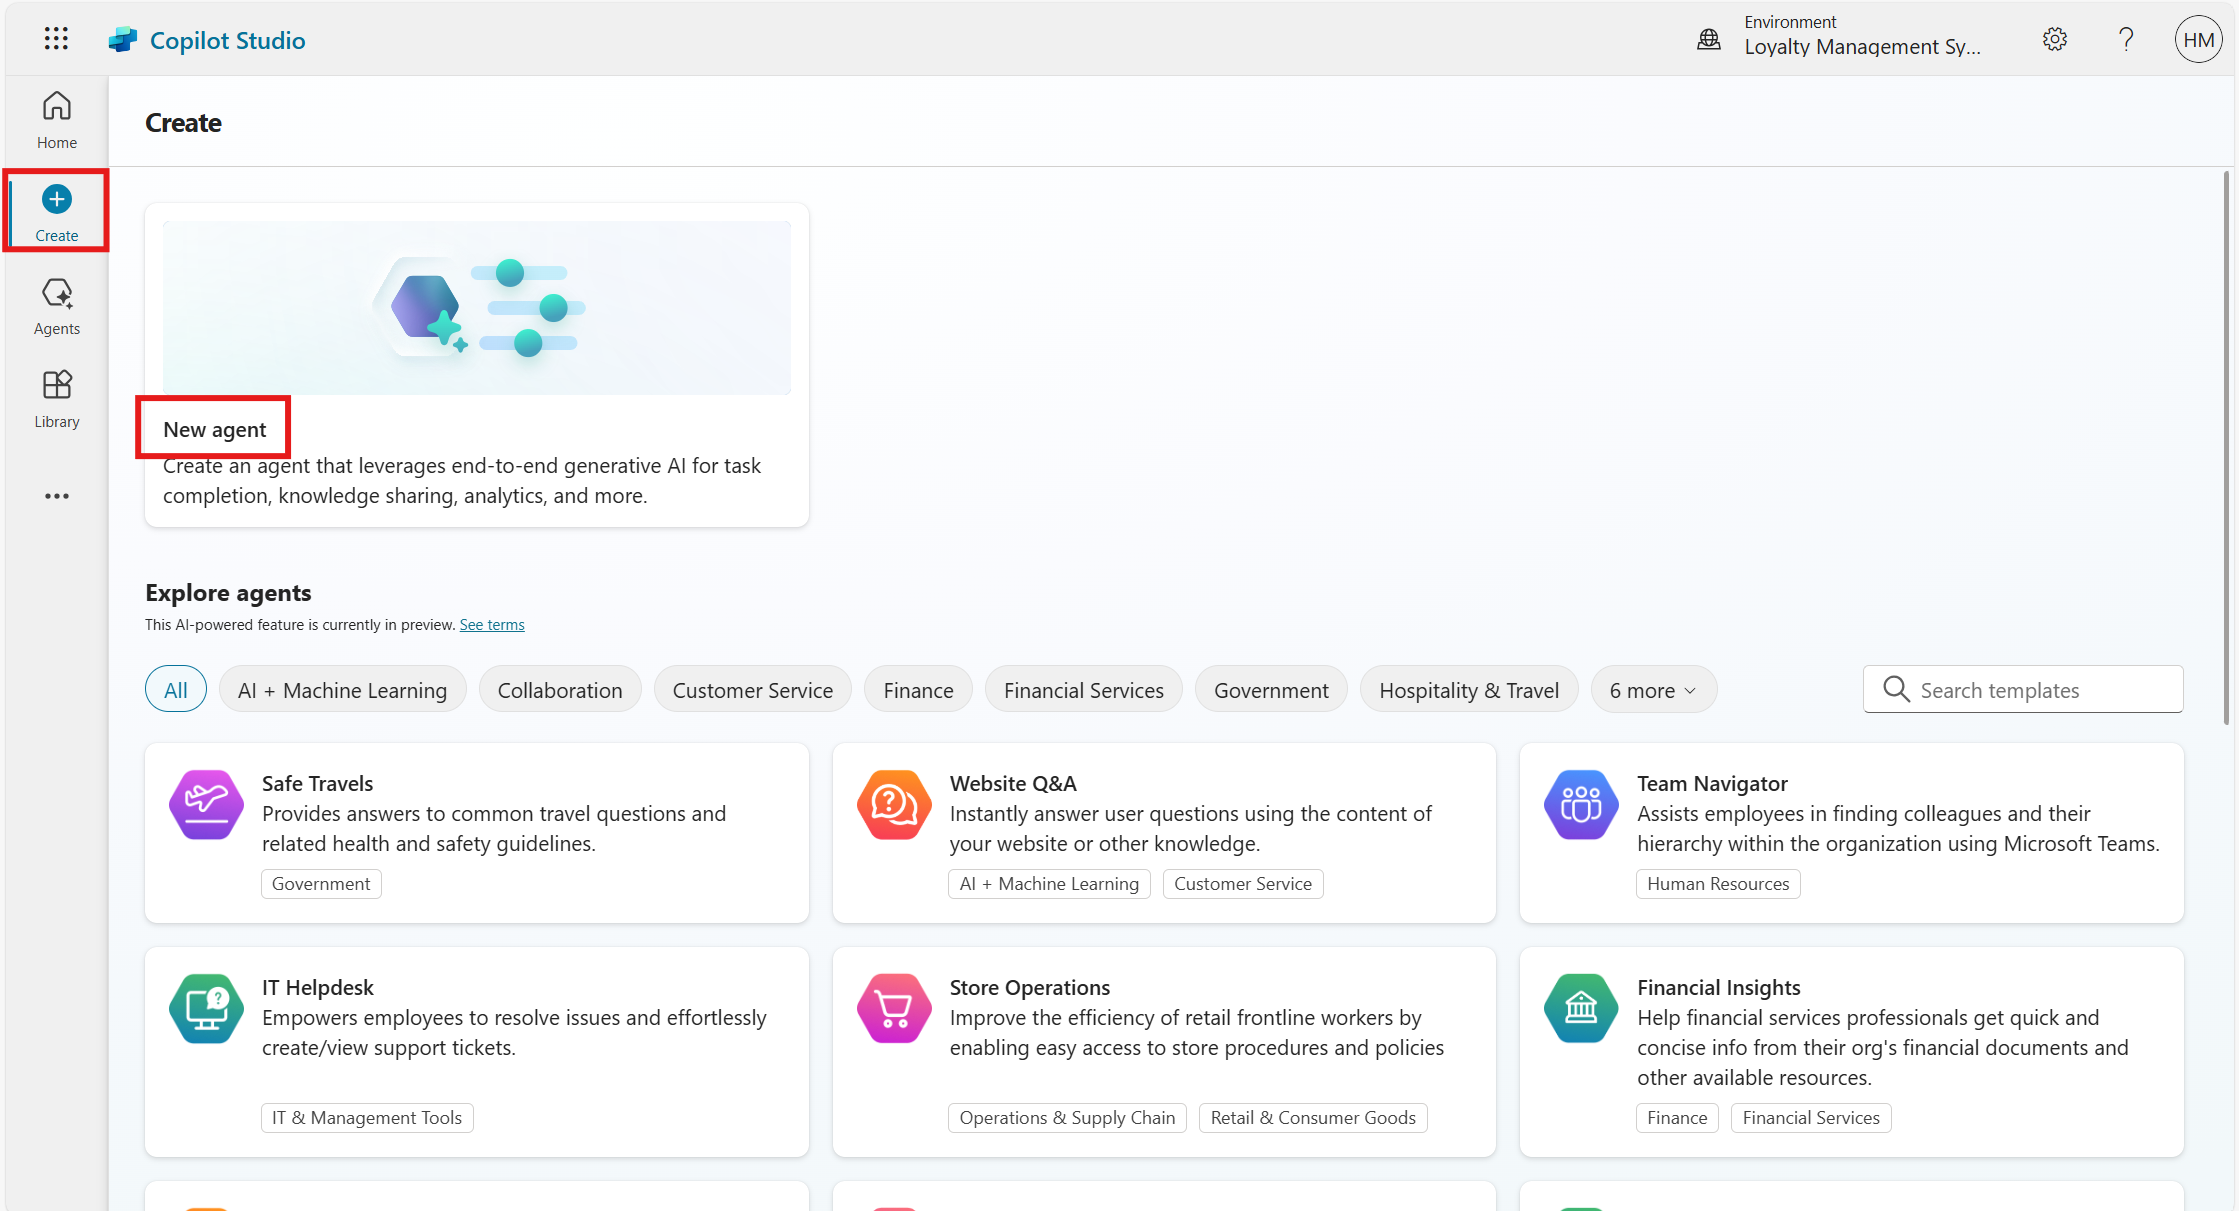
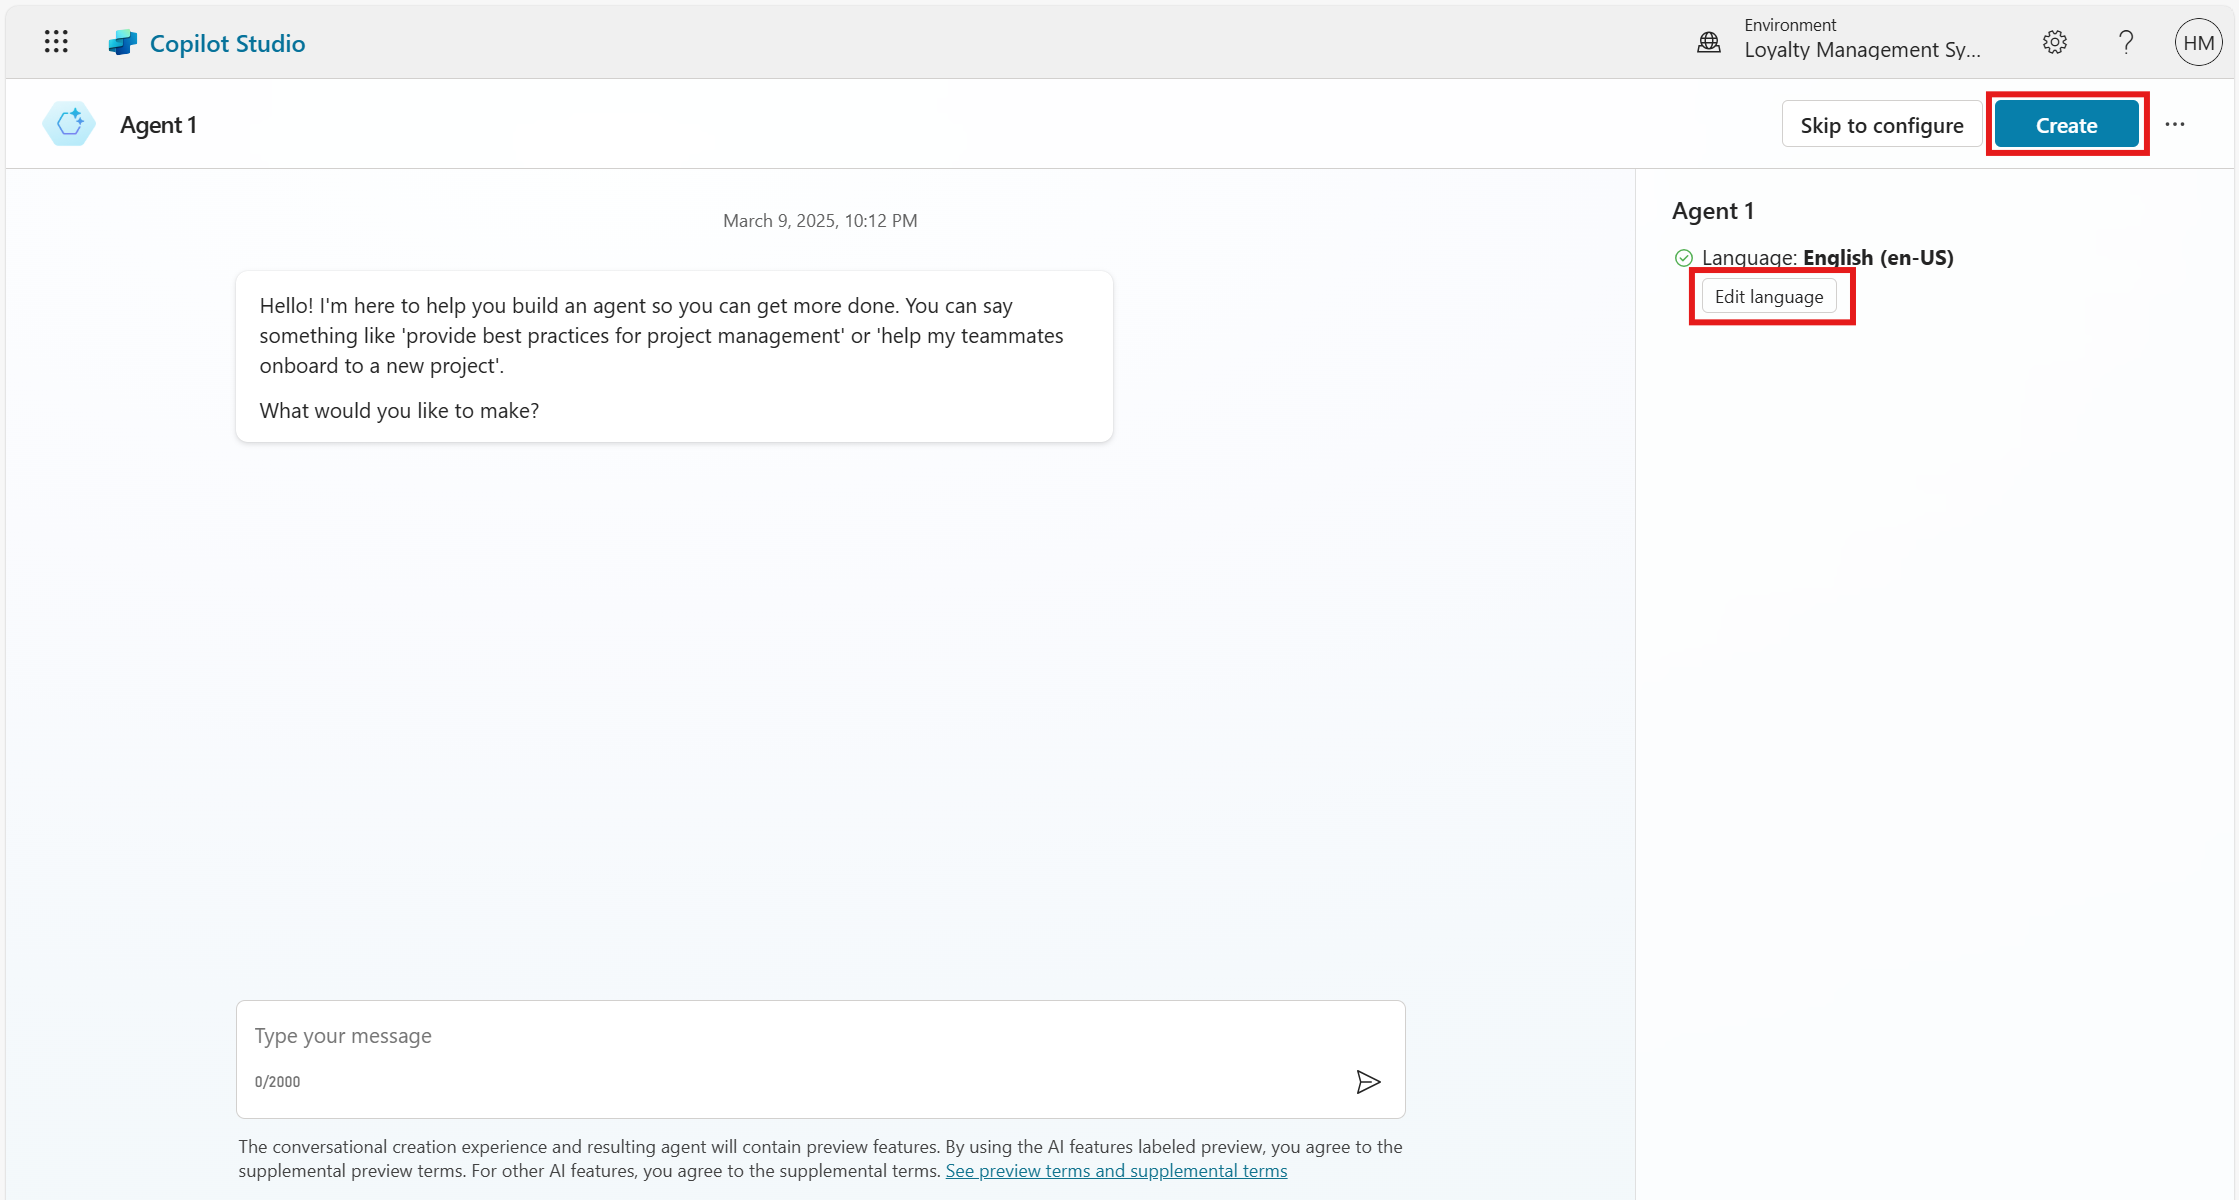
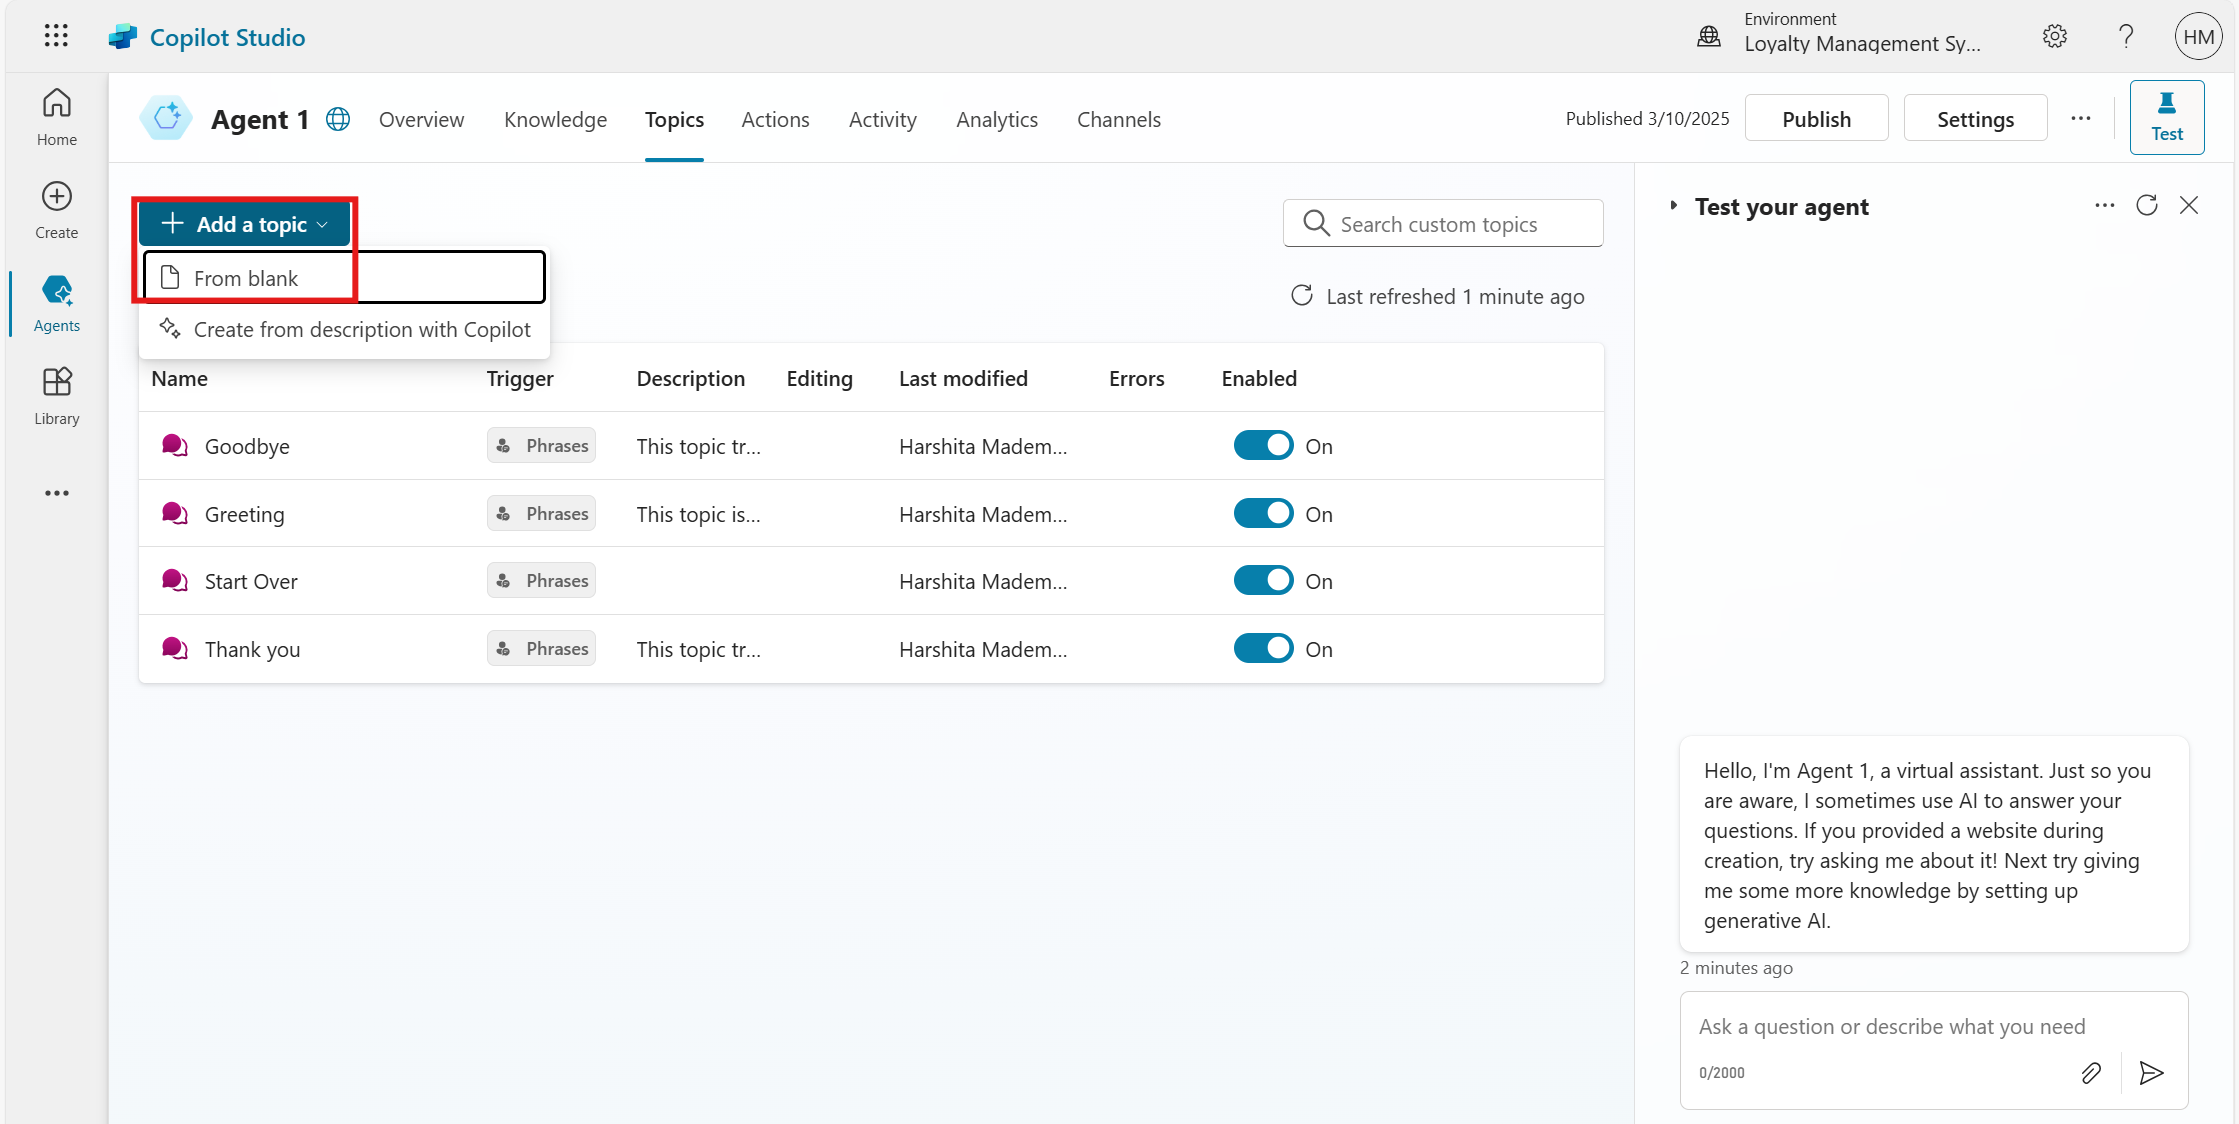
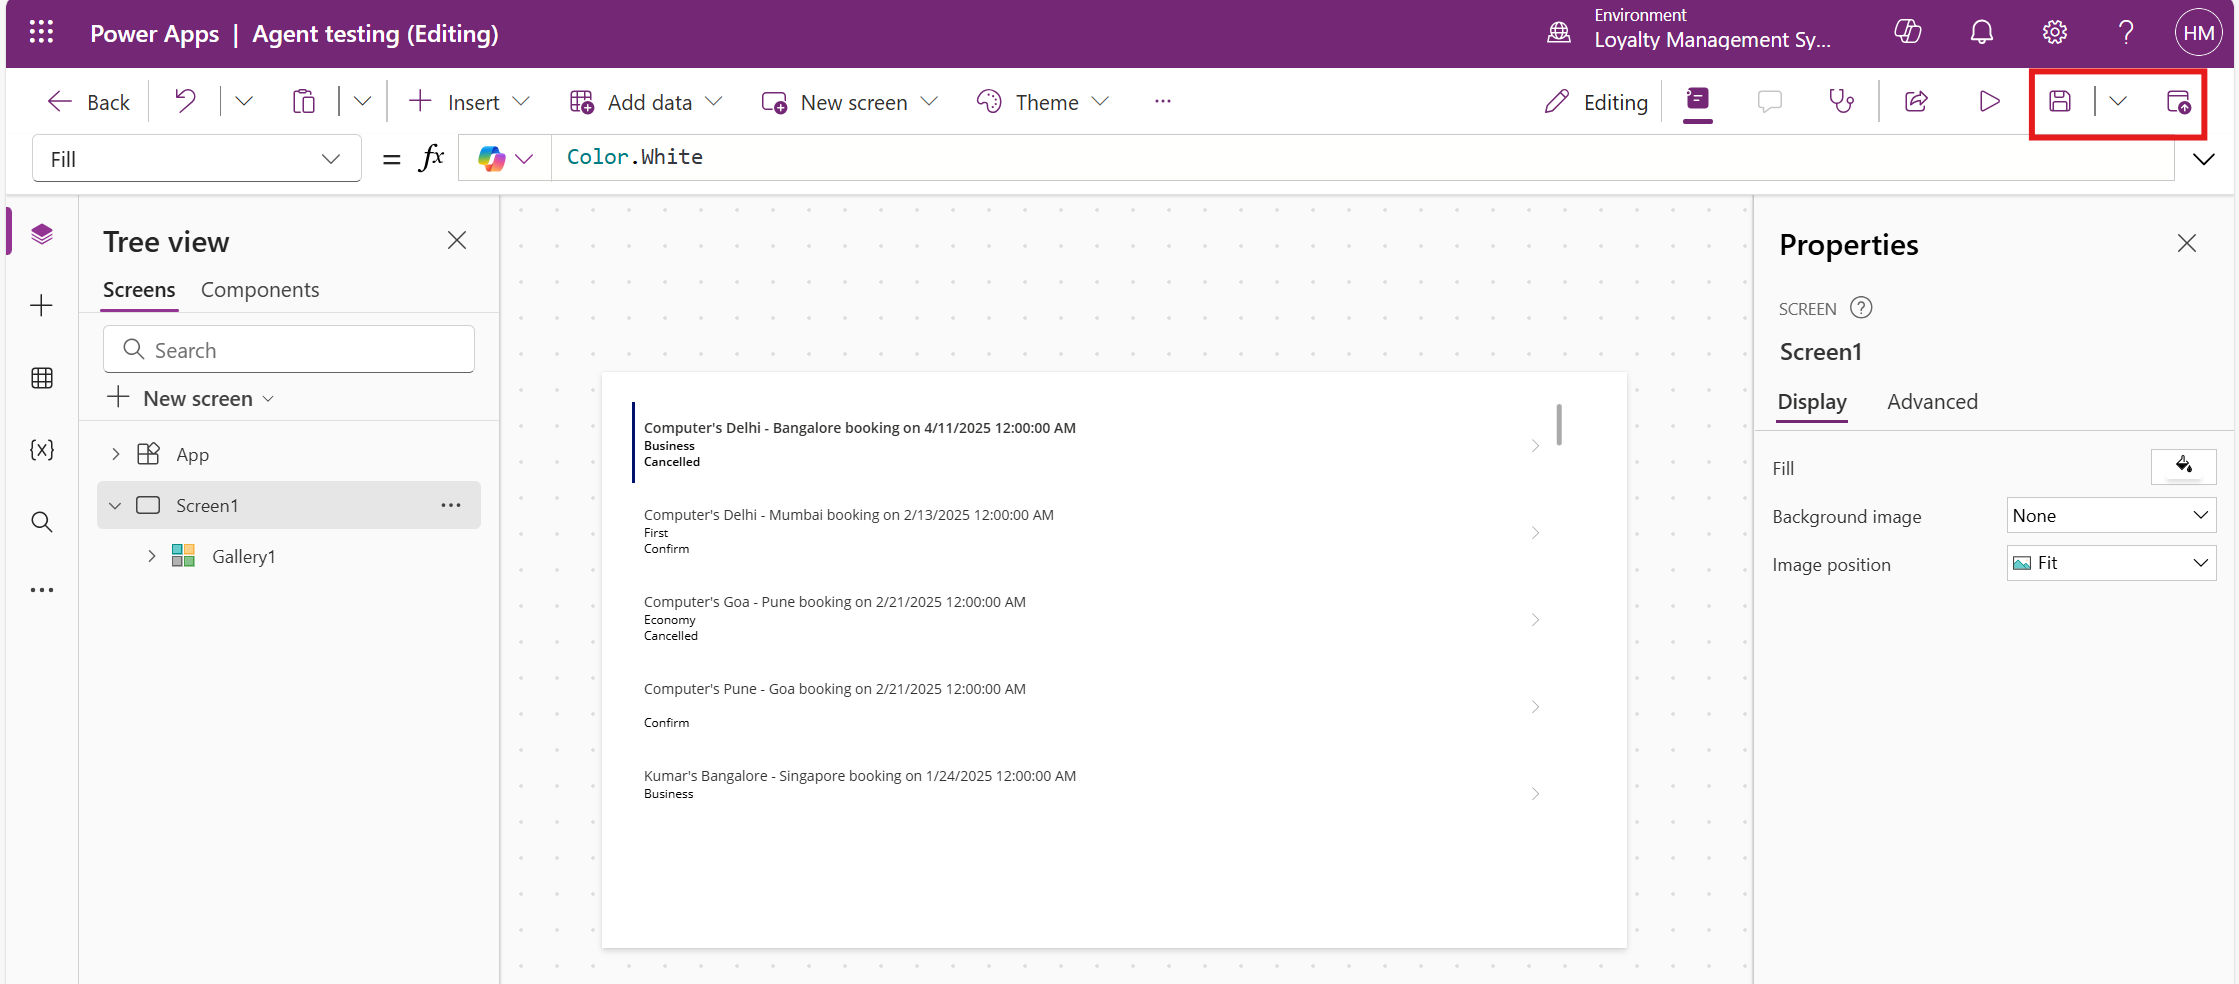
Step 1: Creating the Agent
When creating a new agent, you must define a primary language. This will serve as the base language for all content and interactions.
Need help with your business solution?
Our team can help you implement the right solution for your organization.
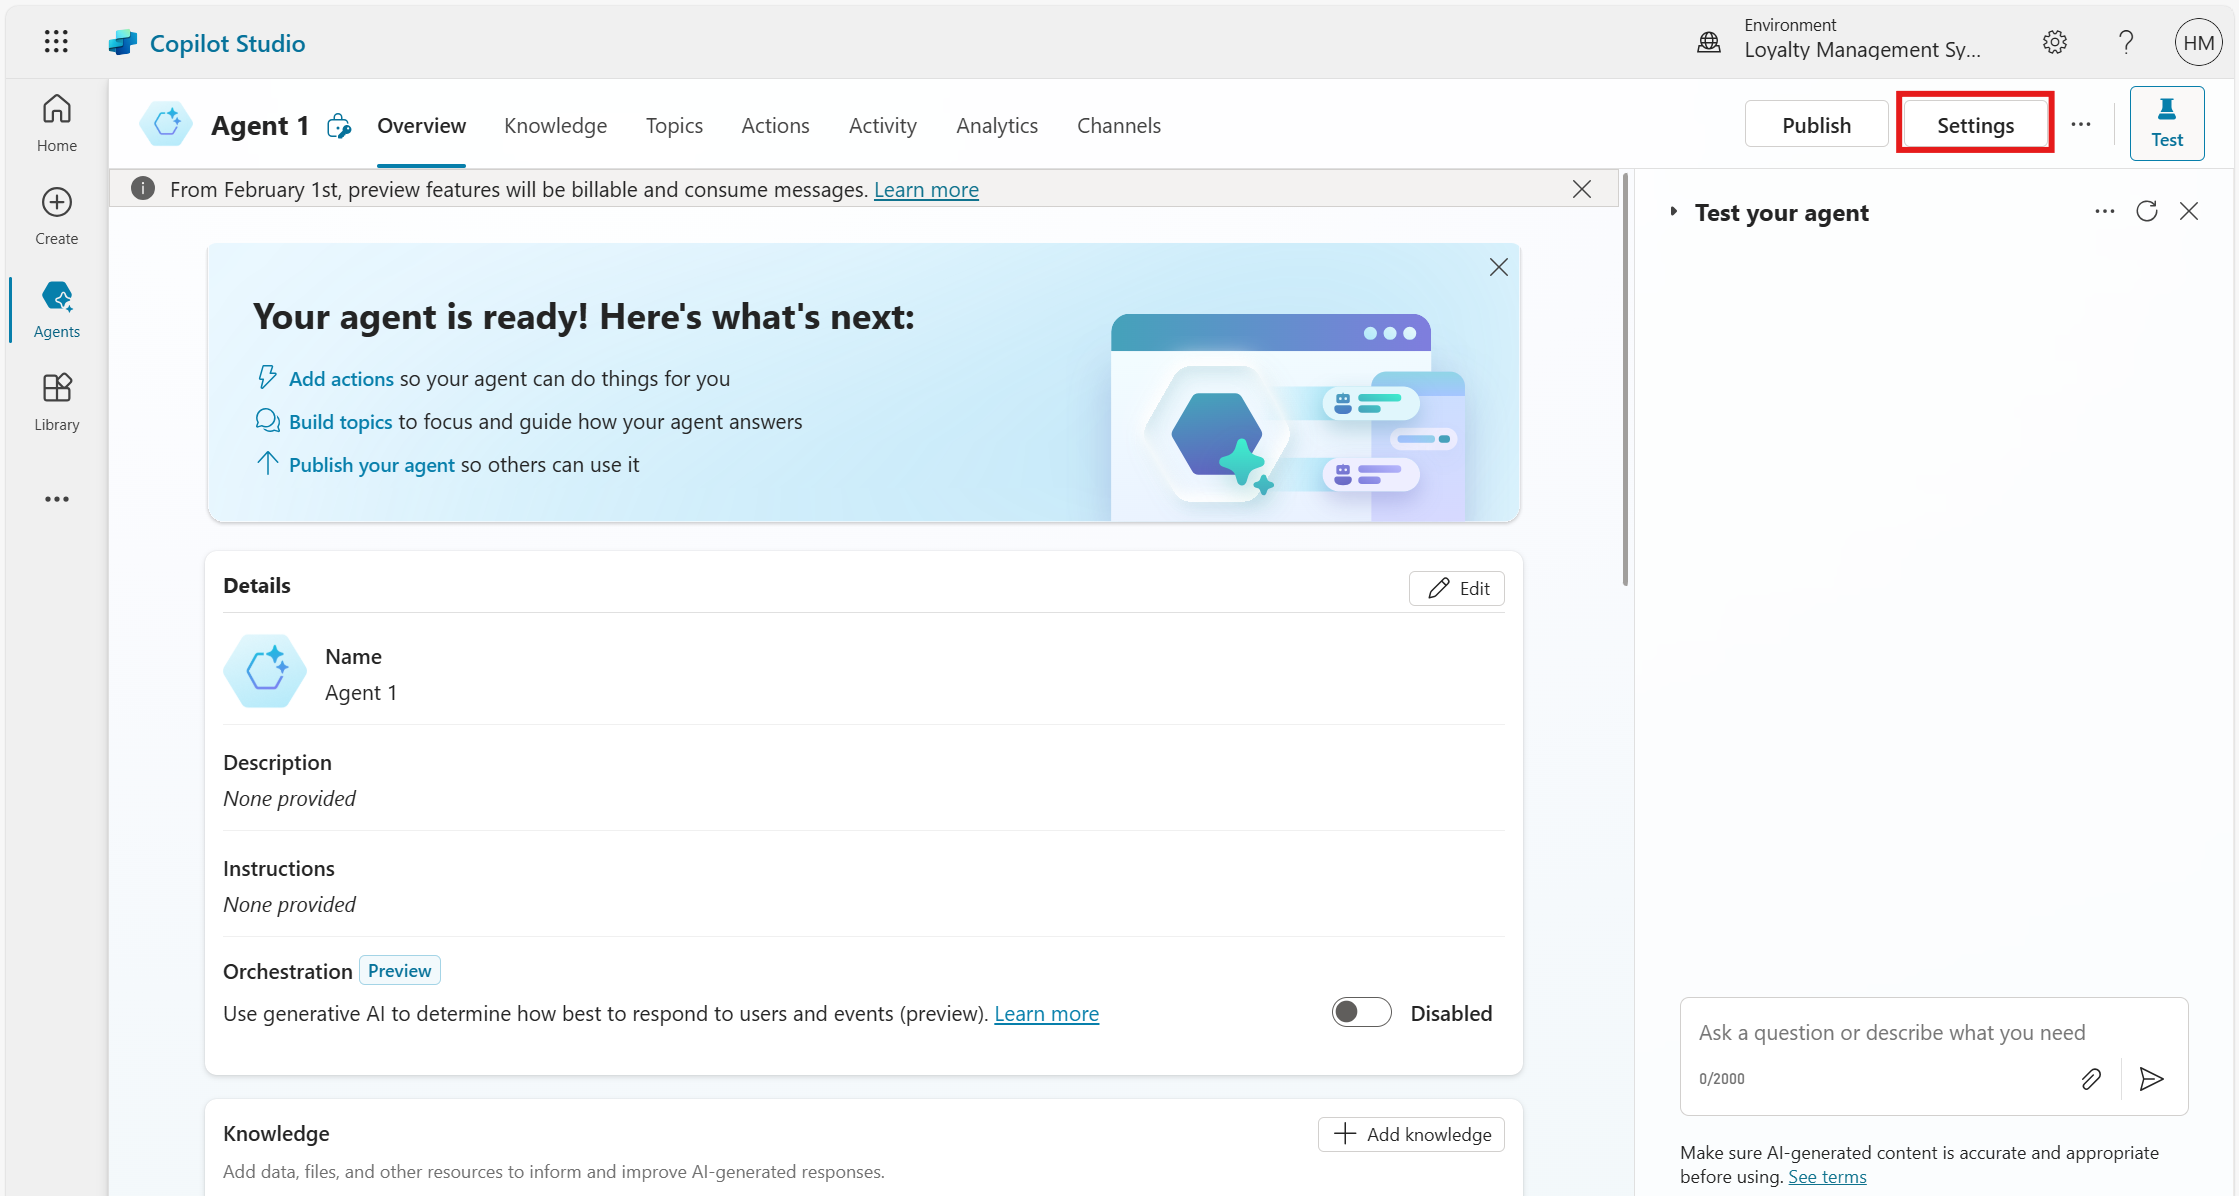
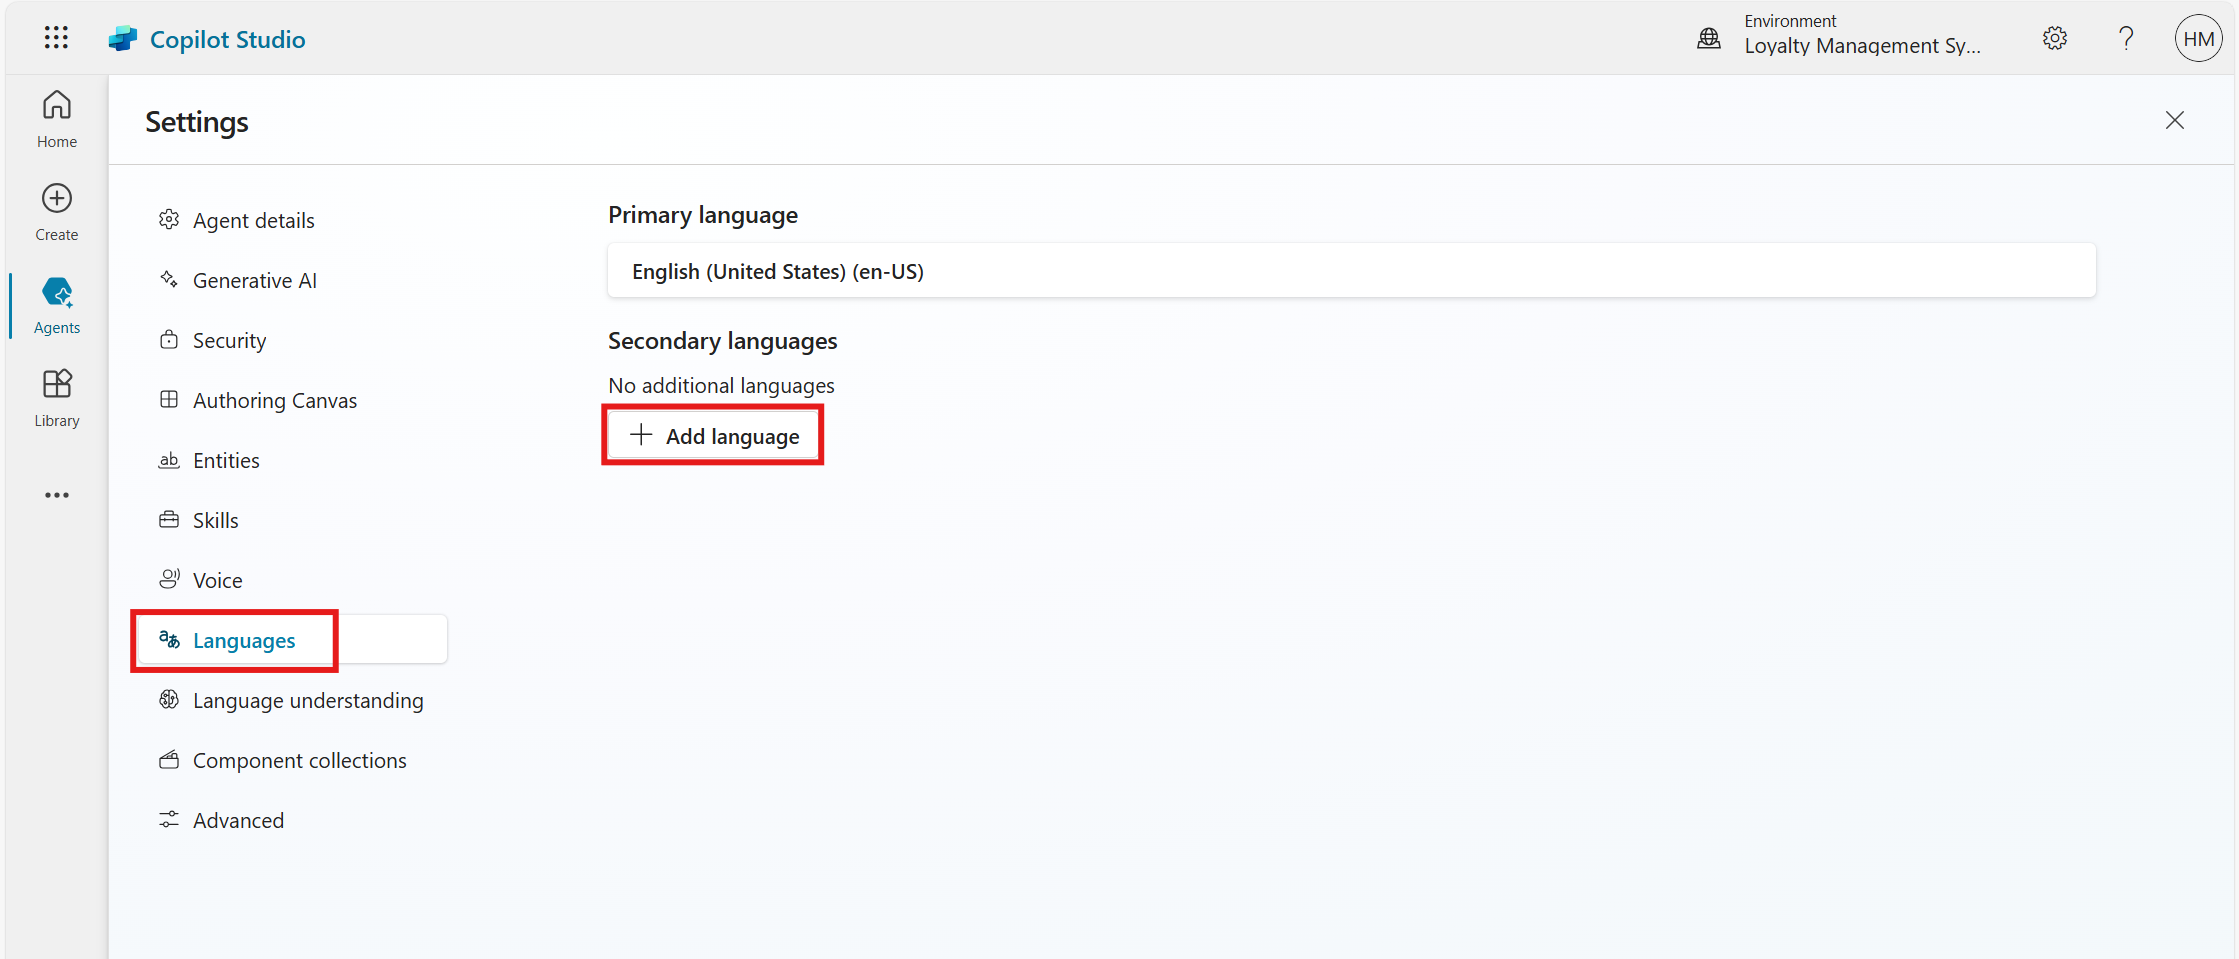
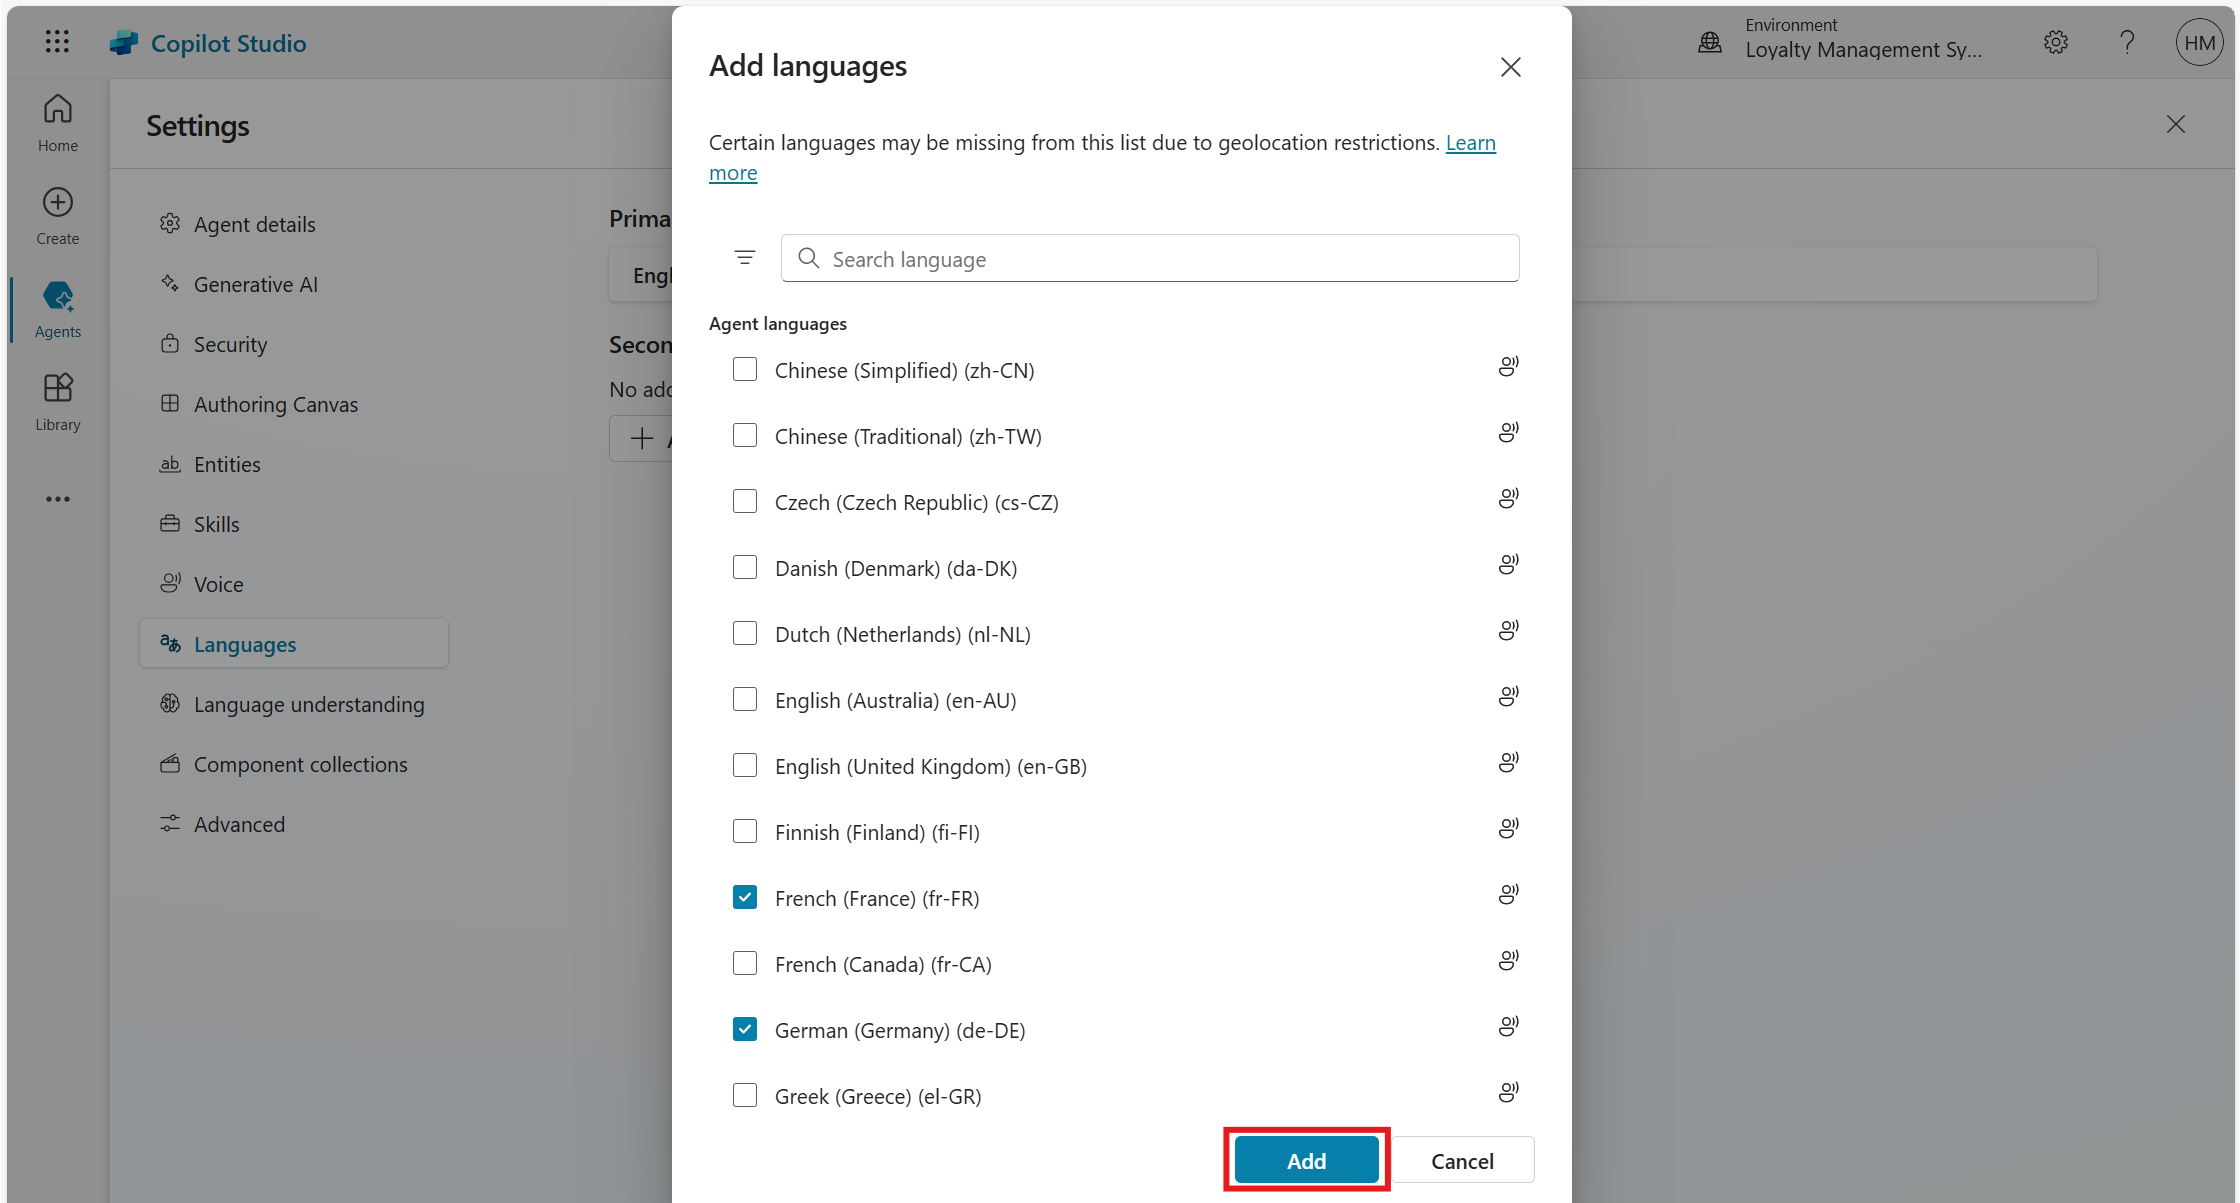
Navigate to the Languages section and click on Add Languages to include additional languages for your agent.
Choose the desired languages.
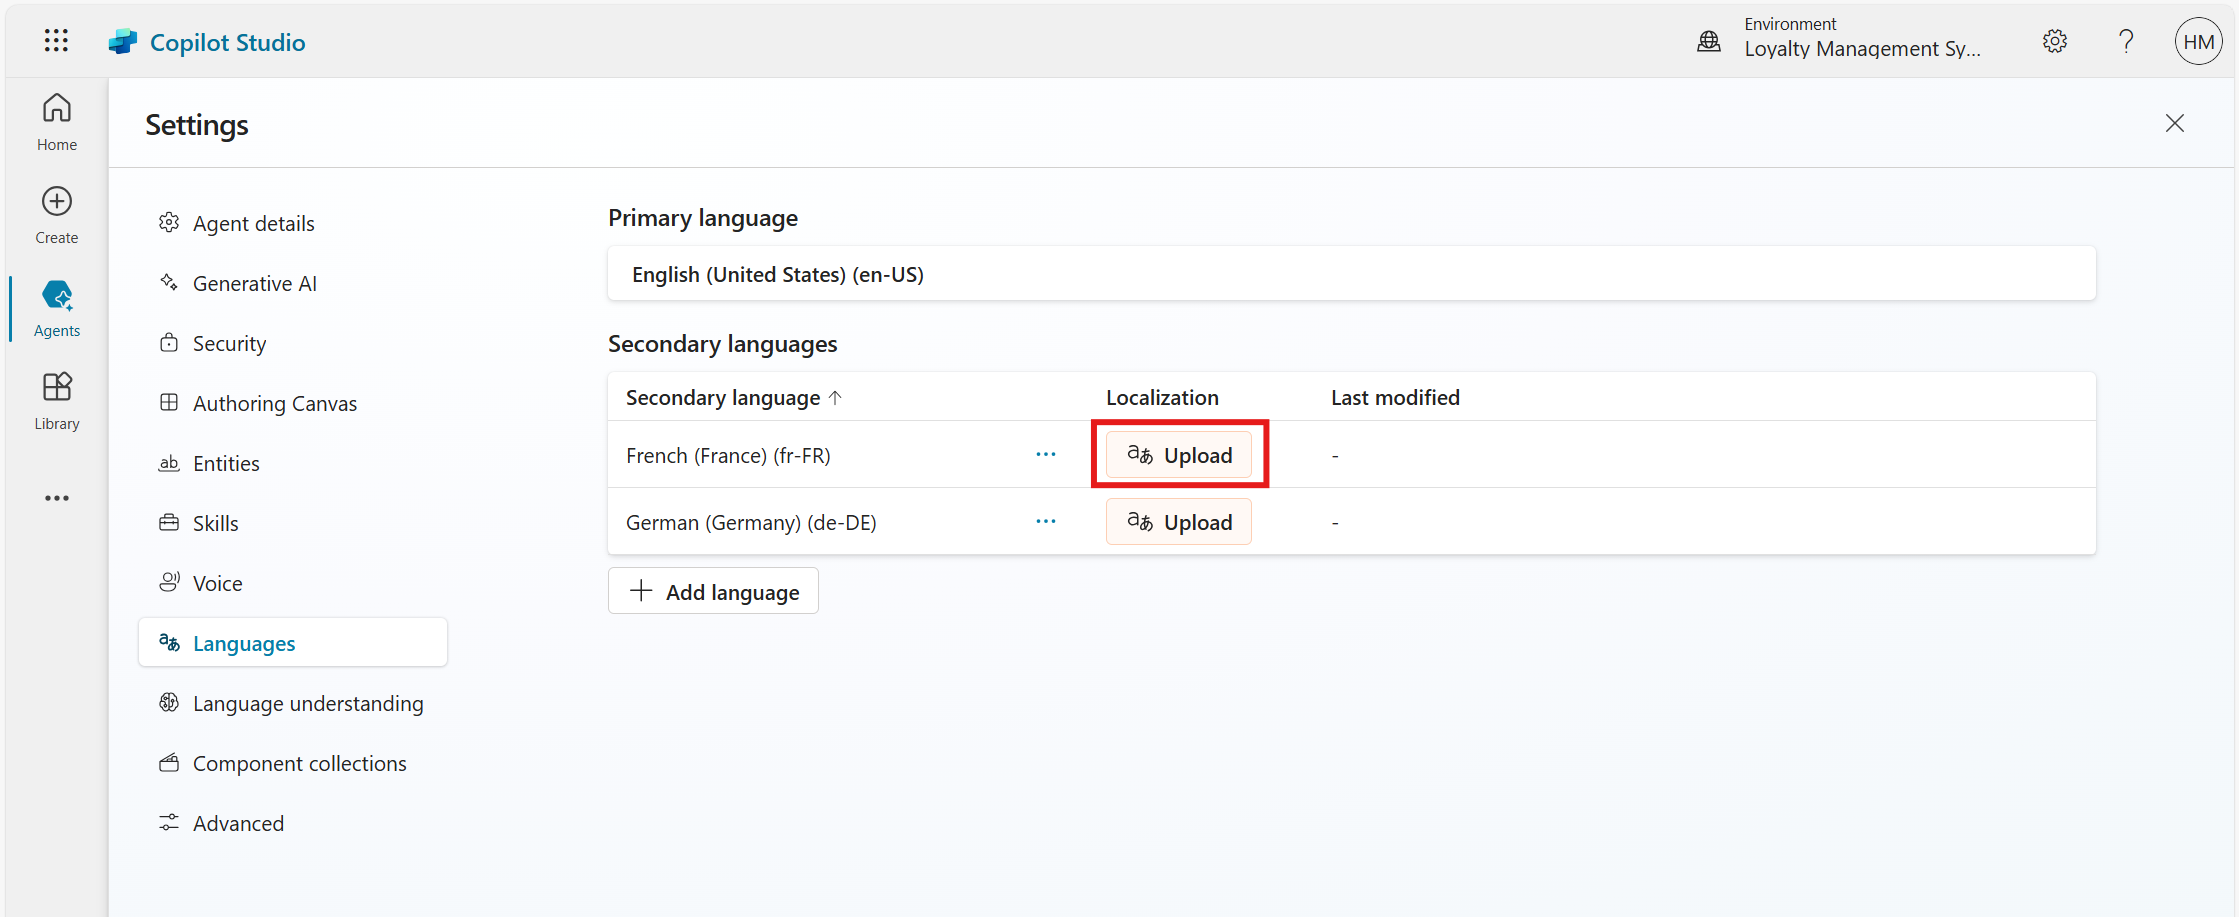
Step 3: Localizing Content for Multilingual Agents
Localization ensures that all text and content in the agent align with the selected languages. However, all agent topic and content editing must be done in the agent's primary language before being translated.
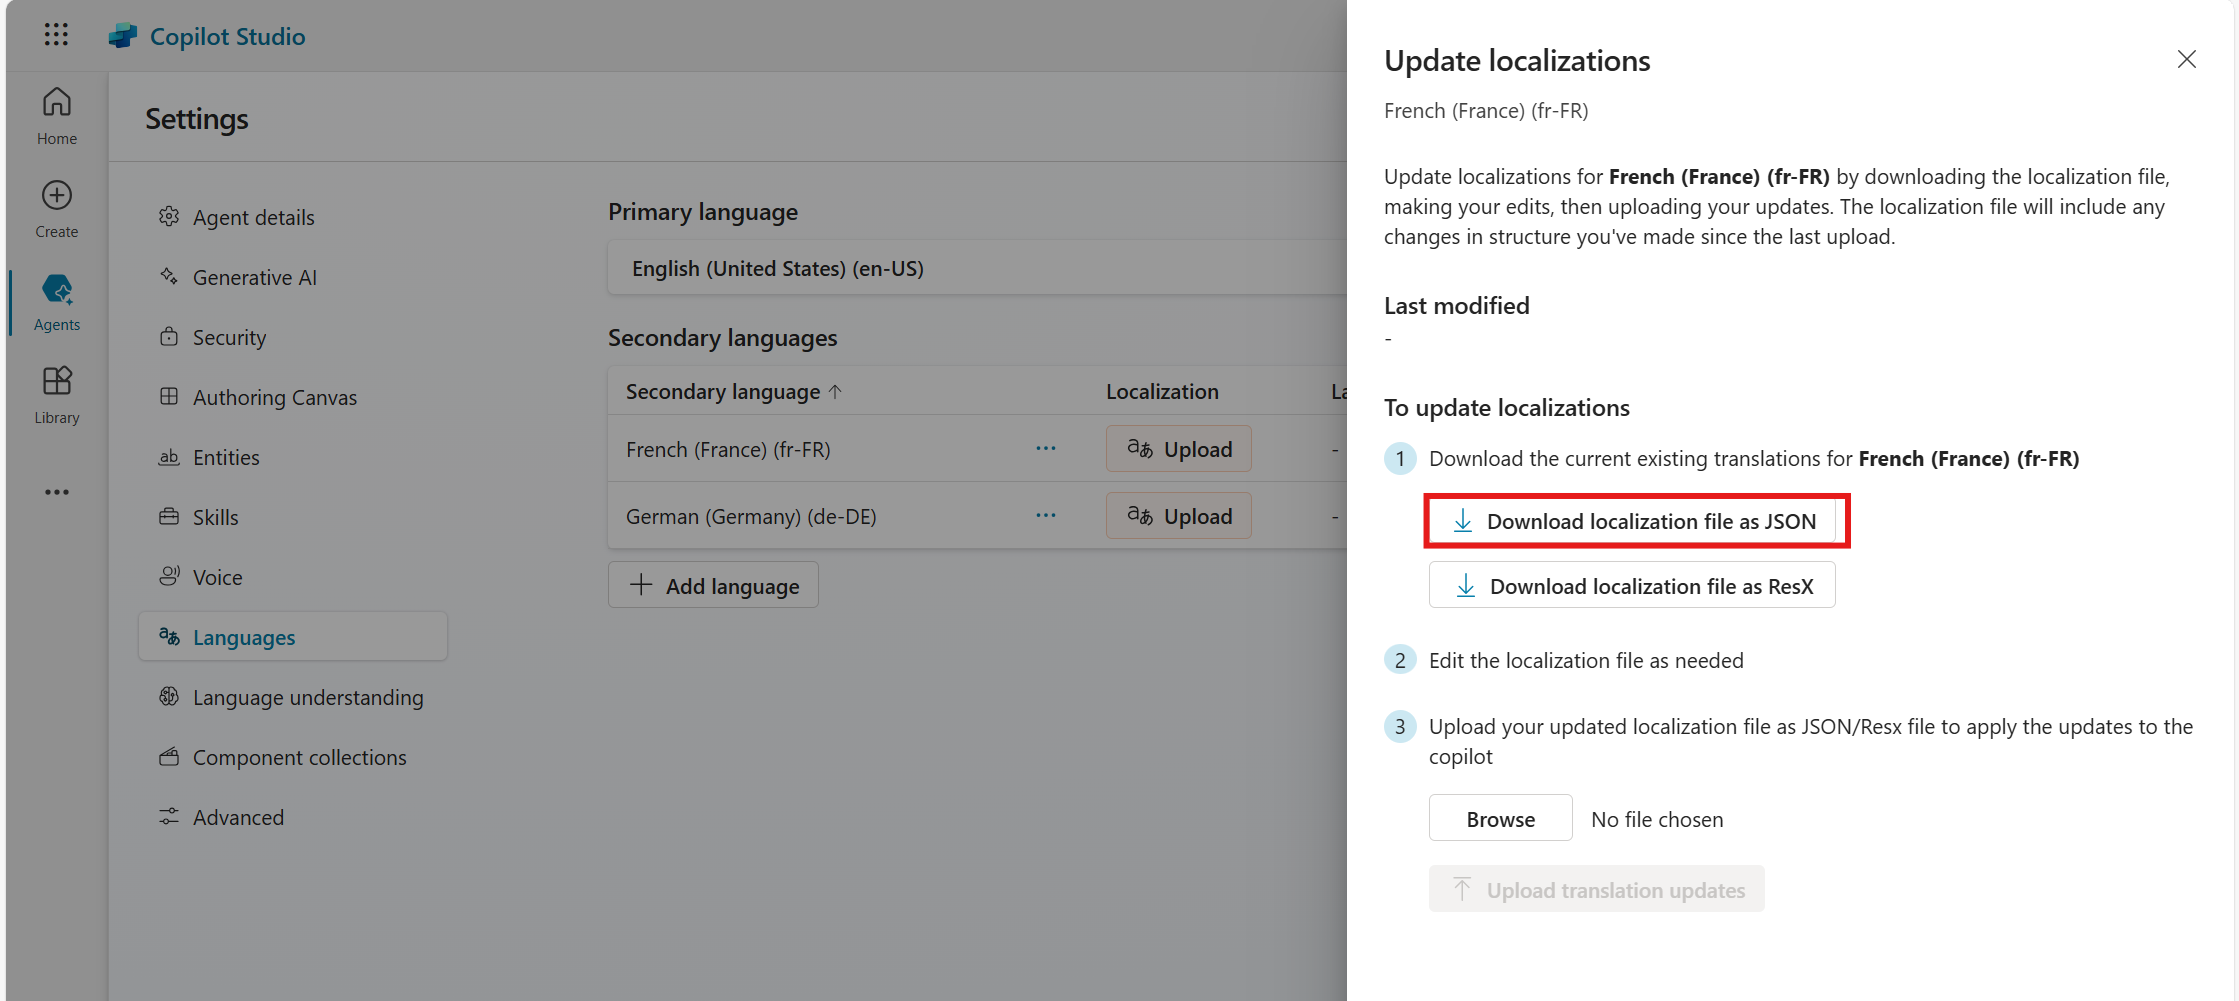
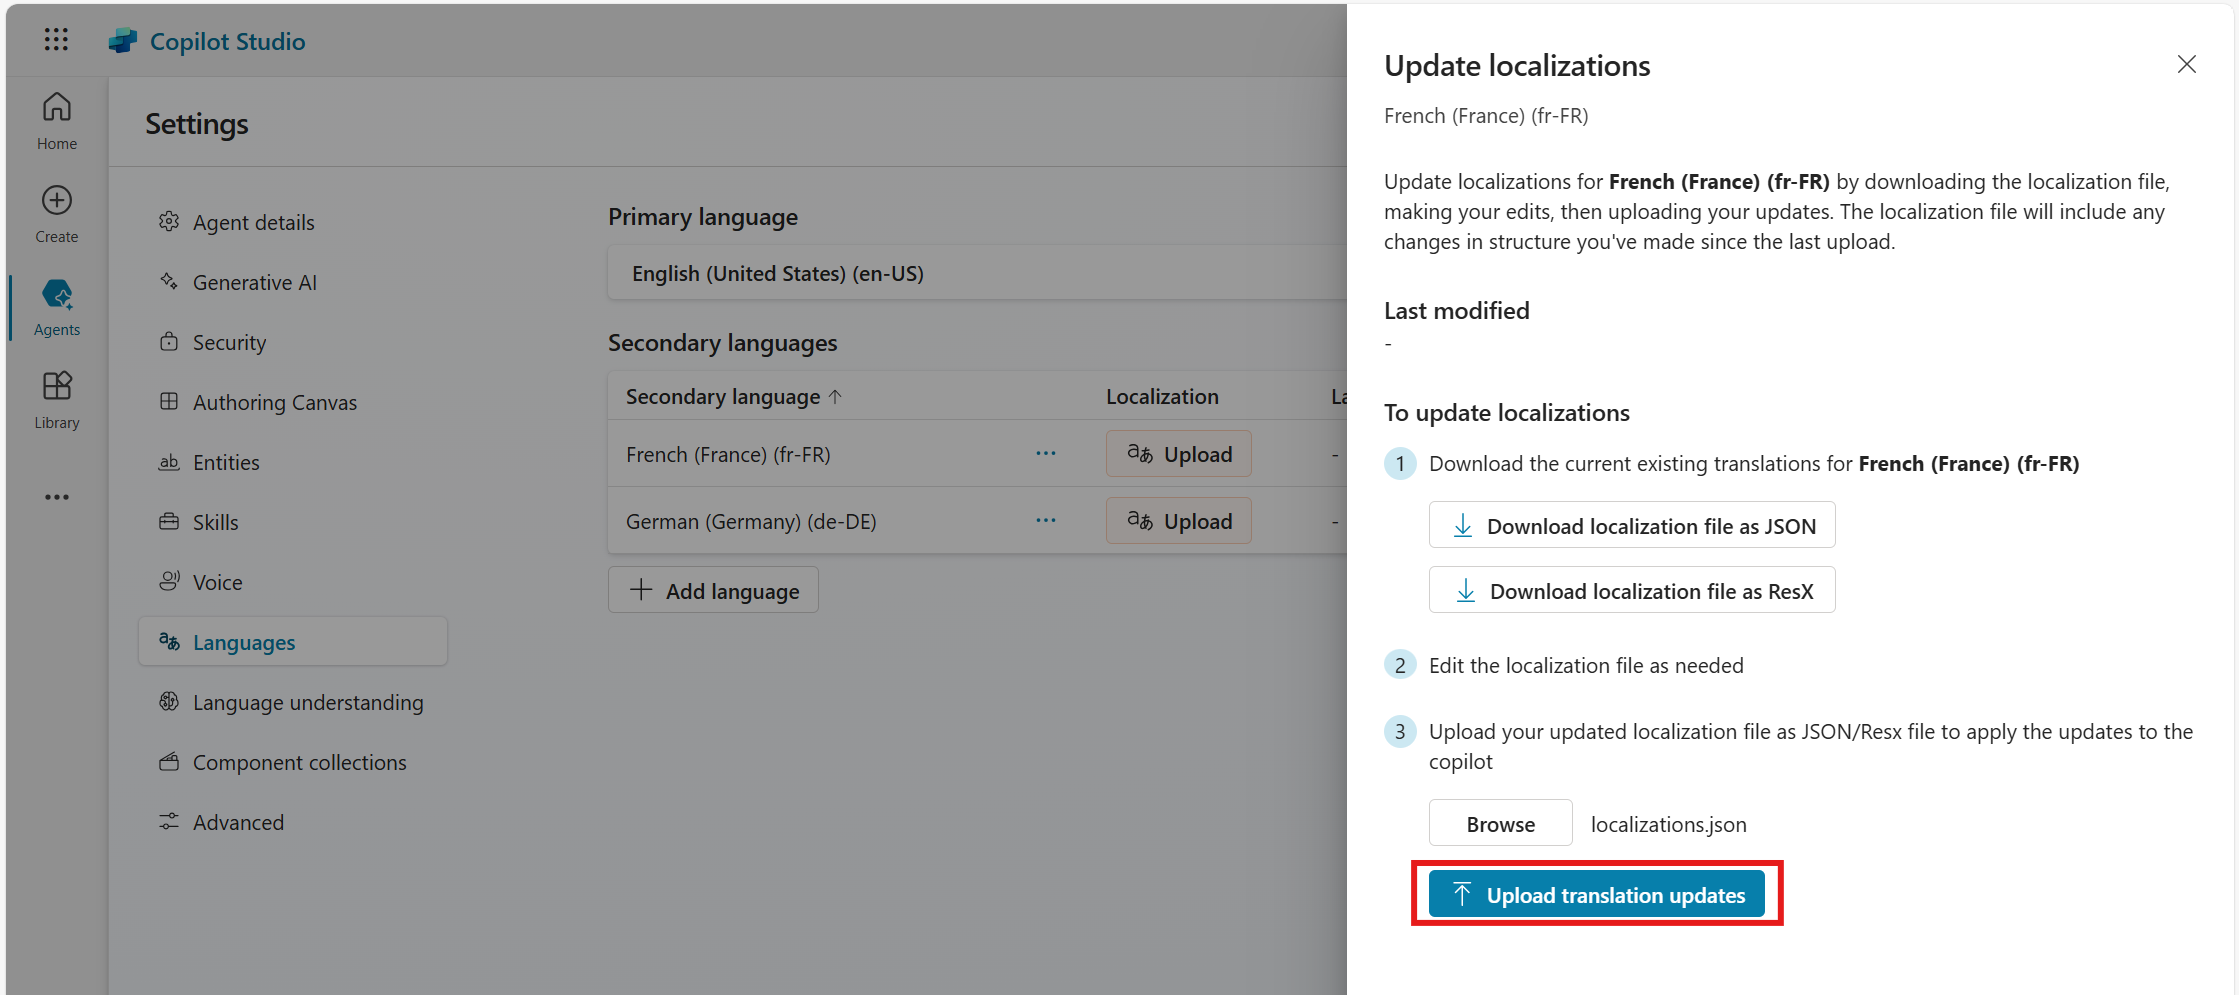
In the Localization column, select Upload for the desired secondary language.
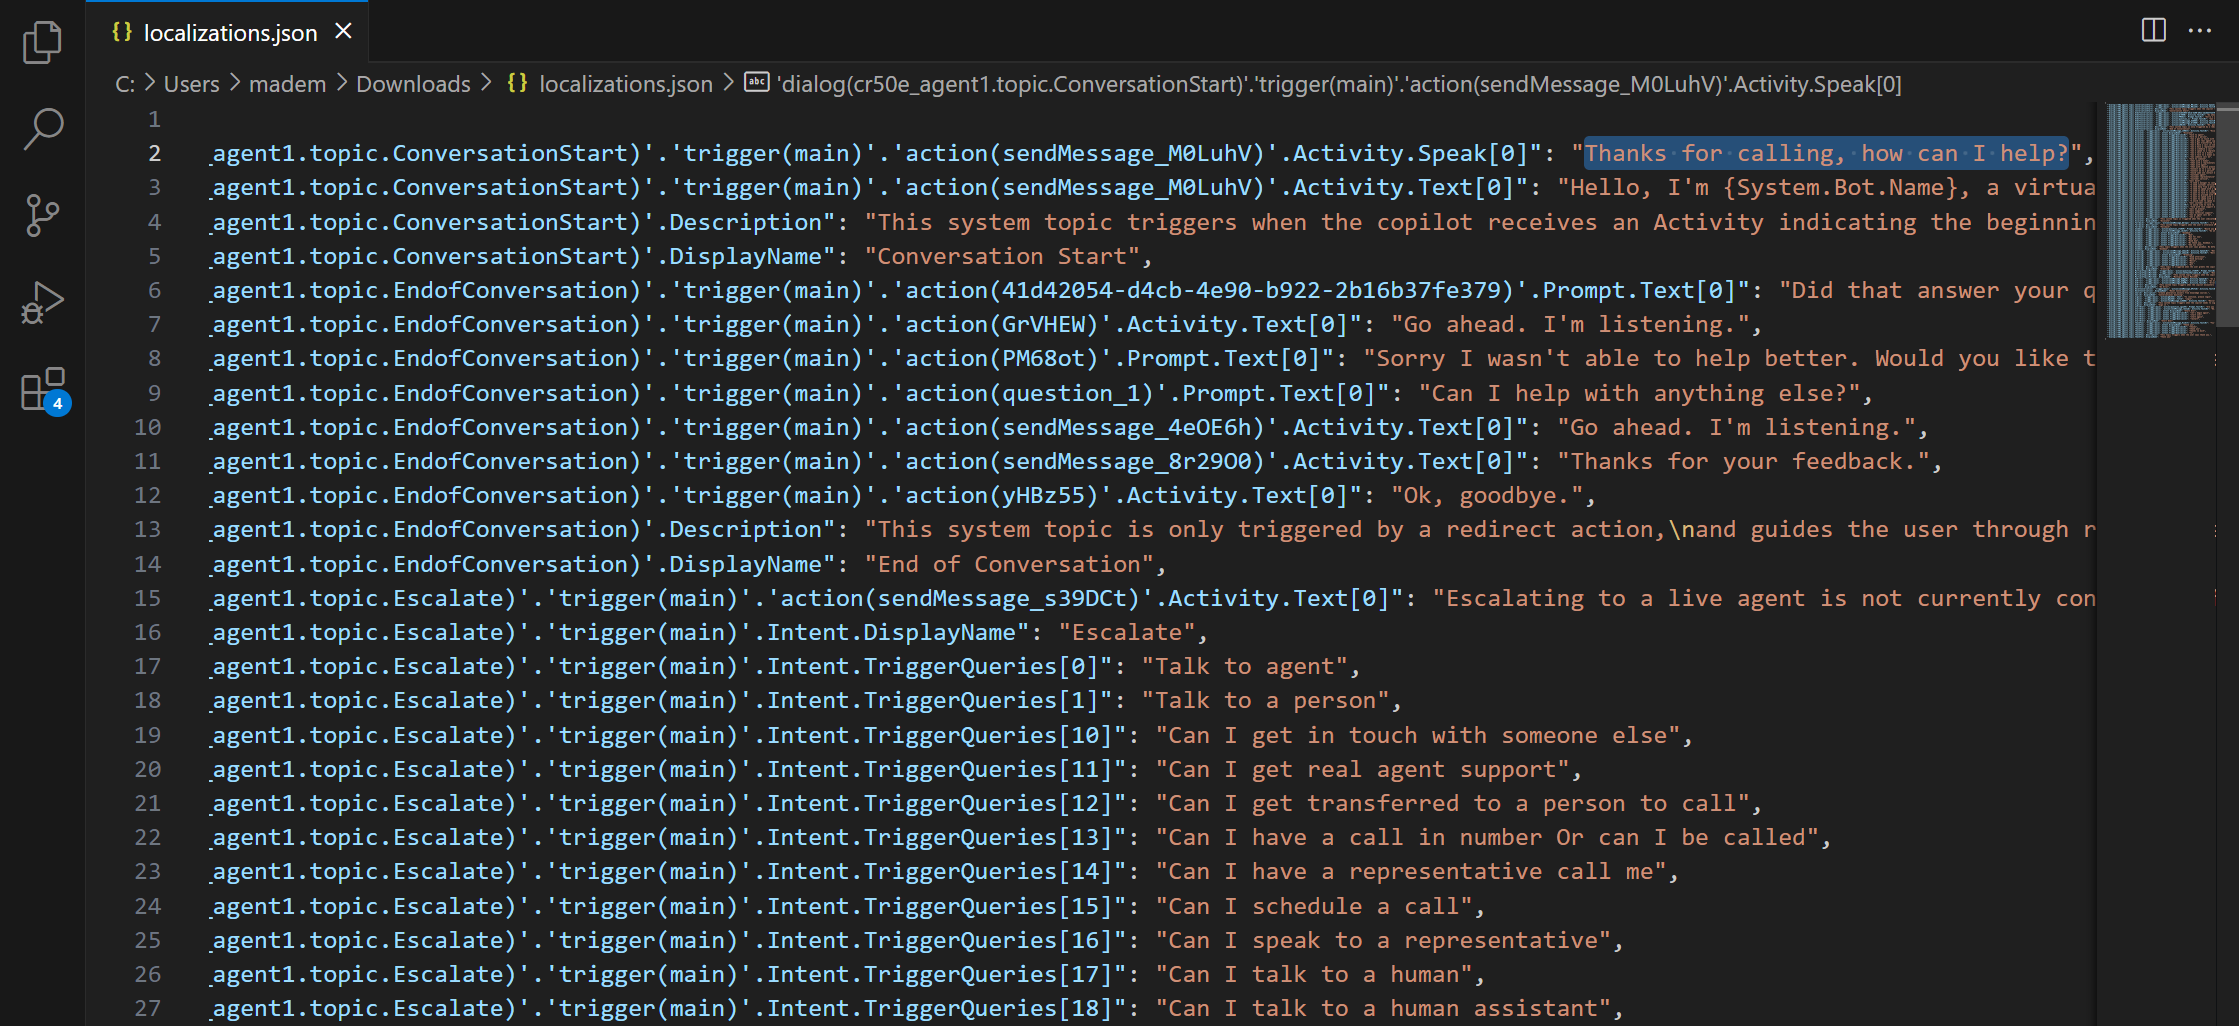
Download the localization file in JSON or ResX format.
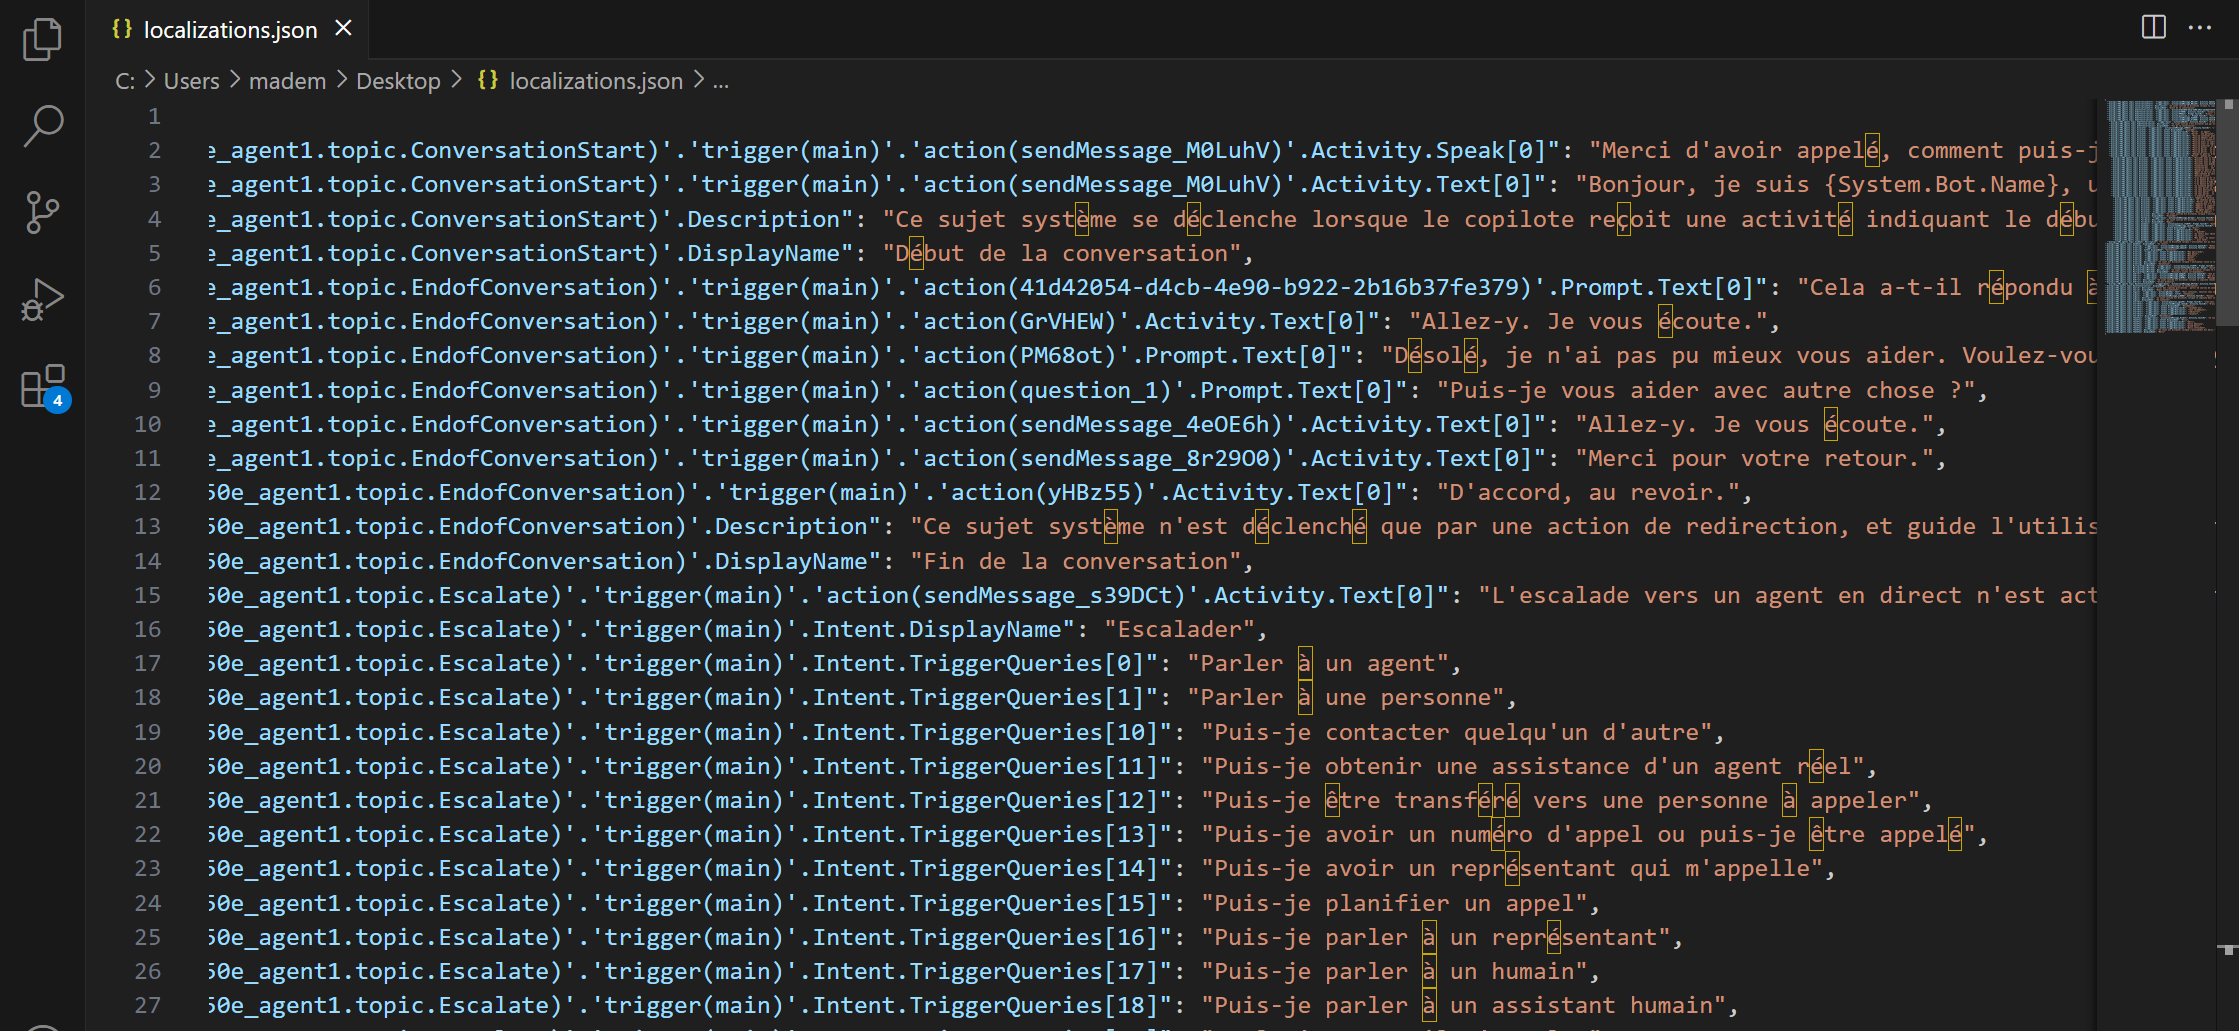
Open the downloaded file and replace the primary language strings with the appropriate translated text.
Localization File Before Translation.
Localization File After Translation.
Upload the updated file back to the agent and click on Upload translation updates.
Step 4: Authoring for Automatic Language Detection
When authoring, you can configure the agent to change the current spoken language in the middle of a conversation. That logic can reside in any topic in the agent.
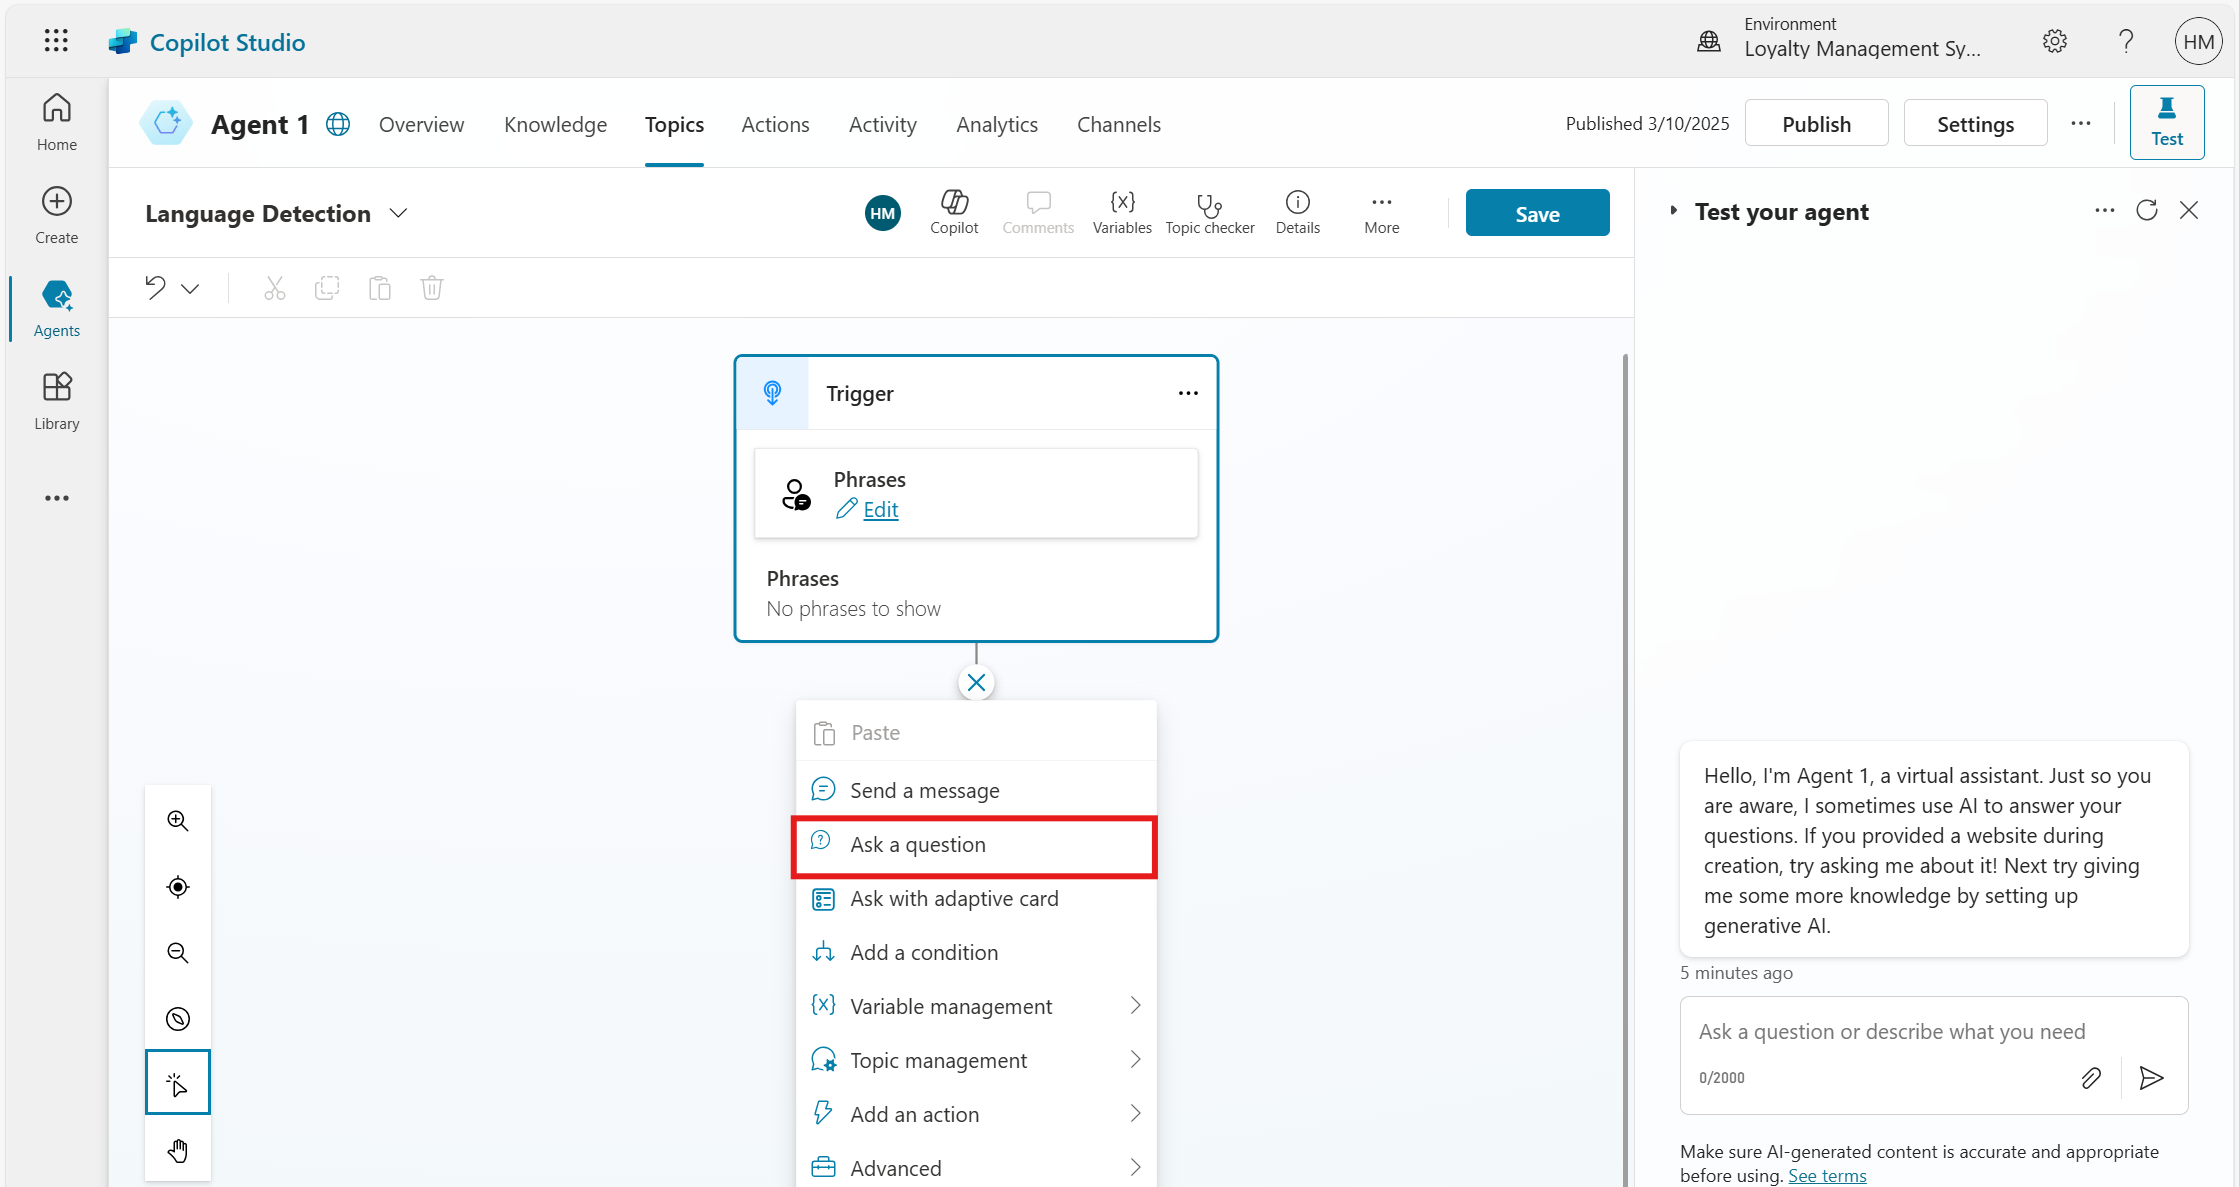
Create a New Topic for Language Detection
Add a question node to ask for user input.
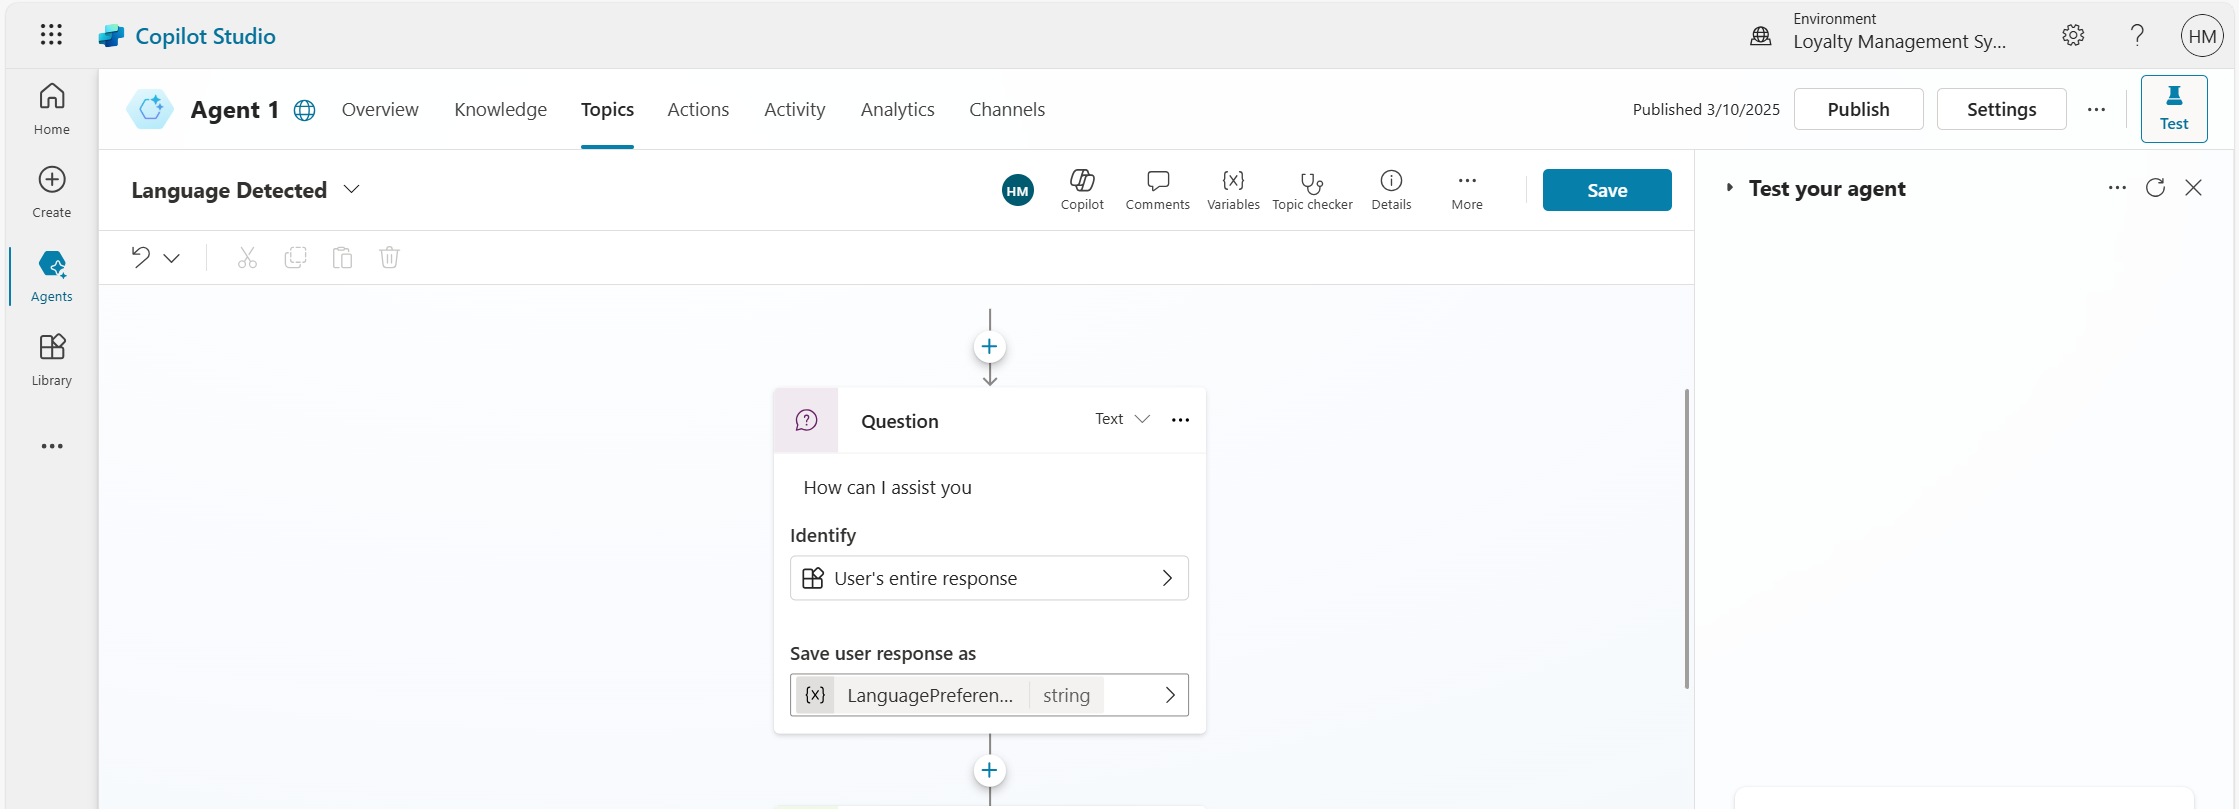
Set the question type to Text, enter the question, choose the identity as the user’s entire response, and set the variable name as Language Preference.
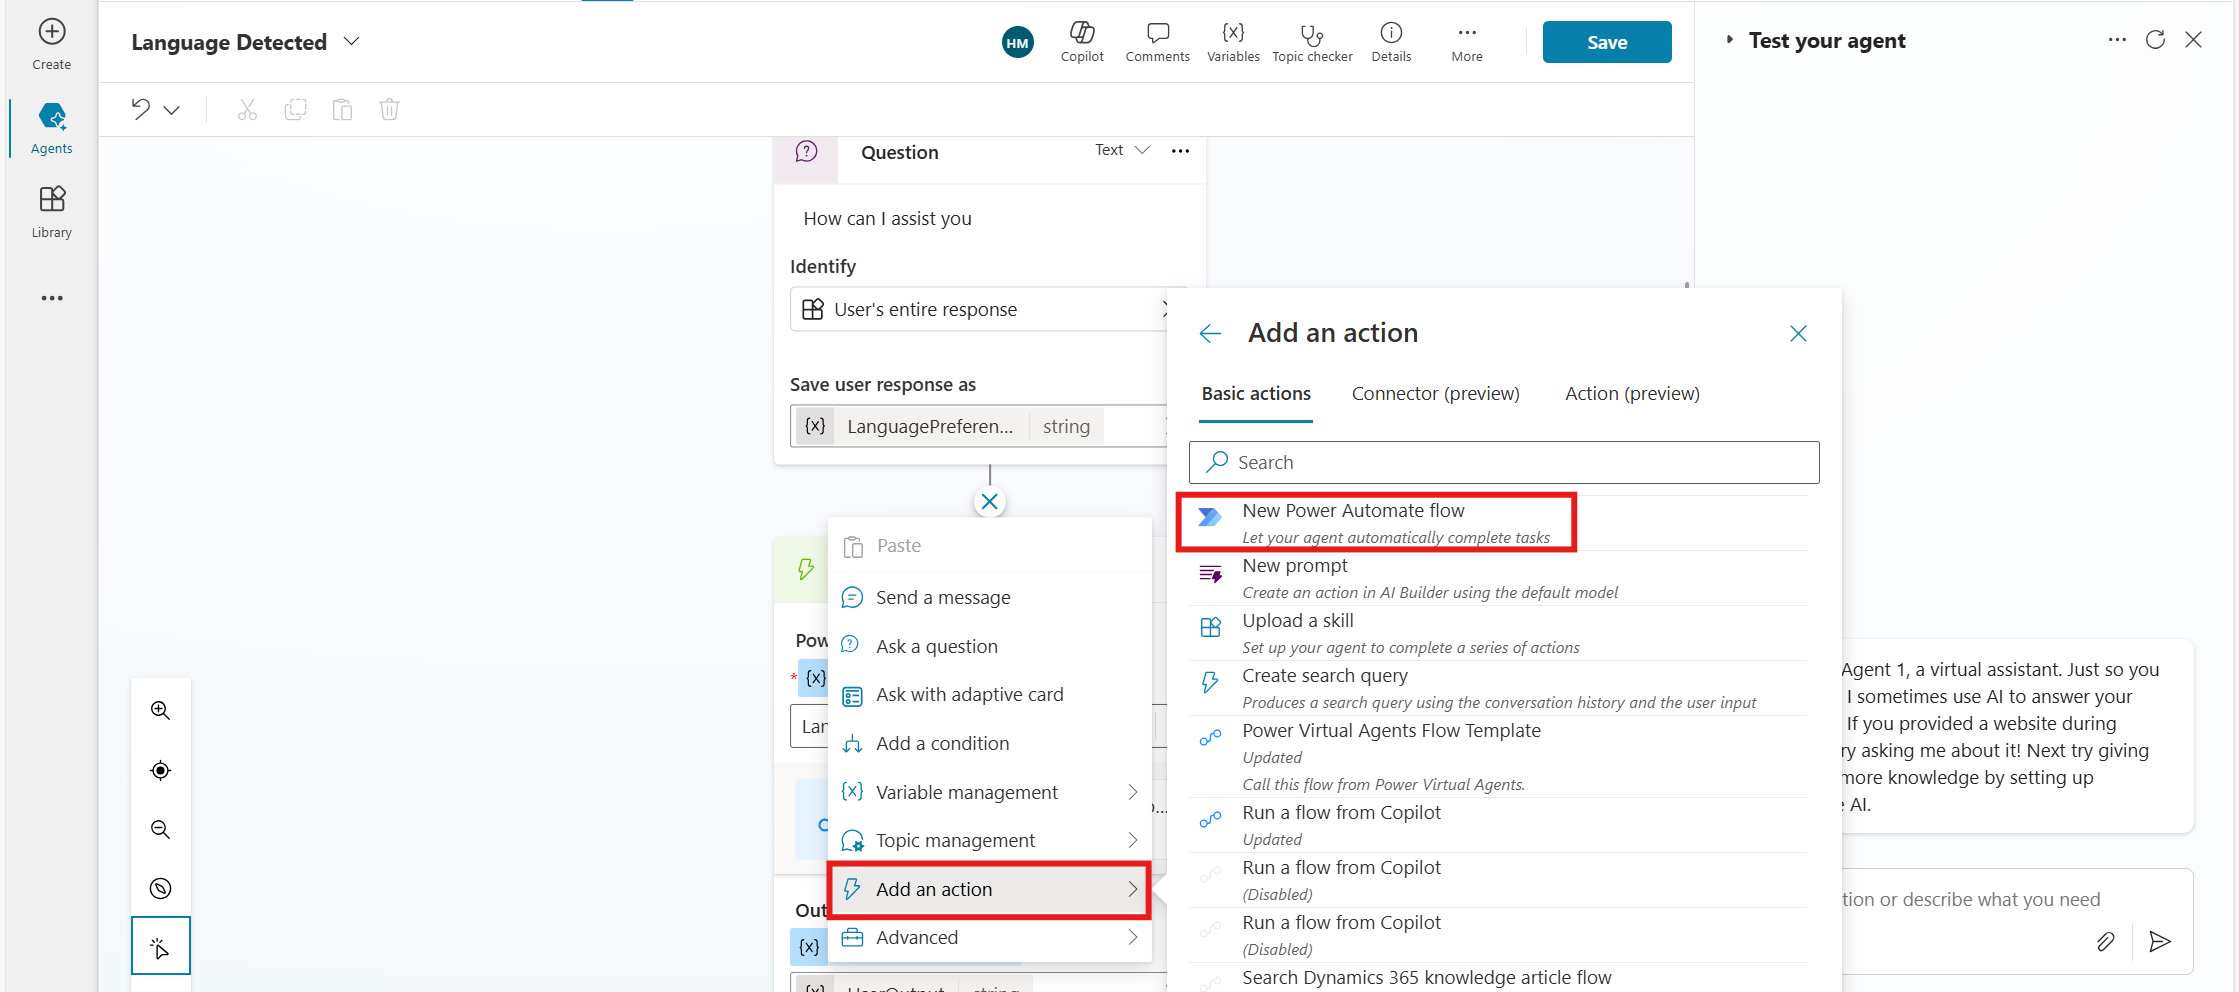
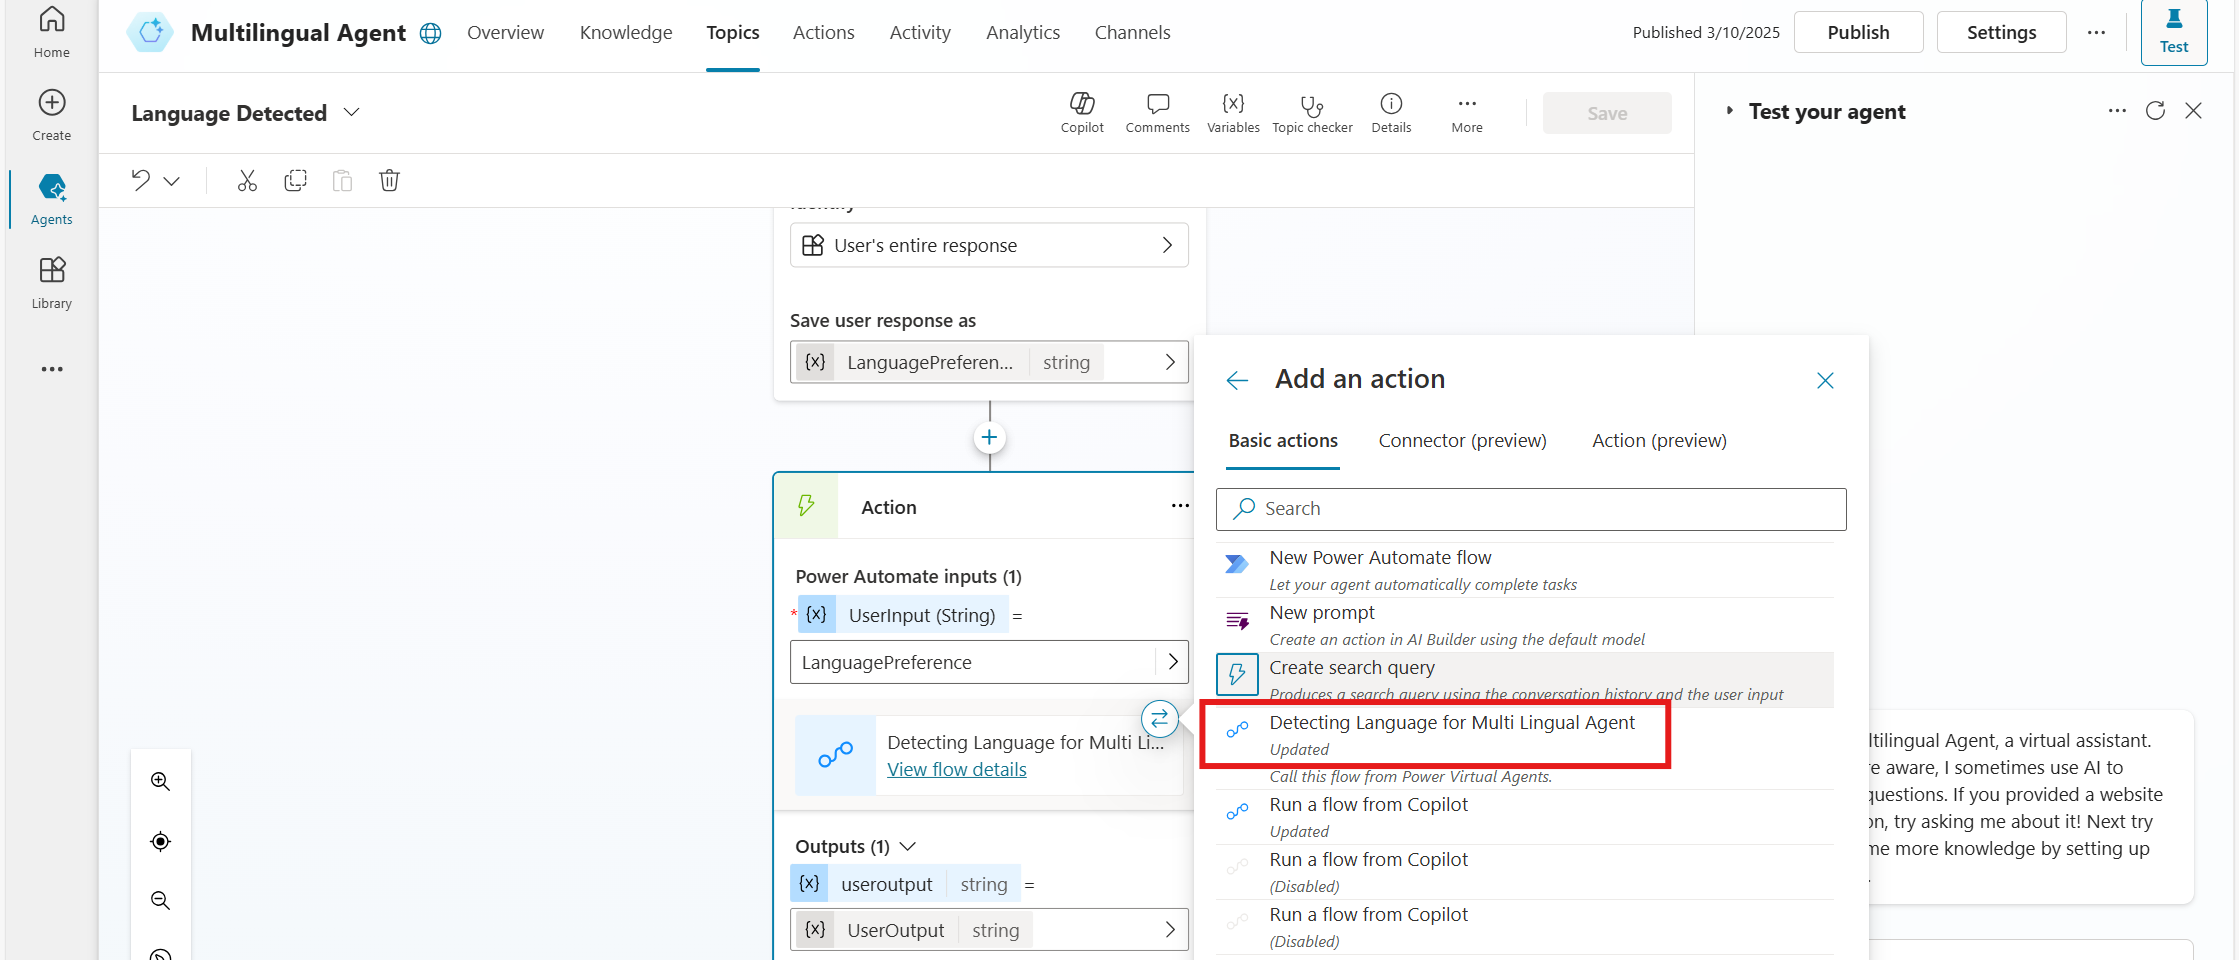
Select Add an action node and choose New Power Automate flow to detect the language based on the user’s input and give a response accordingly.
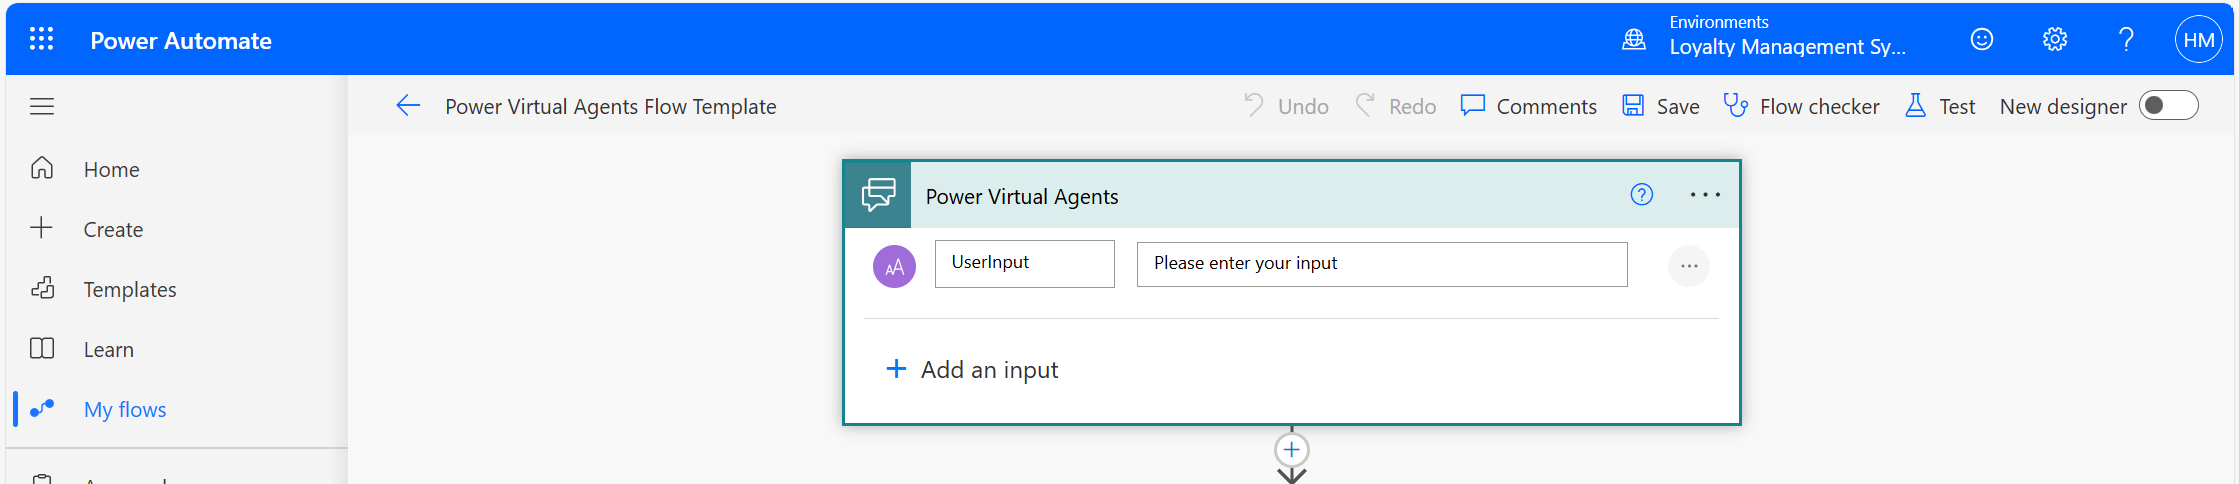
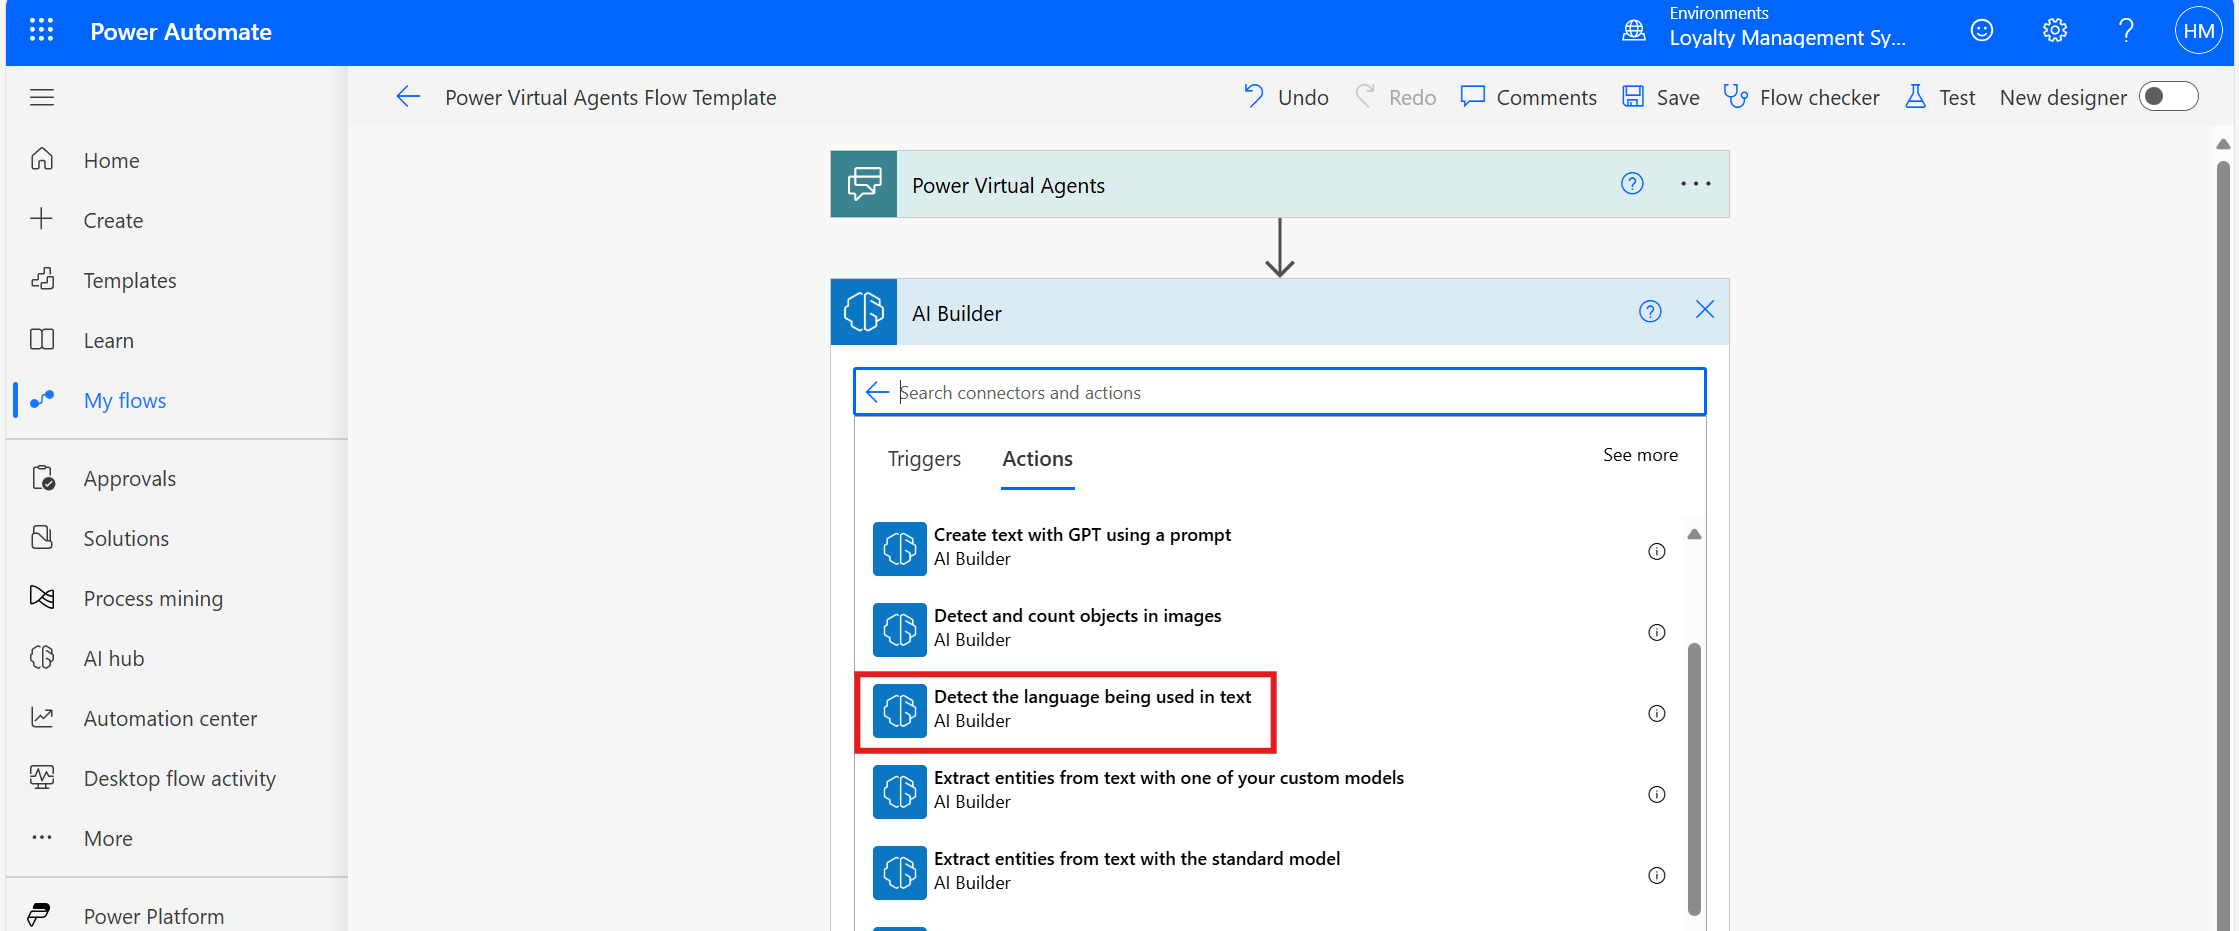
Step 5: Write the Power Automate flow to detect the language based on the input.
Add an input of type Text and enter the title as UserInput.
Search for AI Builder and select Detect the language being used in the text action.
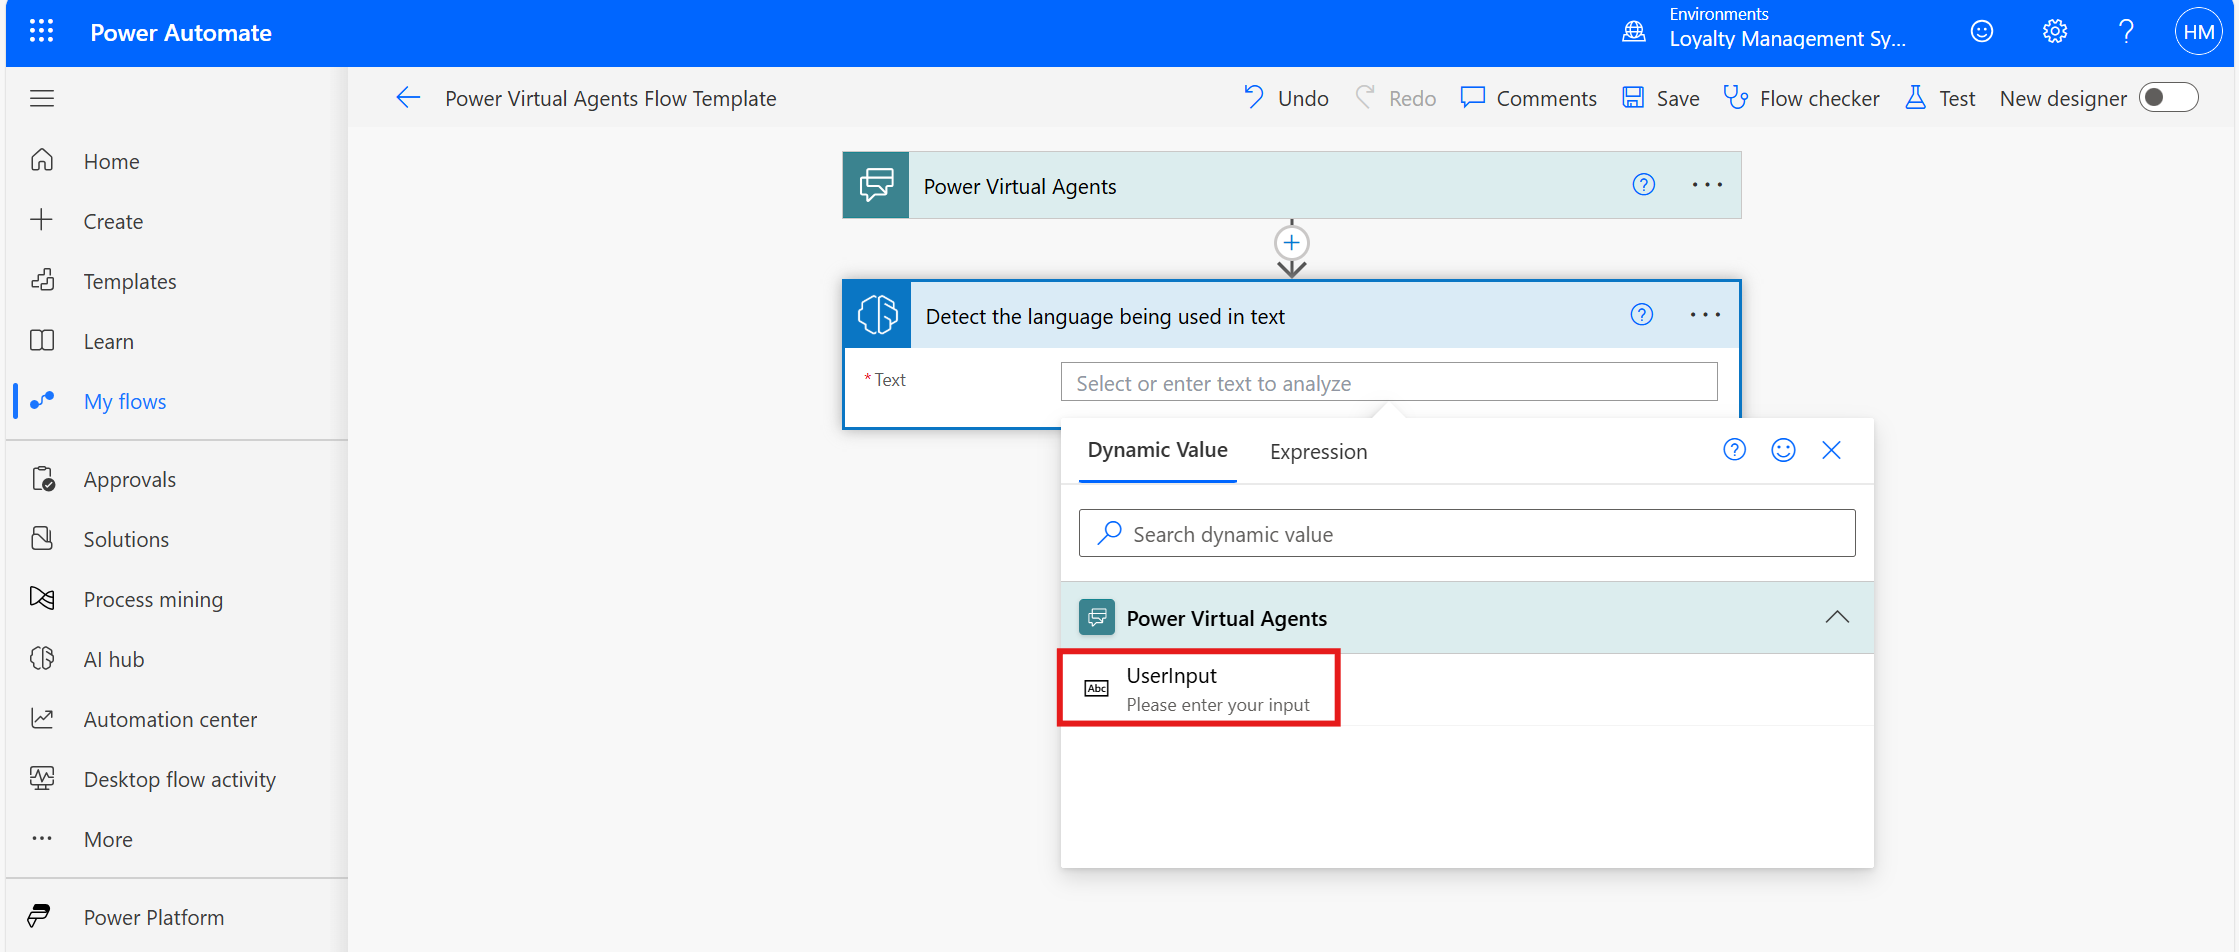
Select the UserInput as text.
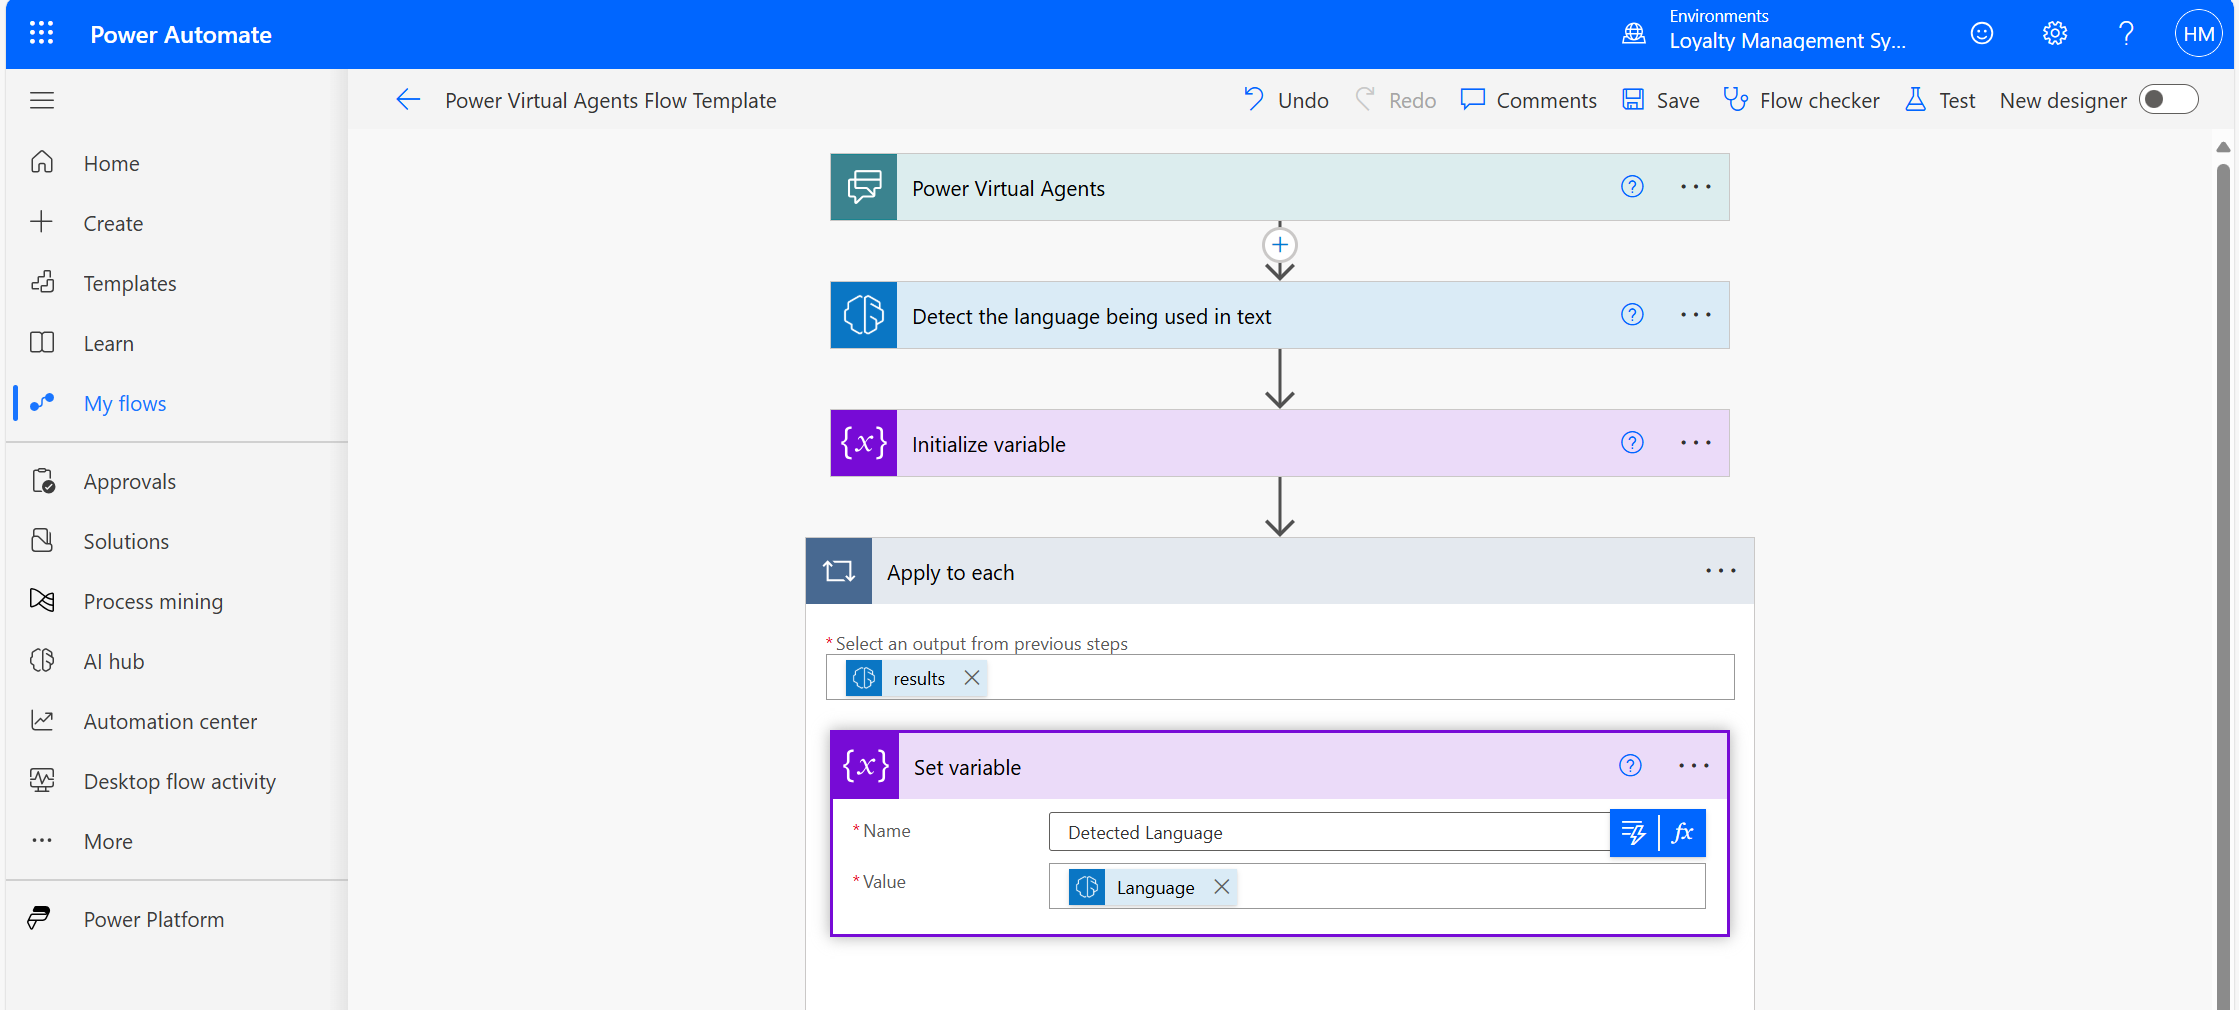
Initialize a variable to store the detected language.
Set the value of the variable as language.
Now, in Return value to Power Virtual Agent, pass the variable as output.
Step 6: Integrating Power Automate Flow in Copilot Studio
In the Actions node, select Input and Power Automate flow.
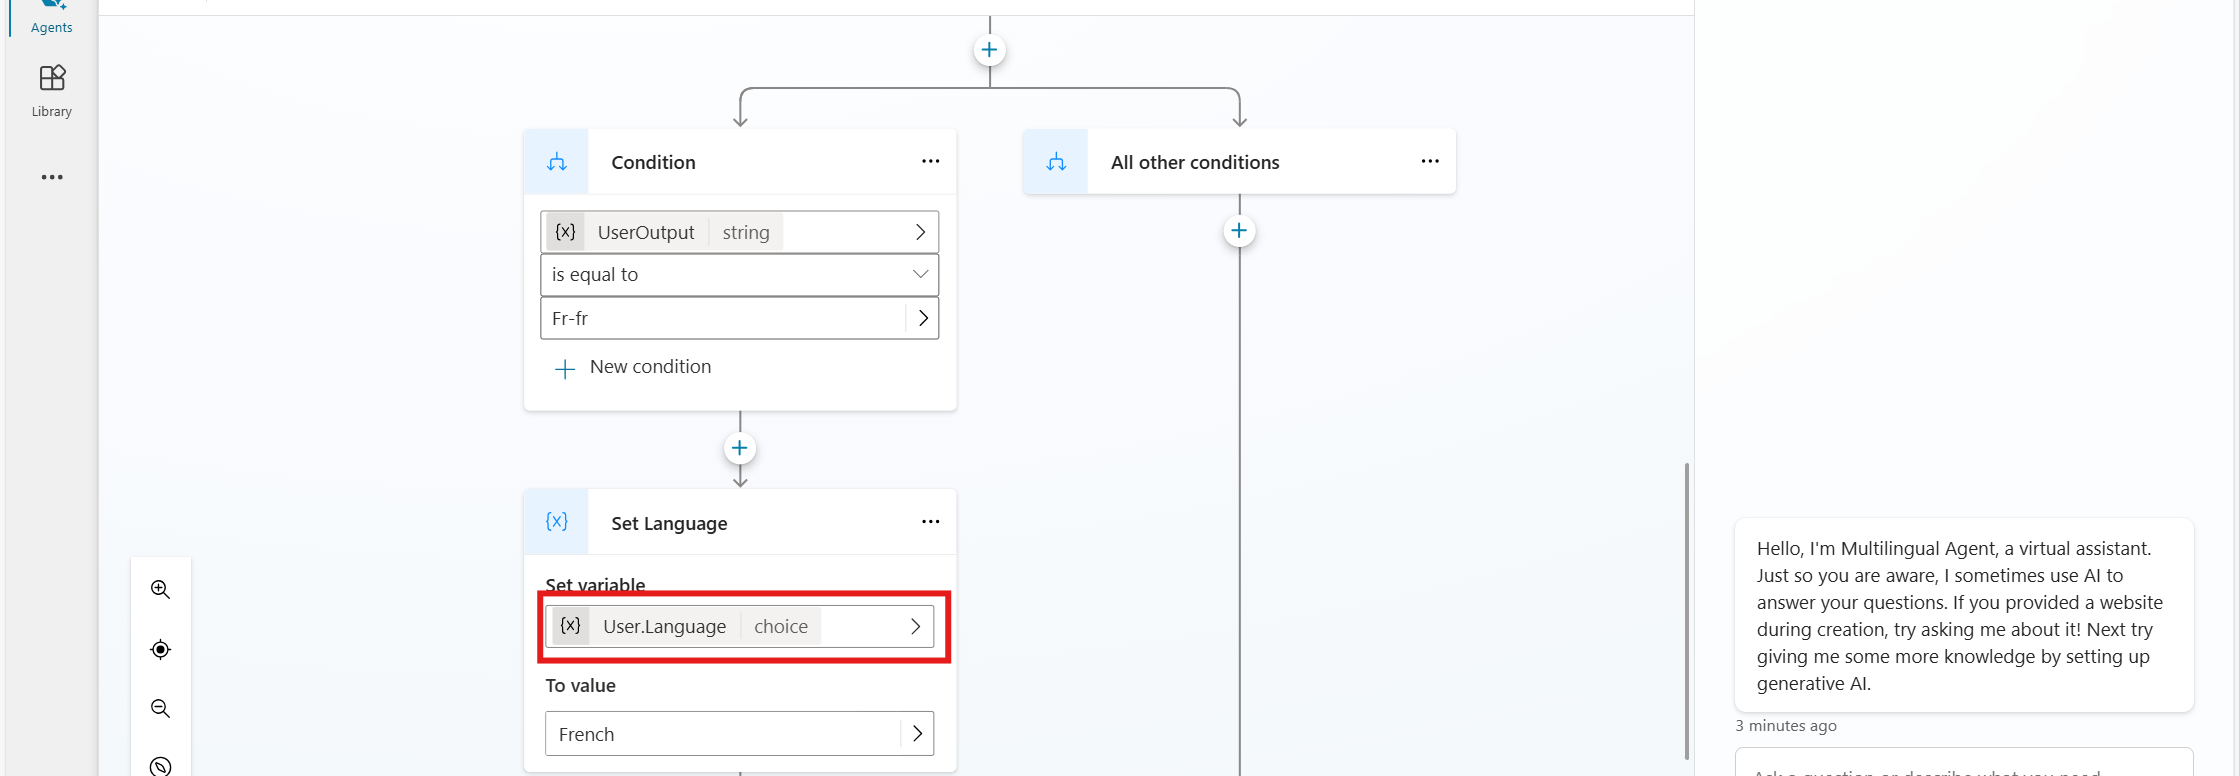
Add a Condition node, check if DetectedLanguage = "fr" (or any supported language), and set the User.Language variable accordingly.
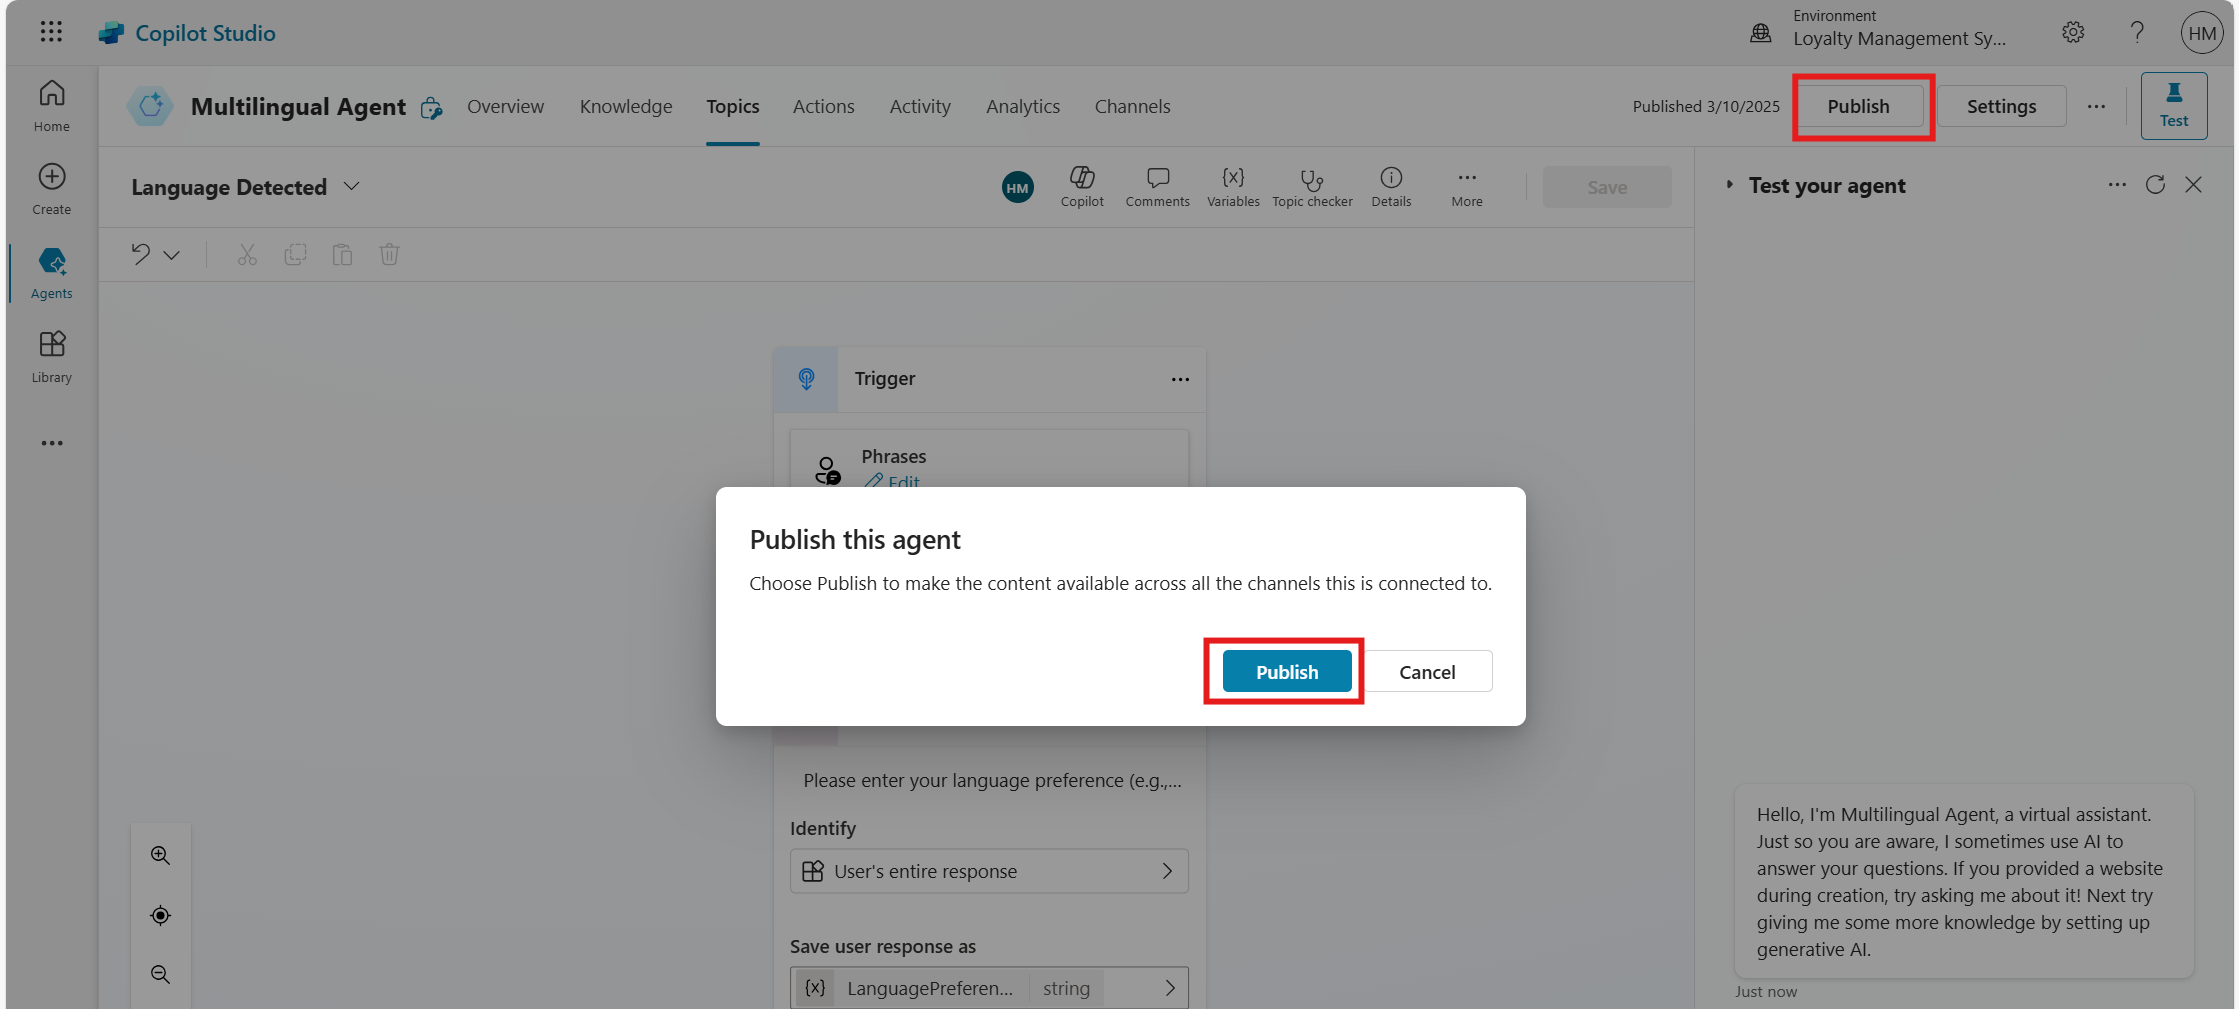
Step 7: Publish and integrate the agent with Power Apps.
Publish the agent.
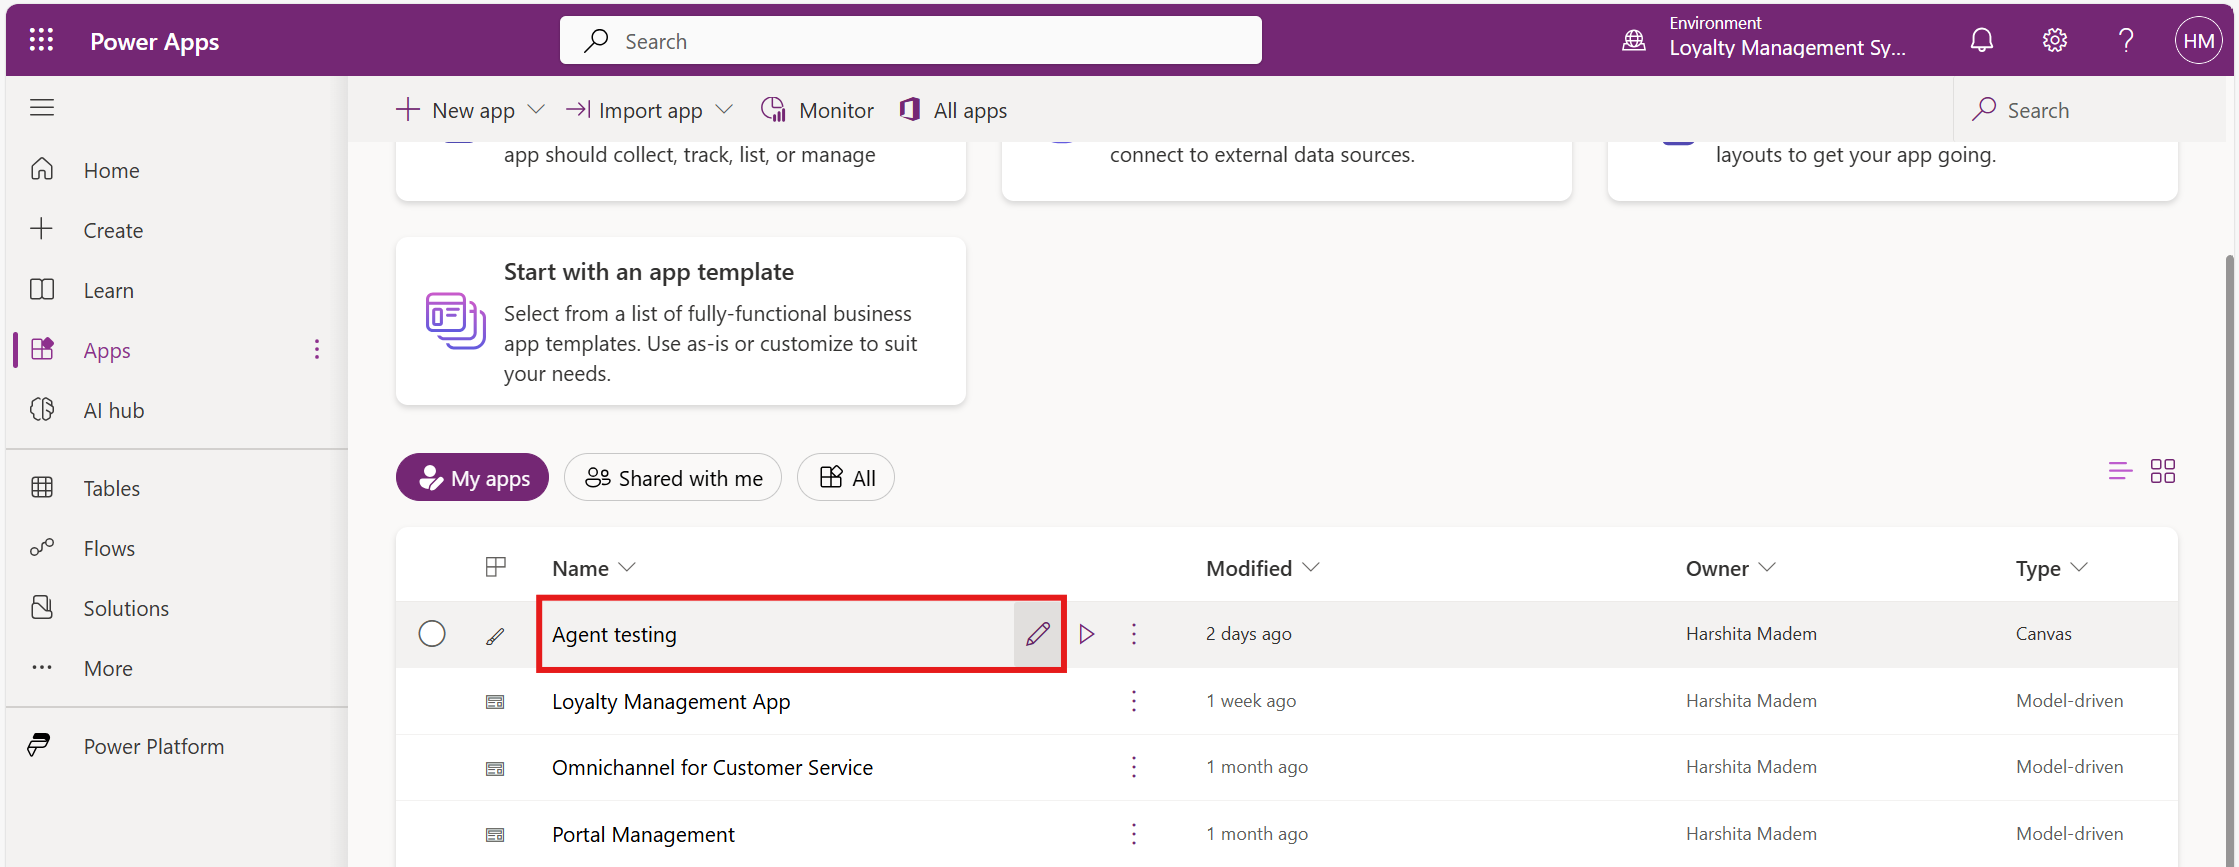
Open Power Apps and select your app where you want to integrate the agent.
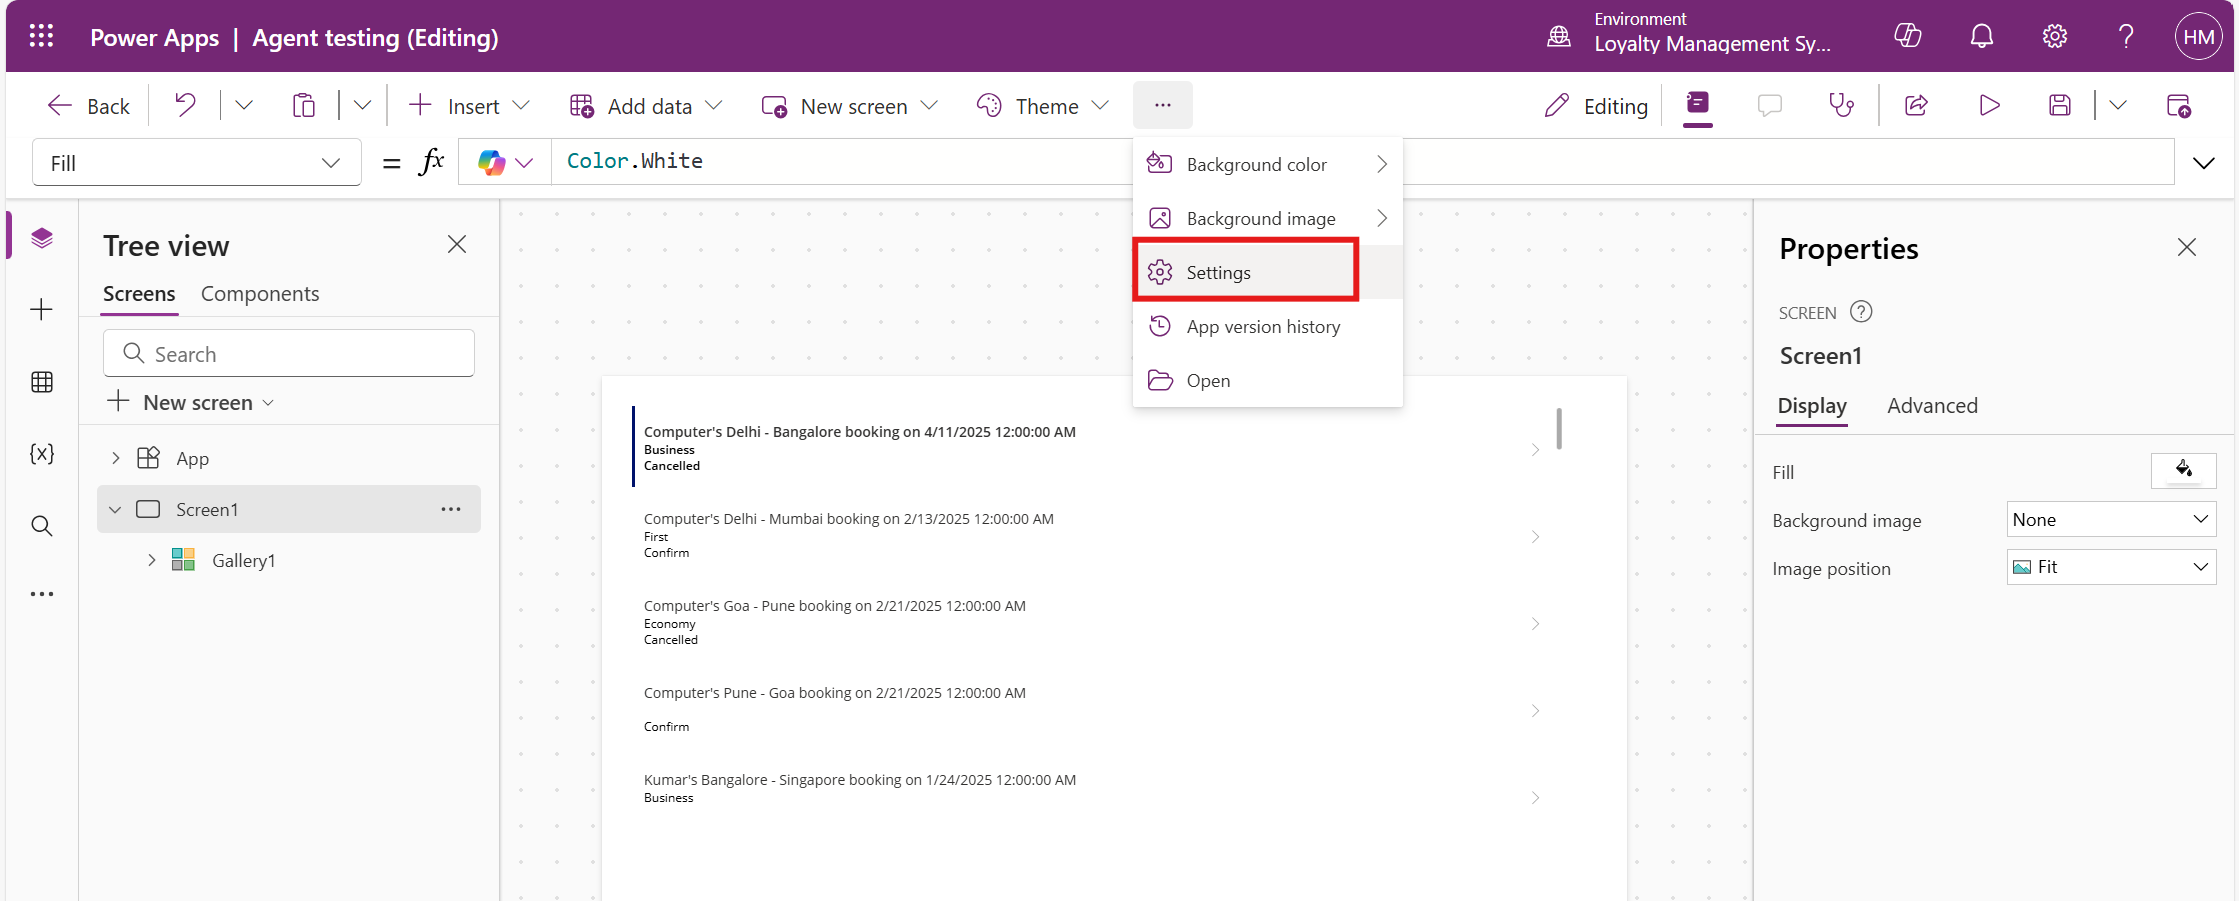
Click on Settings.
Choose Multilingual Agent in the Copilot section.
Save and publish the app.
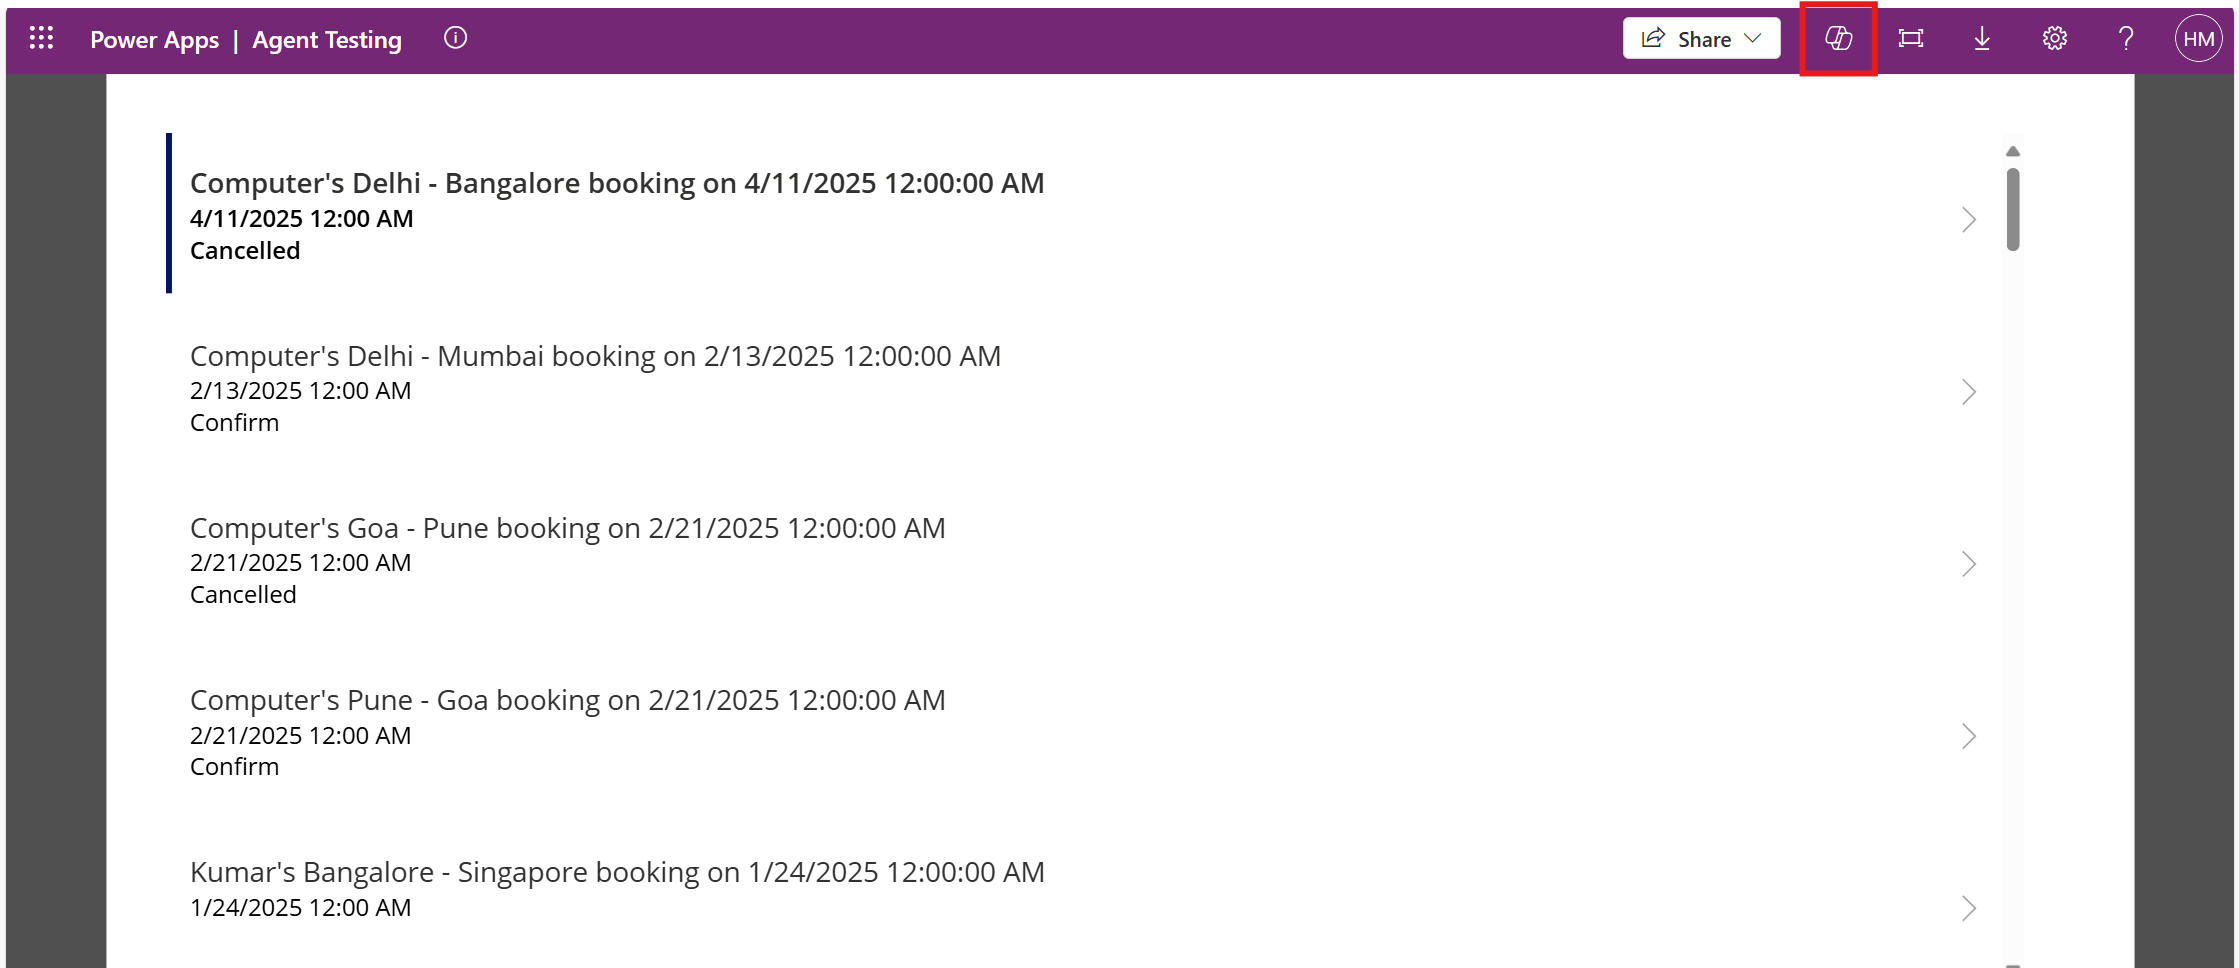
Go back to the Power Apps home page and click Play to launch the app.
Open Copilot in the app interface.
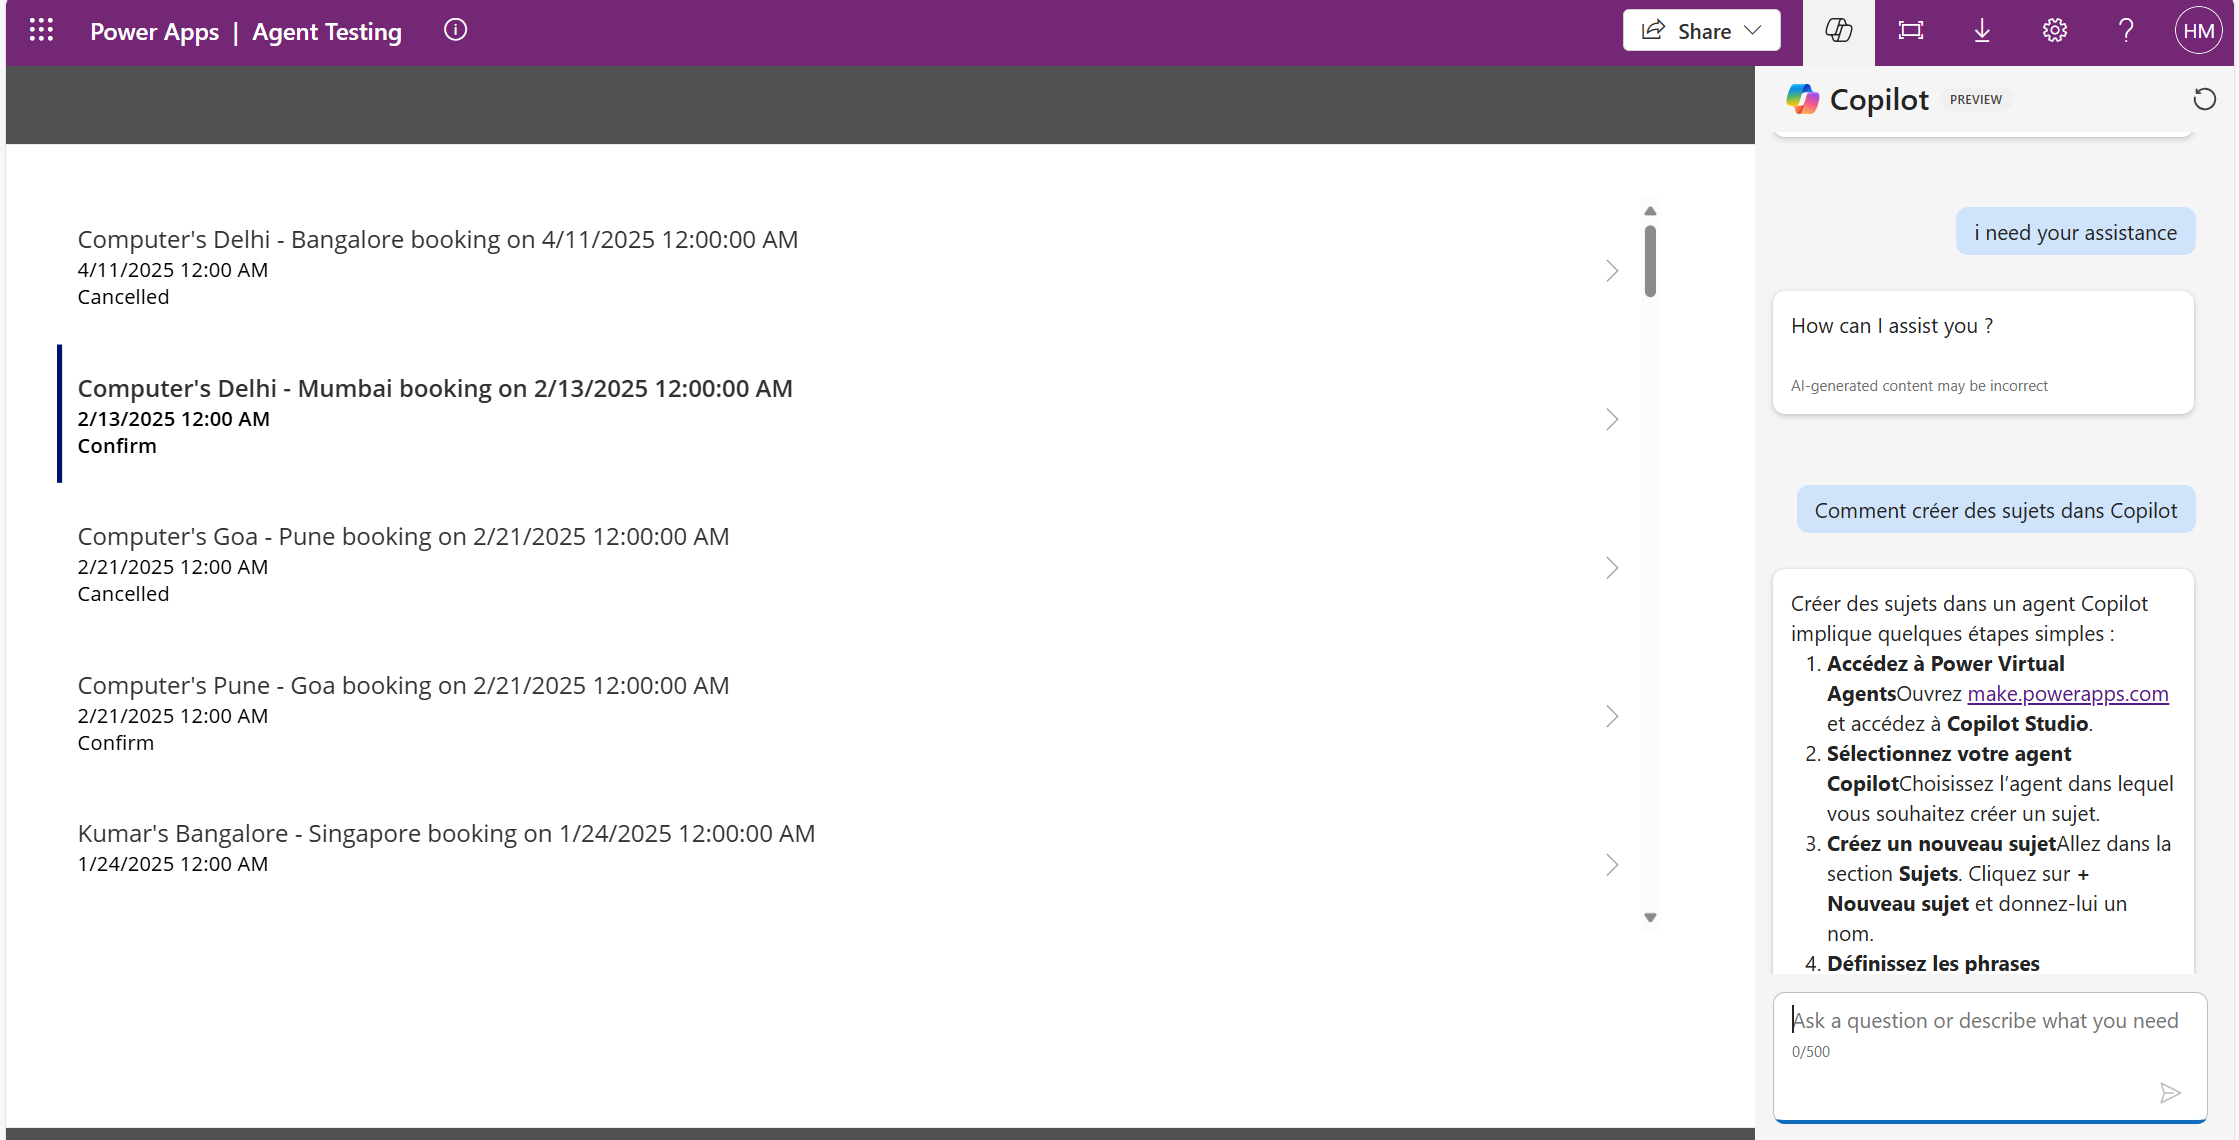
Test the agent by providing input in a secondary language.
Verify whether the multilingual agent detects the language and responds appropriately.
Frequently Asked Questions:
1. Can I add multiple secondary languages to the same Copilot Agent?
Yes, you can add multiple secondary languages in the Languages section of Copilot Studio. However, translations must be managed separately for each language.
2.Does the agent automatically translate user inputs?
No, the agent does not automatically translate user inputs. It detects the language and responds in the appropriate language if translations are available. You need to provide localized content for each supported language. If the user’s input is in a language that is not configured as a secondary language, the agent will default to the primary language. It is recommended to set a default language in advance to handle such cases smoothly and ensure the conversation continues without confusion.
3. Can I disable automatic language detection?
Yes, you can choose not to implement automatic language detection and instead prompt users to manually select their preferred language at the start of the conversation.
4. What happens if a user inputs a language that is not configured in the agent?
If the user's input is in a language that is not configured, the agent will default to the primary language and may not provide an accurate response.