Creating and managing topics in Copilot Studio with Power Apps integration
March 04, 2025
#Power Apps
Harshitha Madem
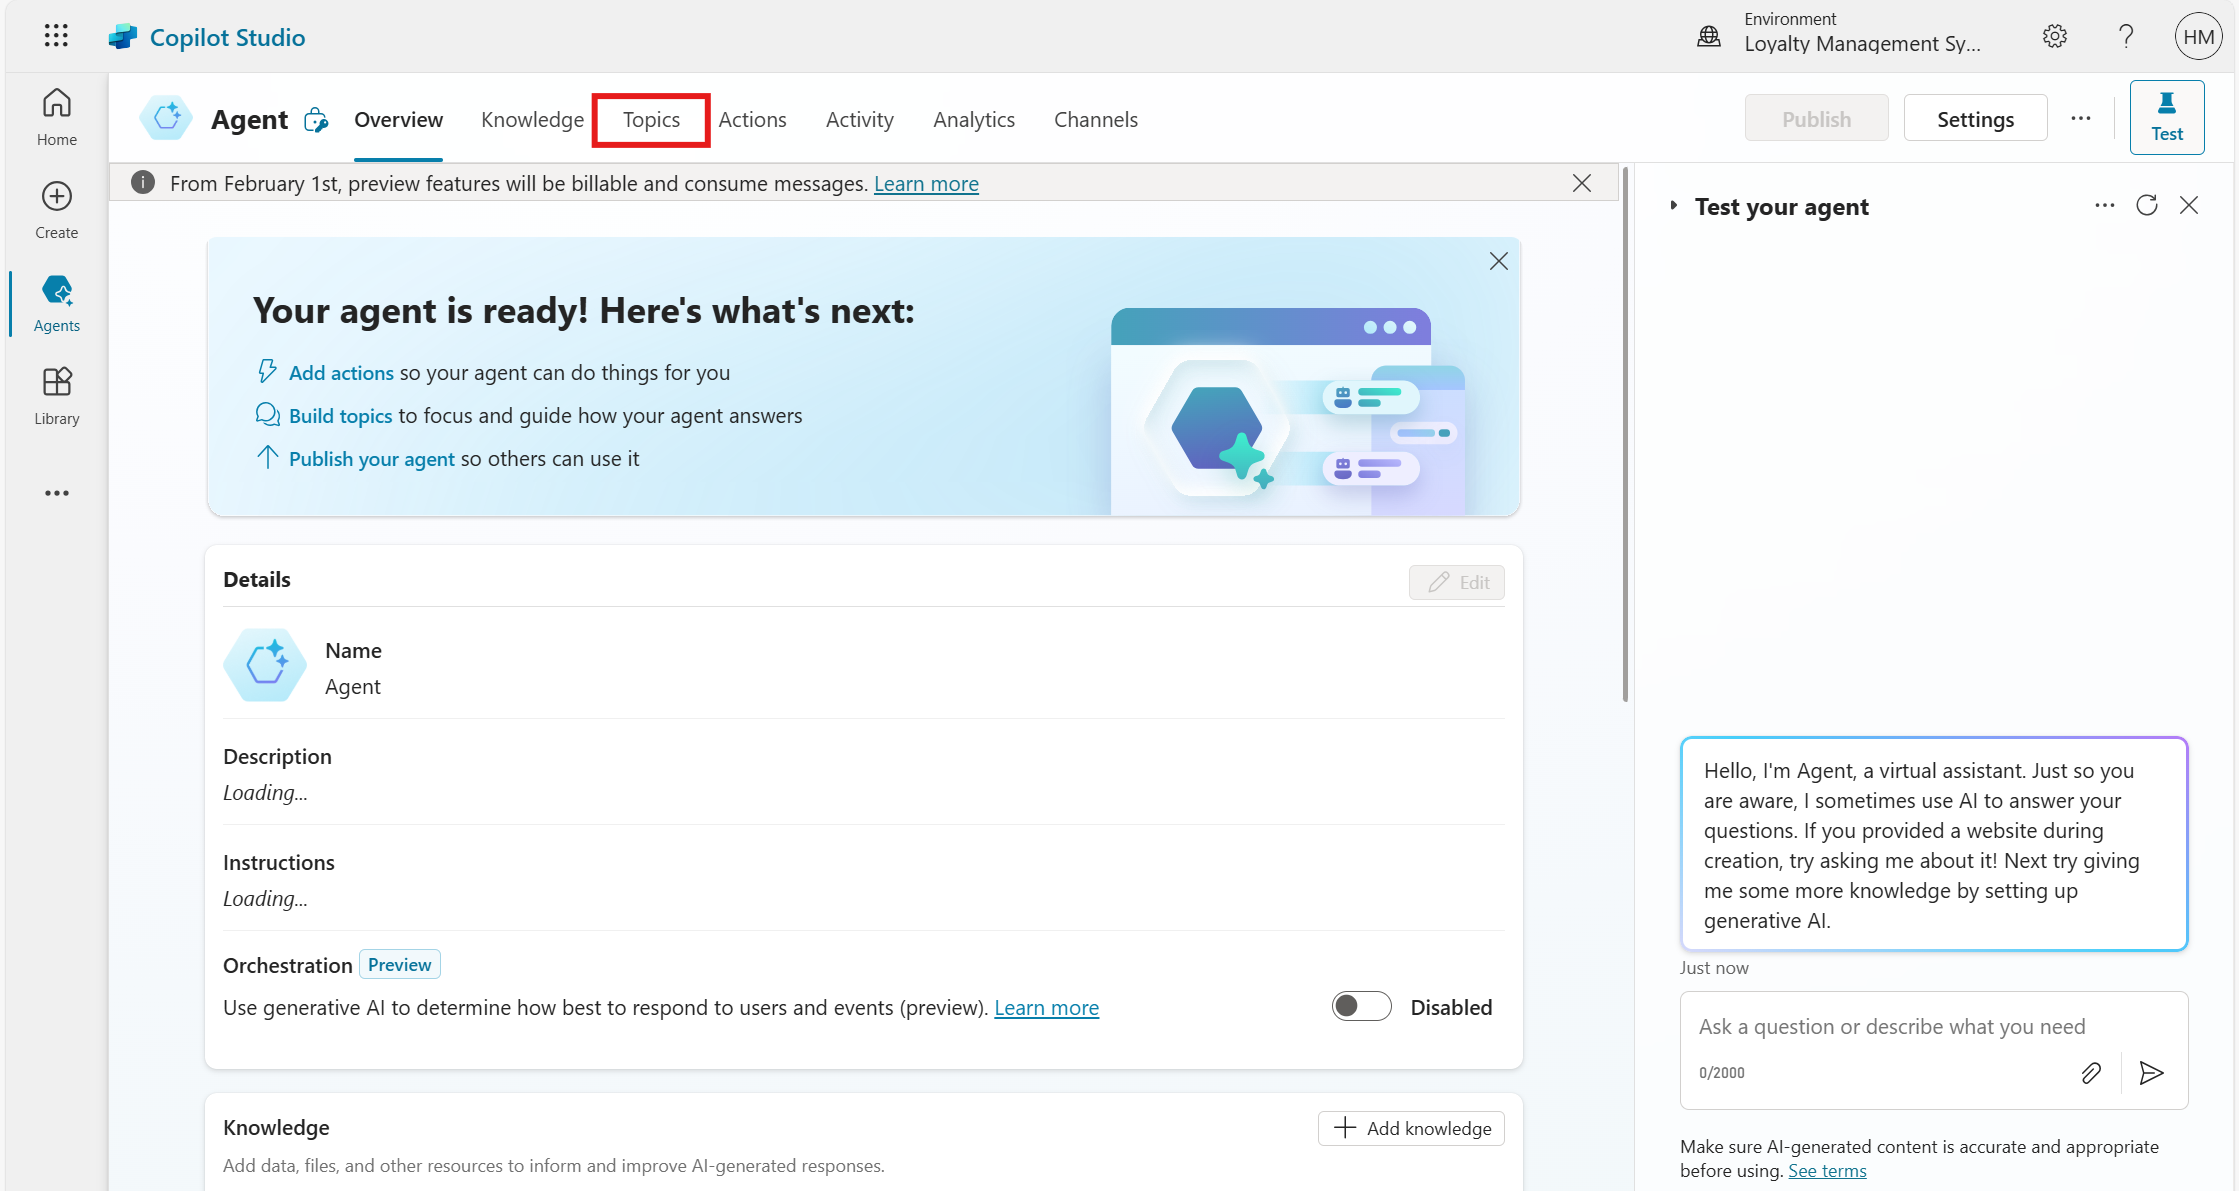
What Are Topics in Copilot Studio?
In Copilot Studio, a topic is a part of a conversation between the user and Copilot. It contains different steps called nodes, which determine what happens in the conversation. Topics often have trigger phrases, which are words or questions customers might use related to a specific issue. These trigger phrases help Copilot know when to engage on that topic.
Types of Topics
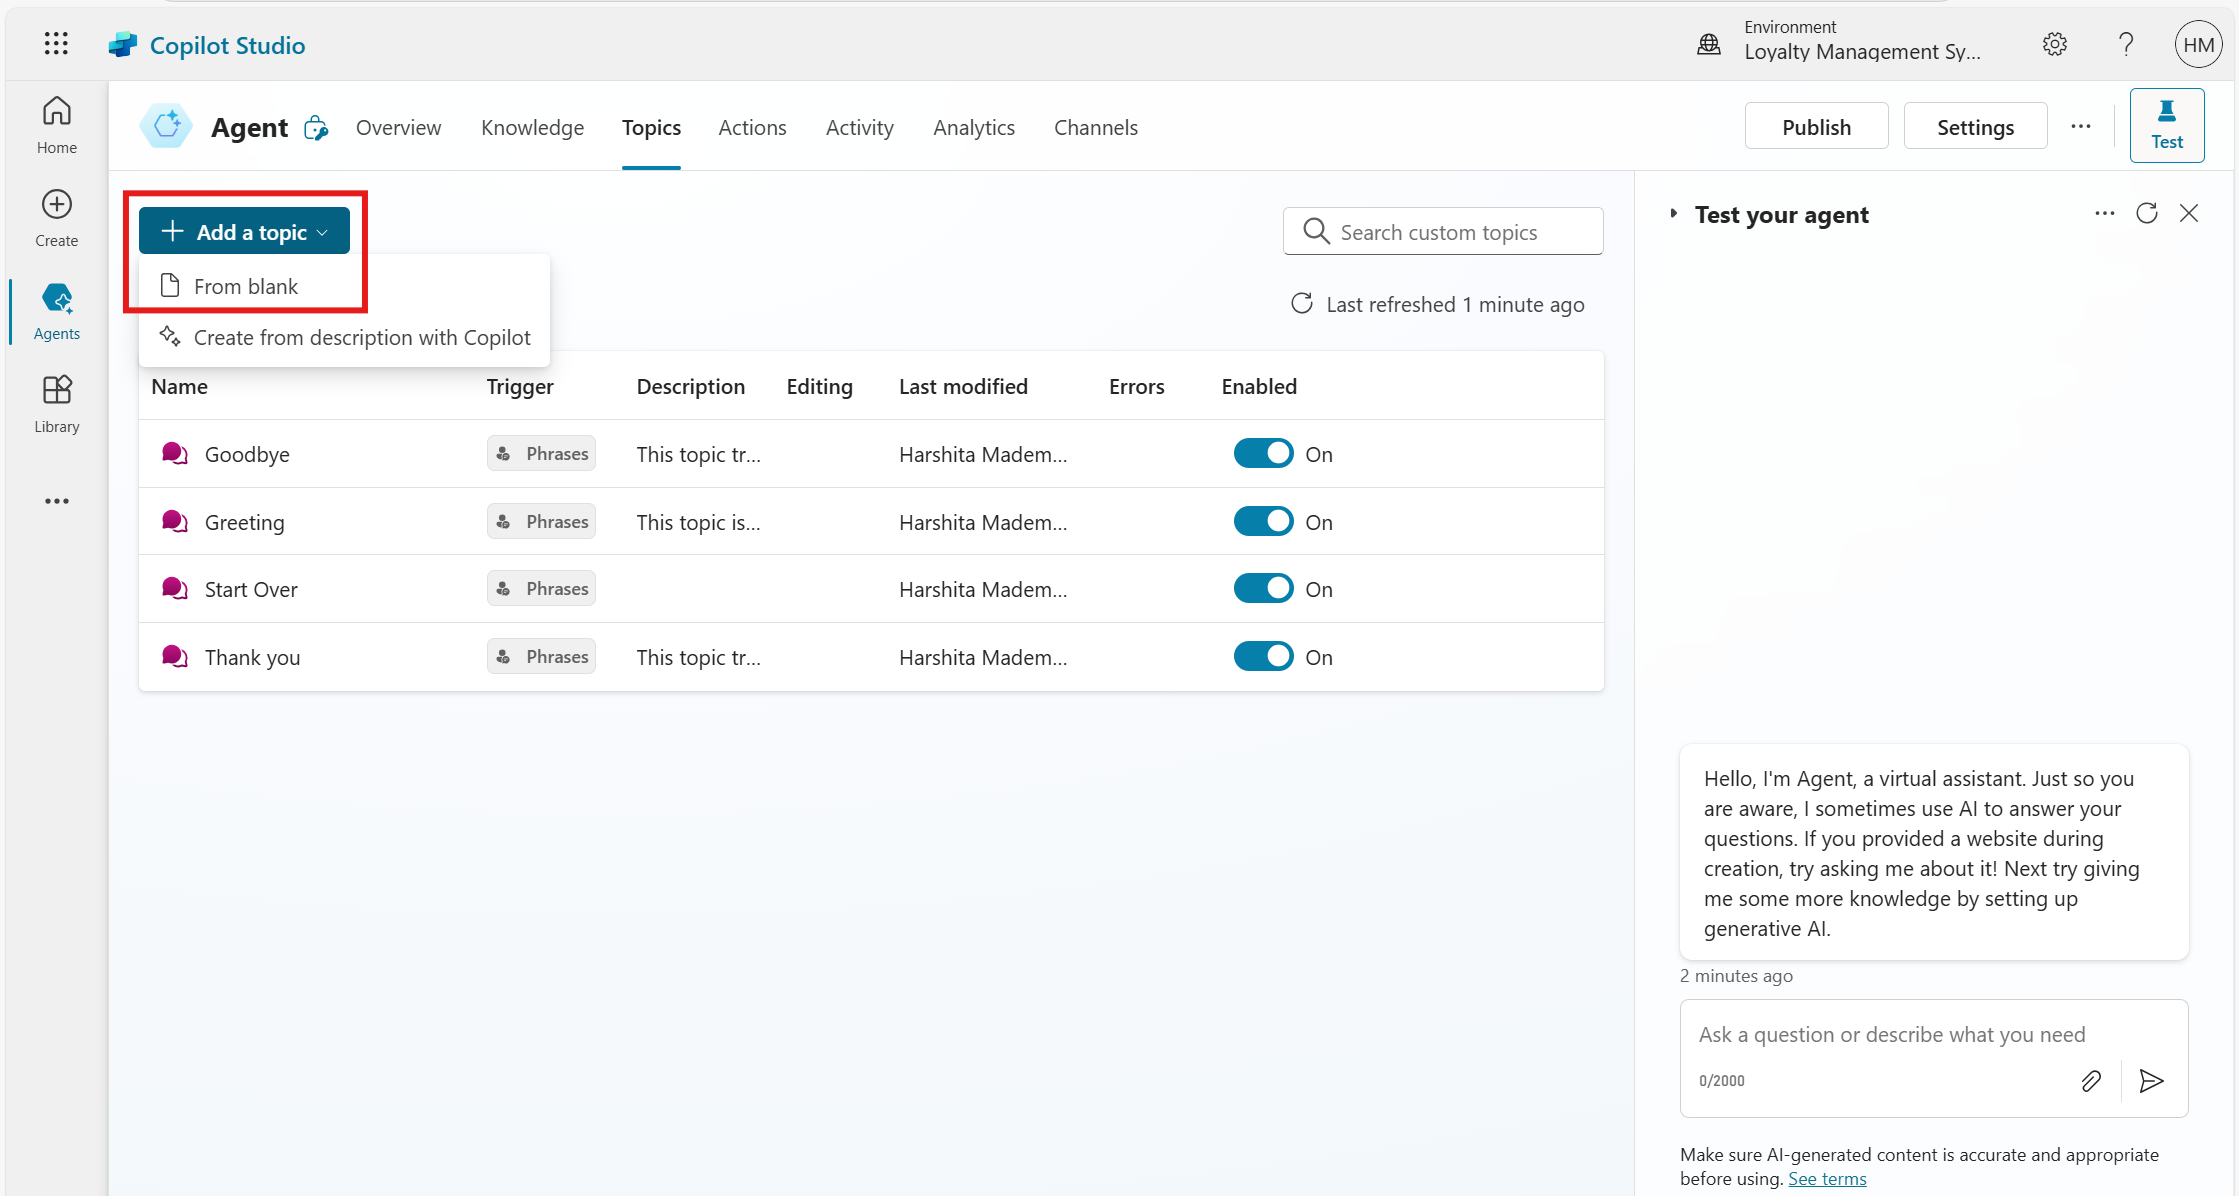
An agent in Copilot Studio includes two types of topics:
System Topics: These are built-in topics that handle essential functions like transferring a conversation to a human agent or ending a conversation. System topics are automatically included when you create an agent. While you can't delete system topics, you can disable them.
Custom Topics: These are user-defined topics that can be modified or removed as needed. Custom topics allow you to create personalized interactions, including greetings, FAQs, and other customized responses.
Node Types in Copilot Studio
Nodes are the building blocks of a topic conversation path. The available node types include:
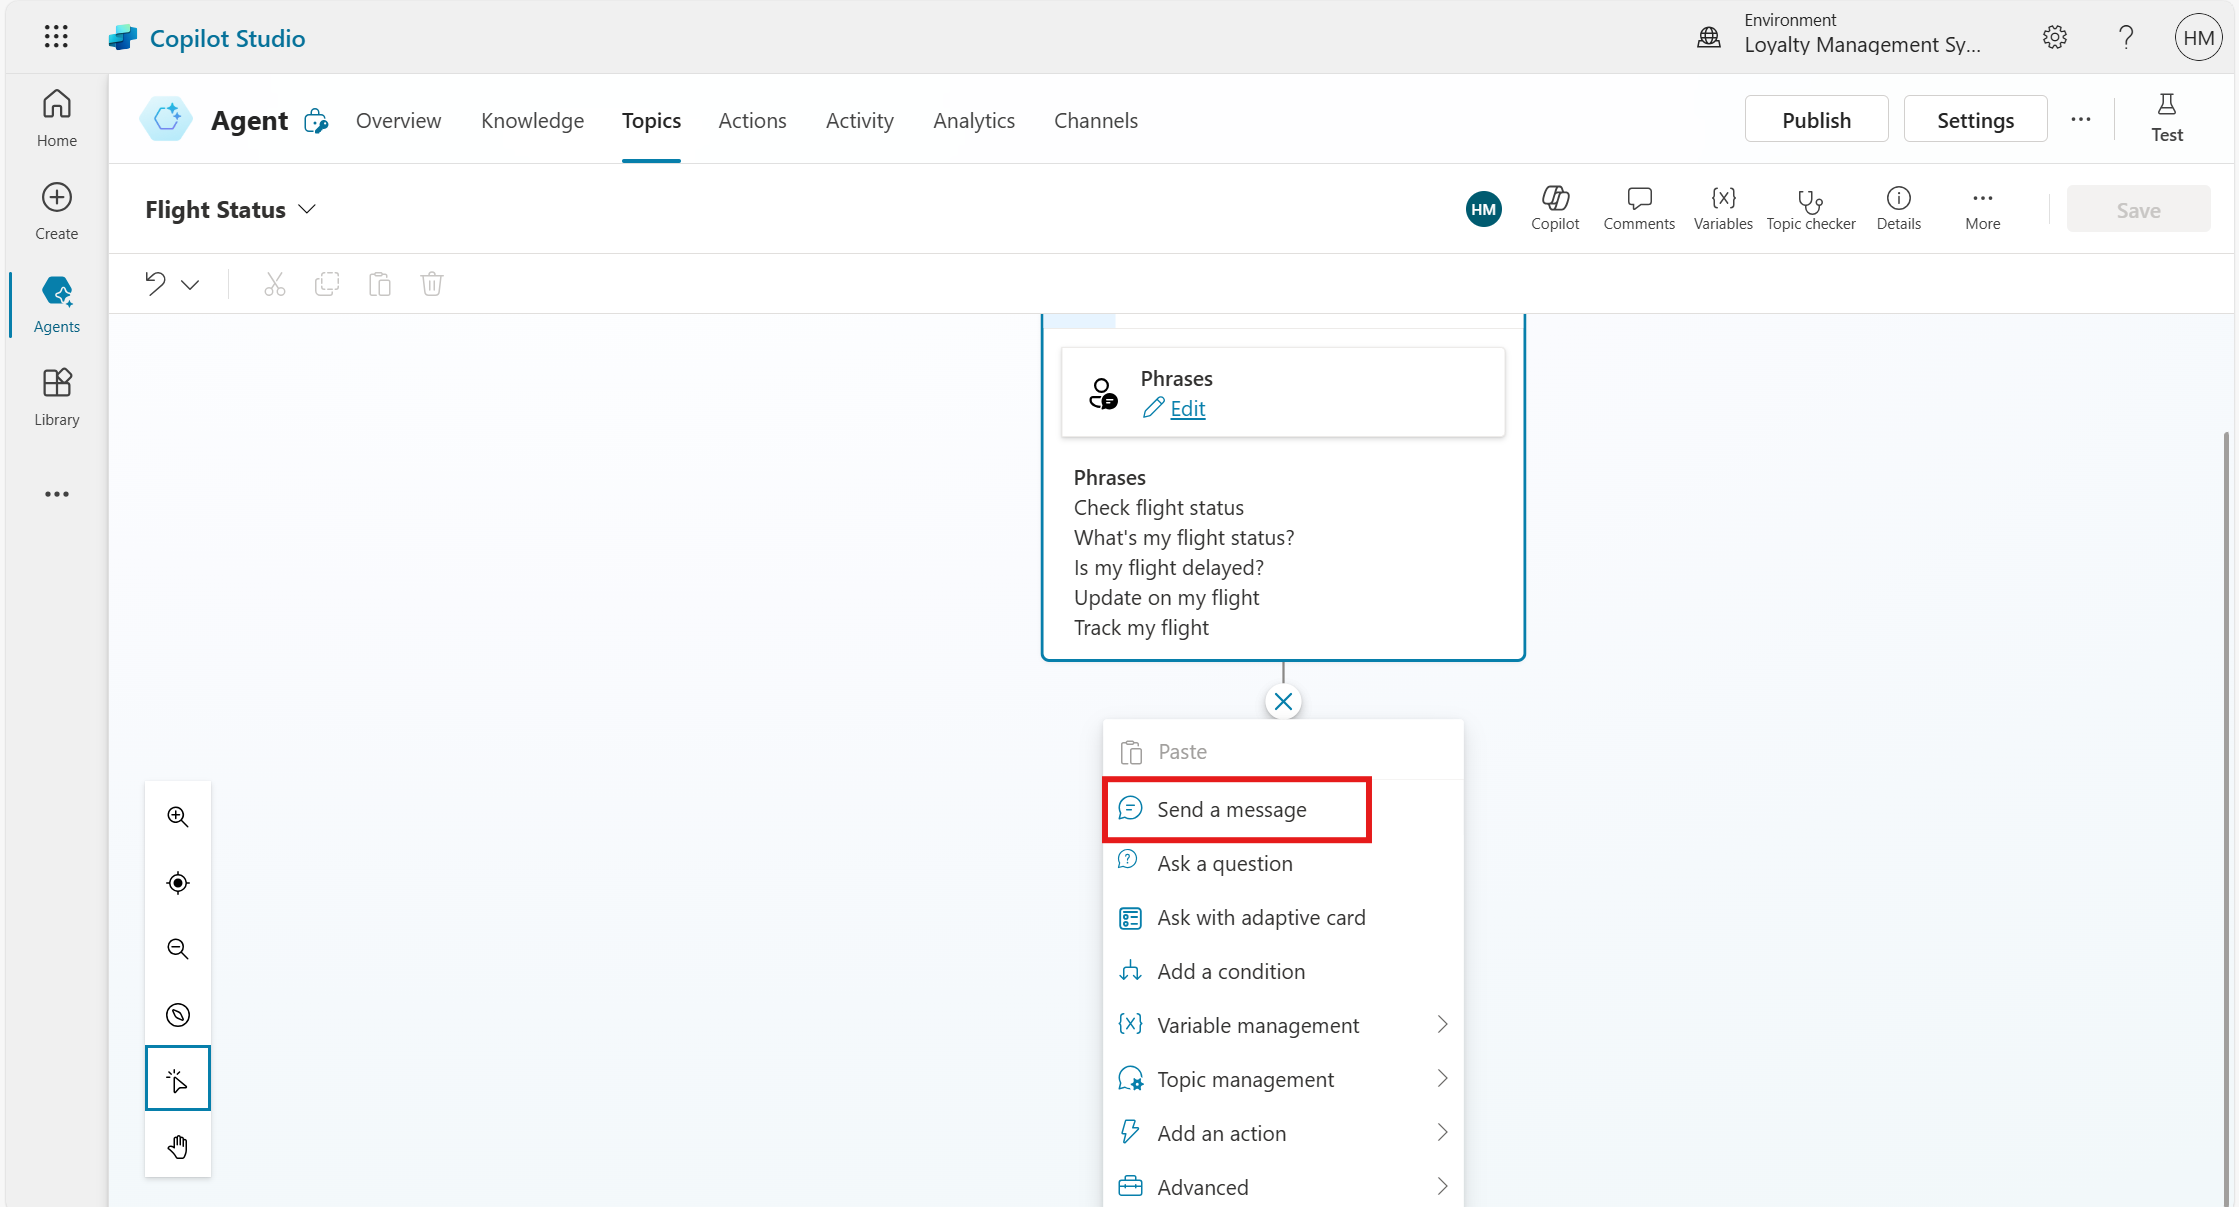
Send a message: Displays a response to the user.
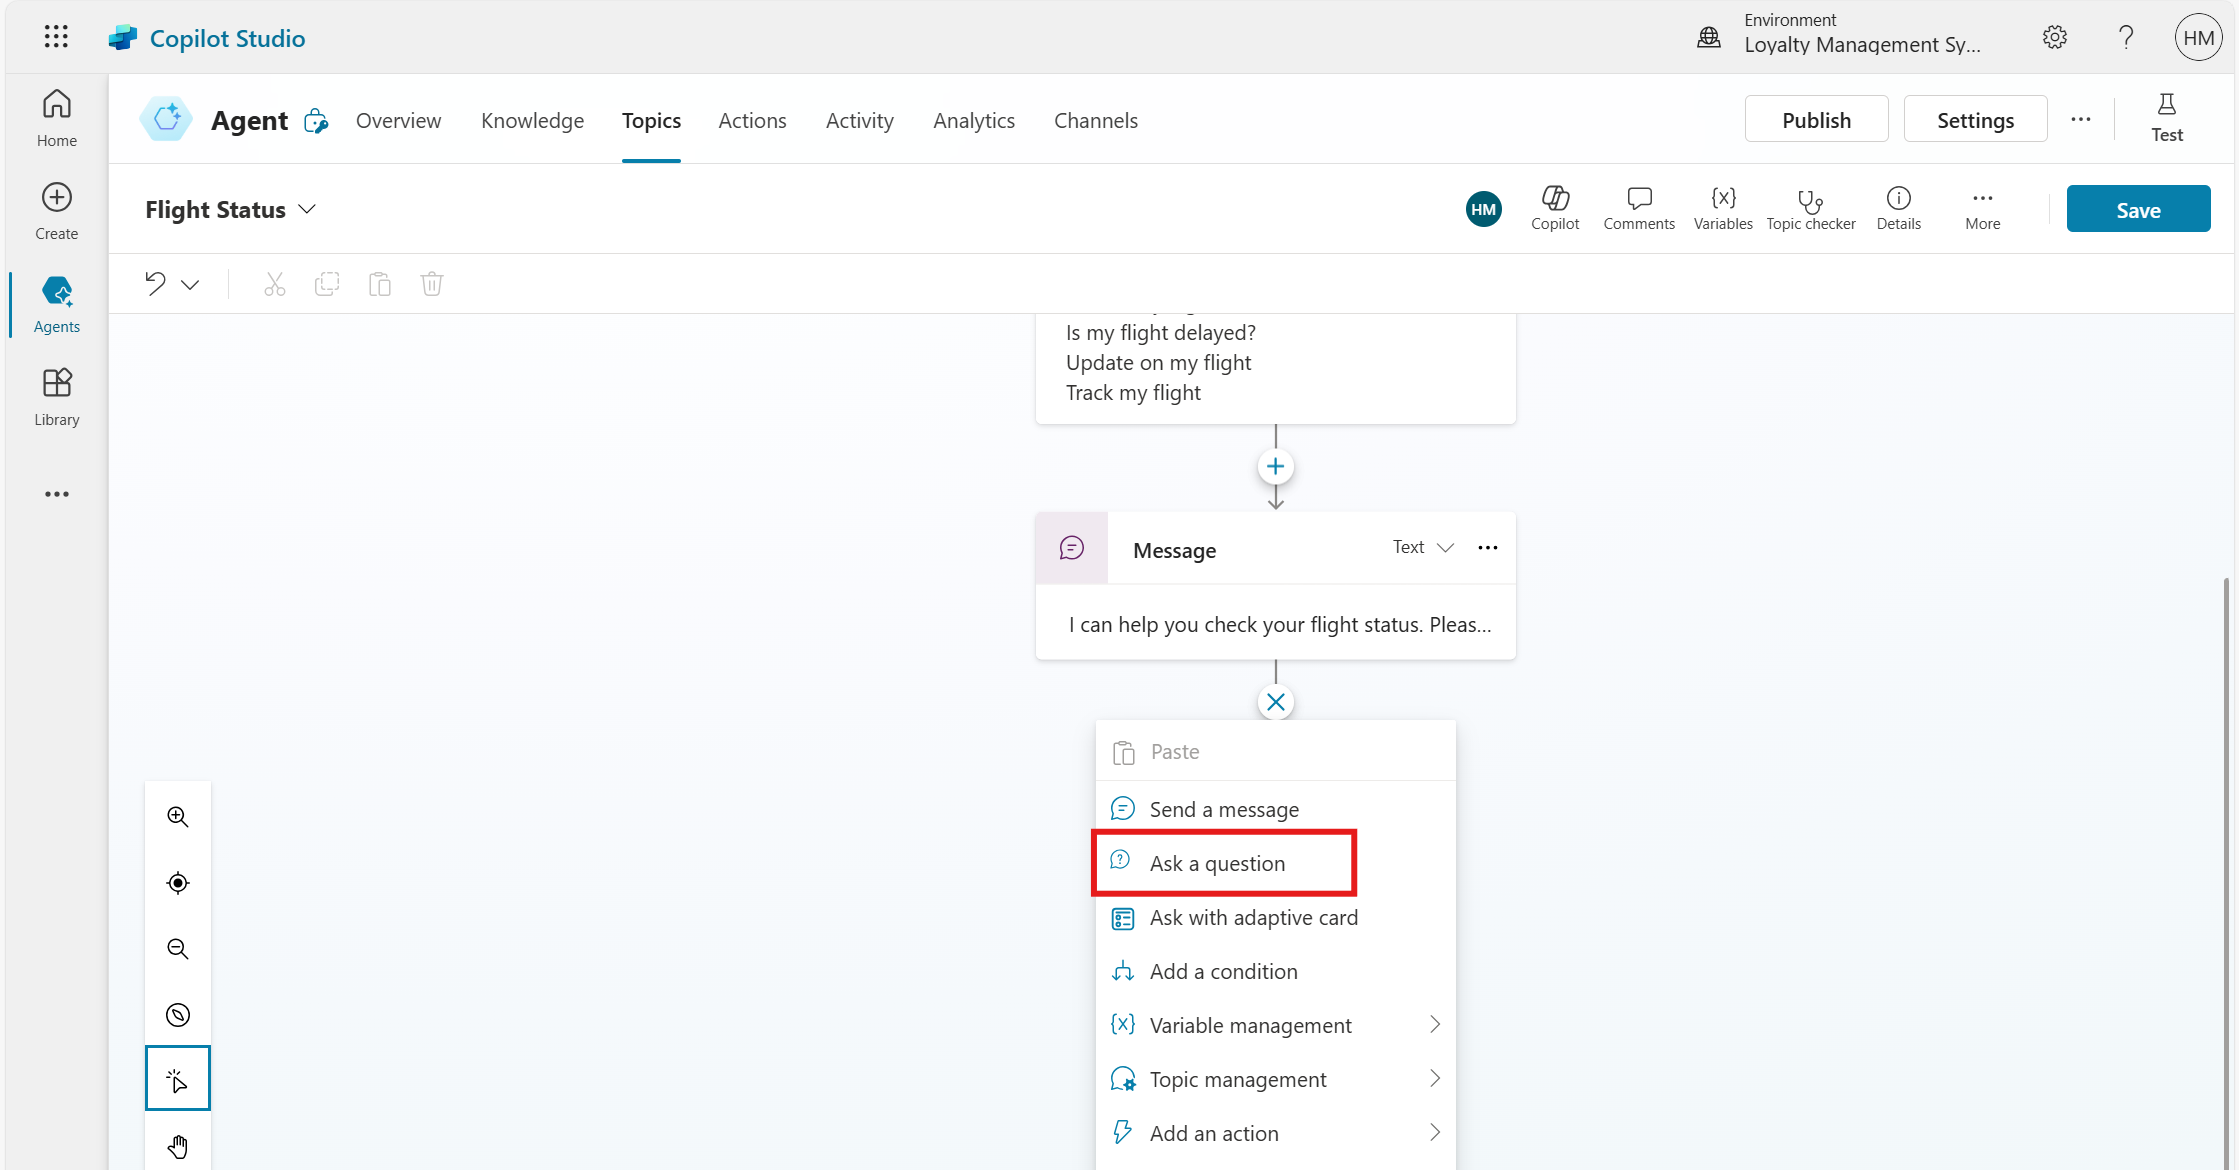
Ask a question: Asks a question to the user.
Ask with adaptive card: Uses JSON to exchange structured data with external apps.
Author using conditions: Directs the conversation based on user responses or conditions.
Variable Management: Set a value, parse a value, and clear all variables.
Manage topics: Allows conversation redirection, user transfers, or session termination.
Need help with your business solution?
Our team can help you implement the right solution for your organization.
Call a flow: Invokes Power Automate flows, connectors, or plugins.
Advanced options: Enables HTTP requests, event triggers, and AI-generated responses.
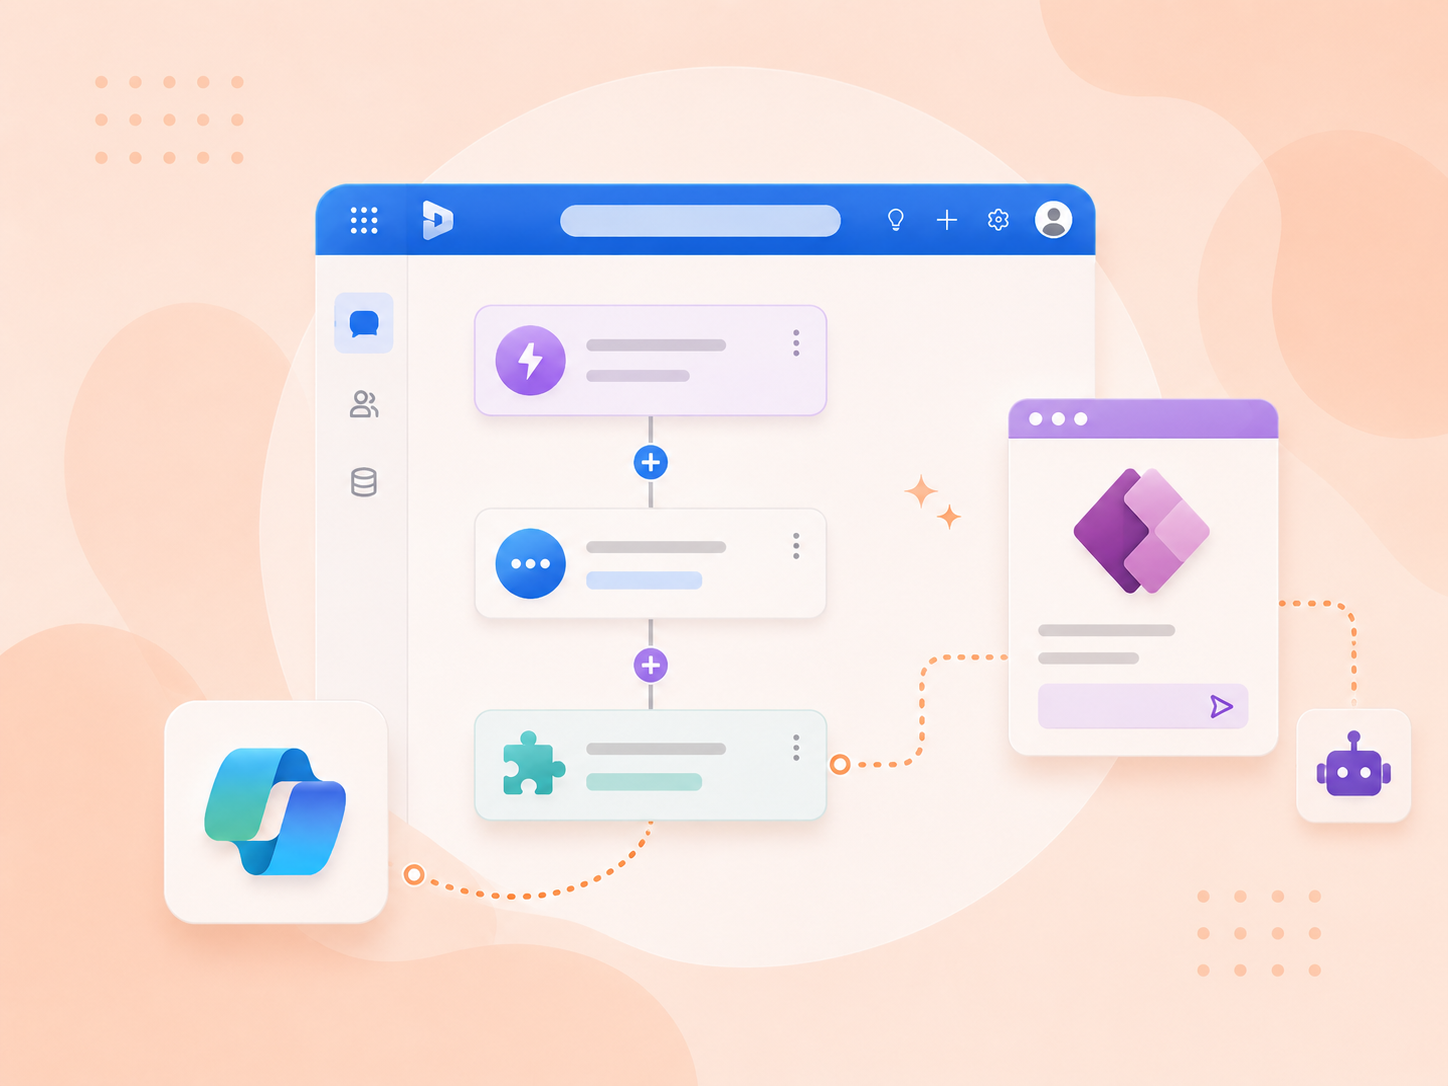
In this blog, we will walk you through the steps to create, design, and manage topics in Copilot Studio, including an example of how to implement a topic using the code editor.
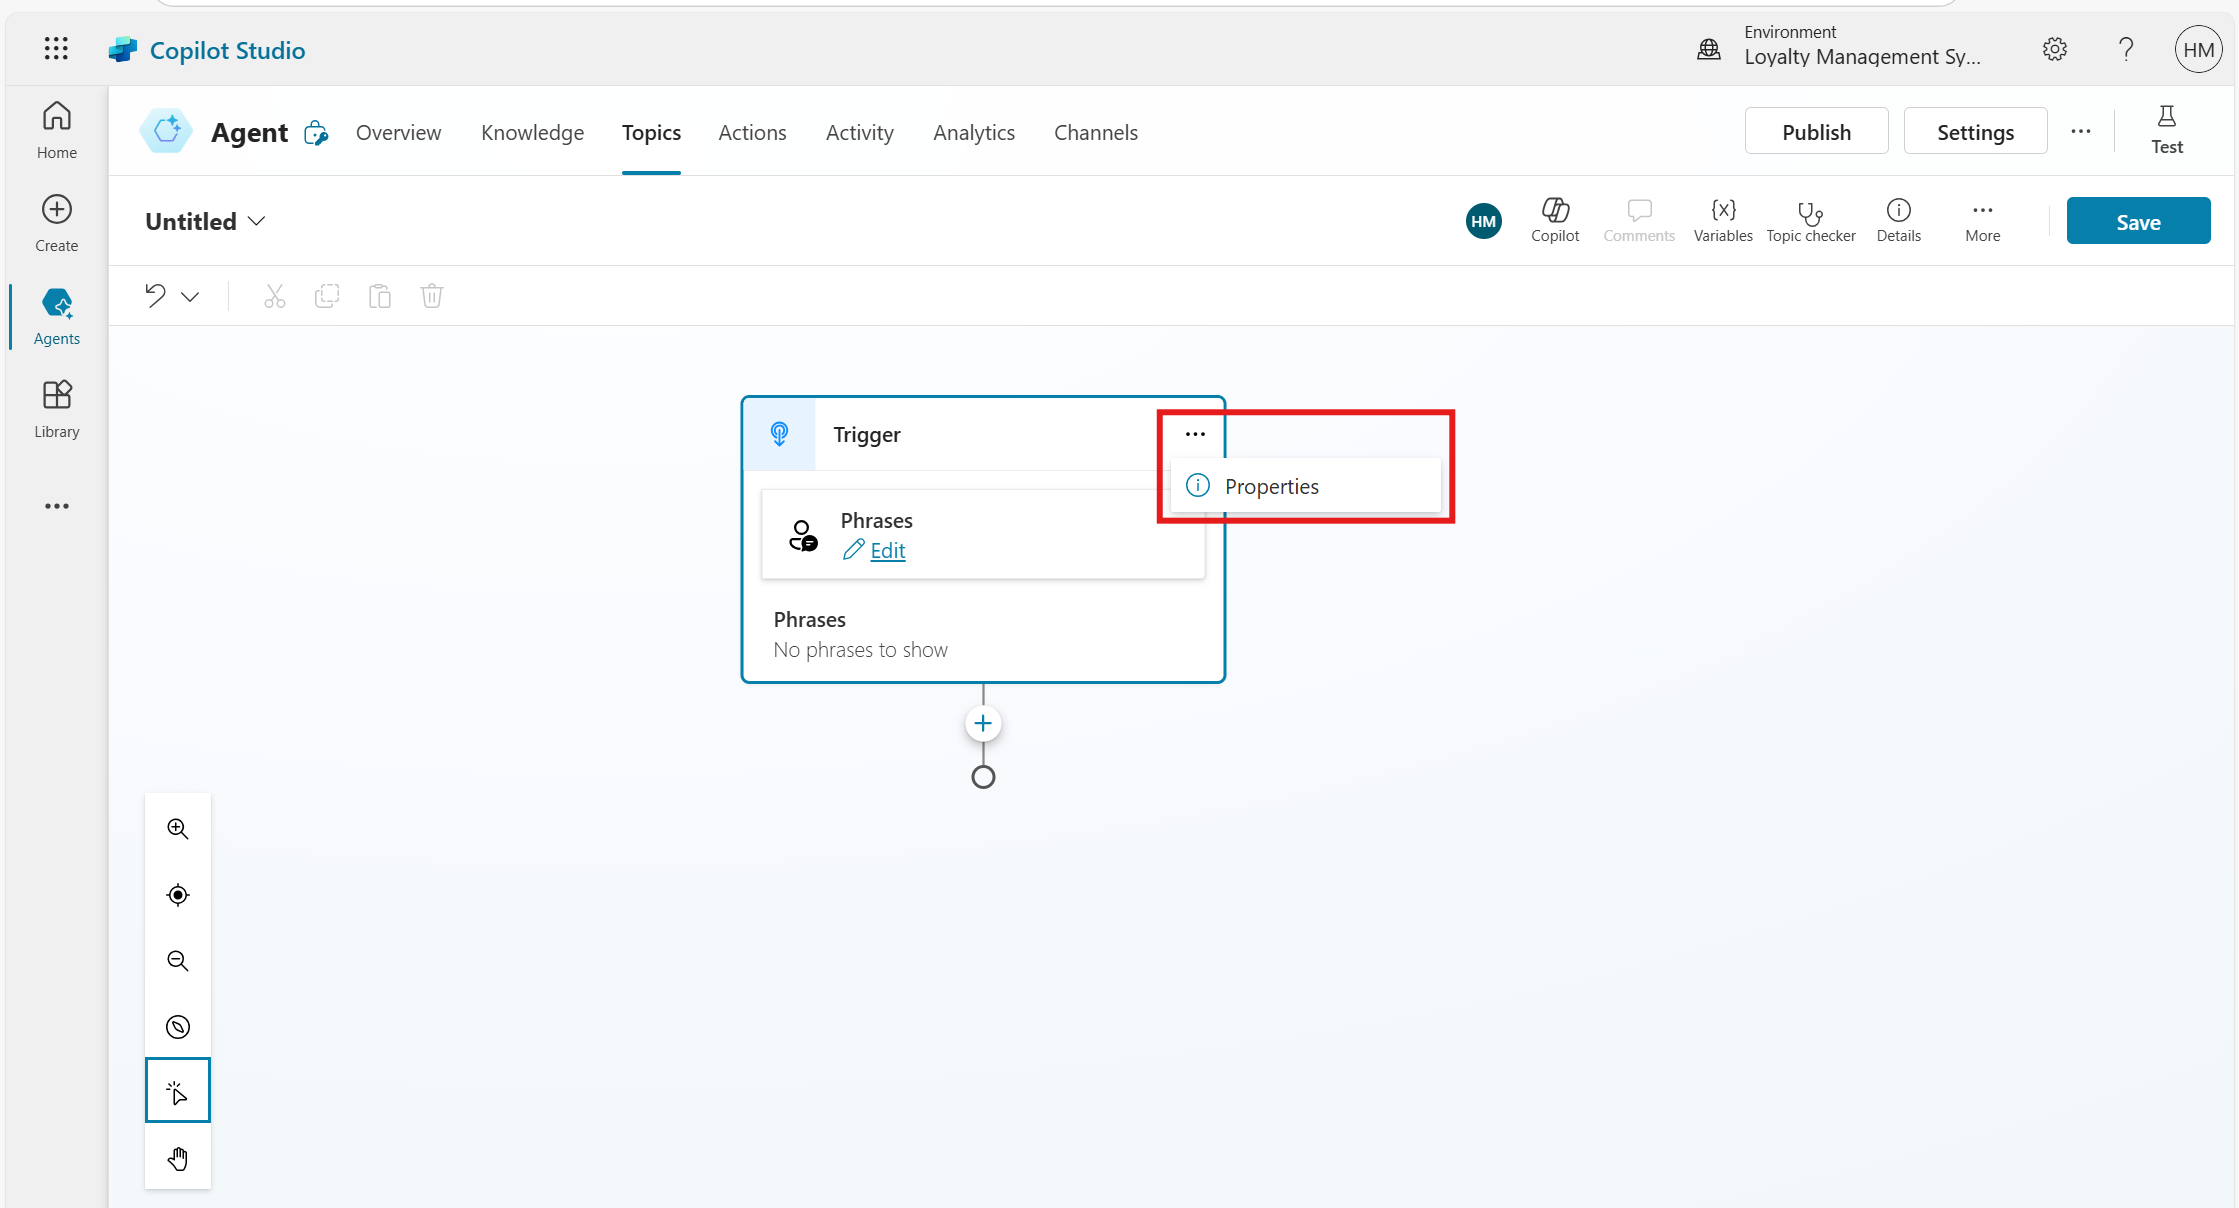
A Trigger node appears on a blank authoring canvas.
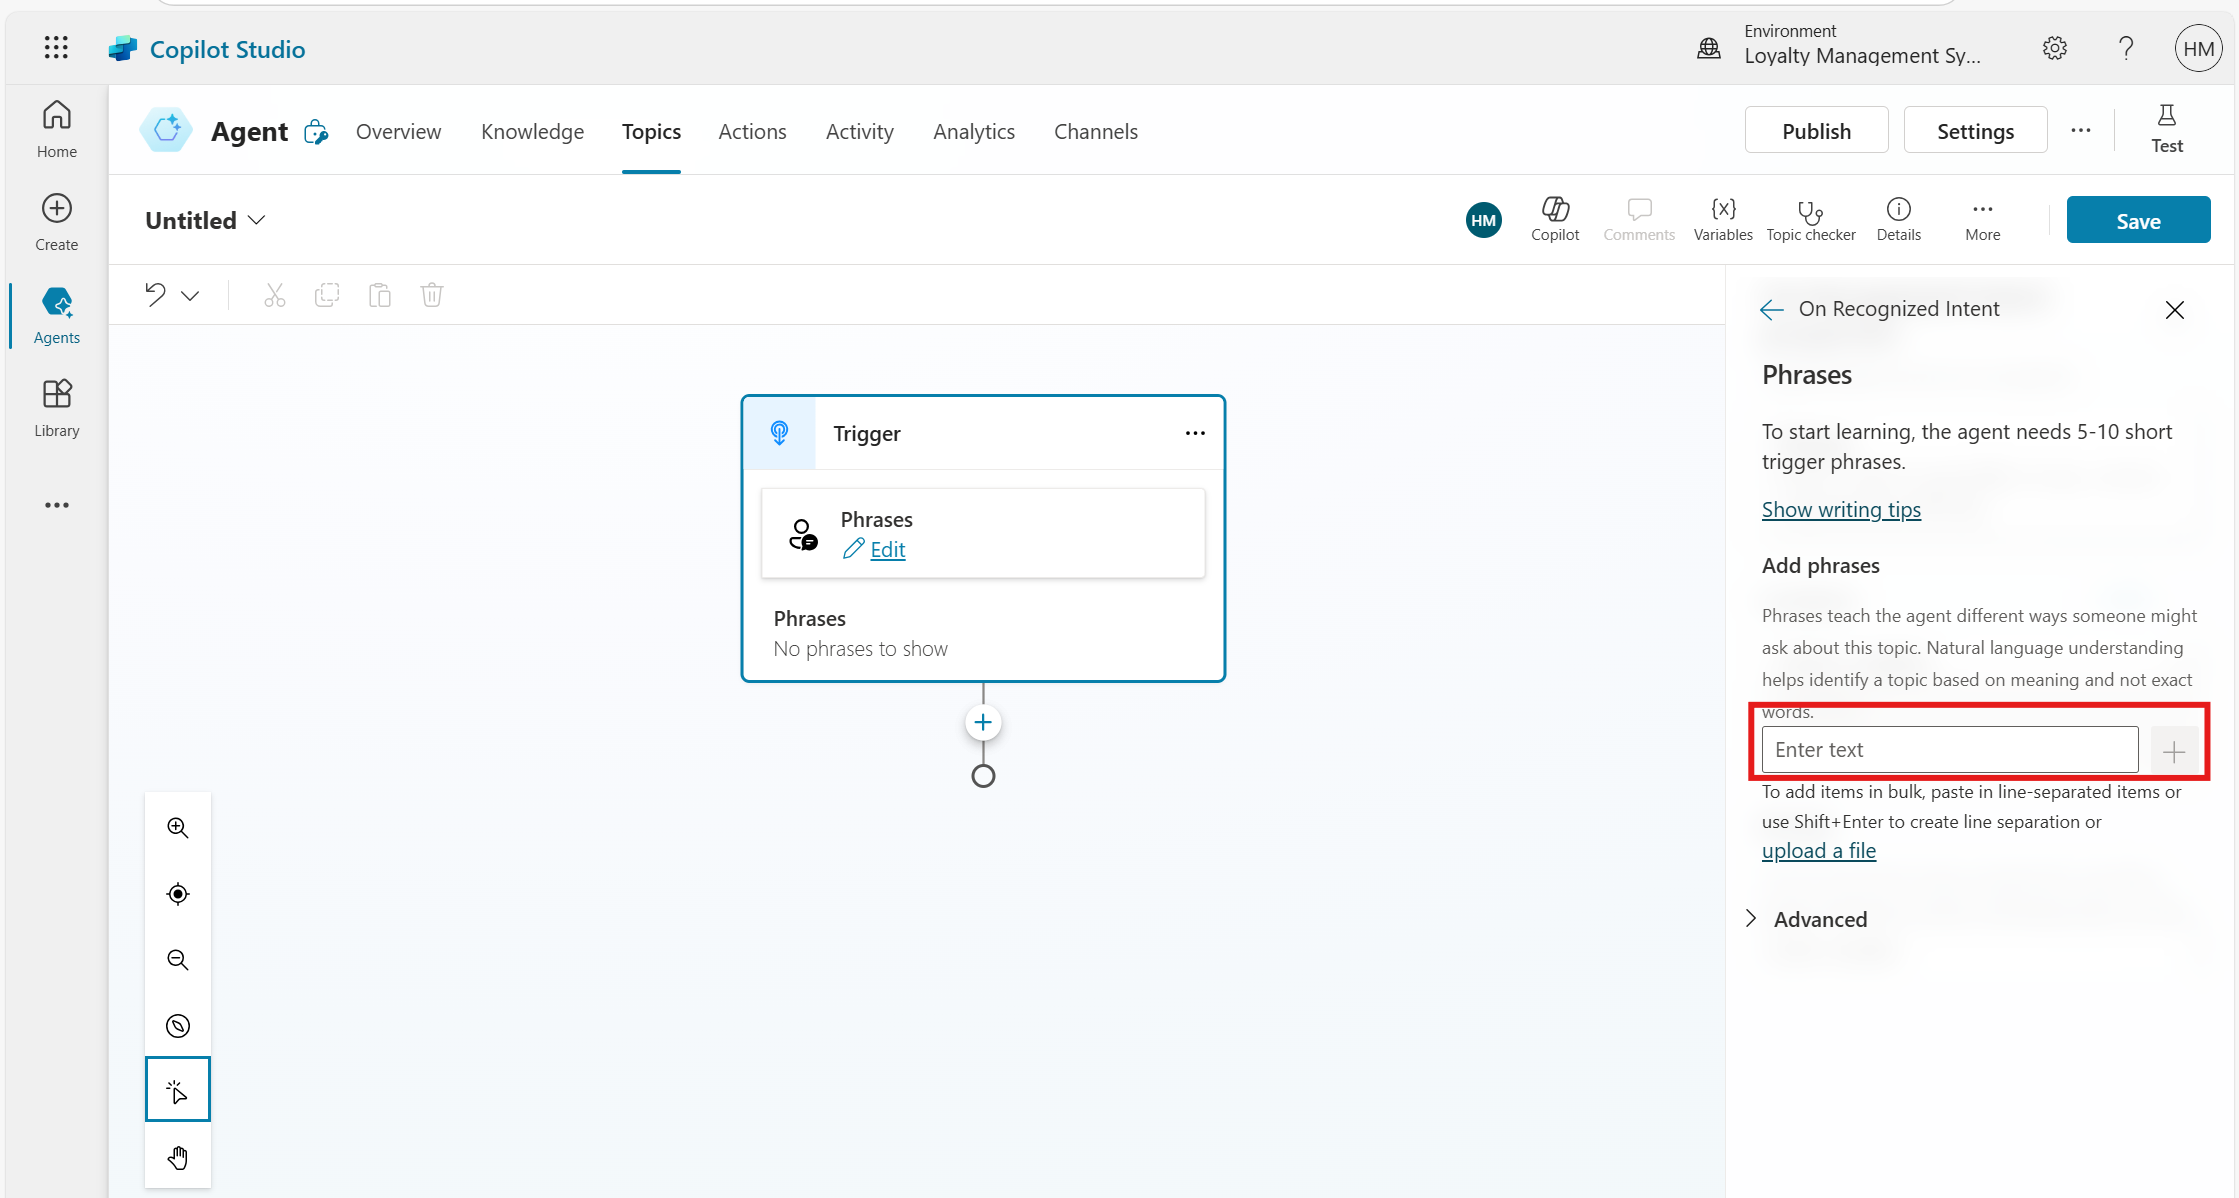
Step 3: Define Trigger Phrases
Click the More icon on the Trigger node and select Properties.
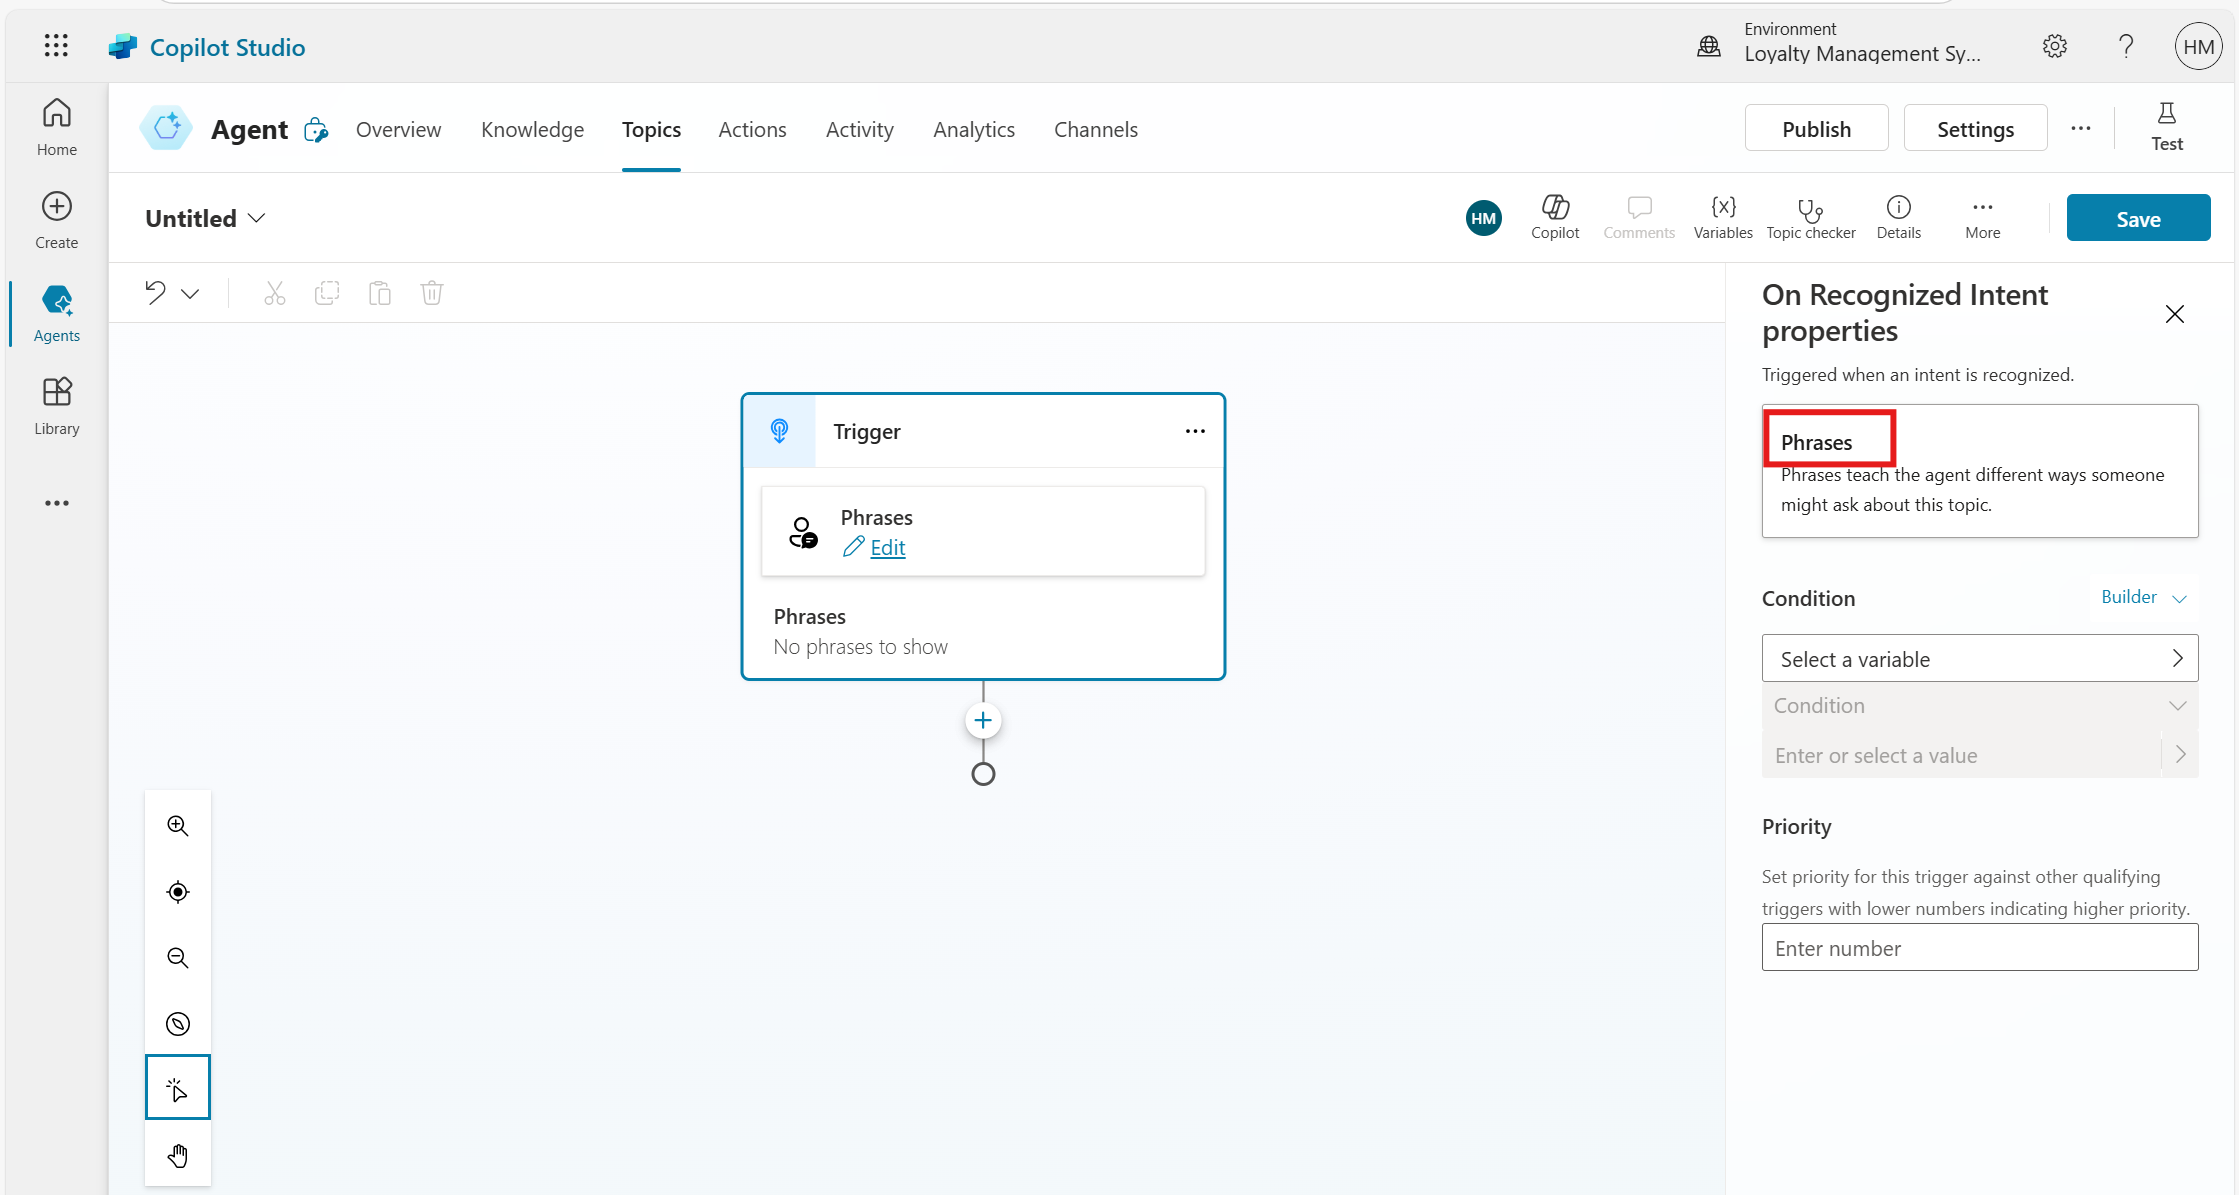
Click on Phrases to open the Phrases panel.
Phrases are trigger words, keywords, or questions that a customer might use to activate a topic.
Copilot Studio uses Natural Language Understanding to match a user’s input to these phrases. It does not need to exactly match the phrase to trigger the topic.
Under Add phrases, enter trigger phrases related to flight status.
Add 5-10 phrases so the AI can recognize different ways users might ask the same question and click Save.
Step 4: Design the Topic Conversation Path
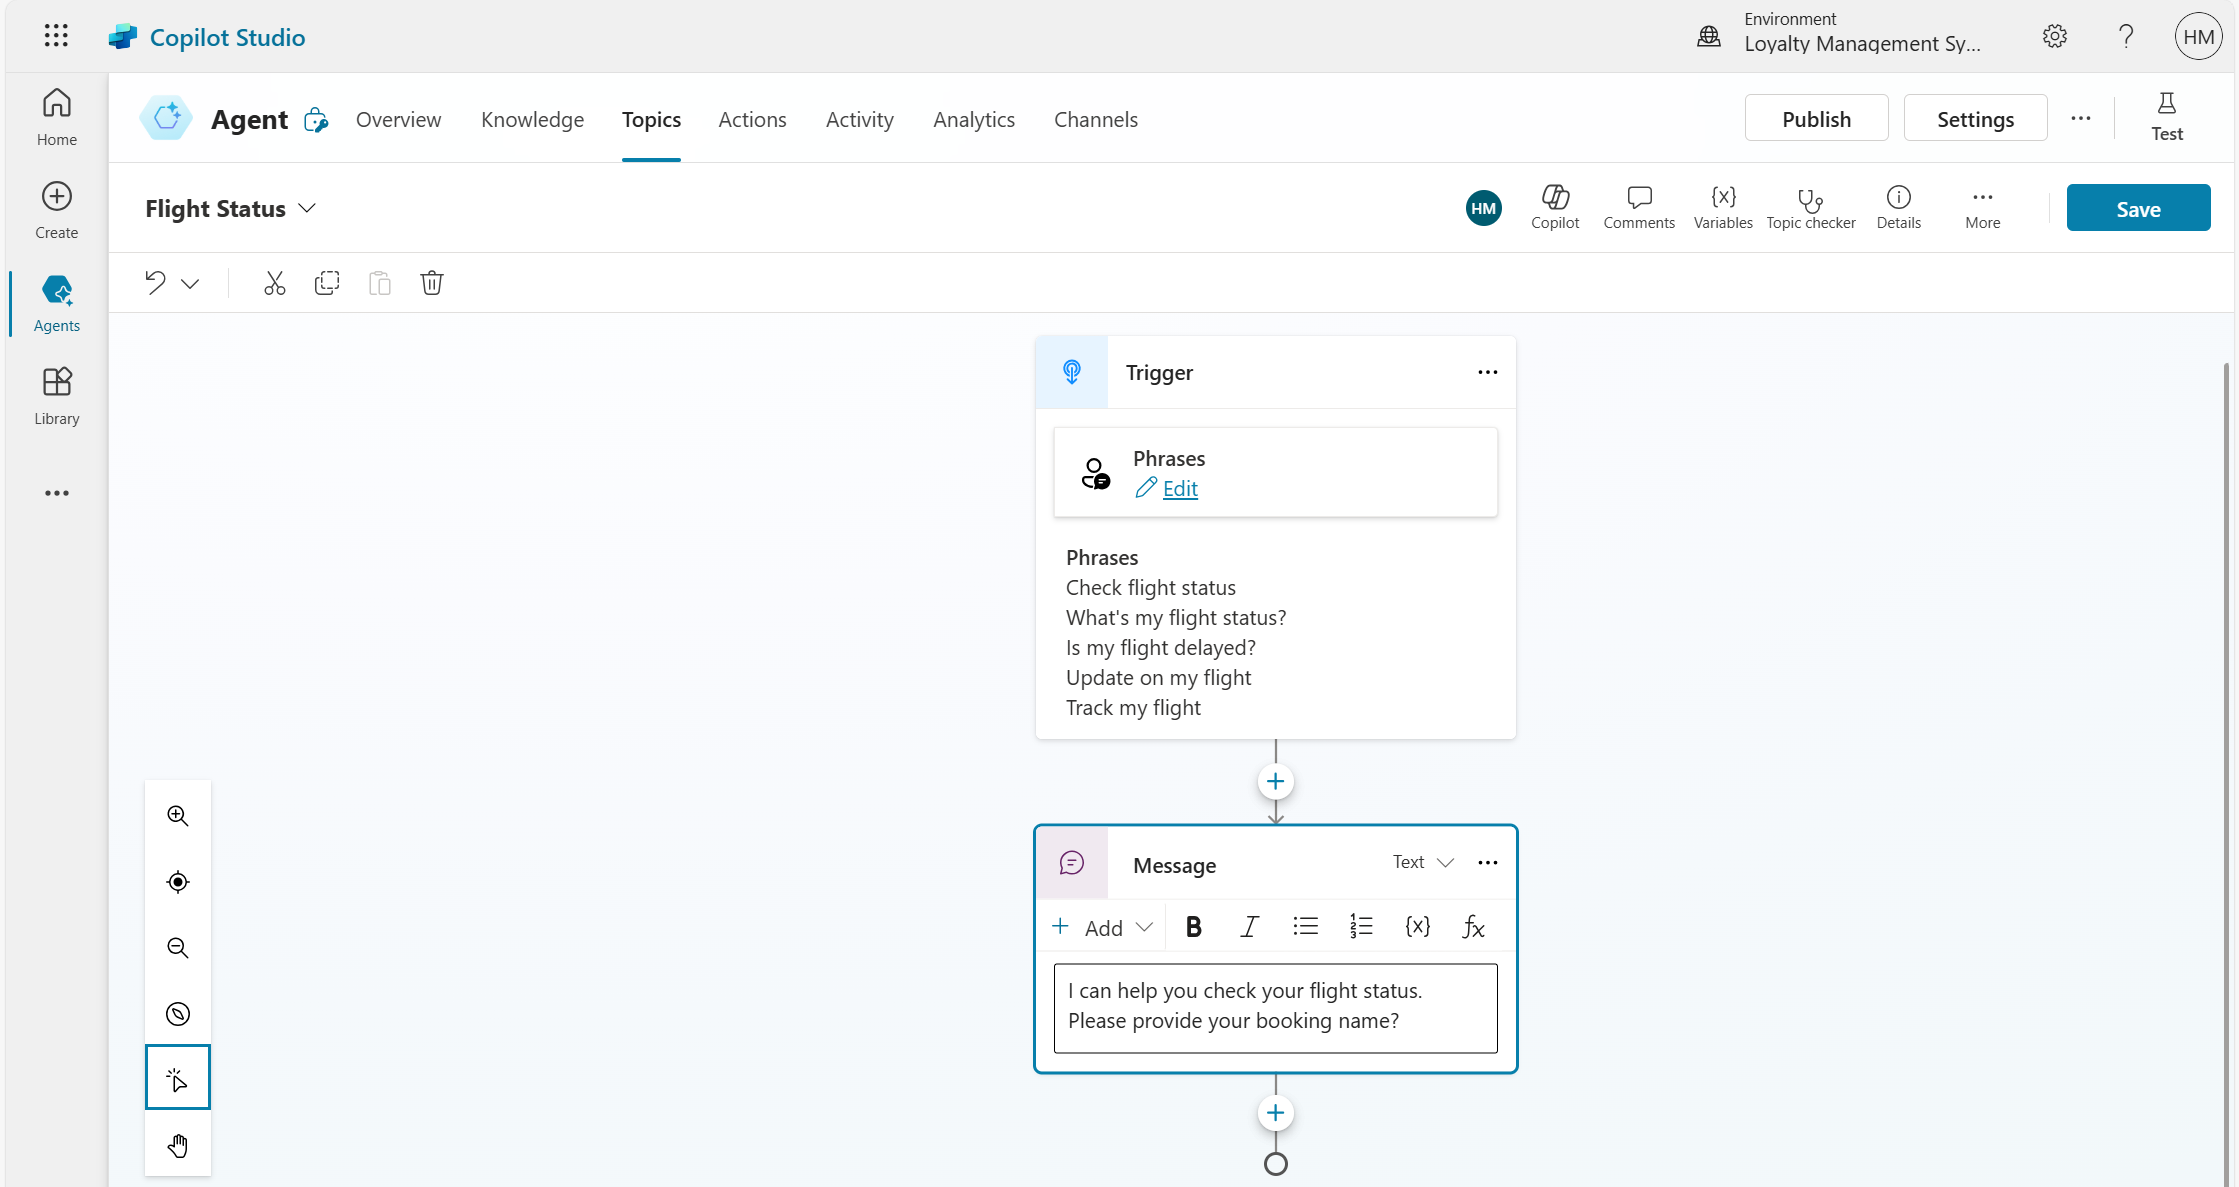
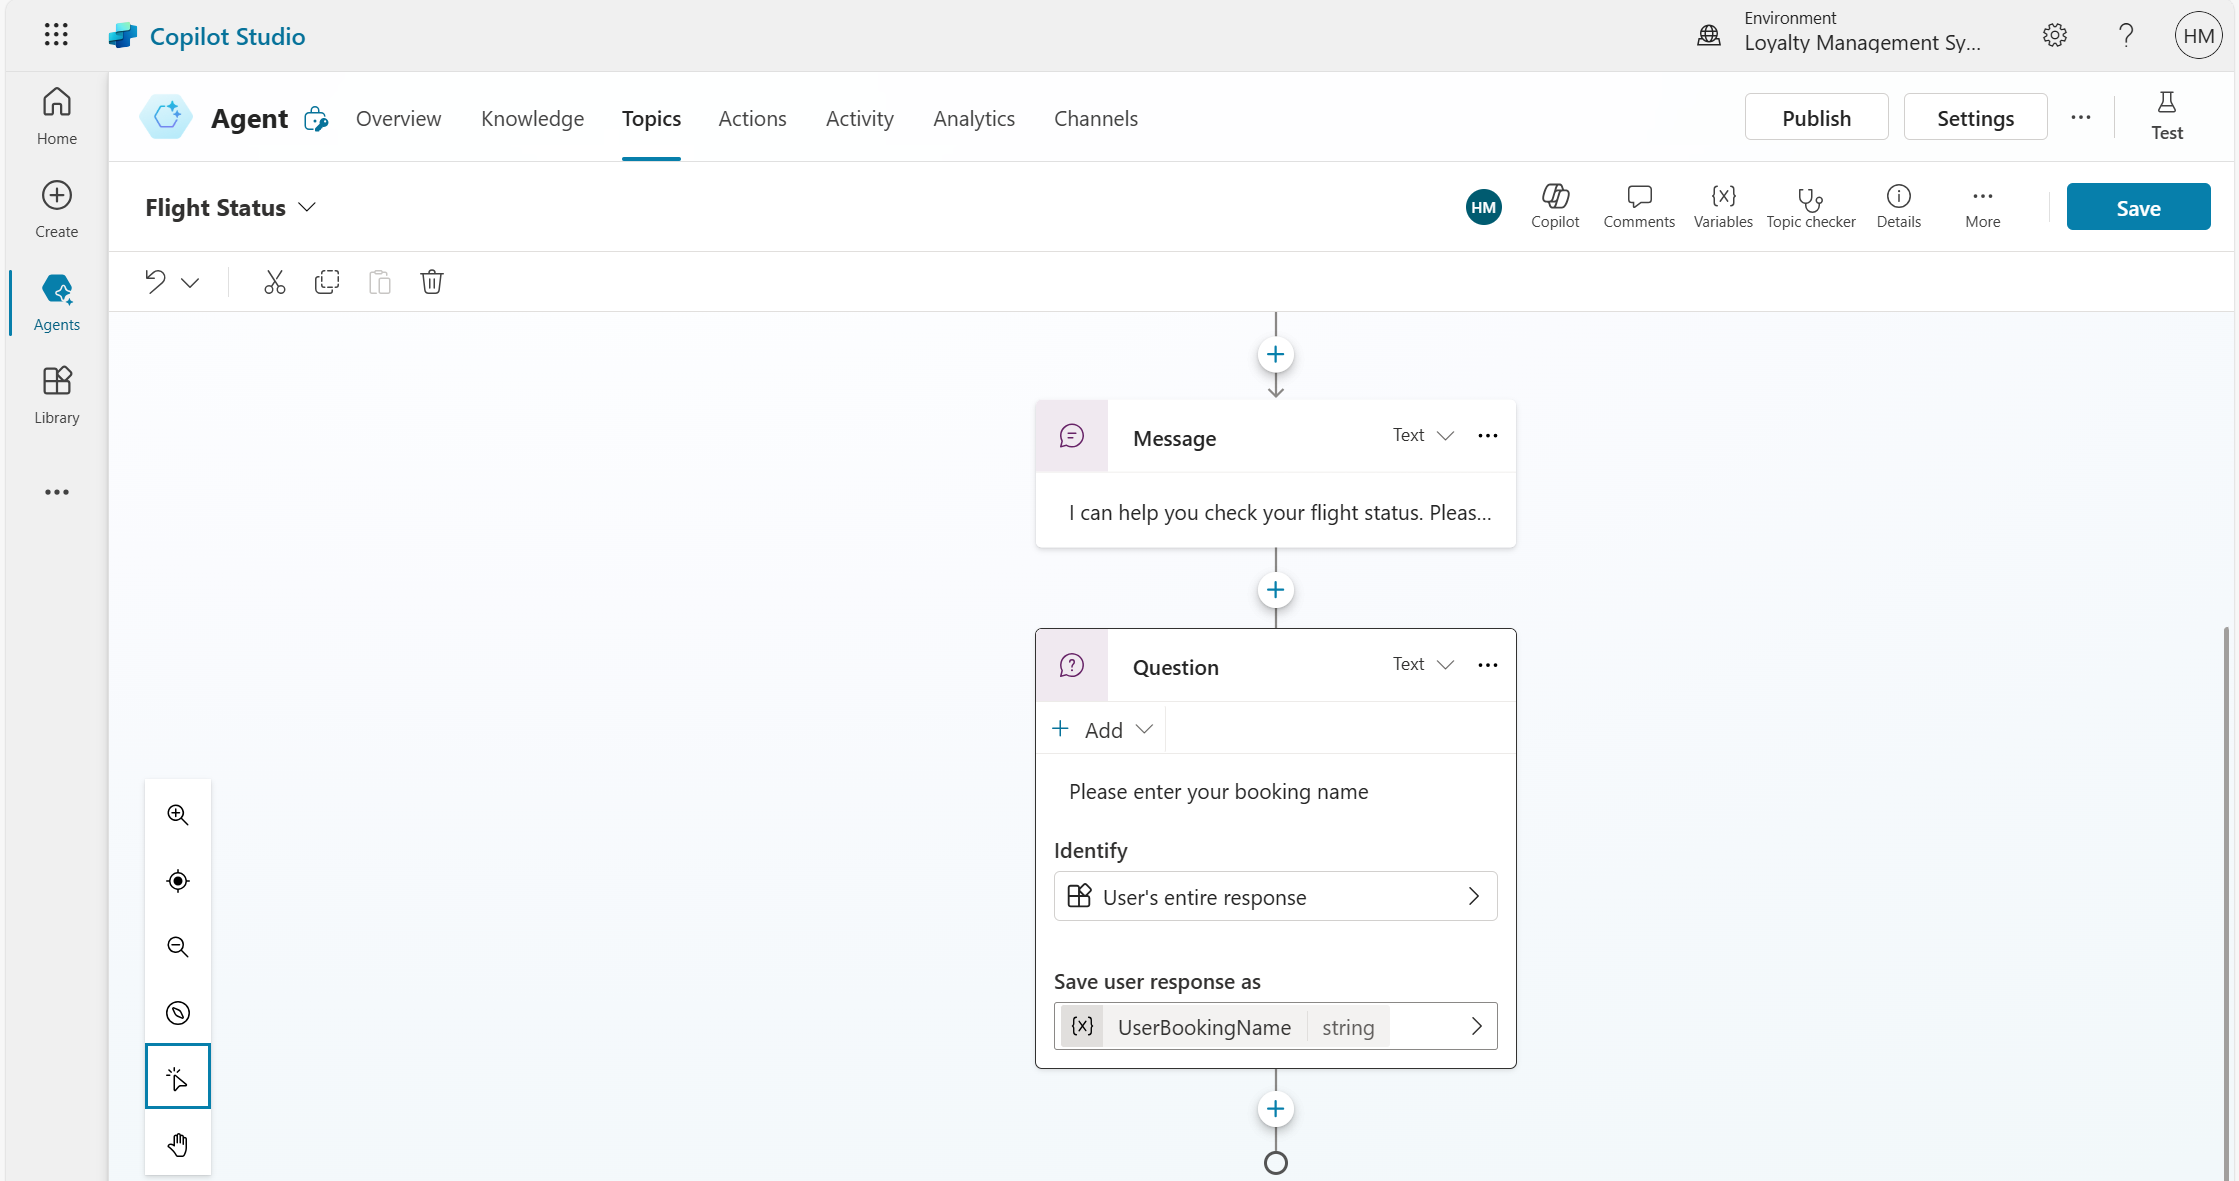
Click the Add node (+) and select Send a message.
Enter the message, for example: “I can help you check your flight status. Please provide your booking name.”
Add the Ask a question node to capture user input.
Set the question type to Text, enter the question, and set the variable name as UserBookingName.
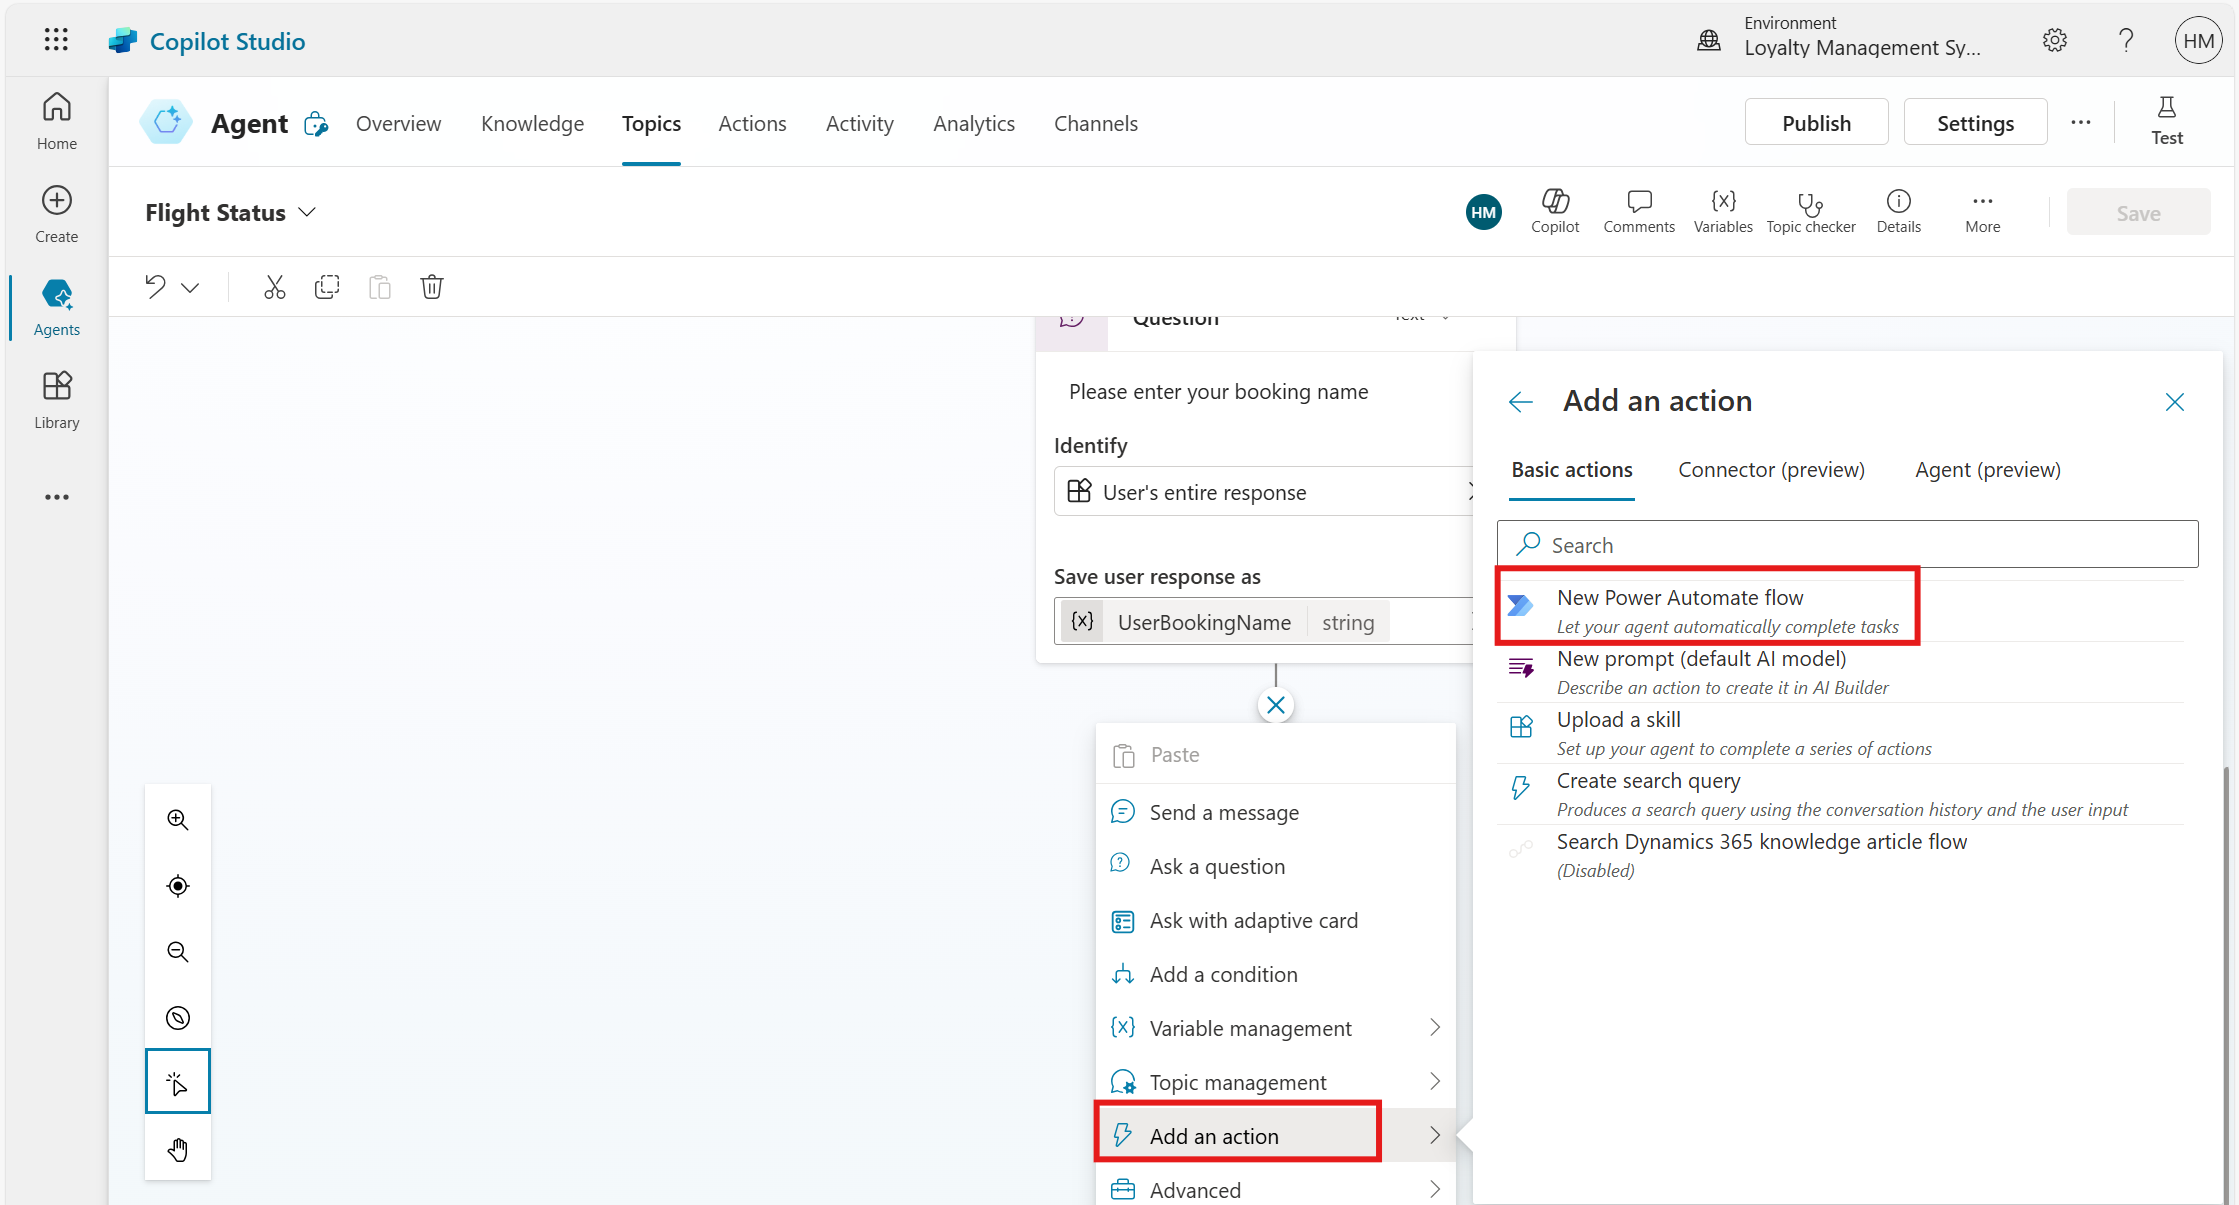
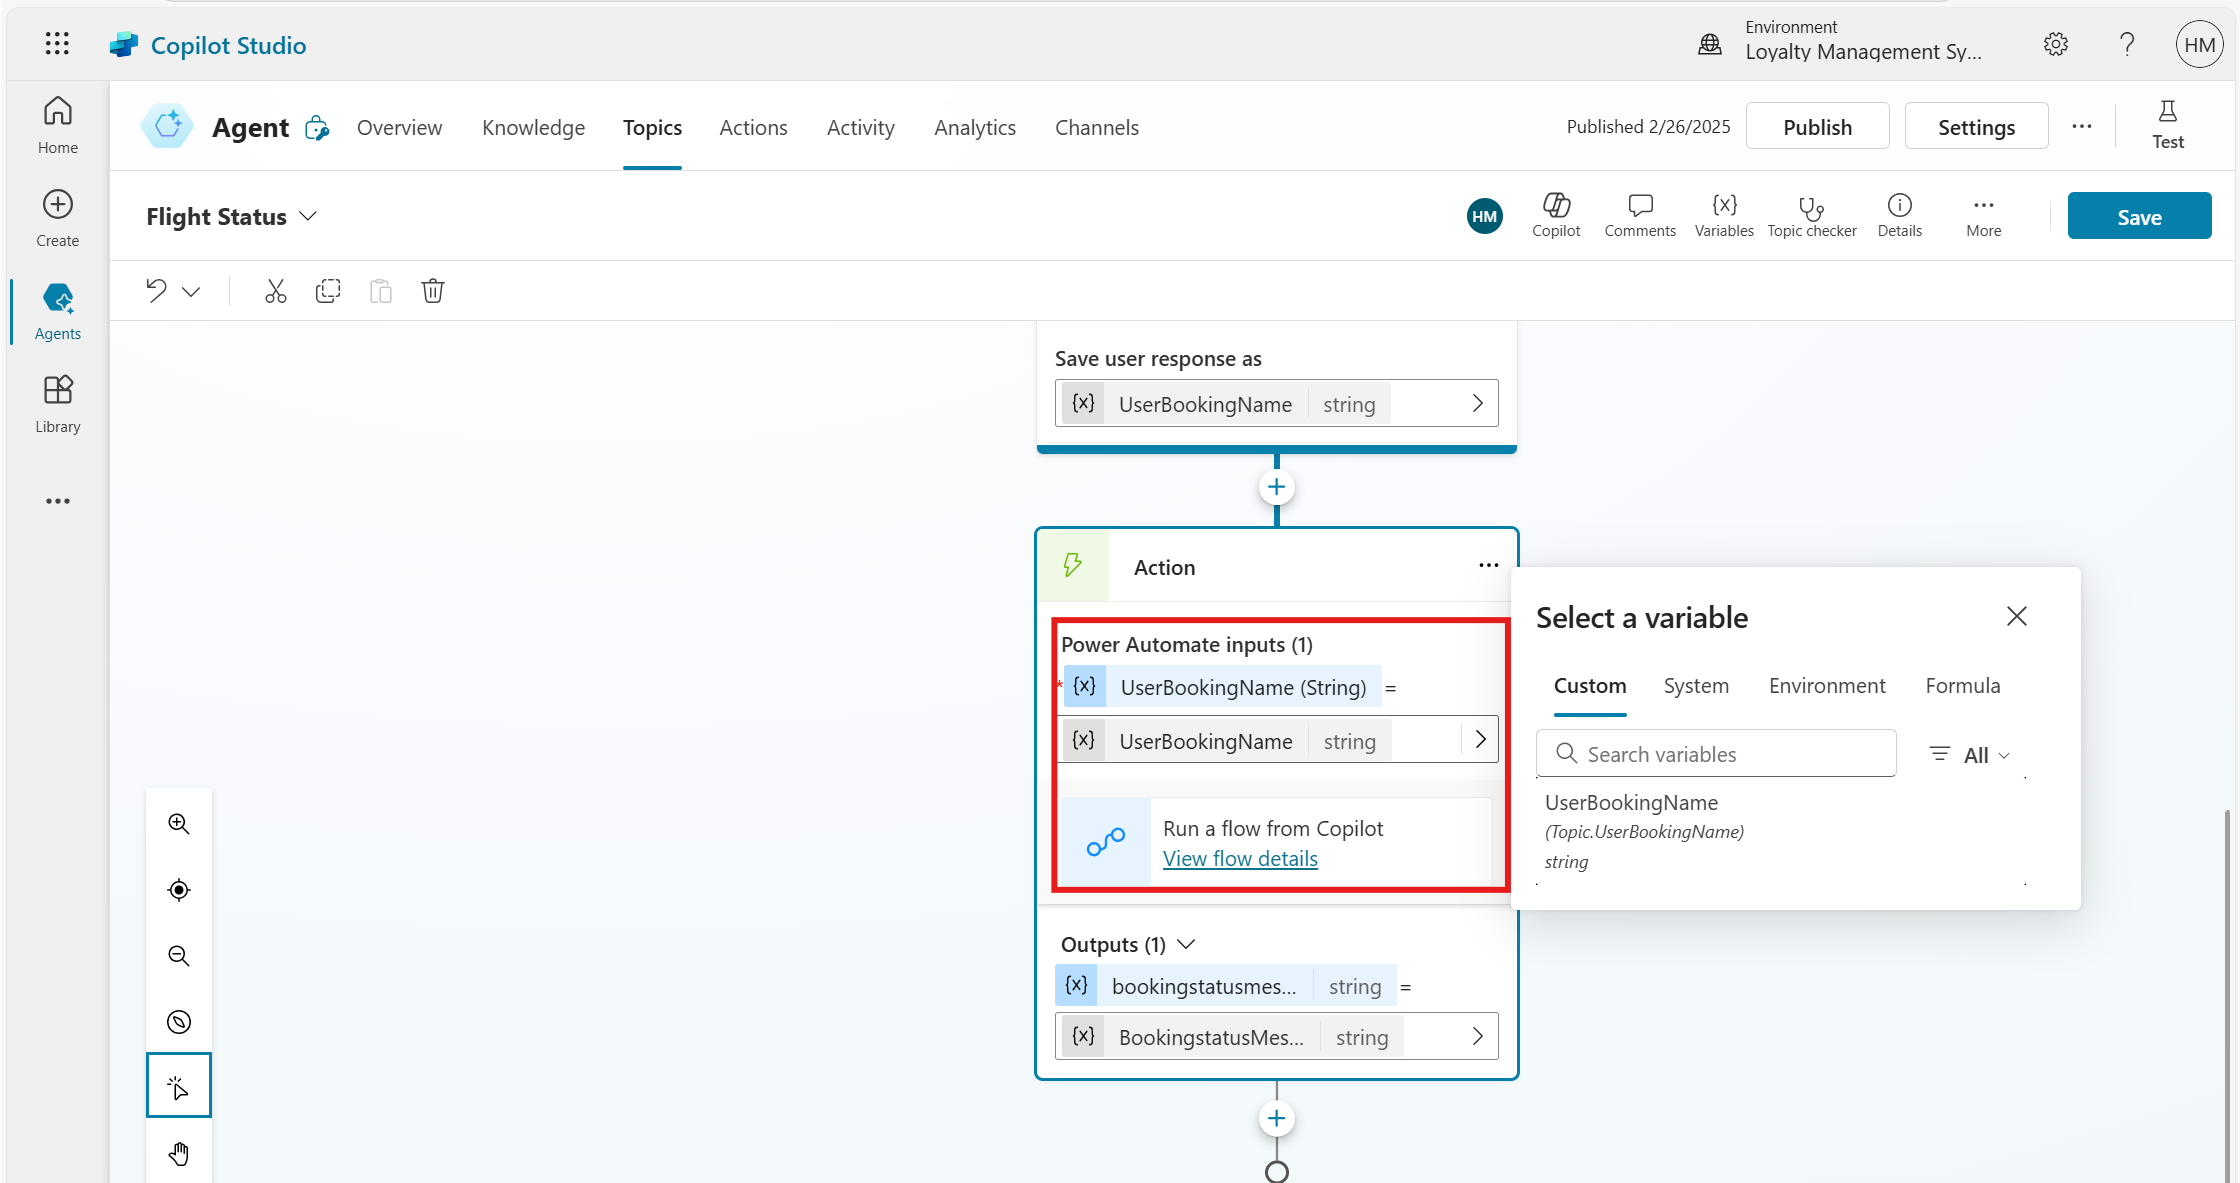
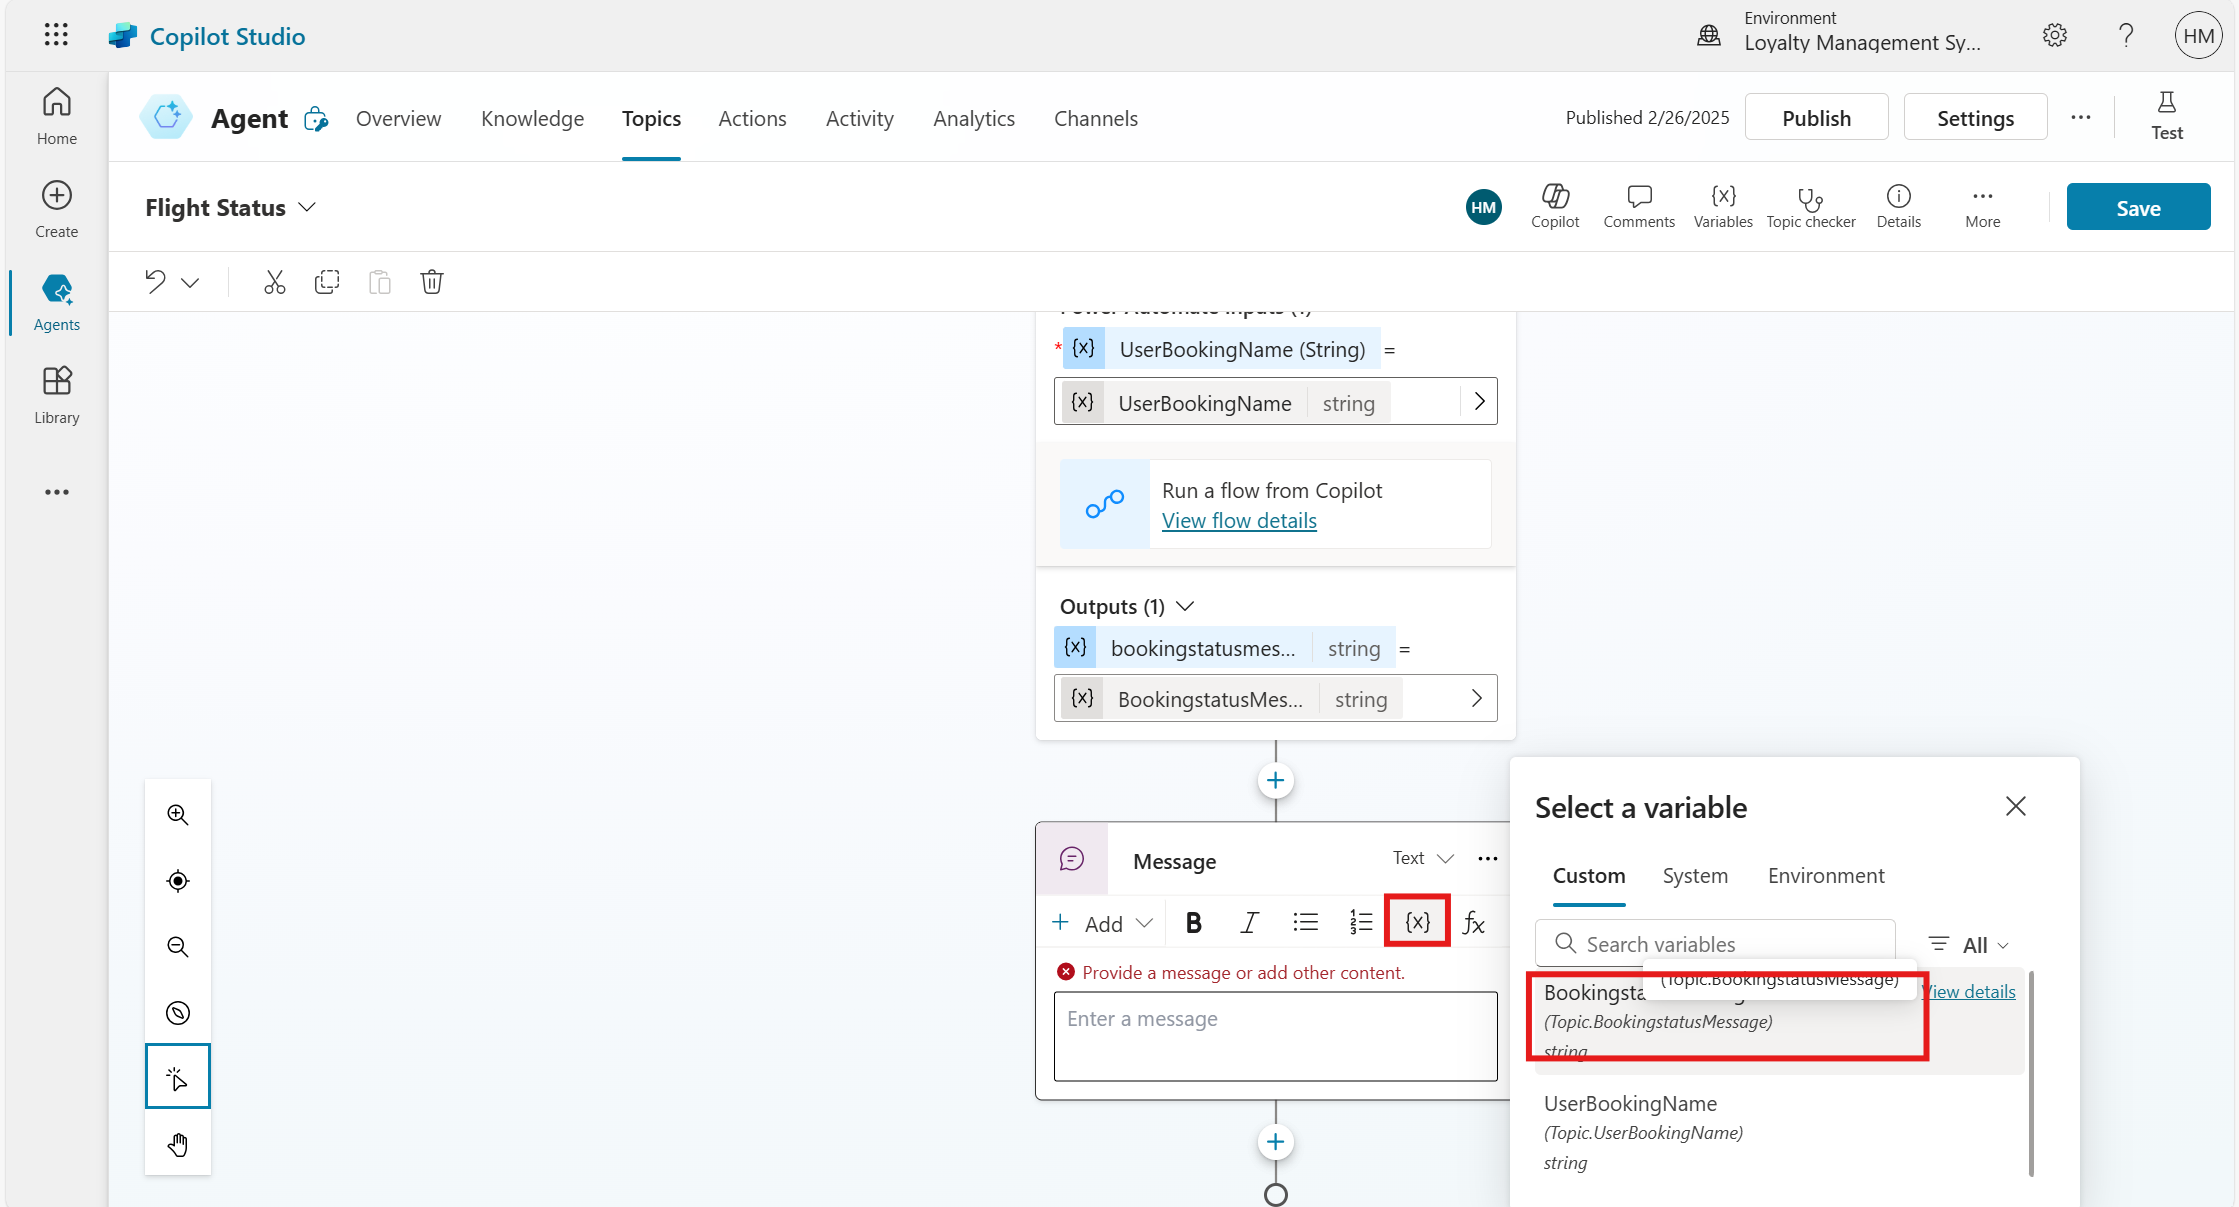
Select Add an action node and choose New Power Automate flow to check the flight status.
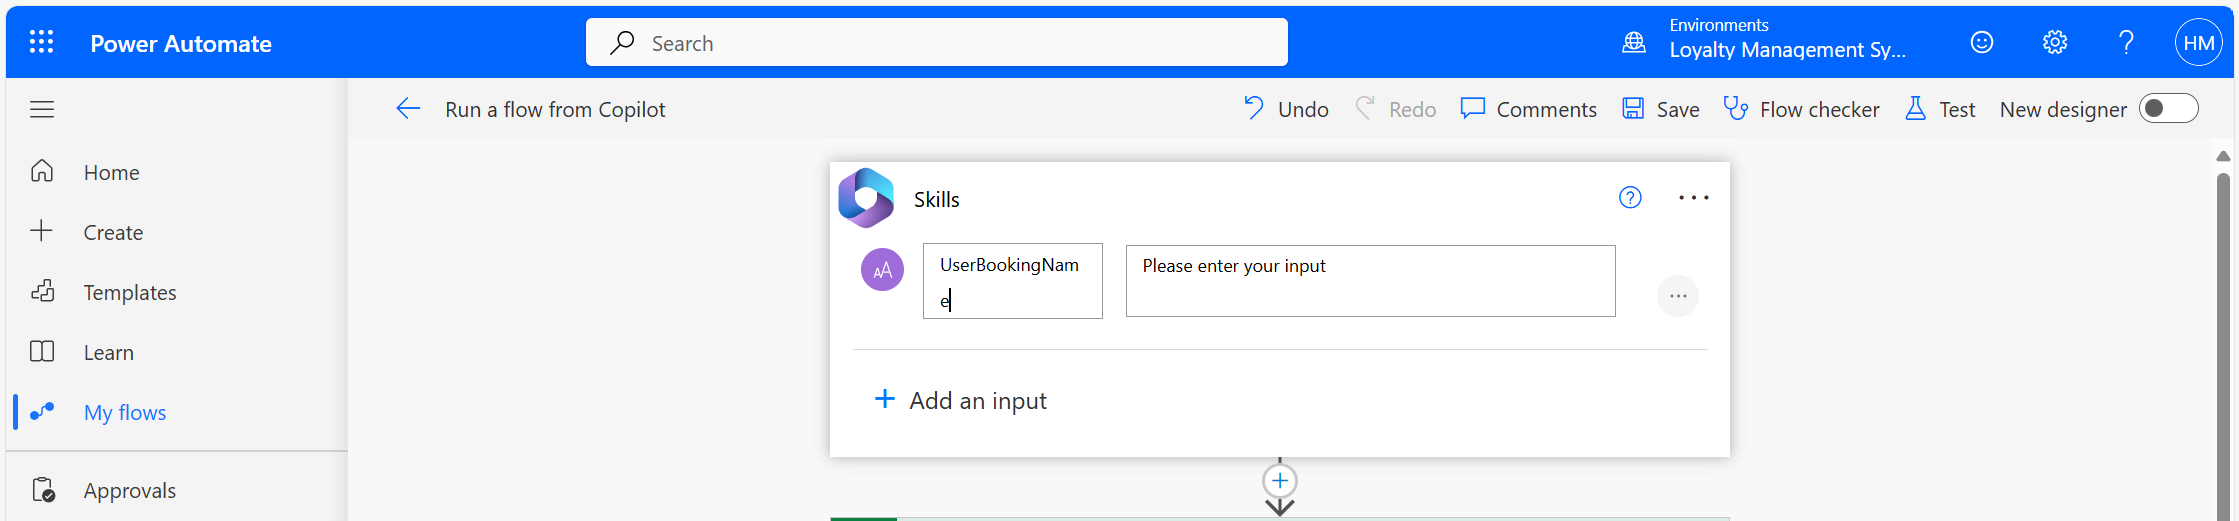
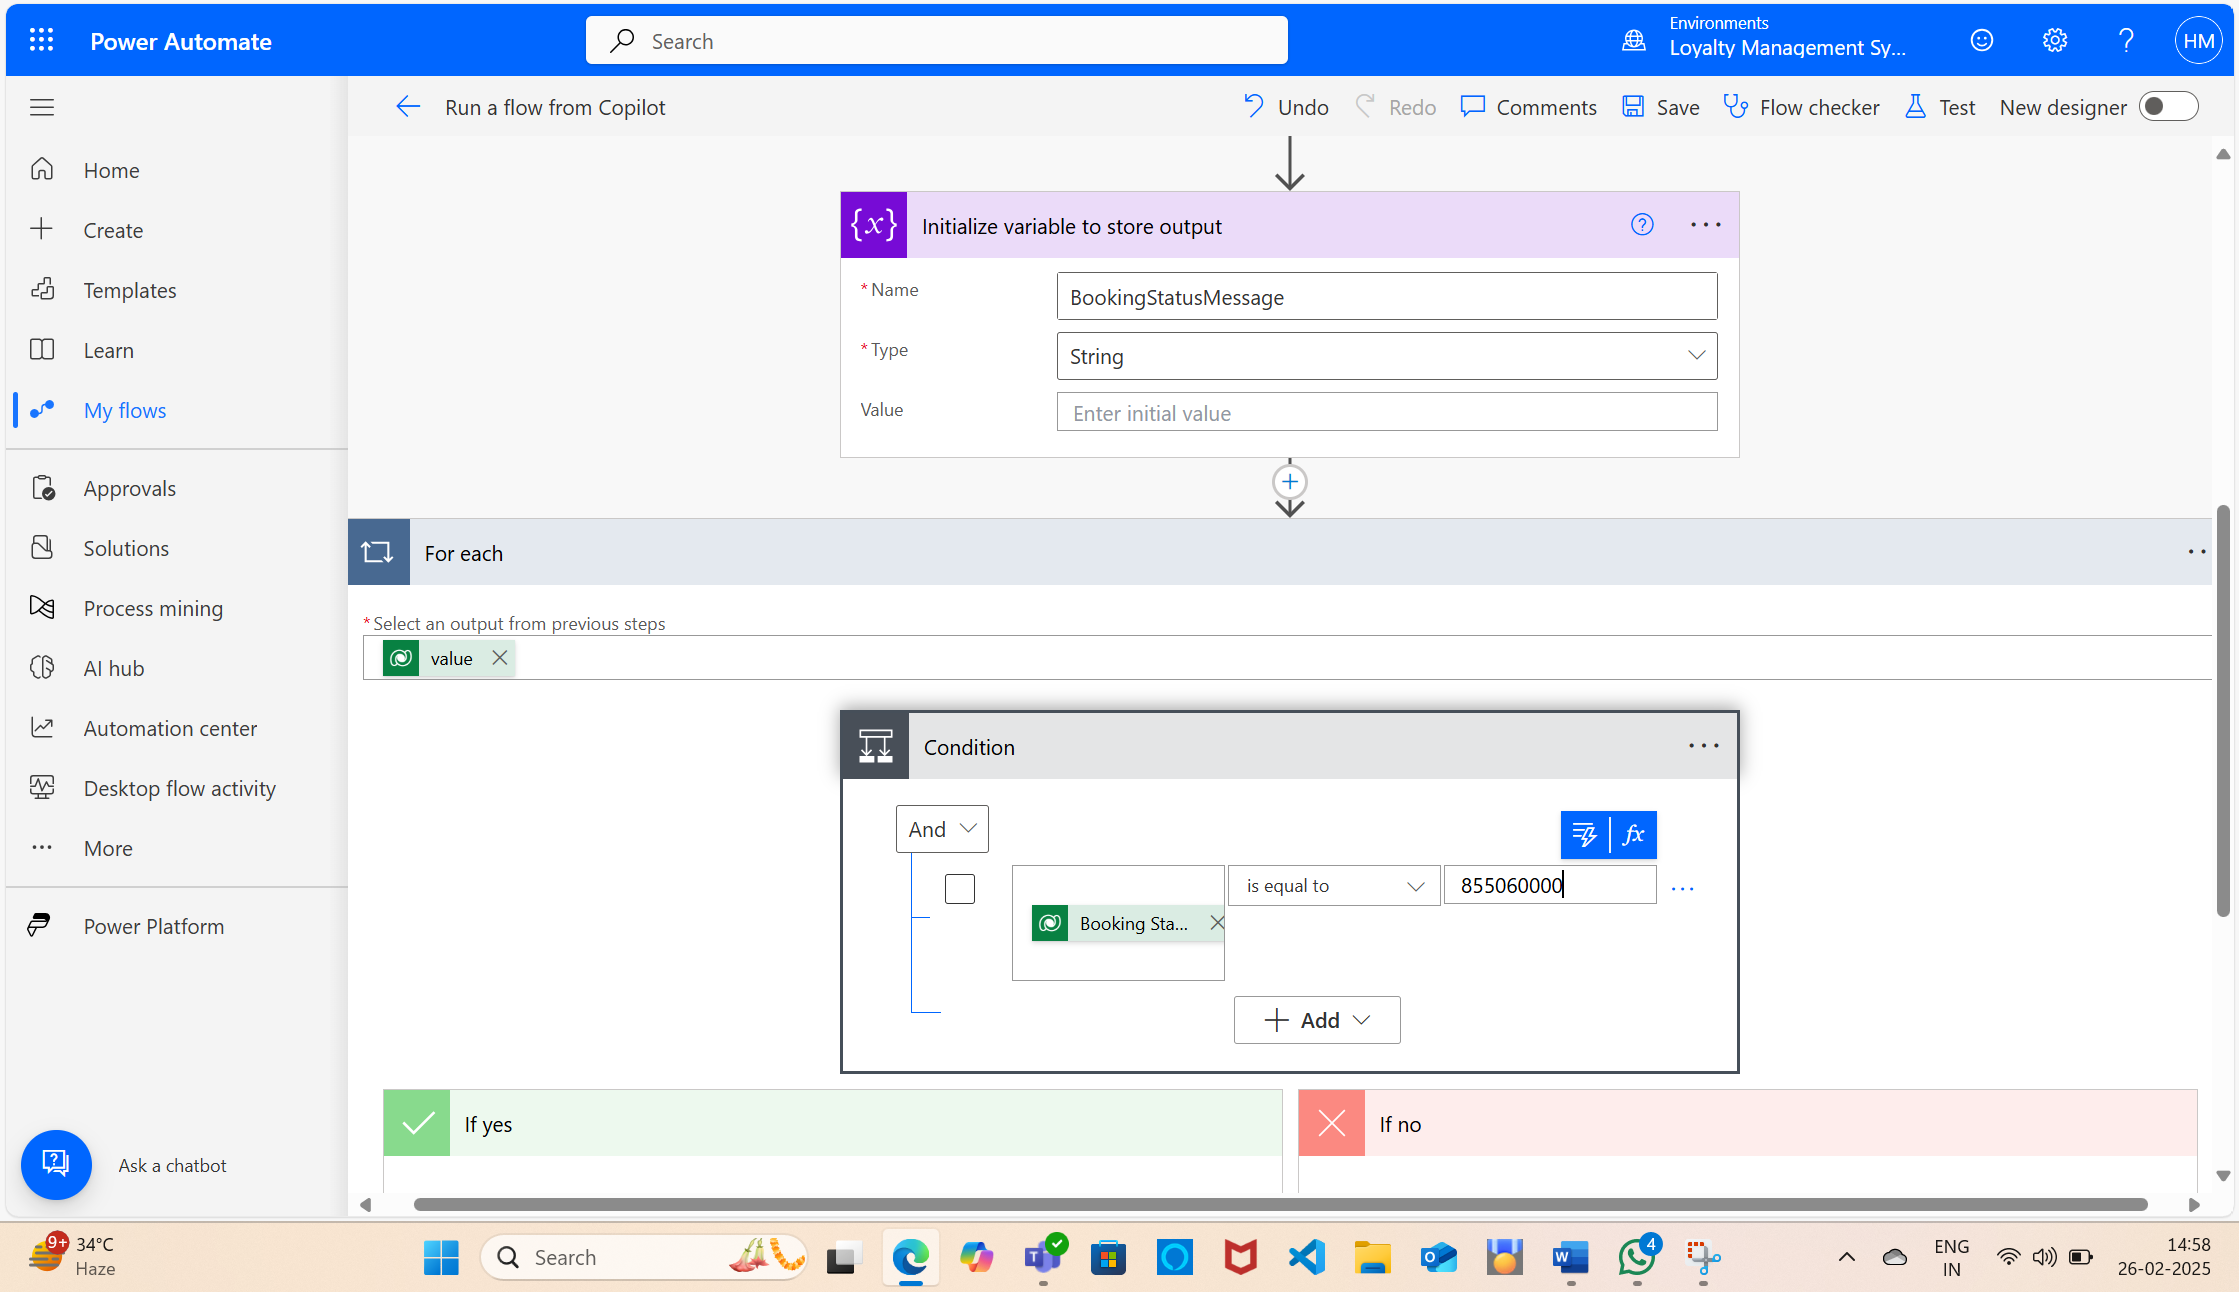
Step 5: Write the Power Automate Flow to check the flight booking status based on the input.
Add an input of type Text and enter the title as UserBookingName.
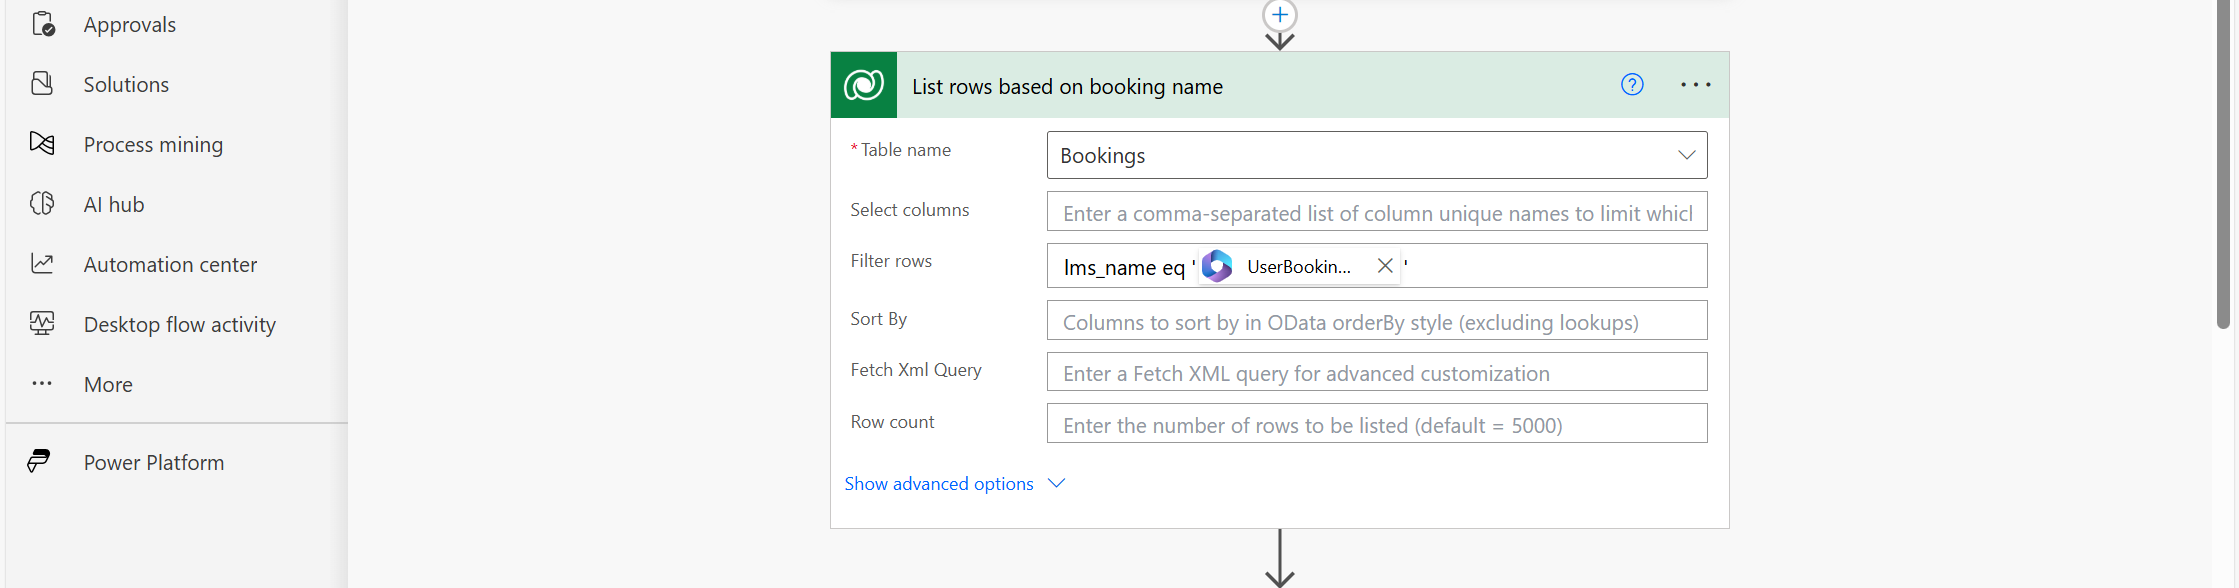
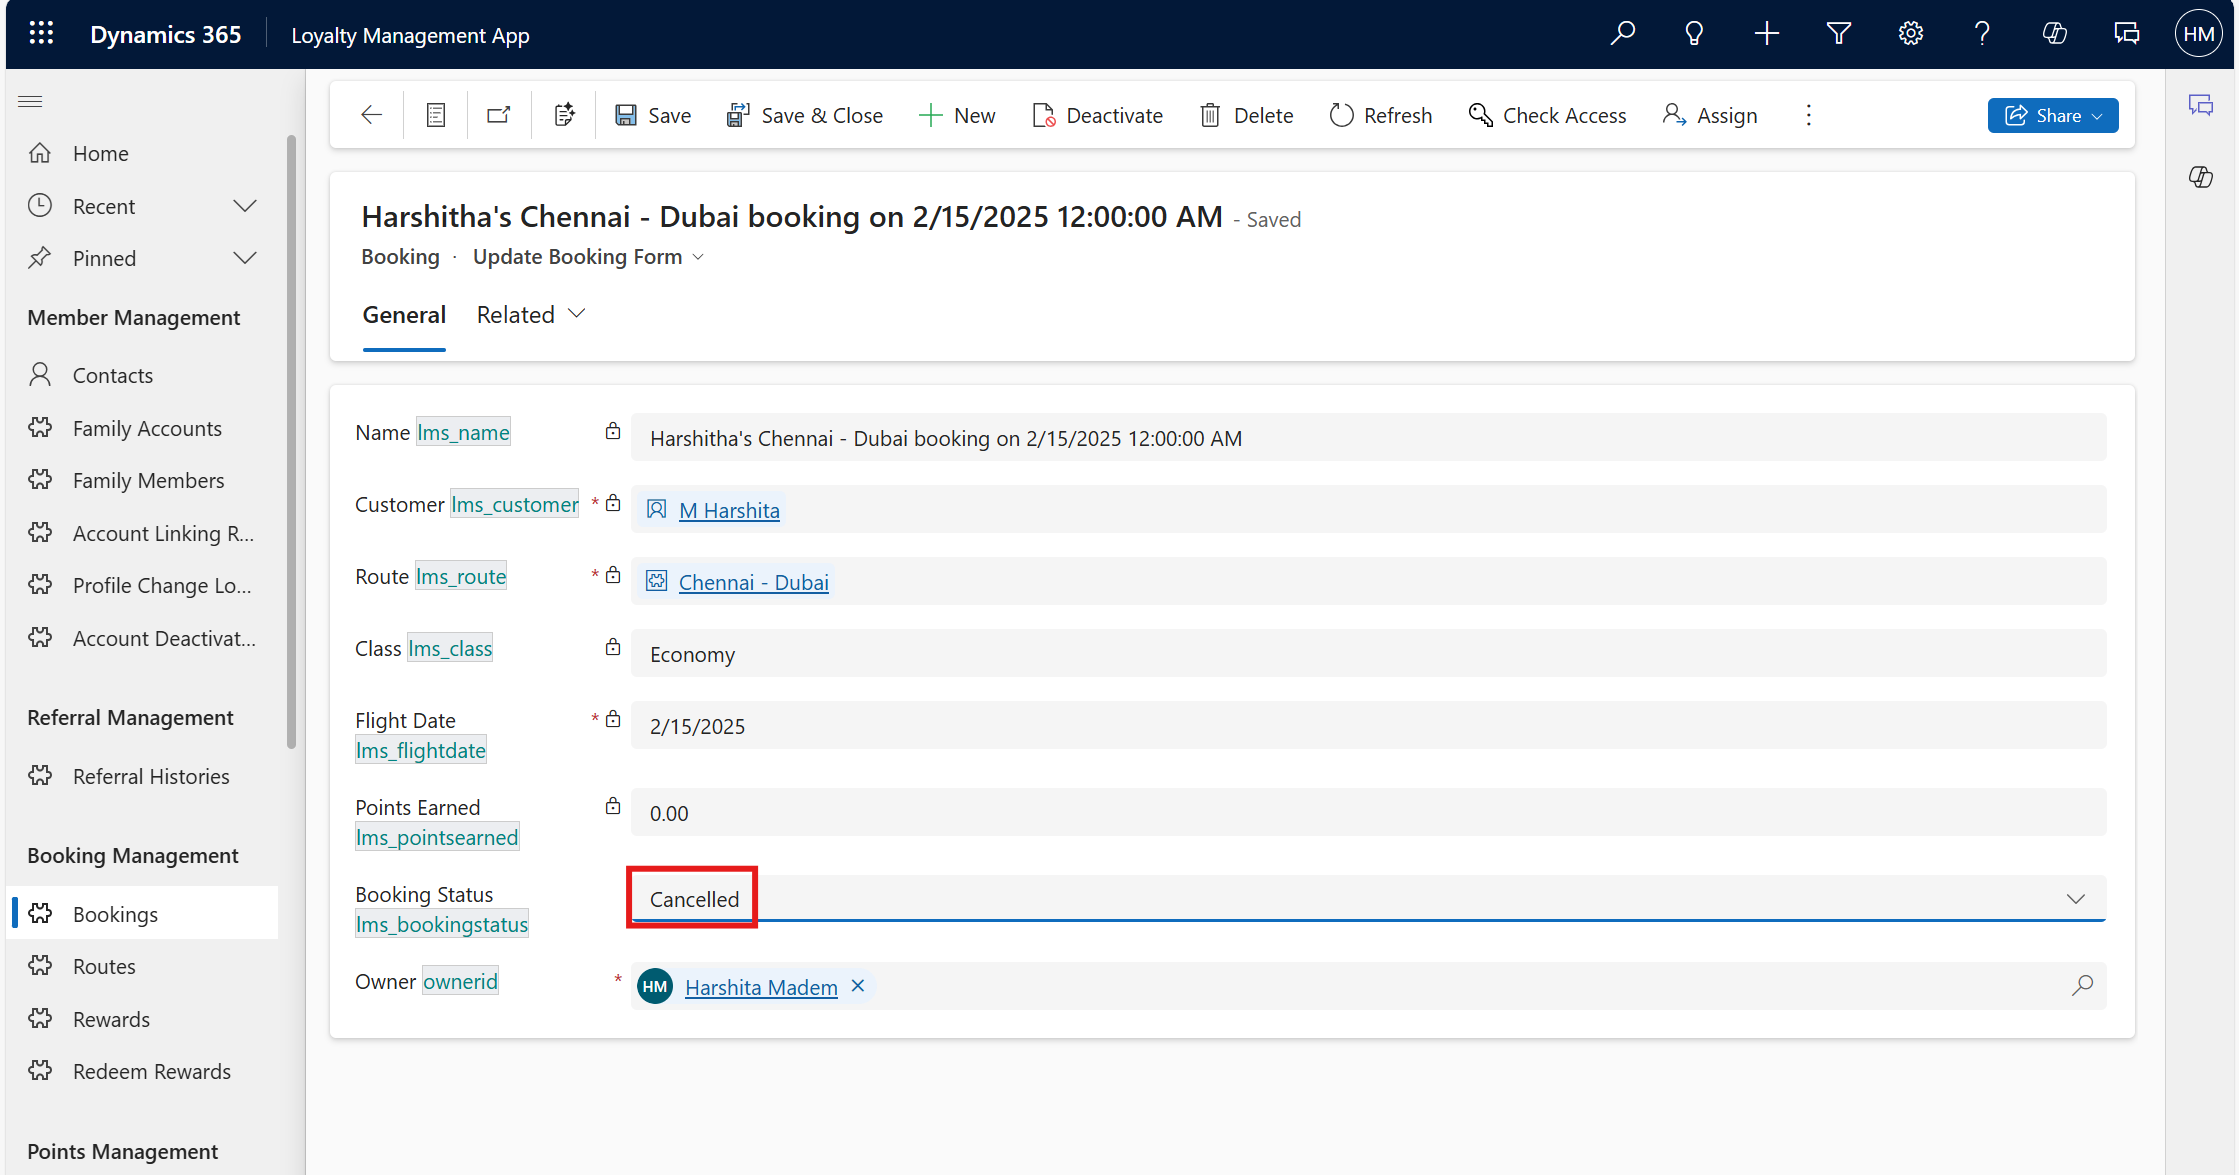
List the booking records based on booking name.
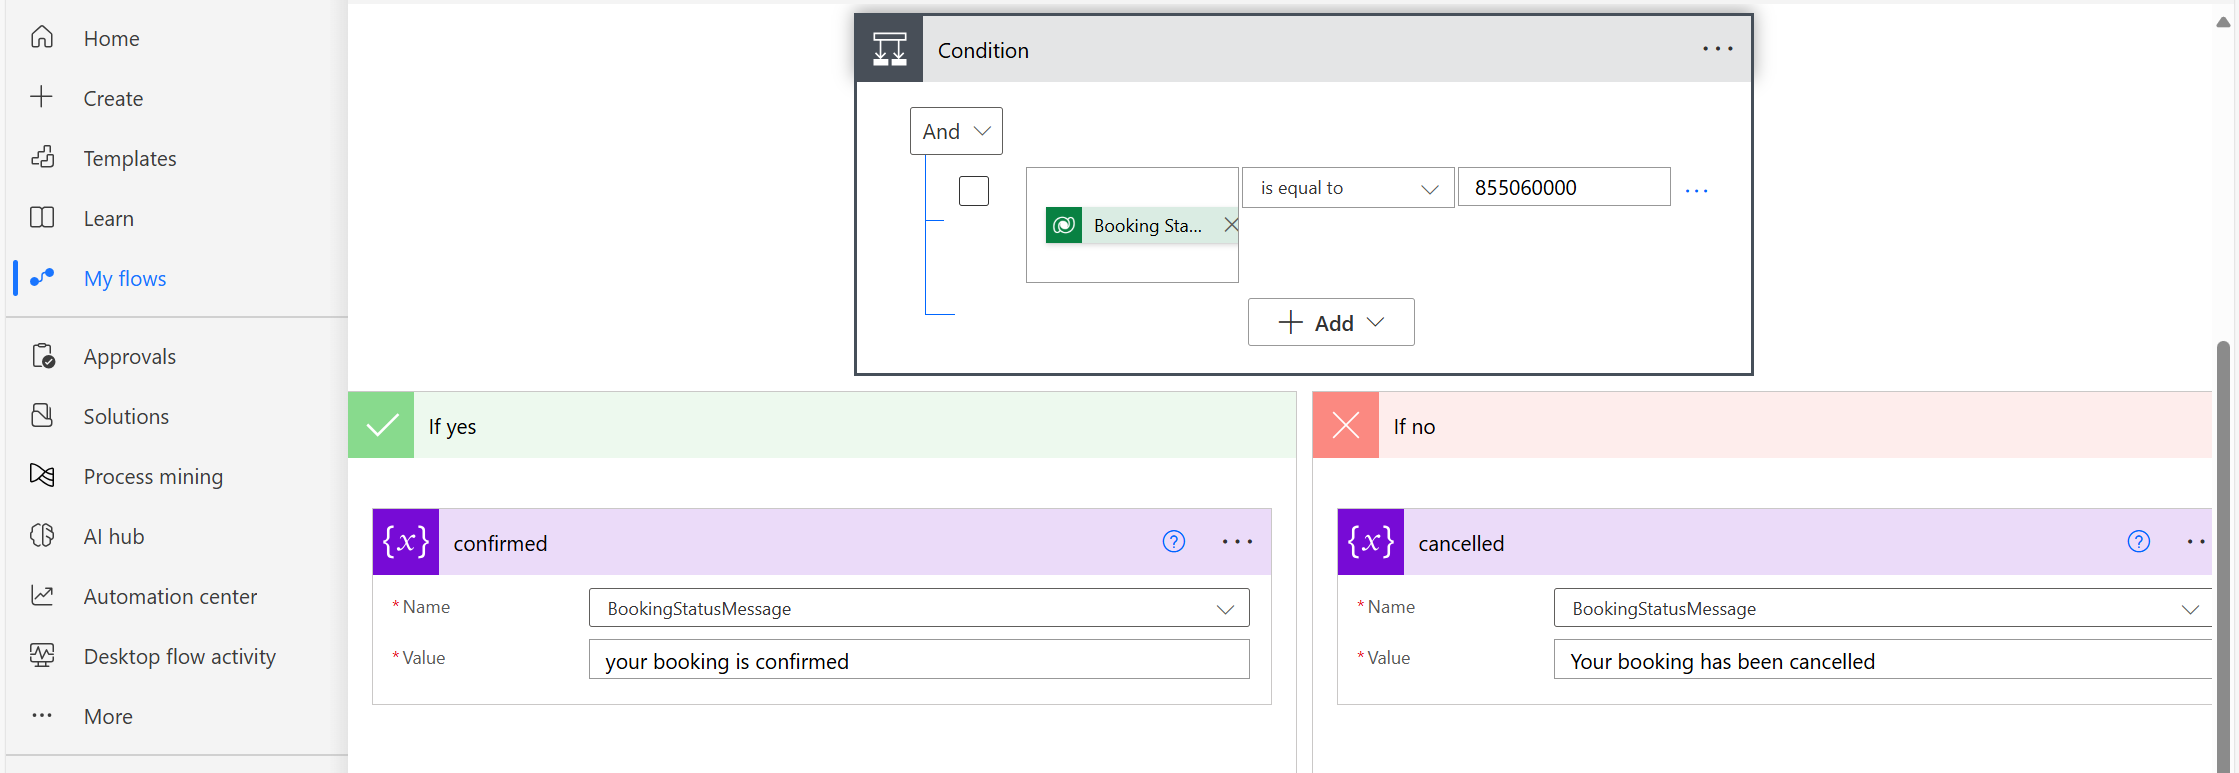
Initialize a variable to store the output and use a condition to check the booking status.
Set the variable value based on the booking status.
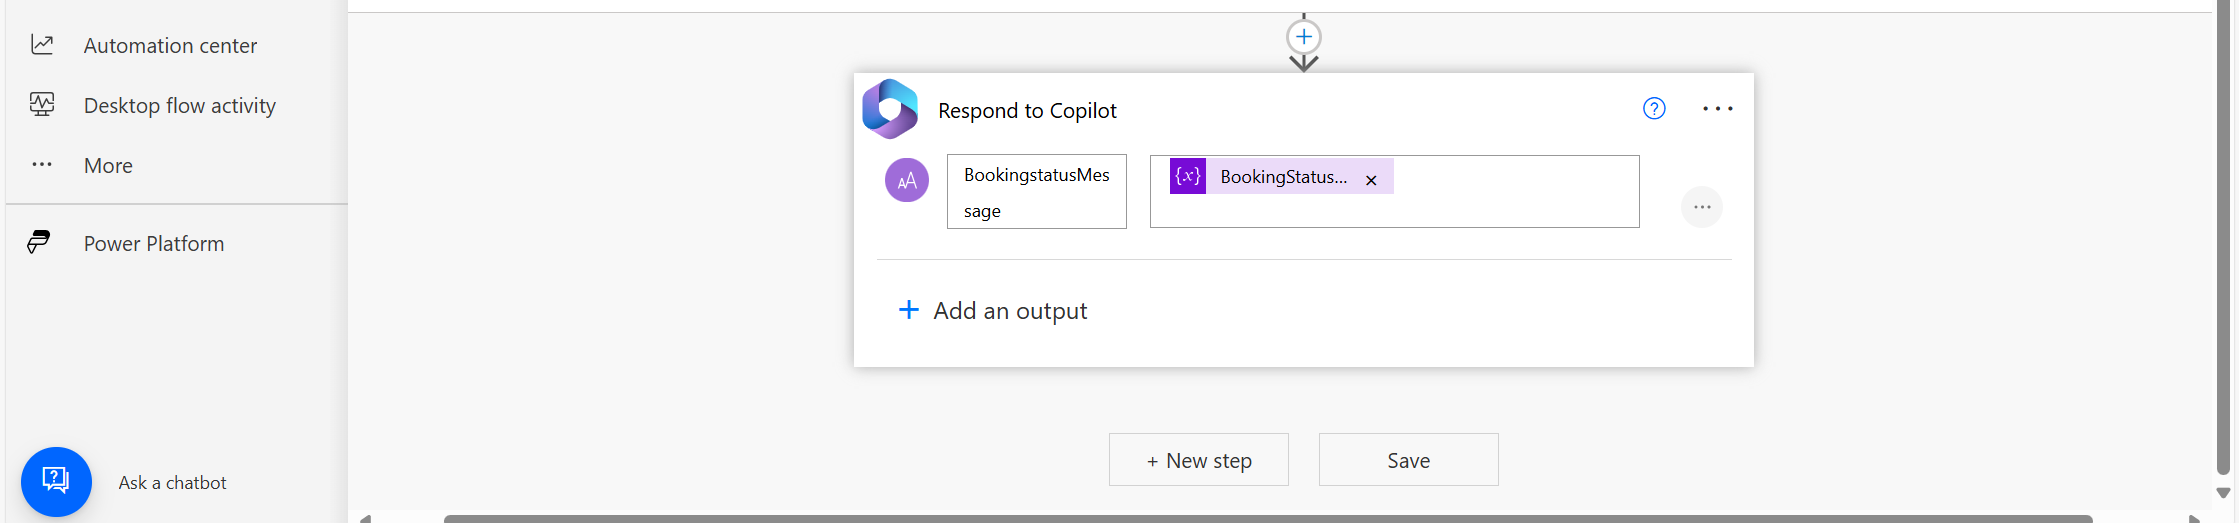
Now, in Respond to Copilot, pass the variable as output.
Save and publish the flow.
In the Actions node, select Input and Power Automate flow.
Add a Send a message node and provide a dynamic value for the message.
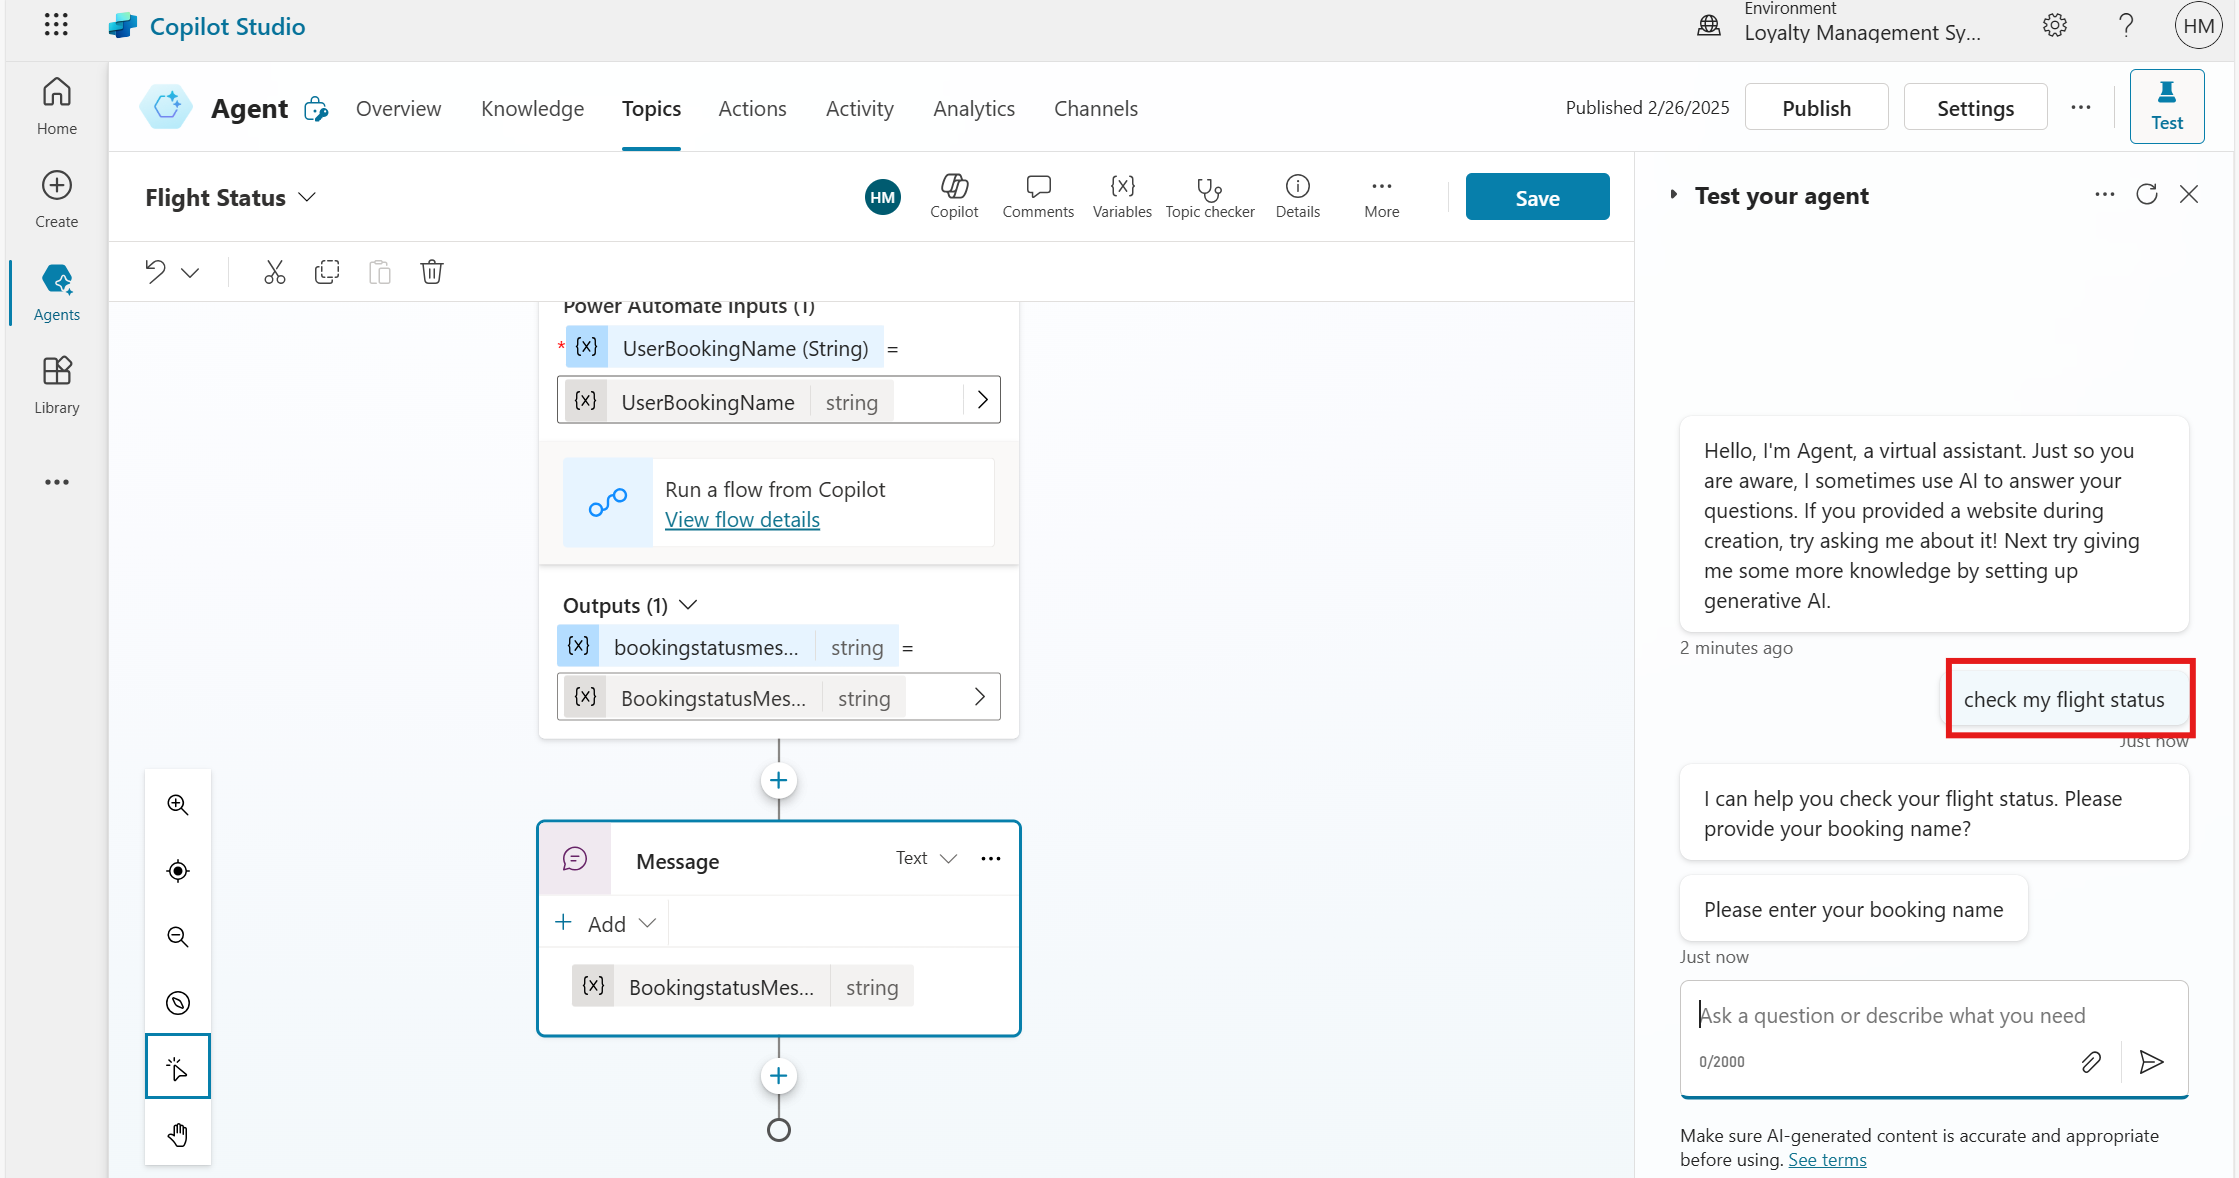
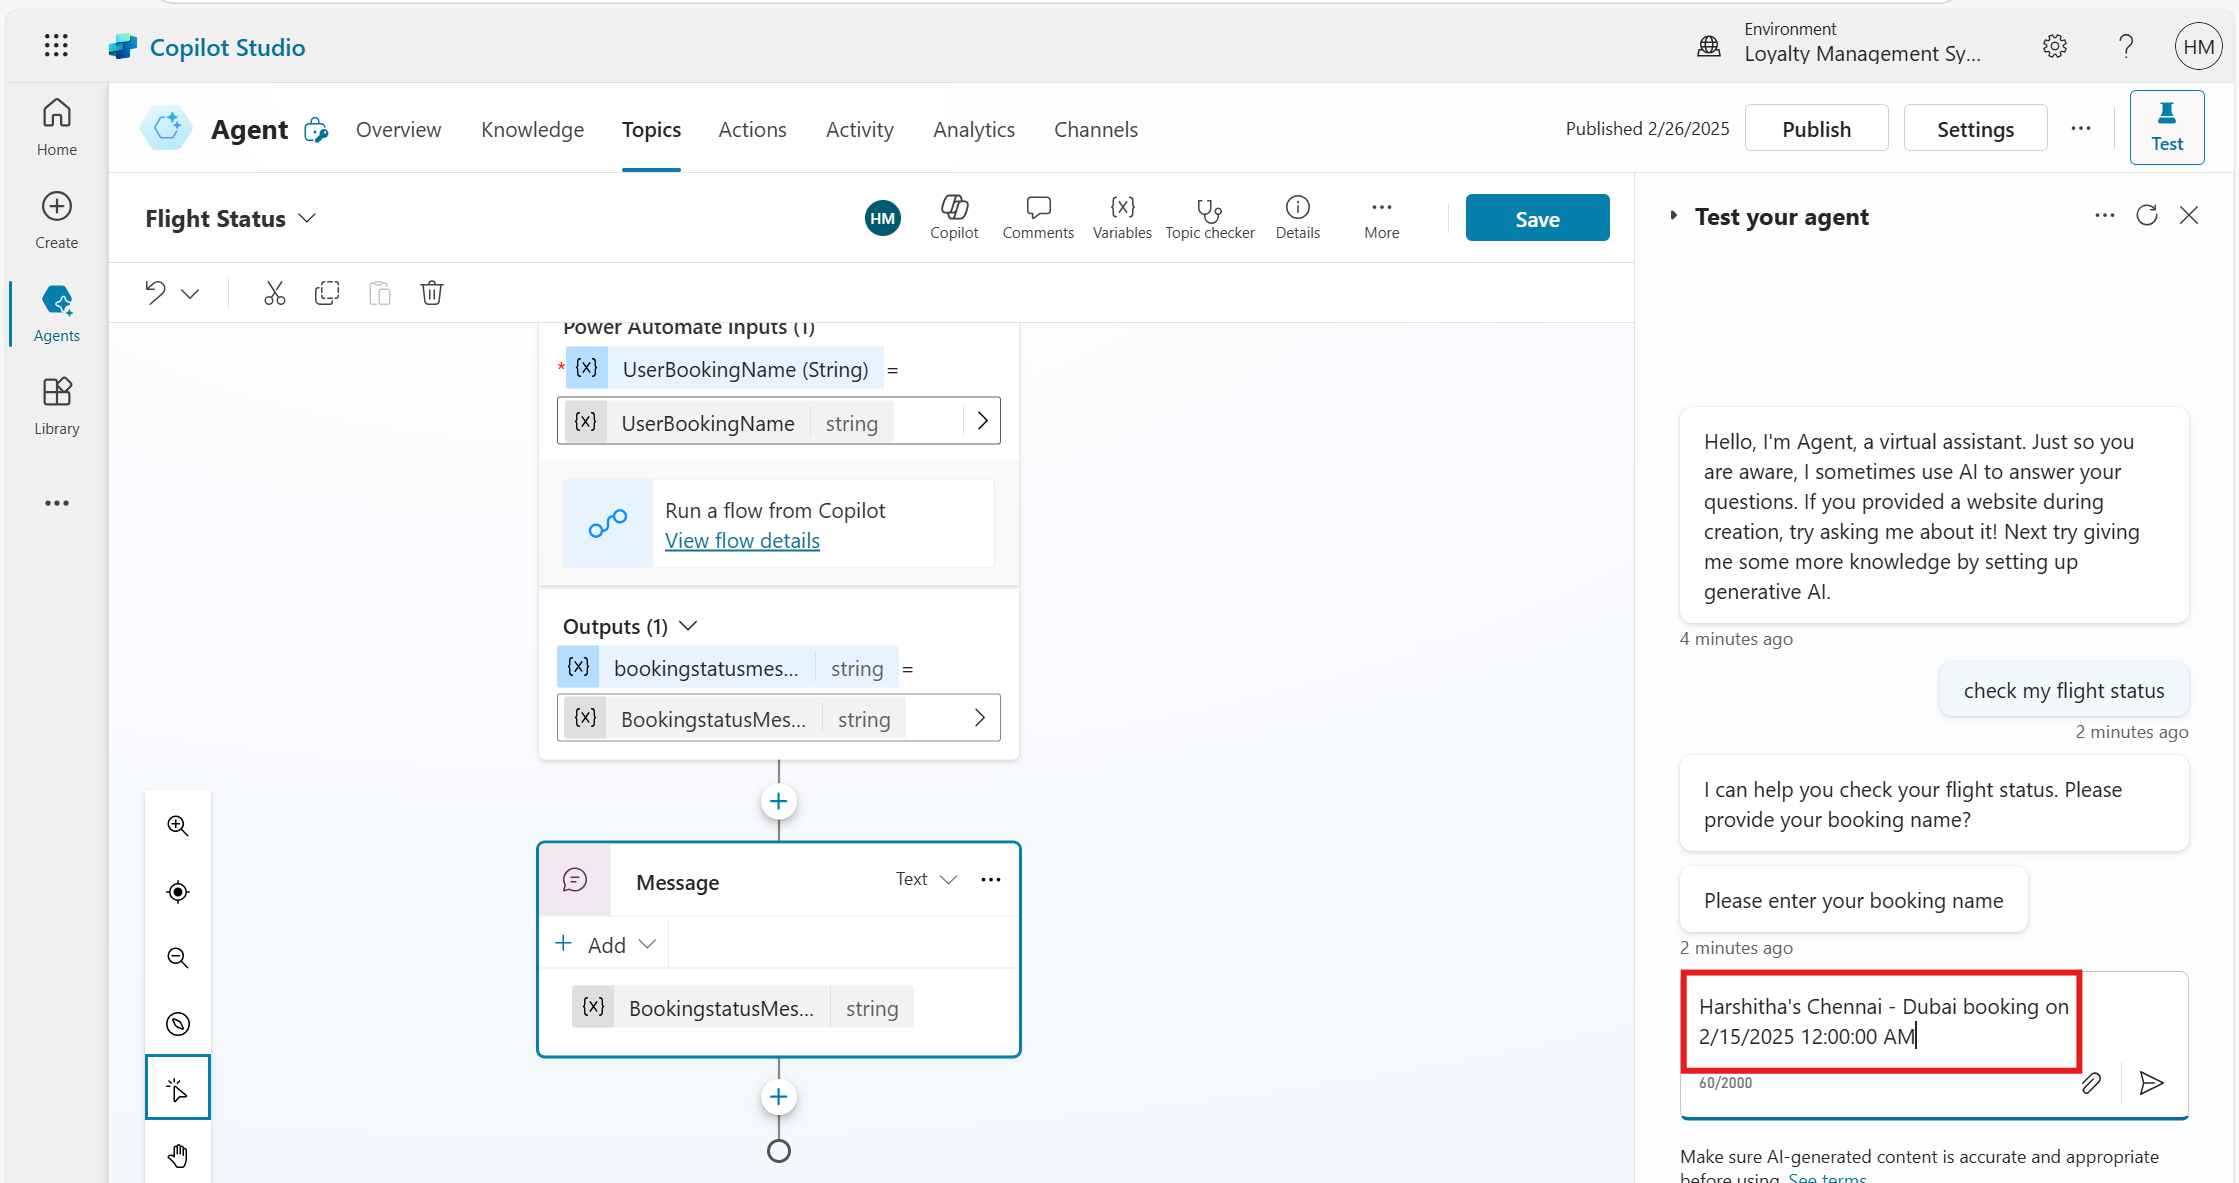
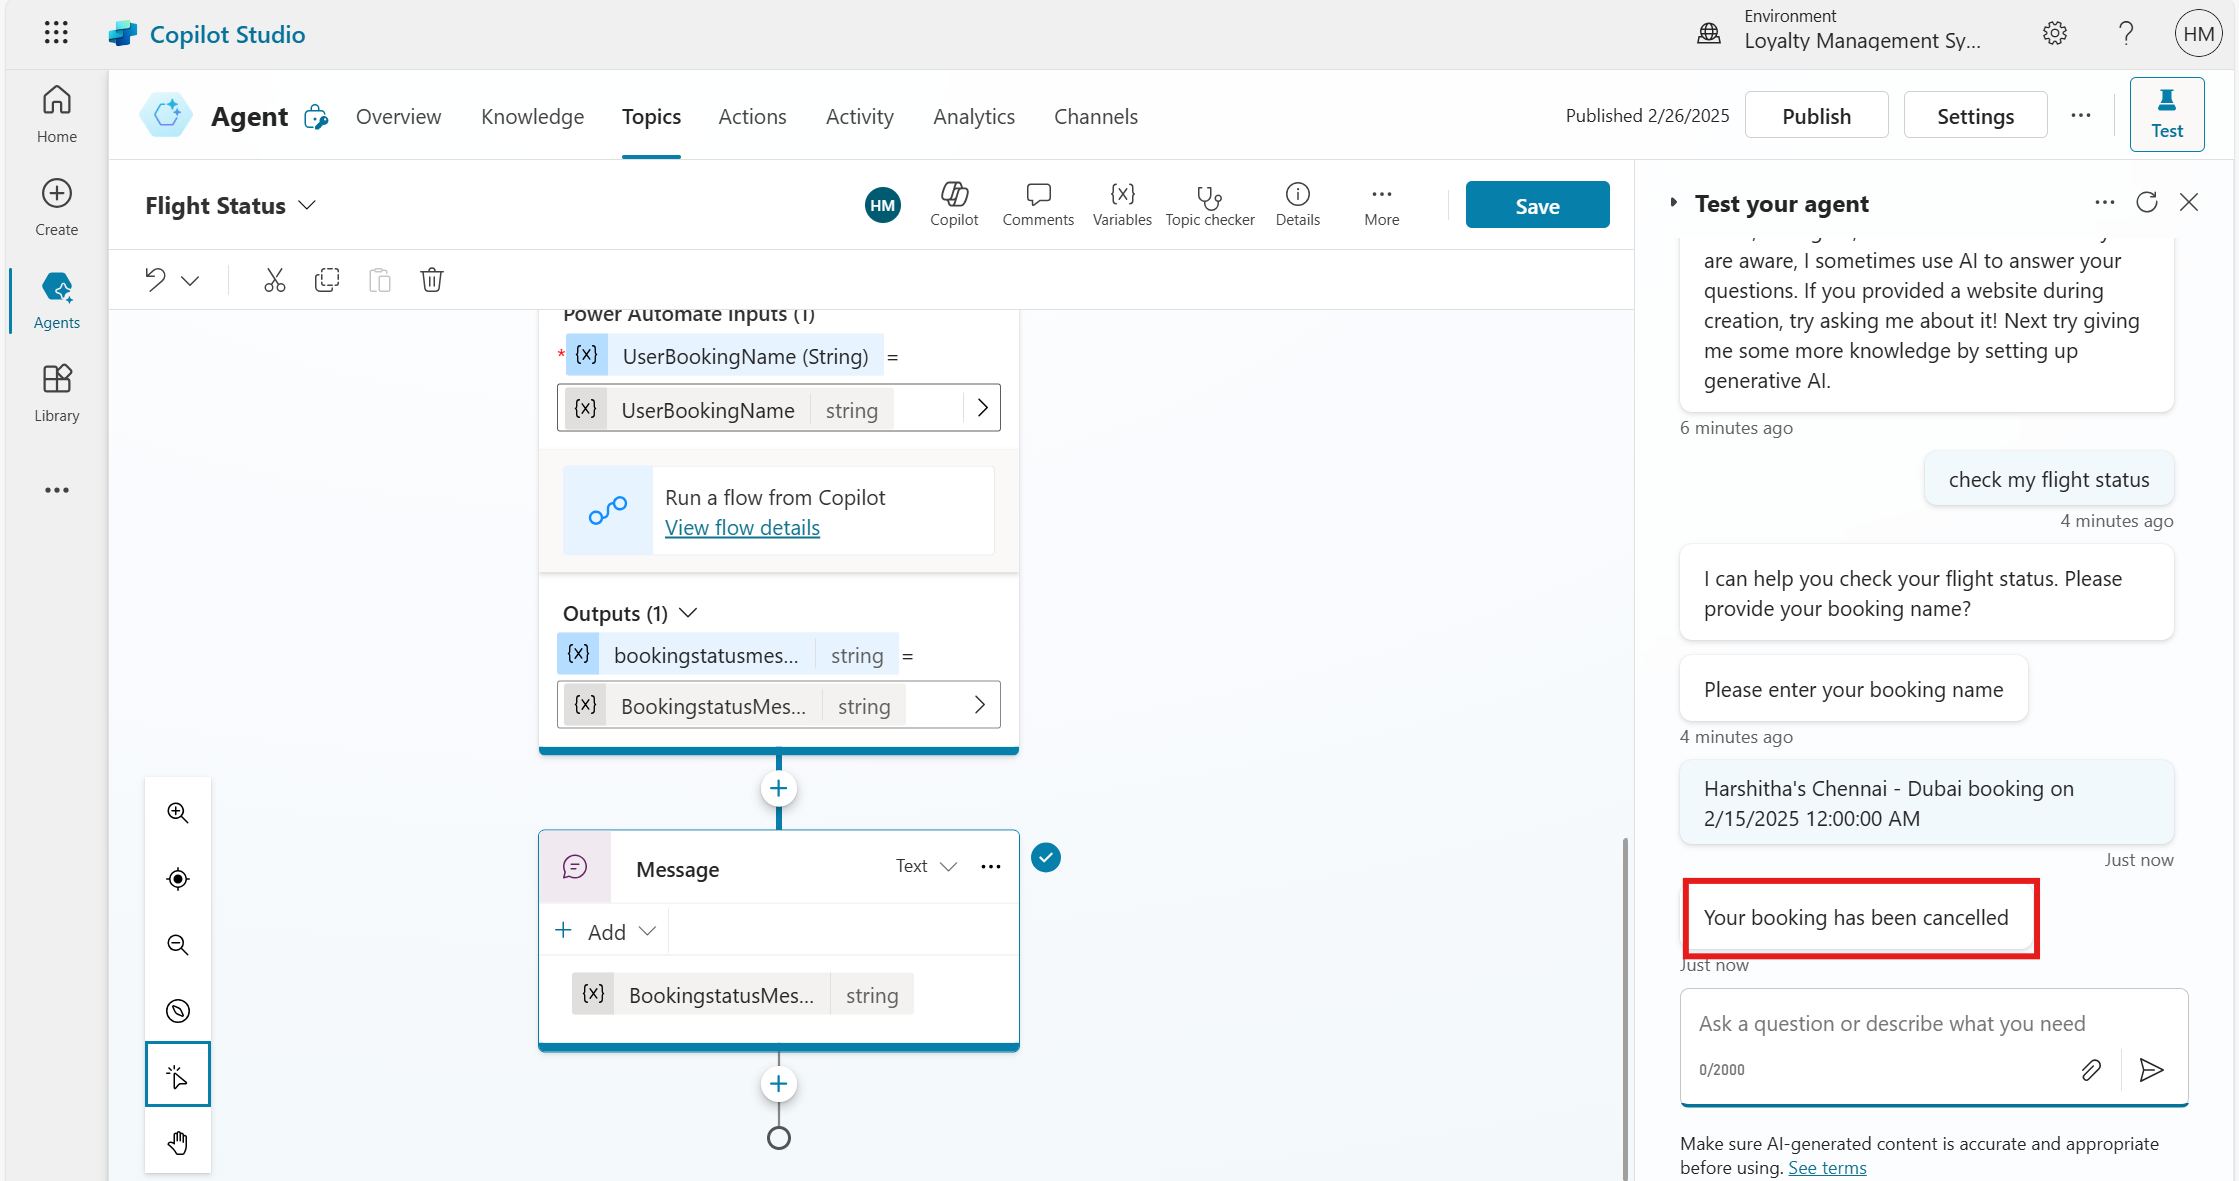
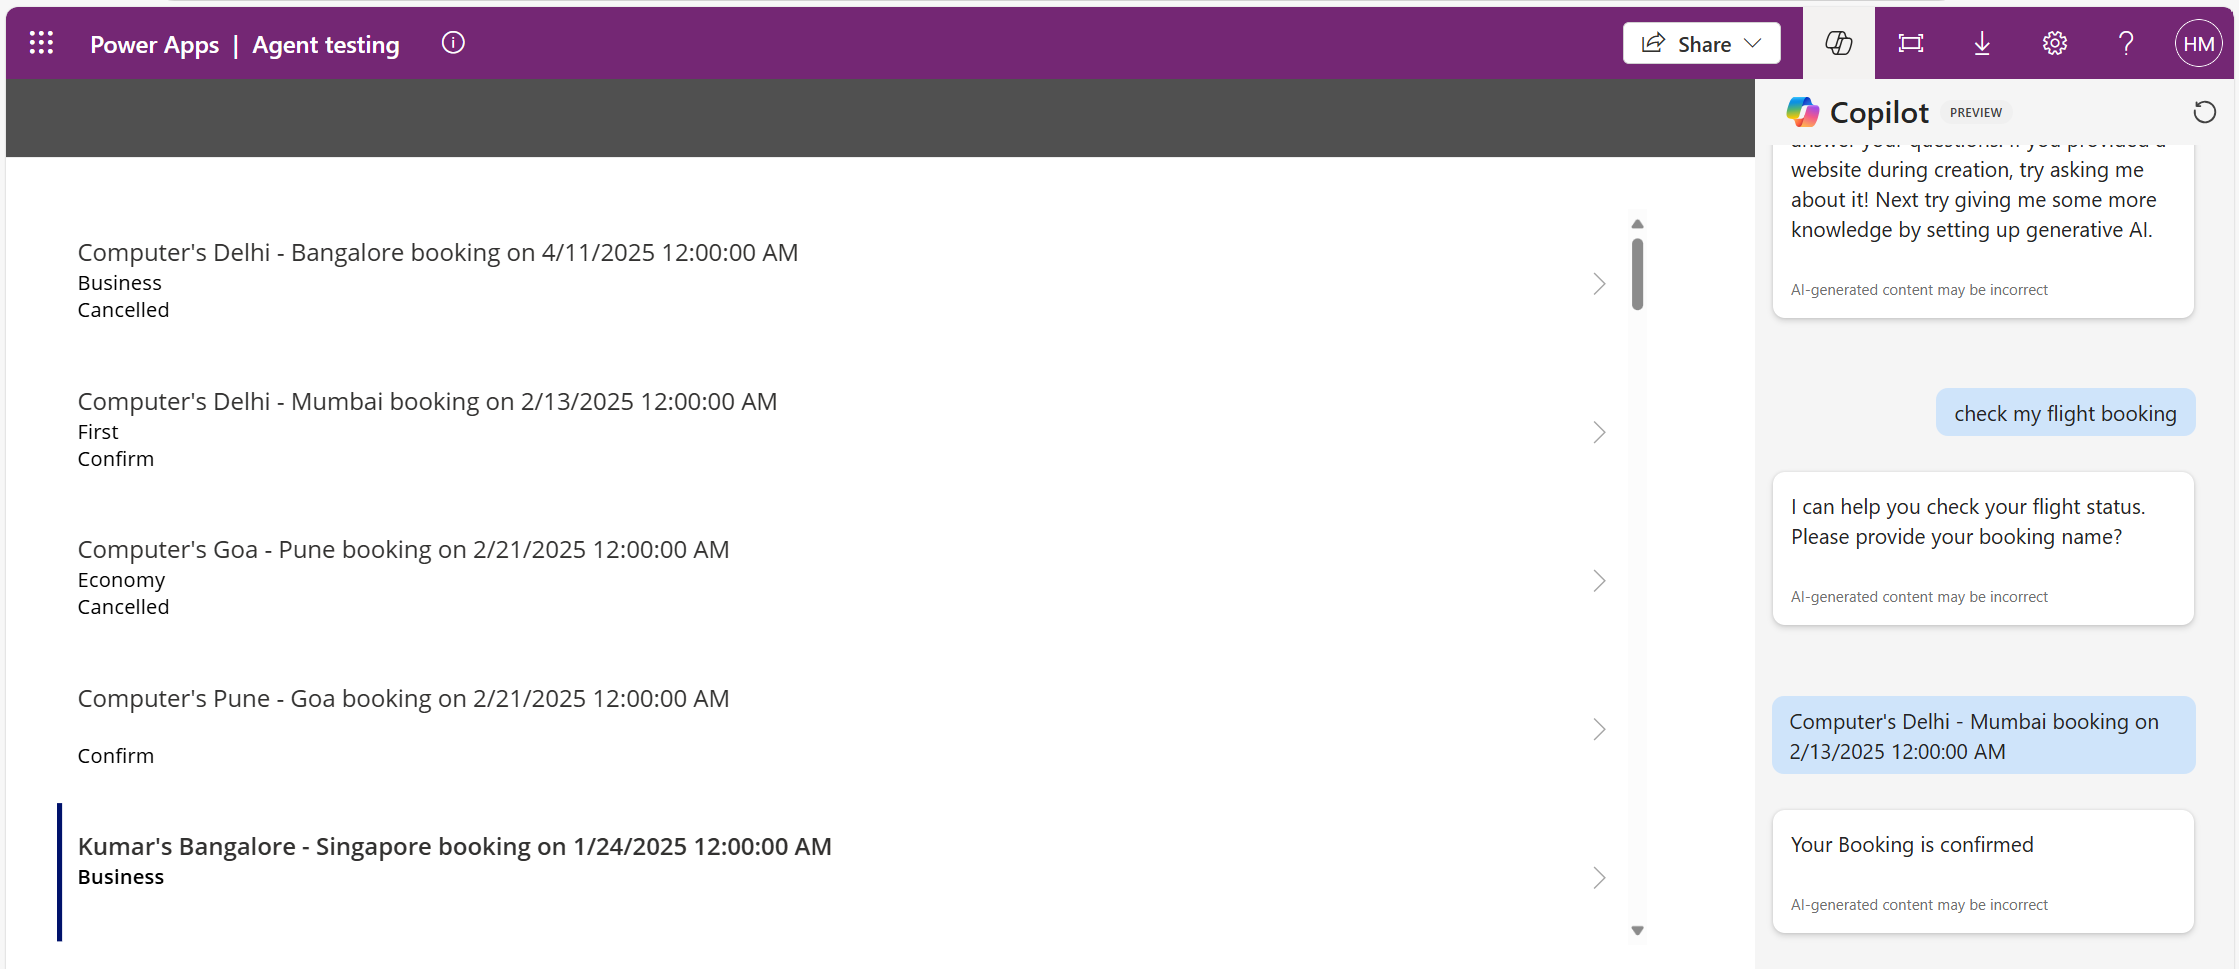
Step 6: Test the Topic
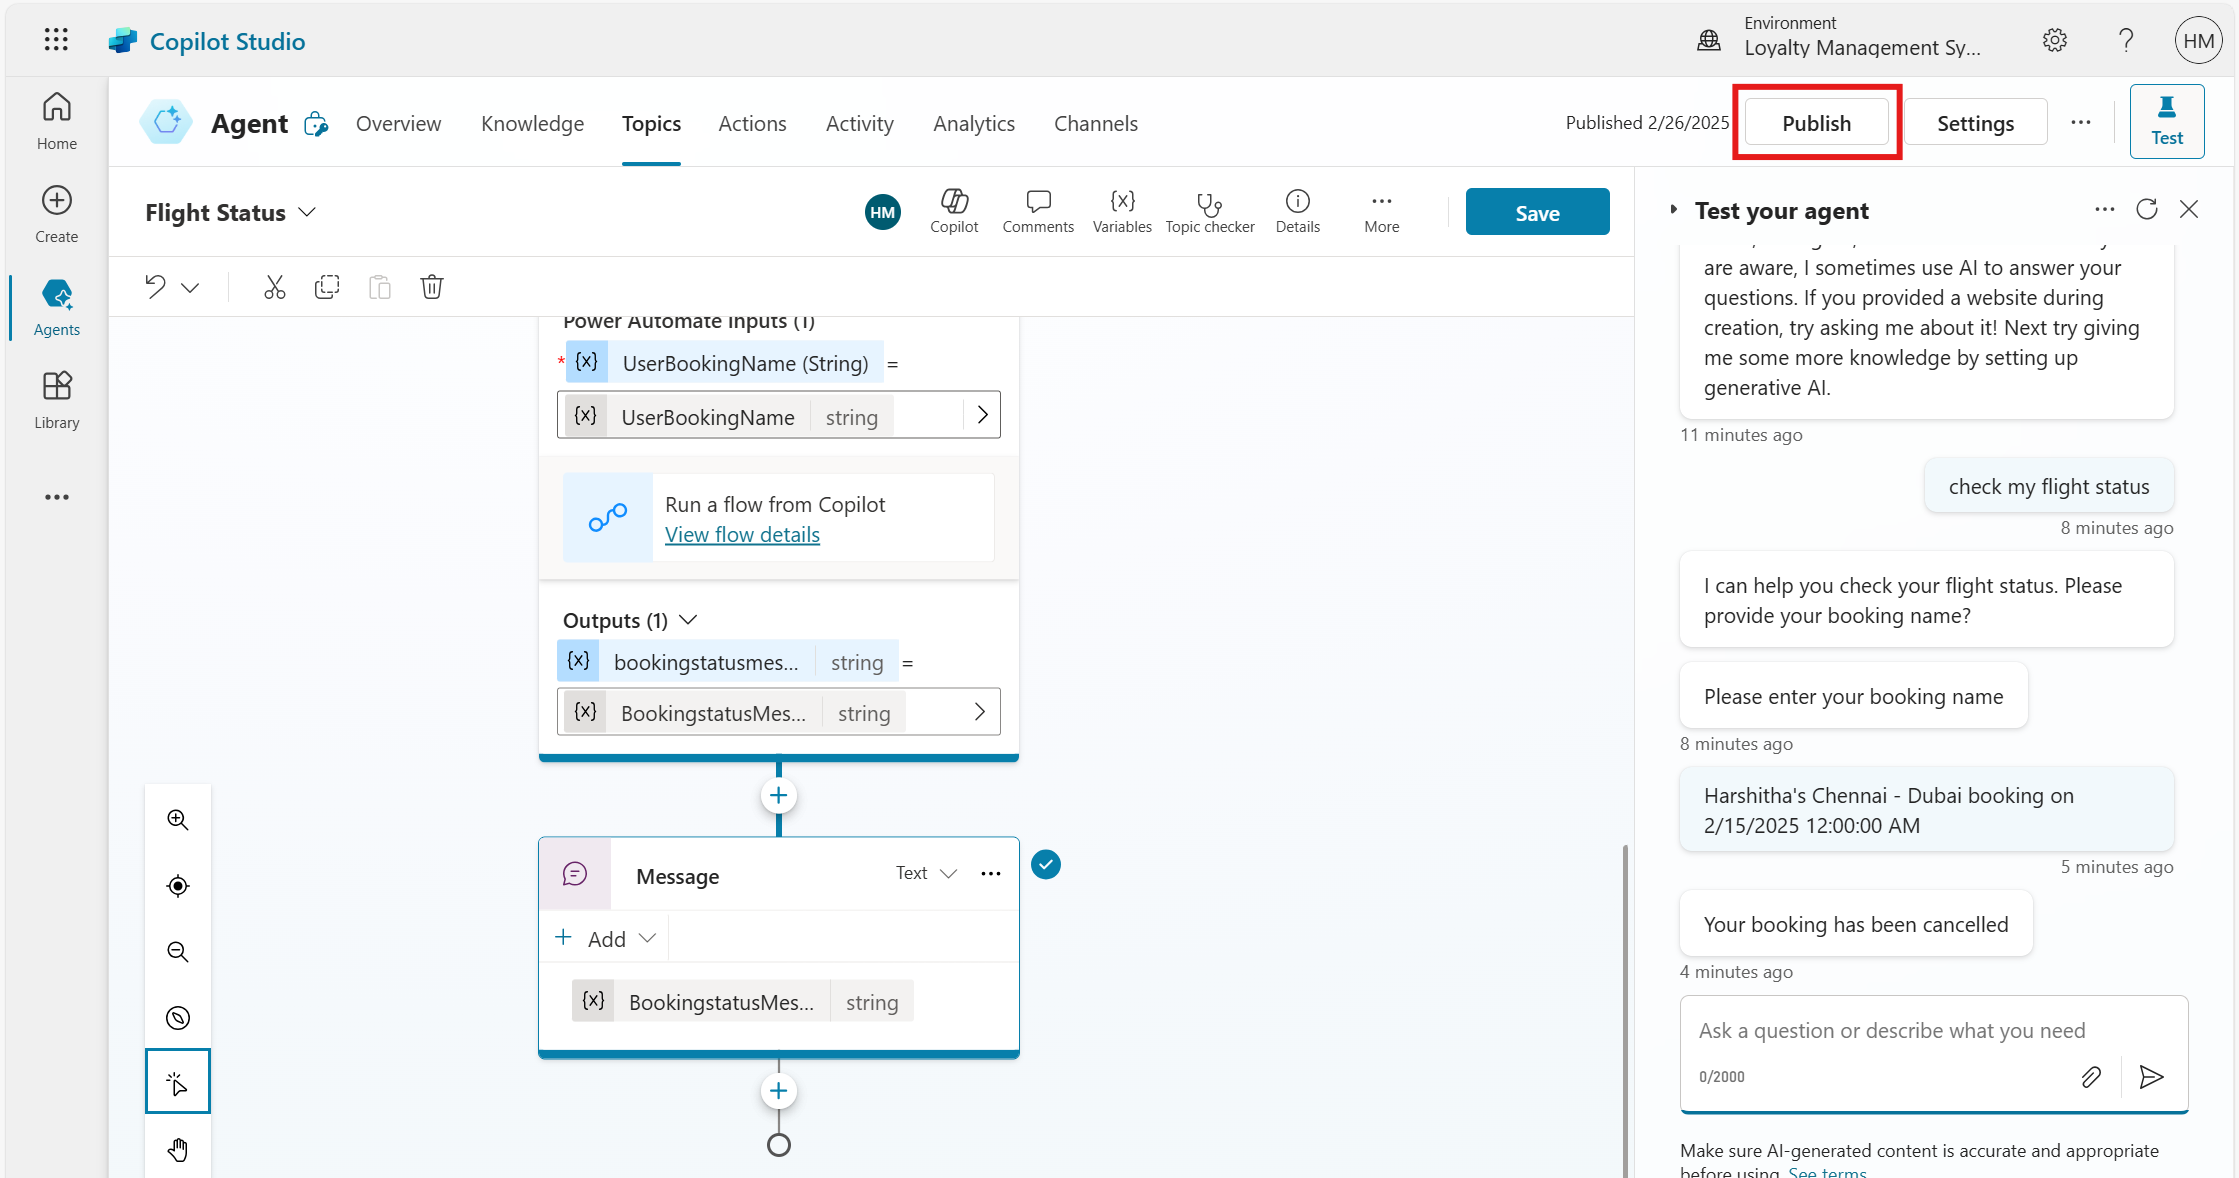
Open the Test your agent pane and enter a sample phrase like check my flight status.
Follow the conversation flow, entering a booking name.
Verify that the response is correct.
Step 7: Publish and integrate the agent with Power Apps.
Click Publish in the top menu bar.
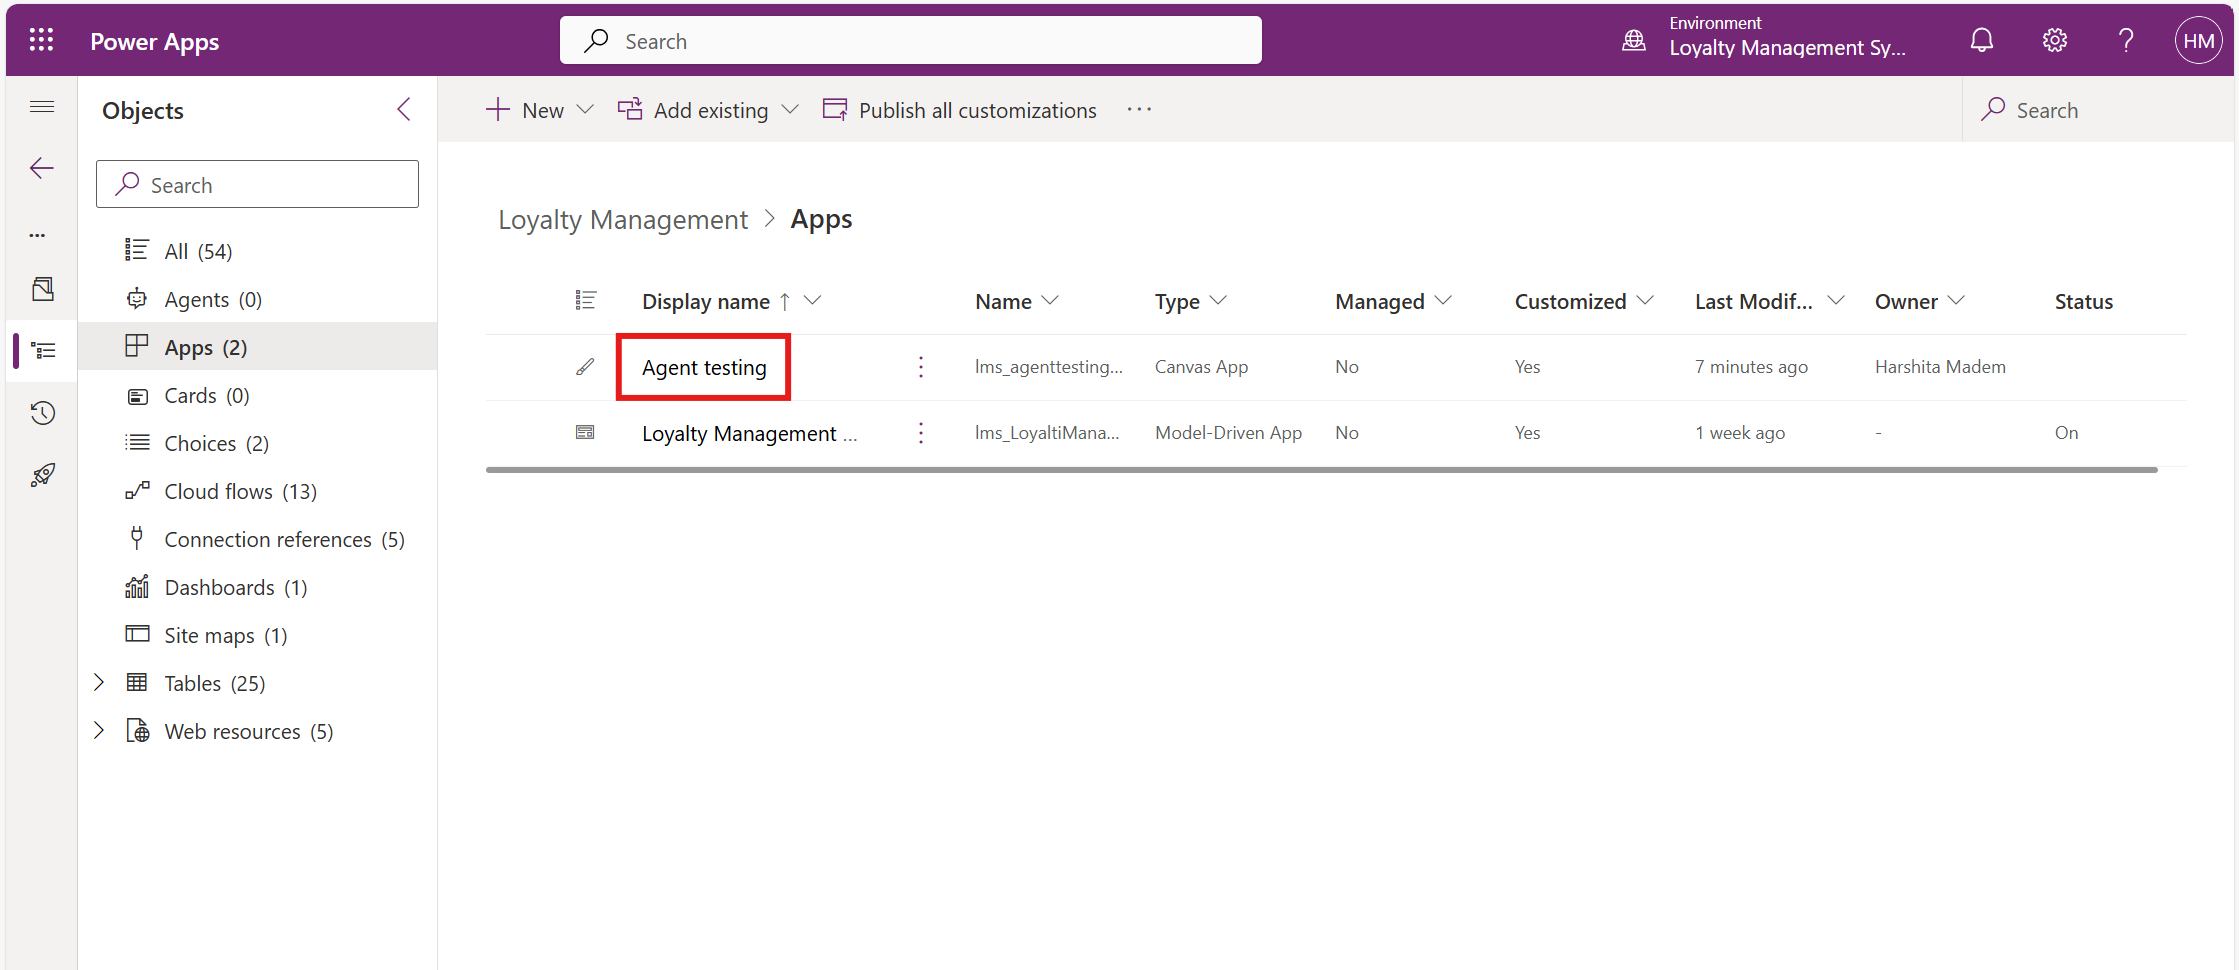
Open Power Apps and select your app where you want to integrate Copilot.
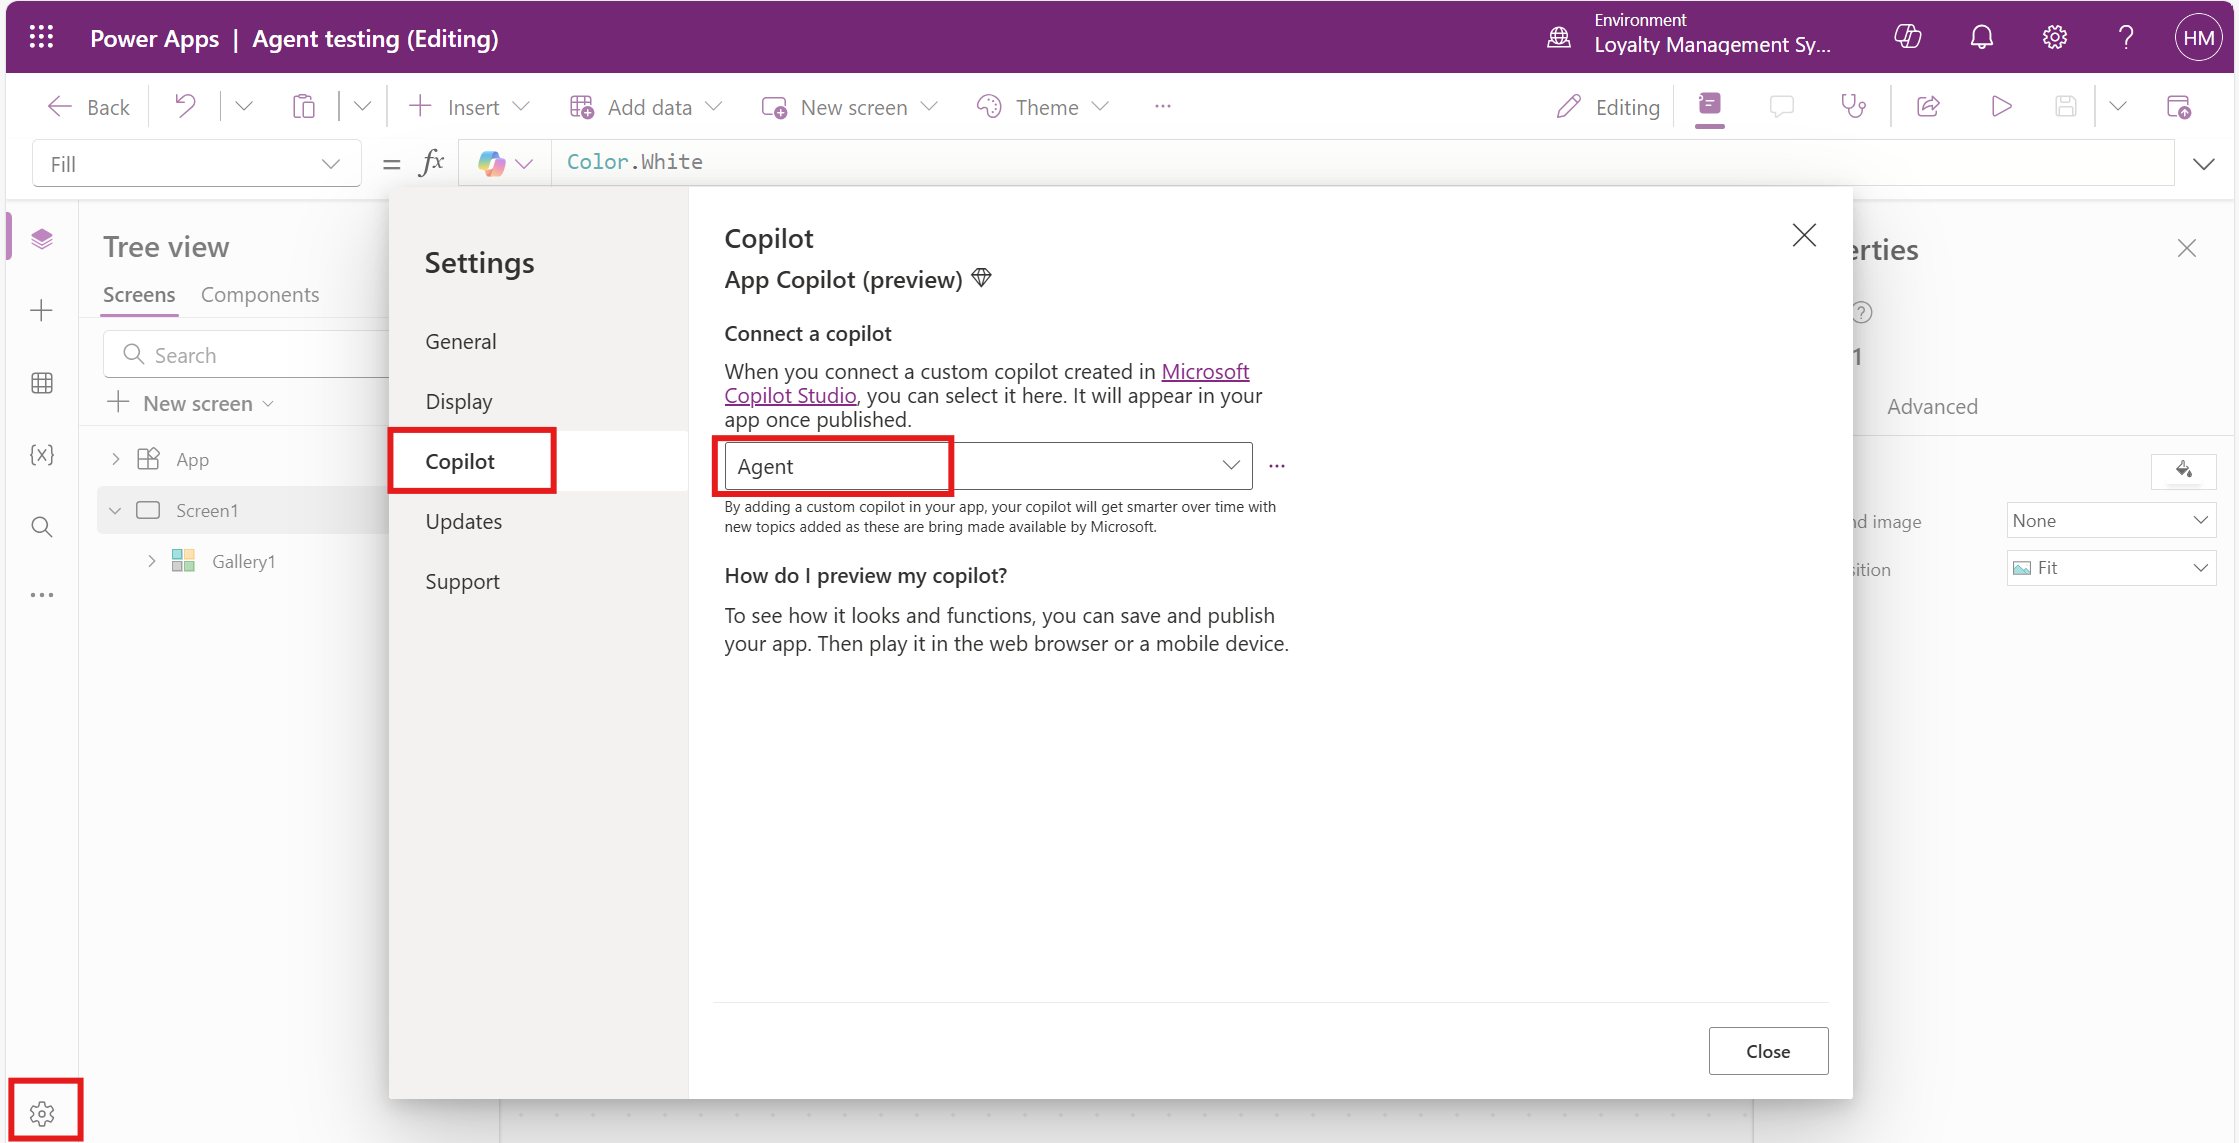
In the app designer, click on Settings and find the Copilot section.
Select your copilot agent from the list.
Click on Save and Publish.
Go back to the Power Apps home page and click Play to launch the app.
Open Copilot from the app interface.
Type a test phrase, such as Check my flight booking.
Verify if the Copilot agent fetches and displays the correct flight booking status.
Frequently Asked Questions:
1. Can I personalize Copilot’s responses based on user roles?
Yes, you can:
Use Dataverse user attributes to check user roles.
Add conditions in Power Automate to process responses based on user permissions.
Configure Power Pages authentication to identify users and adjust responses accordingly.
2. Can a topic trigger another topic automatically?
Yes, you can use the Go to another topic node to redirect users from one topic to another based on conditions or user input.
3.What happens if a user enters a phrase that doesn’t match any topic?
The conversation follows the Fallback Topic (if enabled), which can guide the user to a relevant topic or provide a default response.
4. How do I track user interactions with my Copilot agent?
You can enable conversation analytics in Copilot Studio, integrate with Application Insights, or store interaction logs in Dataverse for further analysis.
5. How do I handle FAQs inside a single topic?
Instead of creating multiple topics, you can:
Use a single topic with multiple trigger phrases covering different FAQs.
Use conditions to check for keywords and send relevant responses.
Implement a decision tree to categorize user queries and guide them efficiently.