Build a Document Preview App in Power Apps with SharePoint and Power Automate
May 20, 2026
#SharePoint#Power Apps#Power Automate
Chetan Jha
Introduction
Have you ever wished you could preview documents directly inside Power Apps without downloading them or switching tabs? In today’s fast-paced business environment, teams need quick access to files, whether proposals, contracts, or reports, all within a single interface.
In this blog, we’ll walk you through how to build a seamless and interactive document preview experience in Microsoft Power Apps. By leveraging SharePoint as a data source and Power Automate for document conversion, you’ll learn how to render various file types, including PDFs, Word documents, and Excel files, directly inside a canvas app. The result? A clean, efficient, and user-friendly document viewer that keeps your workflow uninterrupted.
Business Scenario
A team shares proposal documents, contracts, and reports in a SharePoint library. Team members need a fast, clean way to browse and read files without switching context to the browser.
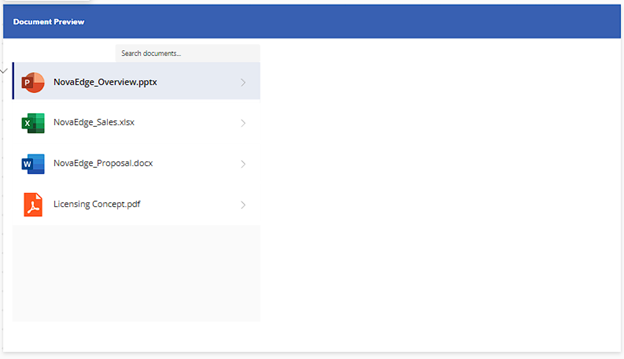
The goal is to build a single-screen Power App where:
All uploaded documents are listed on the left with type icons
Clicking any file instantly renders a preview on the right
A search bar filters documents by name in real time
A Download button gives one-click access to the original file
Security note: Users must have SharePoint library access. Power Apps respects SharePoint permissions. Power Automate flow permissions should align with your organisational security policies.
Prerequisites
A Microsoft 365 account with Power Apps and Power Automate access
A SharePoint site (e.g. https://yourorg.sharepoint.com/sites/Demo)
Permission to create Document Libraries in SharePoint
Need help with your business solution?
Our team can help you implement the right solution for your organization.
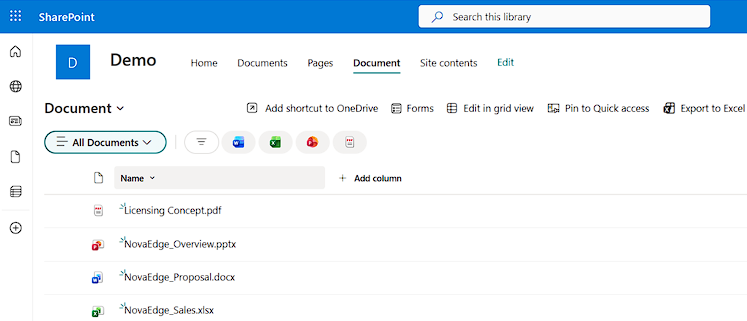
Navigate to your SharePoint site. Click New and then Document library. Name the library based on your business requirements and click Create.
📍 SharePoint Site → New → Document library
Field
Value
Name
Document (or your preferred library name)
Show in site navigation
Checked
Once the library is created, upload a mix of test files. Include at least one .docx, .xlsx, .pptx, and .pdf file so you can thoroughly test all file types later.
Step 2: Create the Canvas App
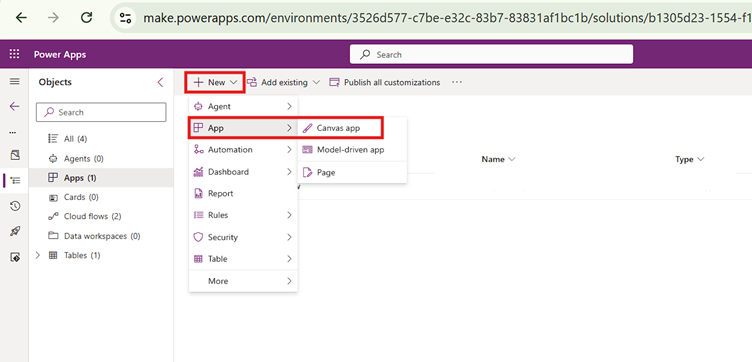
Go to make.powerapps.com. Click New in your solution, hover over App, and select Canvas app.
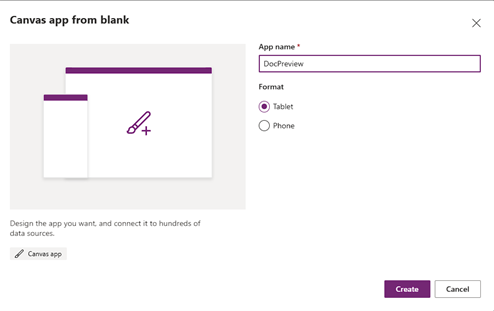
Canvas app from blank — dialog settings
App name
DocPreview
Format
Tablet
Click Create. Rename the default screen to scrPreview.
Step 3: Connect SharePoint as a Data Source
In the left-hand panel, click the Data icon and select Add data. Search for SharePoint, select the connector, choose your Document library, and click Connect.
Step 4: Add the Document Gallery
Insert a Vertical Gallery and rename it to galDocuments. In the Properties panel, set the following values:
Filter(
    Document,
    TextInput1.Text = "" ||
    StartsWith(Lower('File name with extension'), Lower(TextInput1.Text))
)
OnSelect property — file rendering strategy:
Set(varShowPdf, false); // hide viewer while loading
Set(varSelectedDoc, ThisItem); // store selected record
Set(varFileContent, Blank()); // clear previous content
If(
    EndsWith(Lower(ThisItem.'File name with extension'), ".pdf"),
    Set(varFileContent, GetDocumentContent.Run(ThisItem.'{Identifier}').filecontent), // call flow for PDF
    Set(varFileContent, Substitute(ThisItem.Thumbnail.Large, "/thumbnail", "/pdf")) // use SharePoint URL for Office files
);
Set(varShowPdf, true) // show viewer once content is ready
How the OnSelect formula works:
PDF files — the formula calls the Power Automate flow (built in Step 8) which returns a base64 data URI stored in varFileContent and rendered by the PDF Viewer Control.
Office files (DOCX, XLSX, PPTX) — SharePoint generates a preview URL via the Thumbnail property. The formula replaces /thumbnail with /pdf to get the preview-compatible version. No flow call is needed for Office files.
Step 5: Add File Type Icons Inside the Gallery
Insert an Image control inside the gallery template and set its Image property to the following formula:
Switch(
Lower(Last(Split(ThisItem.'File name with extension', ".")).Value),
"docx", "https://img.icons8.com/color/96/microsoft-word-2019.png", // Word icon
"xlsx", "https://img.icons8.com/color/96/microsoft-excel-2019.png", // Excel icon
"pptx", "https://img.icons8.com/color/96/microsoft-powerpoint-2019.png", // PowerPoint icon
"pdf", "https://img.icons8.com/color/96/pdf.png", // PDF icon
"https://img.icons8.com/color/96/document.png" // default for all other file types
)
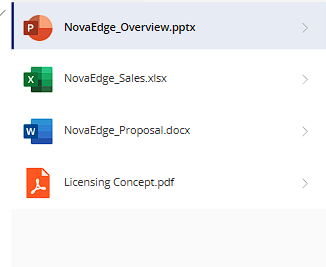
The formula reads the file extension and returns the matching icon URL. For any unrecognised extension, a generic document icon is shown. After applying the formula, your gallery shows colour-coded icons next to each file name.
Step 6: Add the Search Bar and Header
Insert a Header control from the Modern Controls menu. Set these properties:
Property
Value
Fill
RGBA(56, 96, 178, 1)
FontColor
RGBA(255, 255, 255, 1)
Title
"Document Preview"
TitleFontSize
18
IsLogoVisible
false
IsProfilePictureVisible
false
Insert a Text Input control and rename it to TextInput1. Set these properties:
Property
Value
Placeholder
"Search documents..."
BorderColor
RGBA(200, 200, 200, 1)
Height
40
Width
528
X
248
Y
88
Size
15
Because the gallery's Items property already references TextInput1.Text, the gallery filters automatically as the user types. No additional formula is needed.
Step 7: Add the PDF Viewer Control
Insert a PDF Viewer Control and name it PdfViewer1. Position it on the right half of the screen next to the gallery.
Property
Value
X
593
Y
108
Width
750
Height
614
DisplayMode
DisplayMode.View
ShowControls
true
Document
varFileContent
Visible
varShowPdf && !IsBlank(varFileContent)
📍 Power Apps Editor → Insert → PDF viewer (experimental)
Rename to
PdfViewer1
Document
varFileContent
Visible
varShowPdf && !IsBlank(varFileContent)
ShowControls
true
DisplayMode
DisplayMode.View
Why varFileContent and varShowPdf? varFileContent holds the document content — either a base64 data URI for PDFs or a SharePoint preview URL for Office files. varShowPdf is false while content loads and true once ready, so the viewer only appears when content is available.
Step 8: Create the Power Automate Flow for PDF Files
Office files preview using SharePoint's built-in thumbnail URL. PDF files need a different approach: the PDF Viewer Control only accepts a base64 data URI. This flow retrieves the file binary from SharePoint, converts it, and returns it to Power Apps.
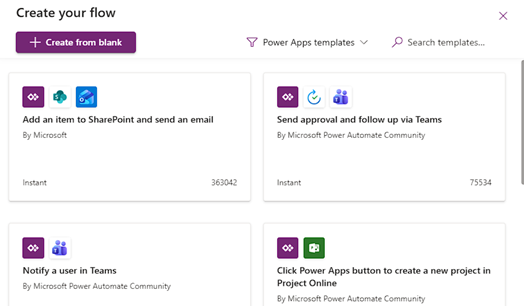
In the Canvas App editor, click the three dots (...) menu in the left panel, select Power Automate, and click Create new flow. Then click Create from blank.
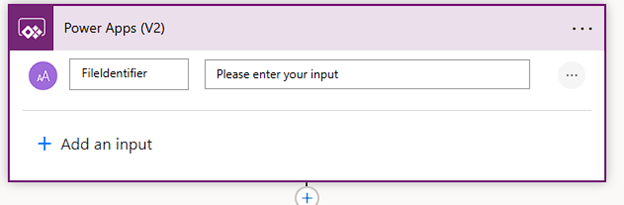
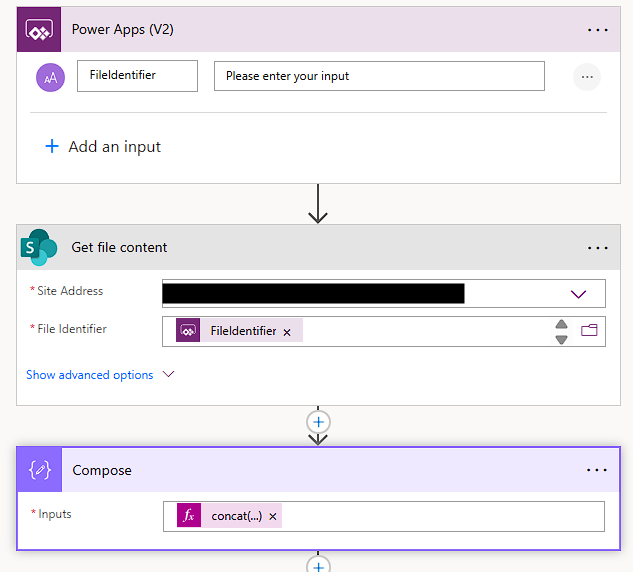
Step 8.1: Power Apps (V2) Trigger
The flow starts with the Power Apps (V2) trigger. Click Add an input, select Text, and name it FileIdentifier. This is the unique ID that Power Apps passes to the flow when a user clicks a PDF file.
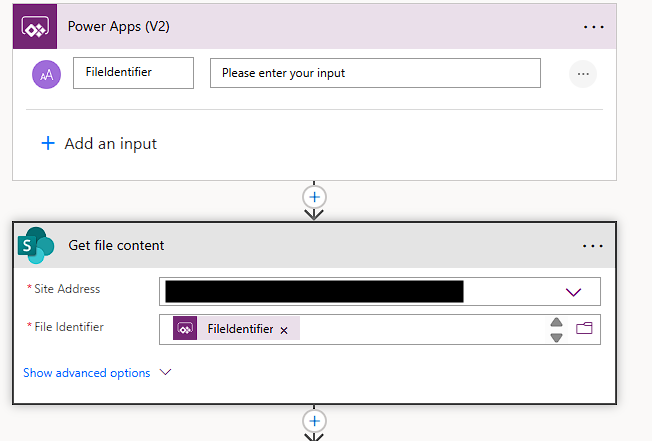
Step 8.2: Get File Content
Add the SharePoint Get file content action. Set Site Address to your SharePoint site URL and map File Identifier to the FileIdentifier parameter from the trigger.
Step 8.3: Compose
Add a Compose action. In the Inputs field, enter the following expression:
Why this expression? The PDF Viewer Control does not accept raw binary. It renders a base64 data URI in the format data:application/pdf;base64,<content>. This action converts the binary from SharePoint to base64 and prepends the required prefix so the viewer can render it.
Important: Do not wrap body('Get_file_content') inside base64ToBinary(). The Get file content action already returns binary. Adding base64ToBinary() causes a type error.
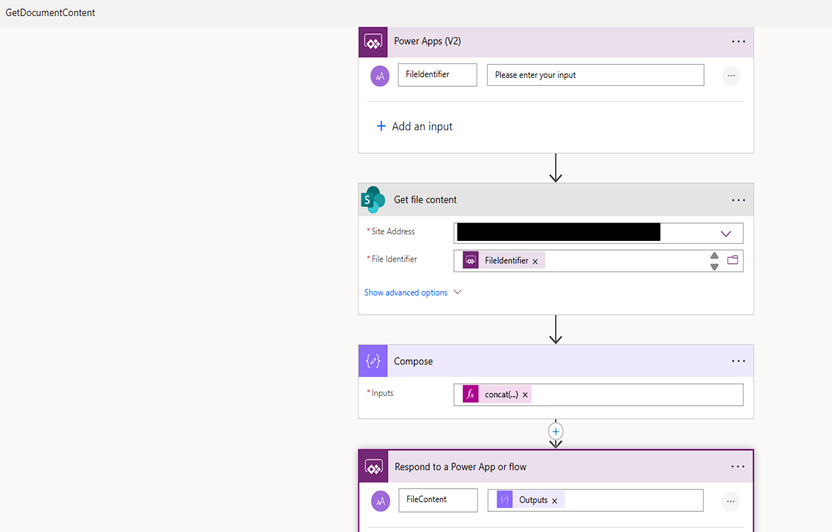
Step 8.4: Respond to a Power App
Add a Respond to a Power App or flow action. Click Add an output, select Text, and set:
Field
Value
Name
FileContent
Value
outputs('Compose')
This sends the base64 data URI back to Power Apps where it is stored in varFileContent and passed to the PDF Viewer Control.
Step 9: Add the Download Button and Loading Spinner
Insert a Button control and set the following properties:
Property
Value
Text
"Download"
Icon
ArrowDownload
OnSelect
Launch(varSelectedDoc.'{Link}') // opens original file in browser
Visible
!IsBlank(varSelectedDoc)
Insert a Spinner control and set Visible to !varShowPdf && !IsBlank(varSelectedDoc). This shows a loading indicator while the flow runs or while content loads for the selected document.
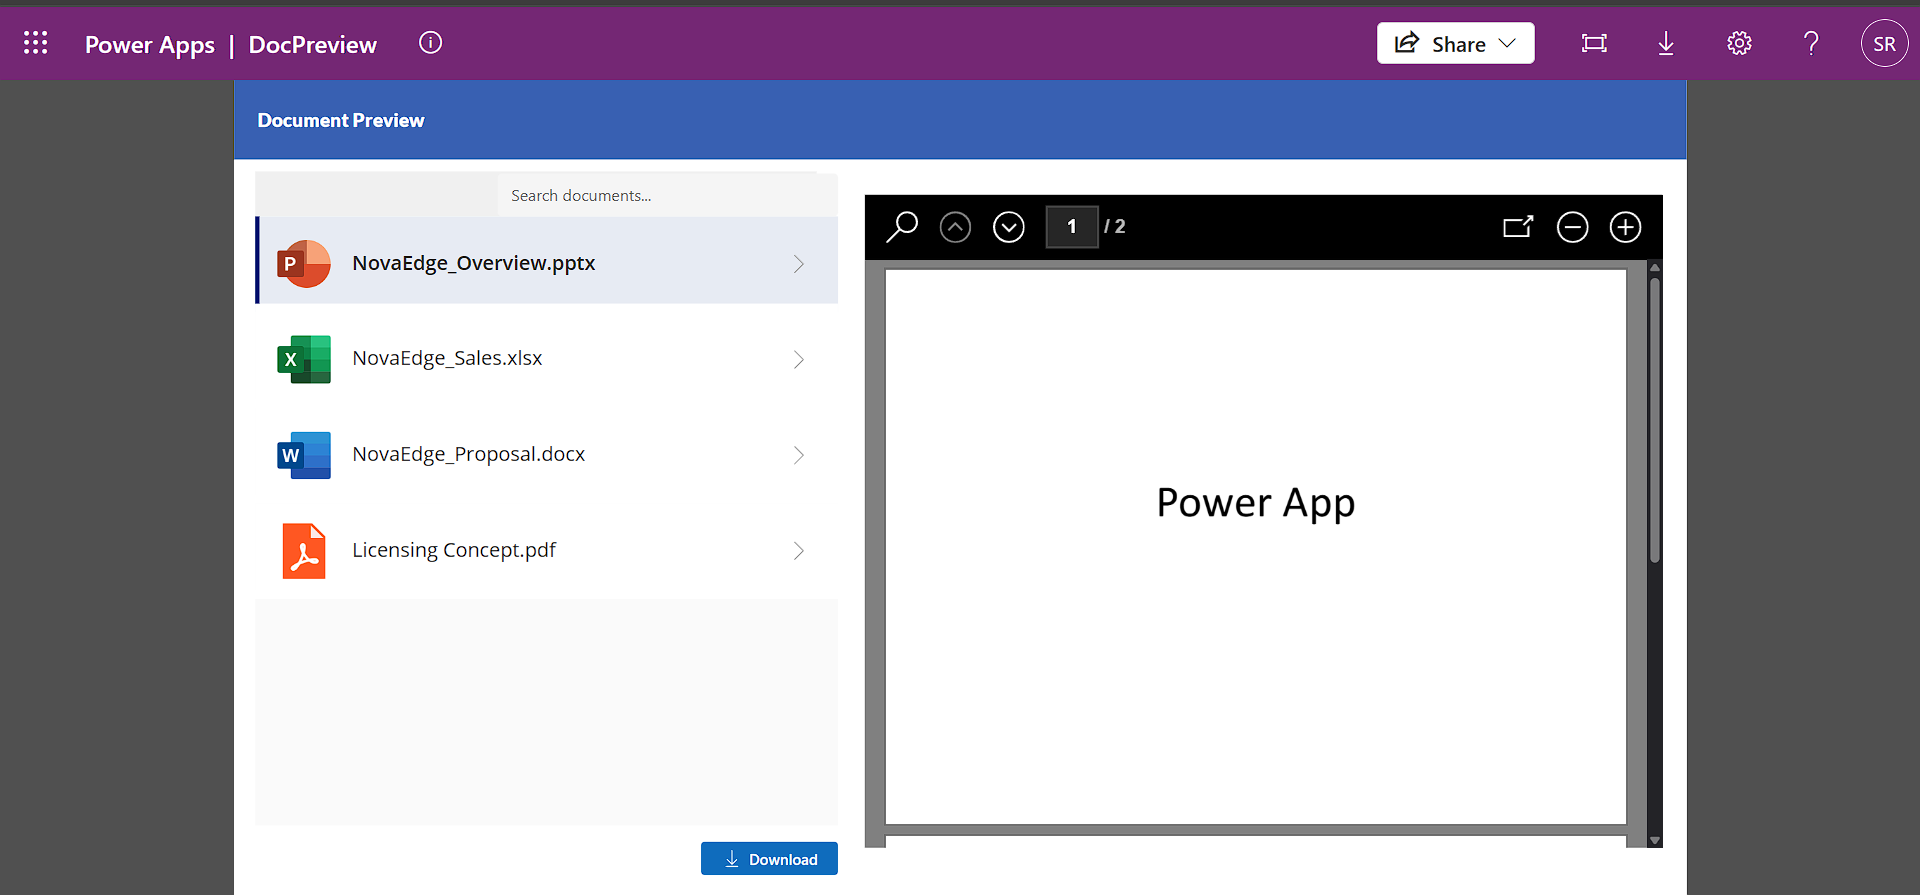
Result
After publishing the app, users see a clean two-panel interface. The left panel lists all documents from SharePoint with colour-coded file type icons. Typing in the search bar instantly filters the list in real time.
Clicking a document triggers the OnSelect formula. For Office files, the thumbnail URL transformation fires immediately and the viewer renders the document in under a second. For PDF files, the Power Automate flow retrieves and converts the file content and the viewer displays it within 2 to 3 seconds.
Conclusion
With just a few steps, you can transform your Power App into a dynamic file viewer that enhances productivity and user experience. This approach eliminates the need for external downloads and keeps your team focused within the app environment.
Try implementing this solution in your next project and see how it simplifies document handling for your organisation. If you found this guide helpful, share your thoughts in the comments and explore our other Power Apps tutorials for more practical insights and automation ideas.
Frequently Asked Questions (FAQ)
1. Which file types are supported?
This implementation supports PDF, DOCX, XLSX, and PPTX files. PDFs are rendered using the Power Automate flow and the PDF Viewer Control. Office files use SharePoint's built-in preview capability via the thumbnail URL transformation and do not require the flow.
2. Why is Power Automate used only for PDF files?
The PDF Viewer Control requires content as a base64 data URI. Power Automate retrieves the raw binary from SharePoint, converts it using concat('data:application/pdf;base64,', base64(body('Get_file_content'))), and returns the result to Power Apps. Office documents use SharePoint's own preview mechanism and bypass the flow entirely.
3. How does the preview work for Word, Excel, and PowerPoint files?
Office files use SharePoint's built-in thumbnail URL. The formula replaces /thumbnail with /pdf in that URL:
Substitute(ThisItem.Thumbnail.Large, "/thumbnail", "/pdf") // converts thumbnail to preview URL
This generates a PDF preview-compatible URL without calling Power Automate, making Office file previews near-instant.
4. Can users download files after previewing them?
Yes. The Download button uses Launch(varSelectedDoc.'{Link}') to open the original SharePoint file in the browser. It only appears when a document is selected, controlled by !IsBlank(varSelectedDoc).