Connecting a console application to Dynamics 365 allows you to work with Dynamics 365 data directly within your application. In this blog, we will use Application Registration and Application User to authenticate the connection and access data securely, without needing to re-enter user credentials every time.
Here are a few prerequisites for you to follow:
Dynamics 365 Environment: You must have access to a Dynamics 365 instance, either as an administrator or with sufficient privileges to create and manage users.
Azure Active Directory (Azure AD) Account: You need an Azure AD tenant for managing identities and applications. If you are using Dynamics 365, you are already set up with an Azure AD account.

Administrator Access to Azure AD: To register an application in Azure AD and grant it permissions, you’ll need administrator access to Azure AD or the appropriate permissions to register applications.

Visual Studio or C# Development Environment: You will need a development environment set up with Visual Studio or a similar IDE to build and run the console application.

.NET Framework or .NET Core: Depending on the version of your console application, ensure you're working with .NET Framework or .NET Core that supports the required libraries for authentication and connecting to Dynamics 365.
Required NuGet Packages: Your console application will need certain NuGet packages for working with OAuth authentication and Dynamics 365.
Step-by-Step Guide to Connect Dynamics 365 with a Console Application:
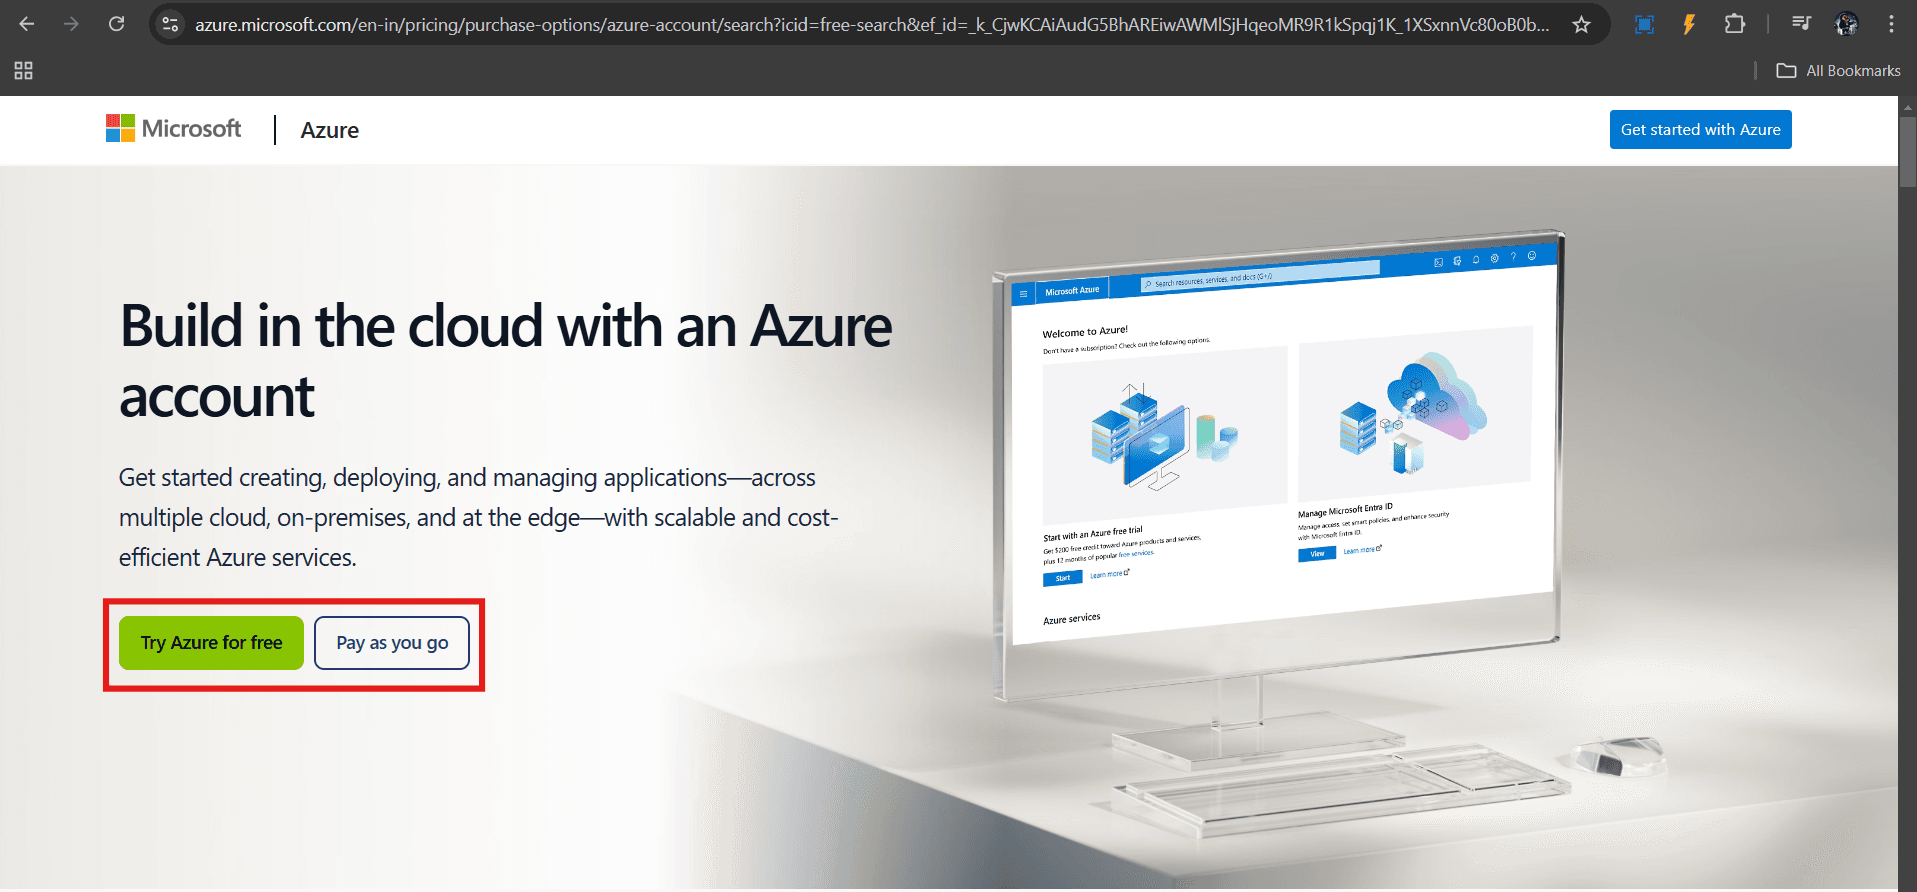
First, head over to the azure portal and log in to your account. In case it is your first time; you can start with a trial account first.
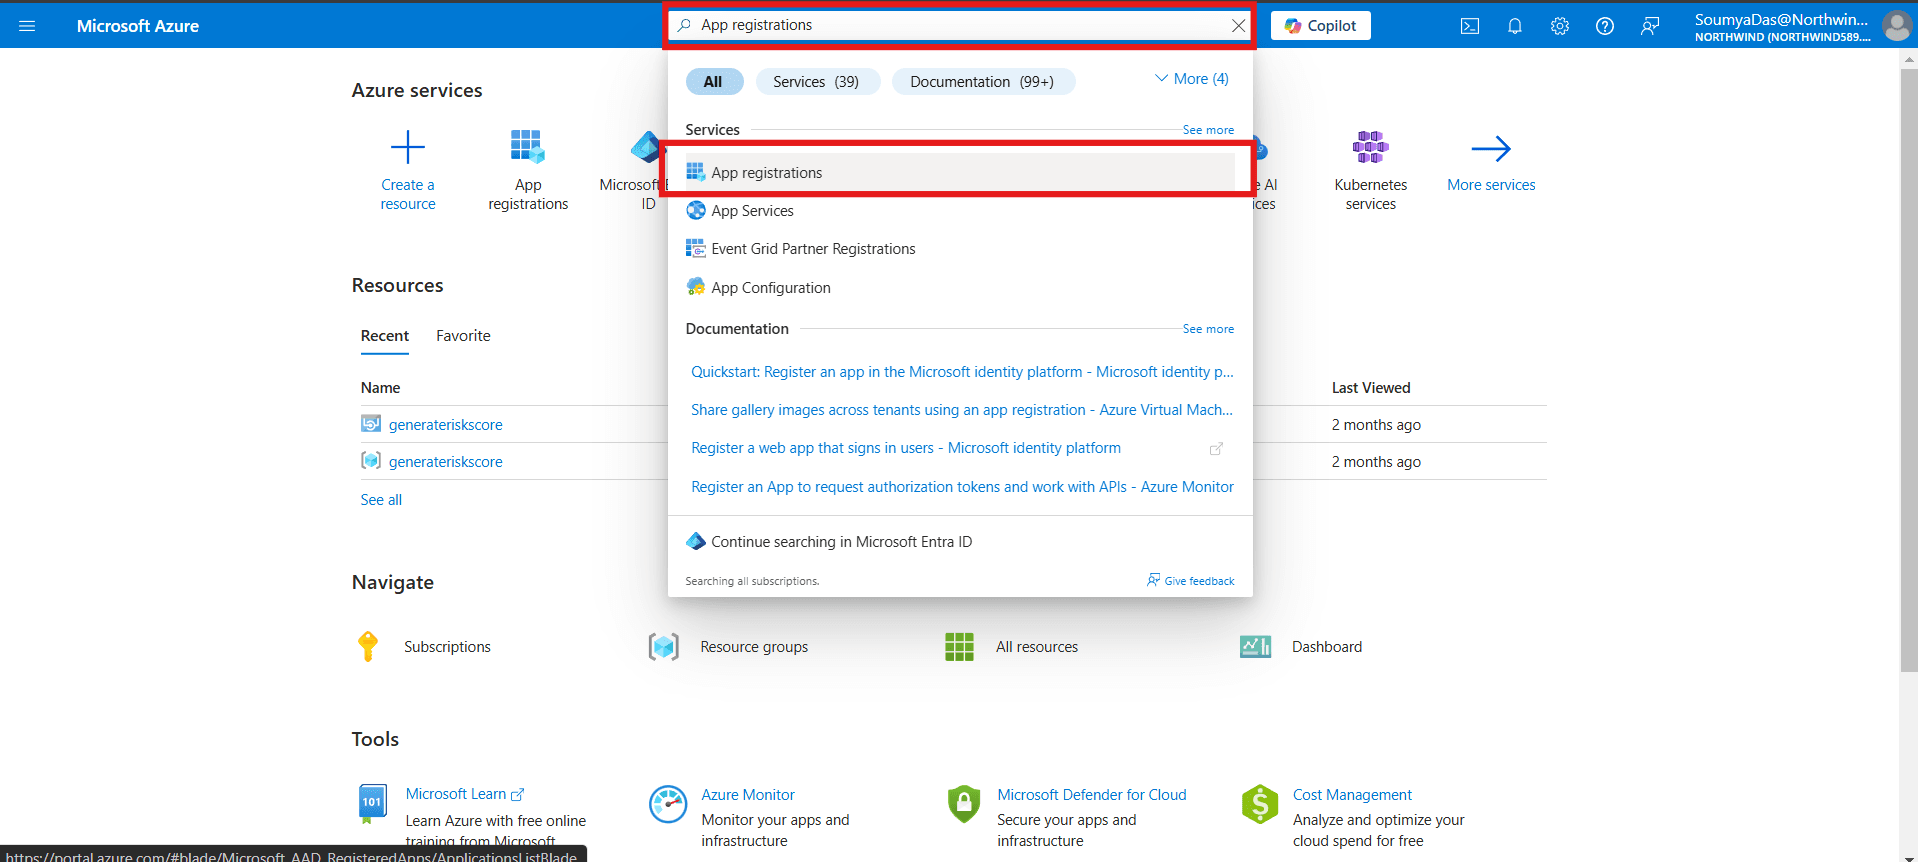
Search for App Registrations on the search bar and click on the icon in the results or press Enter.
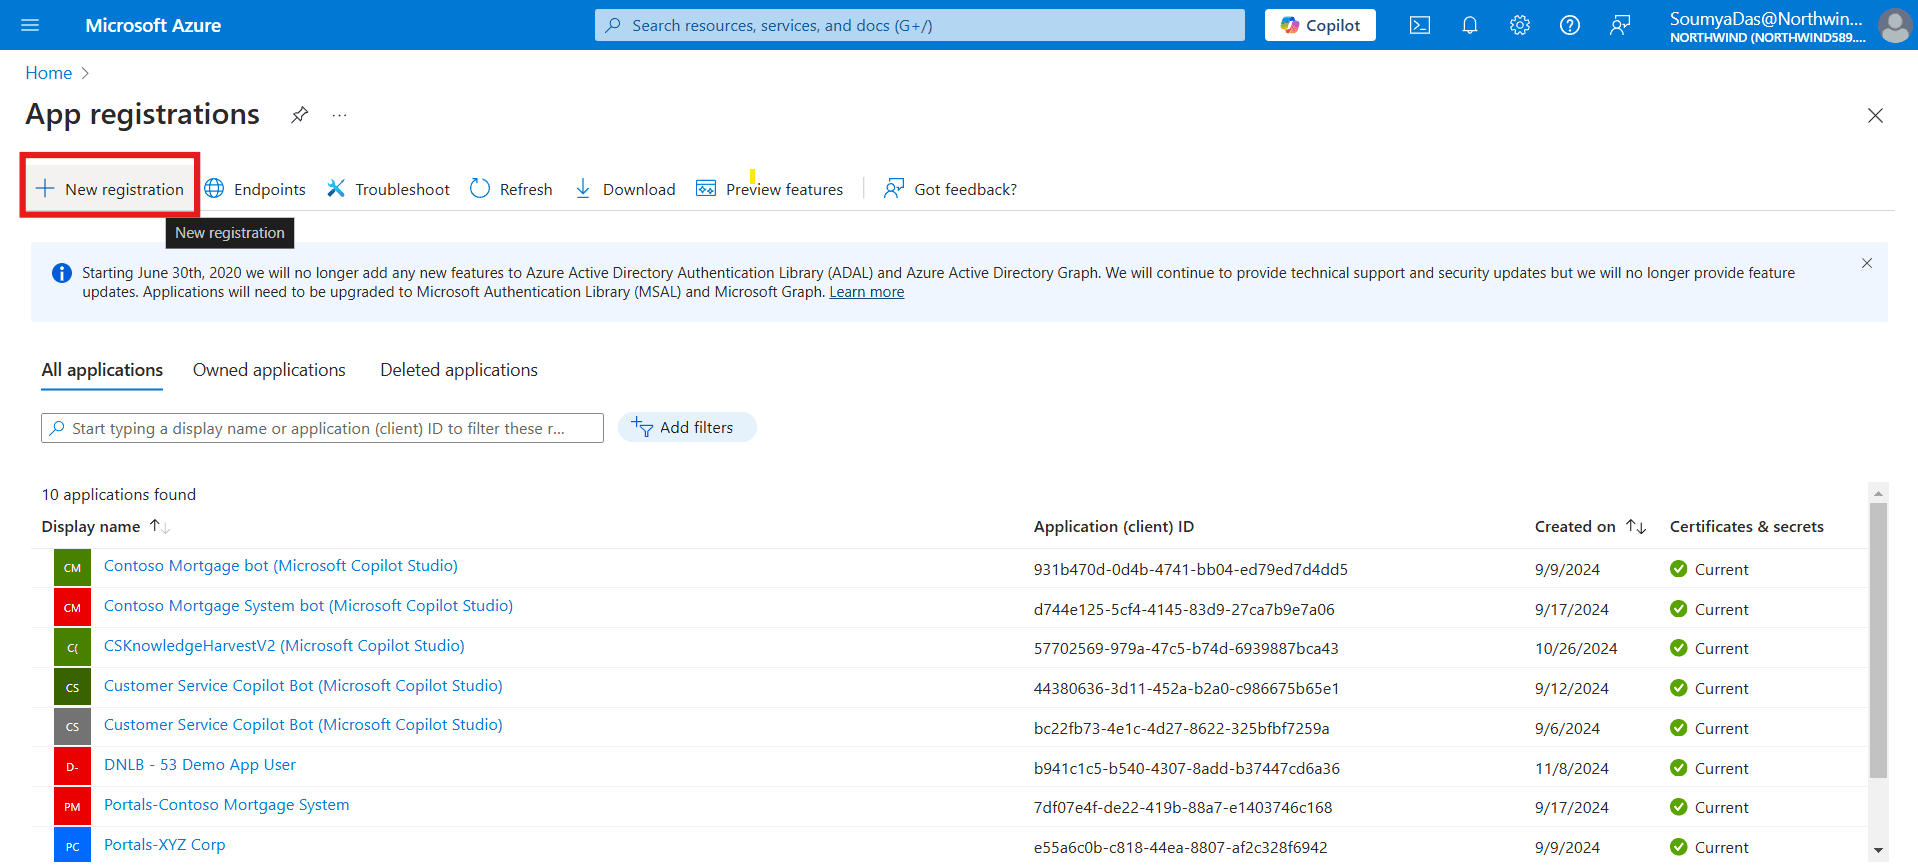
Click on New Registration.
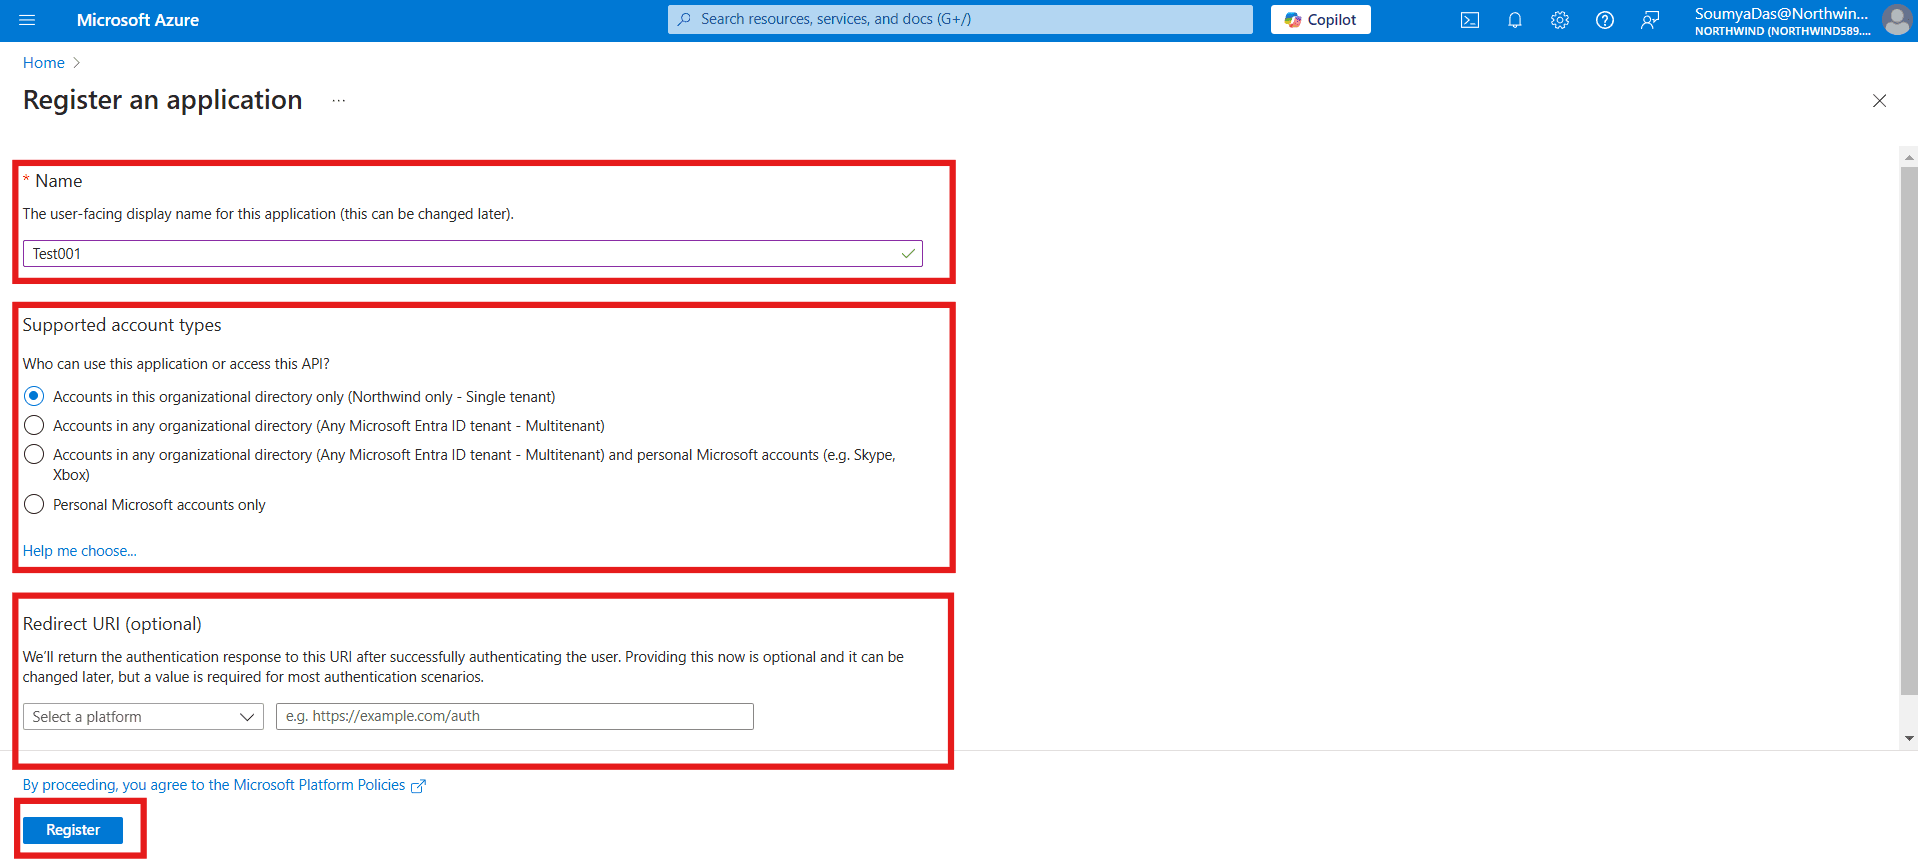
Provide a display name, select the type of access, and optionally choose a Redirect URI (incase you are using services like Postman, etc.).
Once done, go back to the app registration and you will find the app under All applications. Click on it.

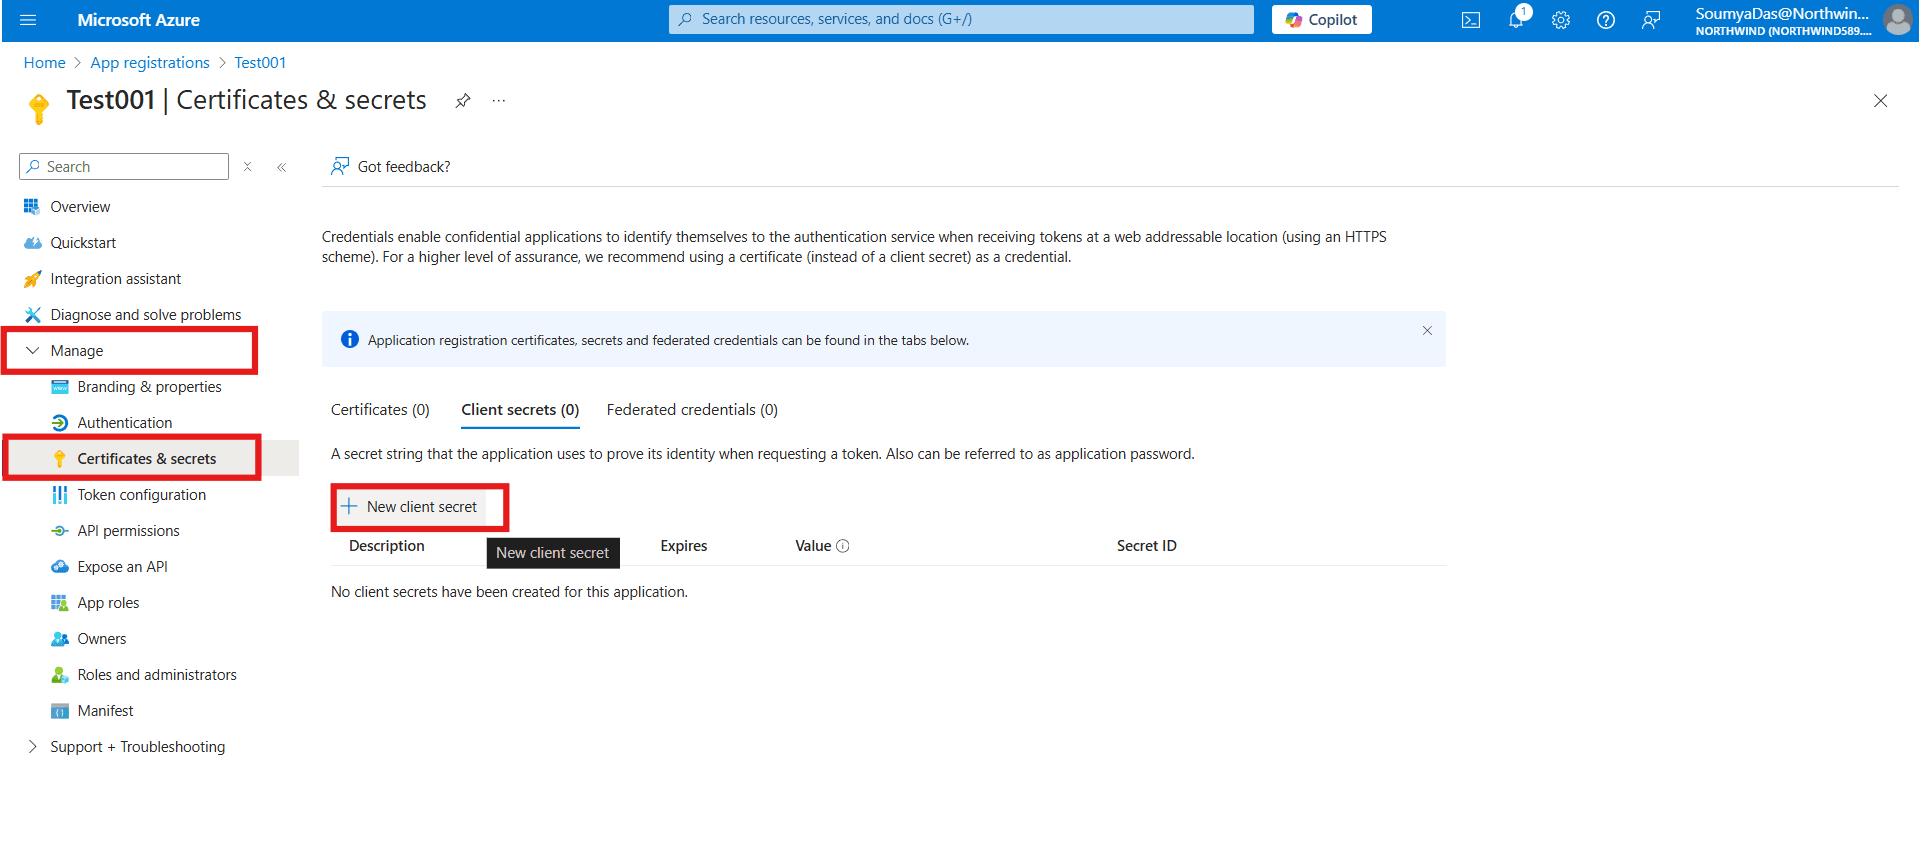
Once you click on it, the app registration dashboard will open. Go to Manage – Certificates & secrets – Click on New Client Secret.
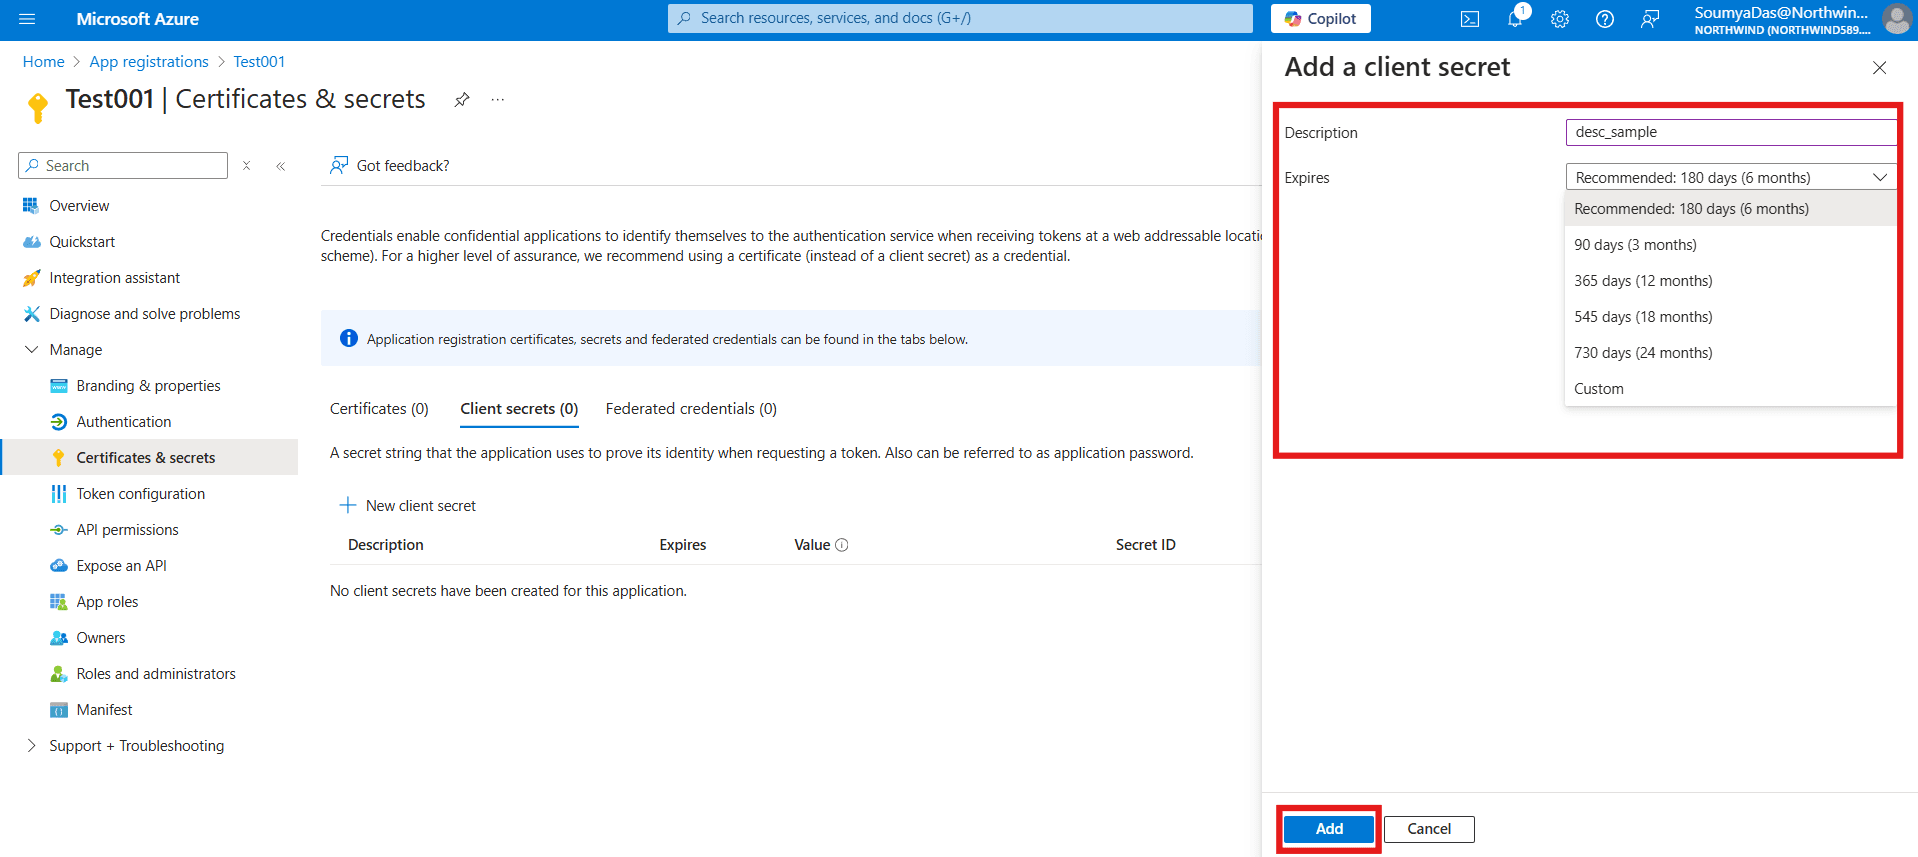
Add a Description, choose an expiration date, and click on add.
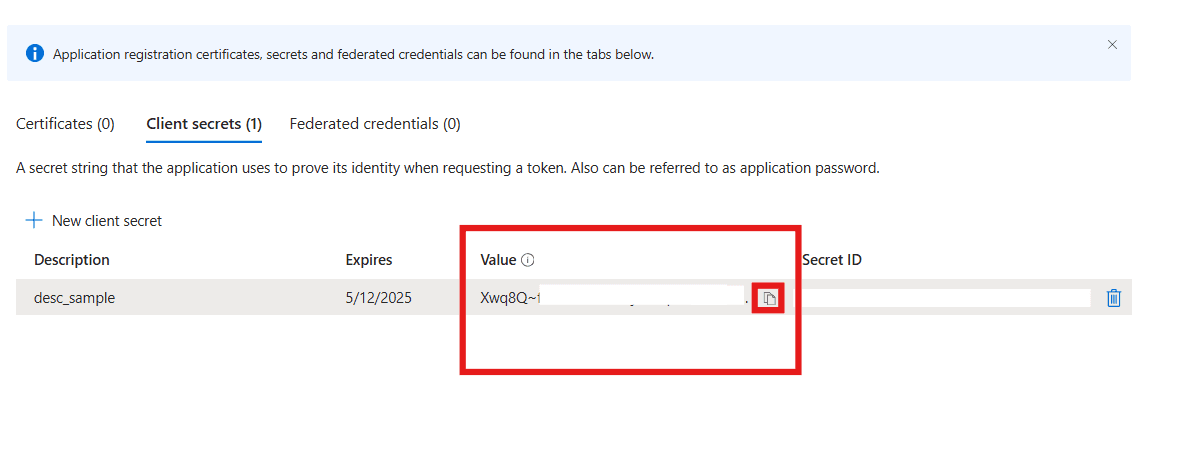
Once added, copy the ClientSecret value and save it locally on a notepad as it gets masked later on.
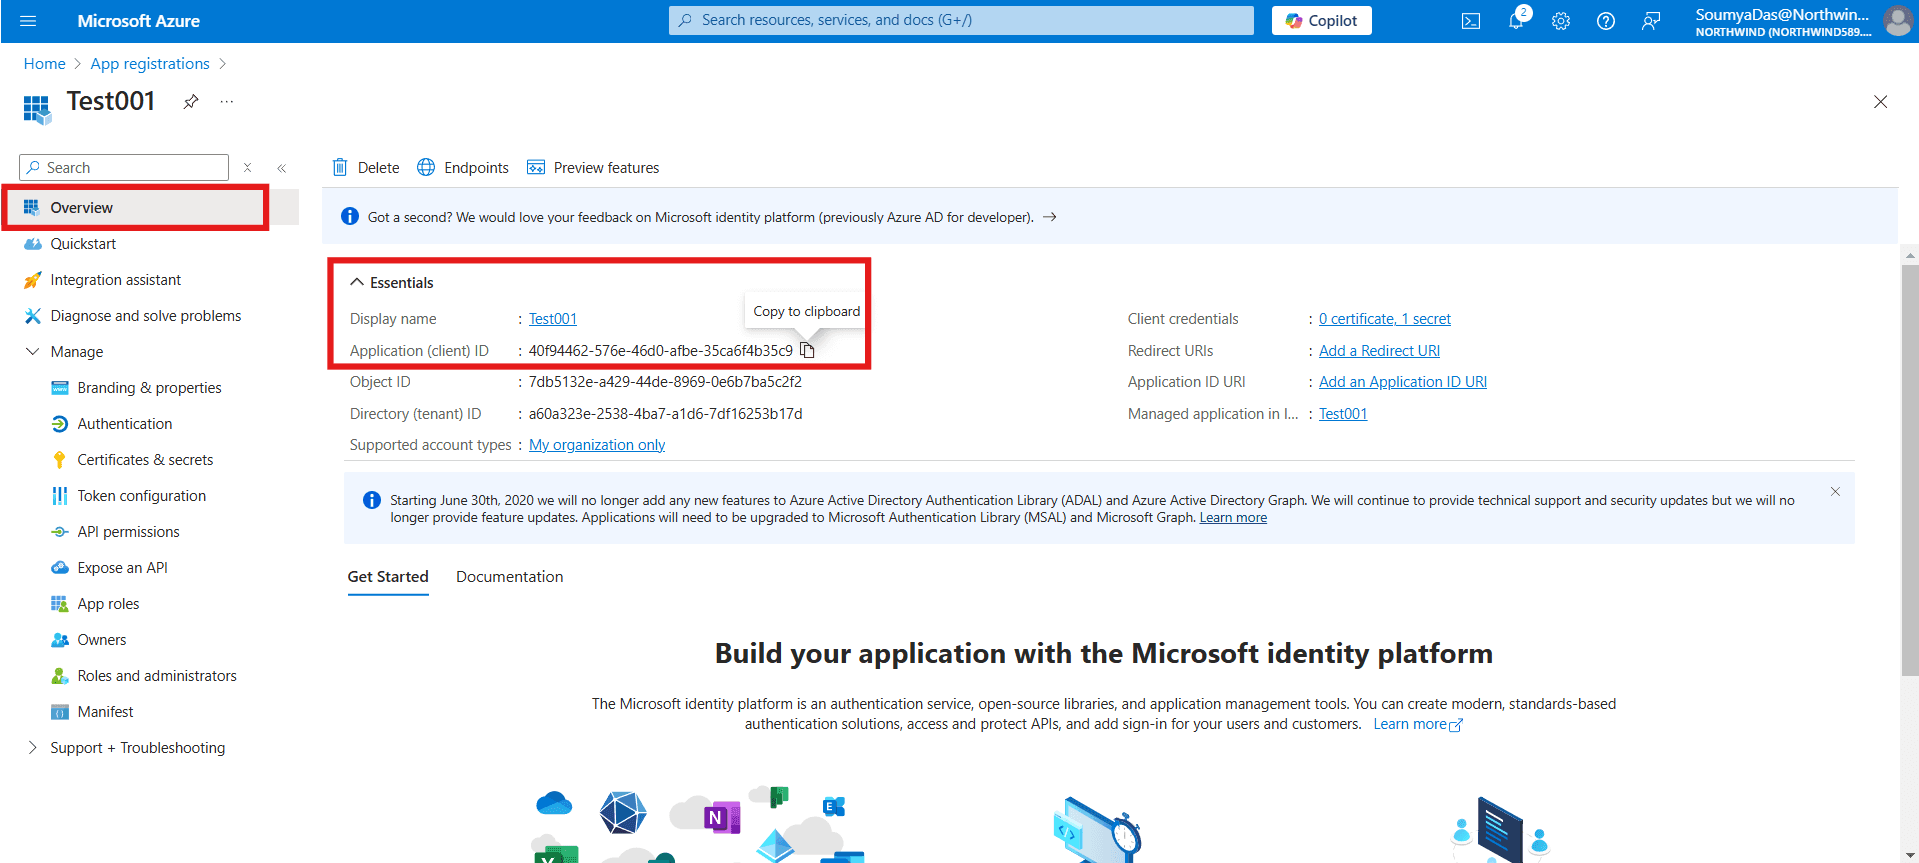
Go to the Overview ribbon and copy the app/ ClientID as well, locally.
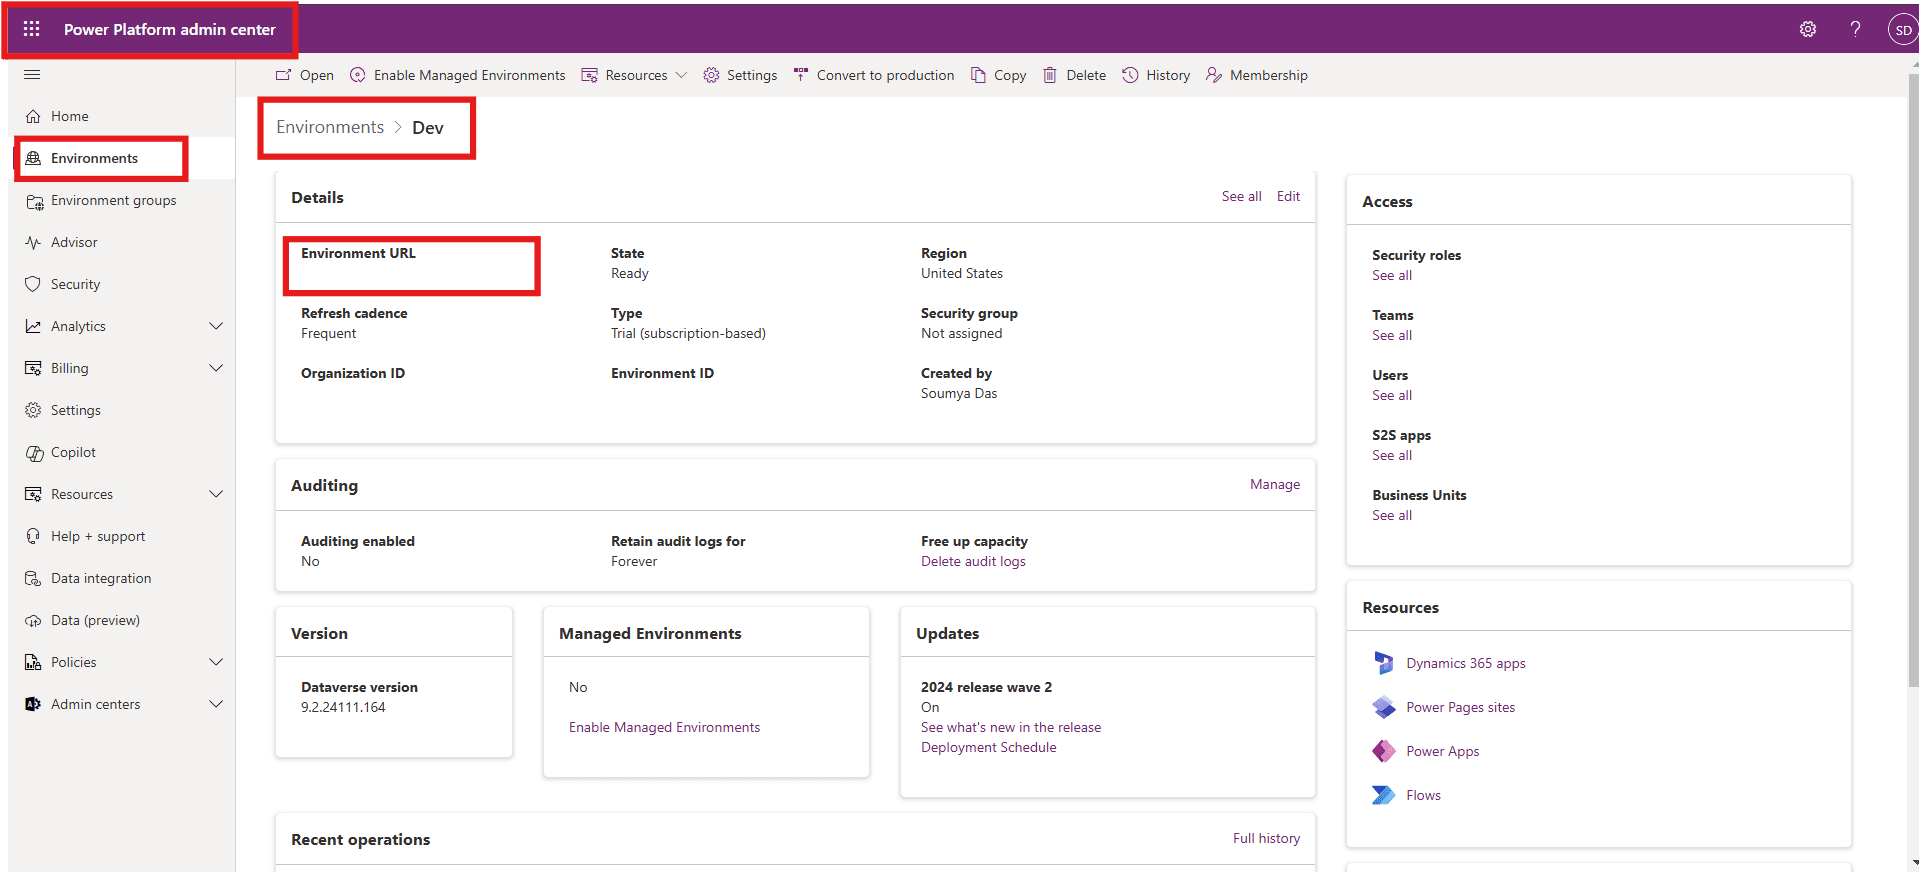
This completes the first phase of the integration; in the second phase, you will have to add this app to your environment. For this, go to admin.powerplatform.microsoft.com – Environments and copy the environment URL on your notepad.
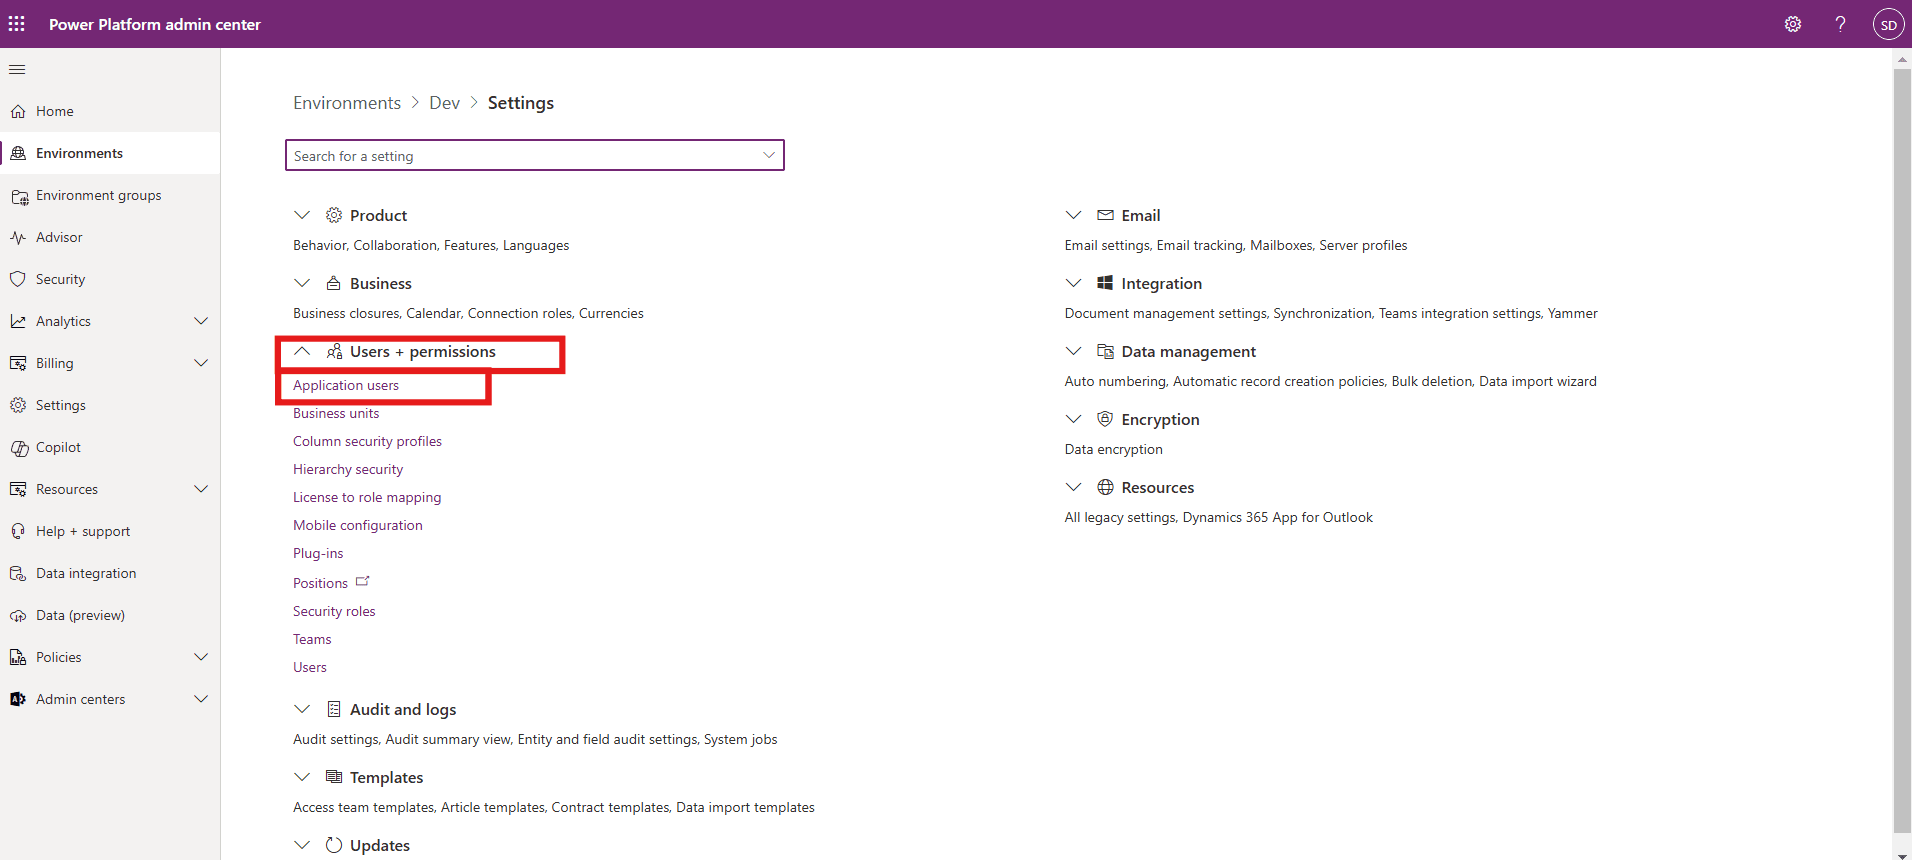
Next, go to settings and click on Application Users under Users + permissions tab.
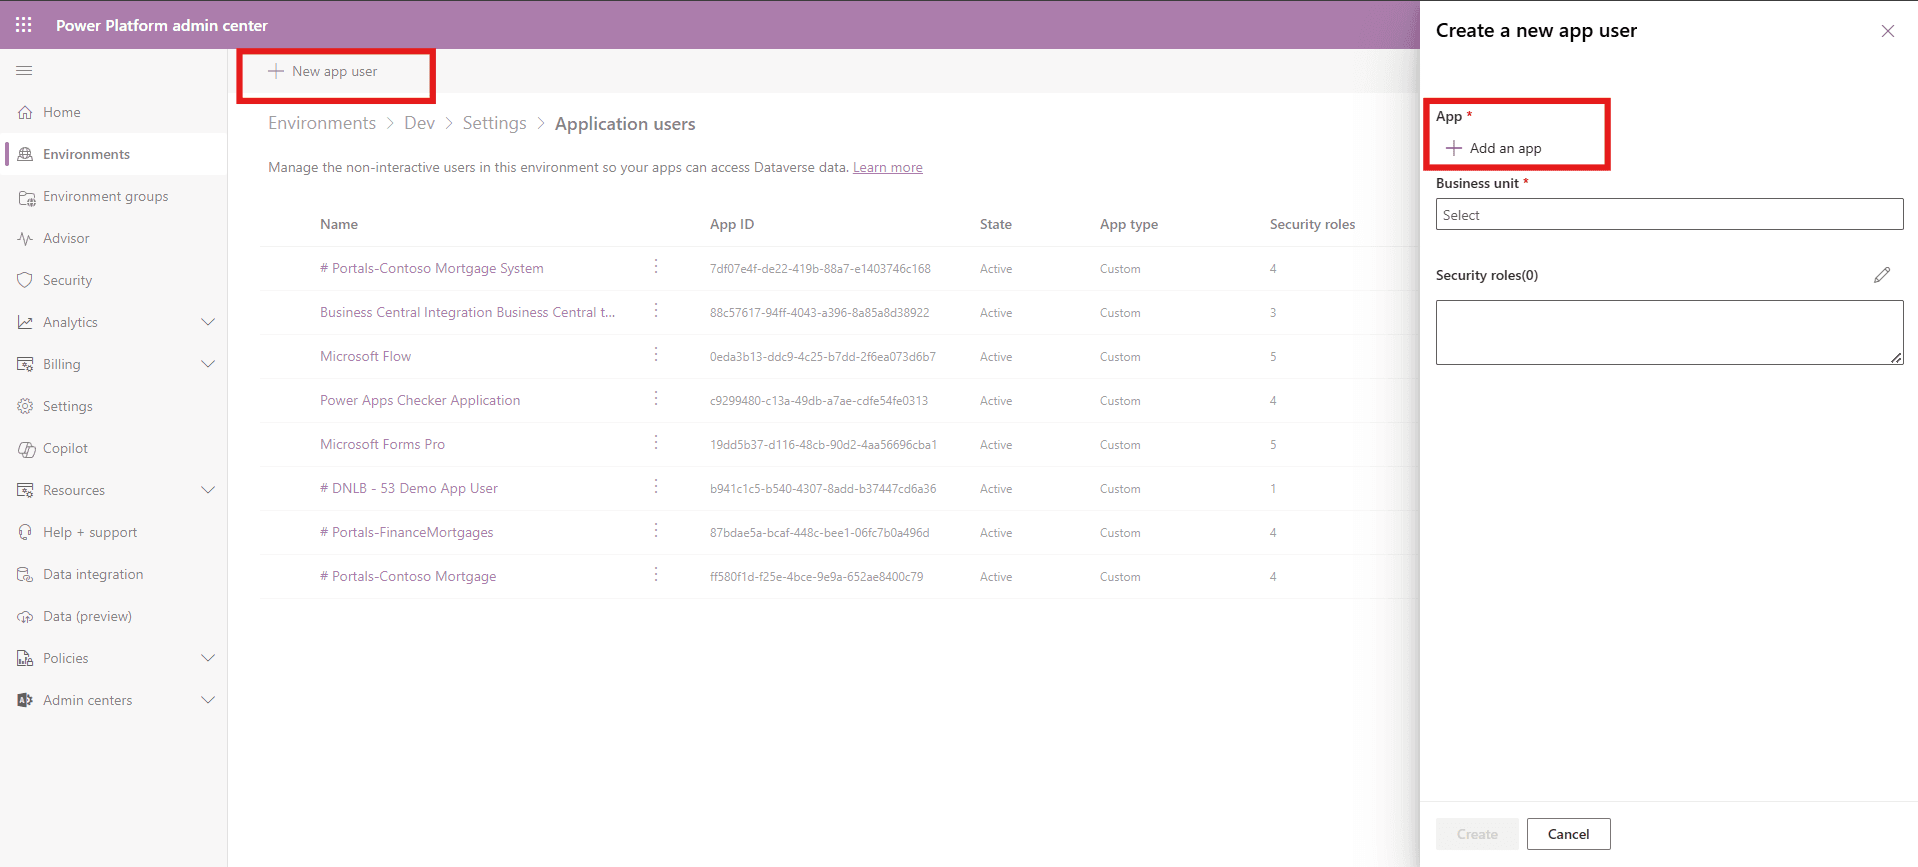
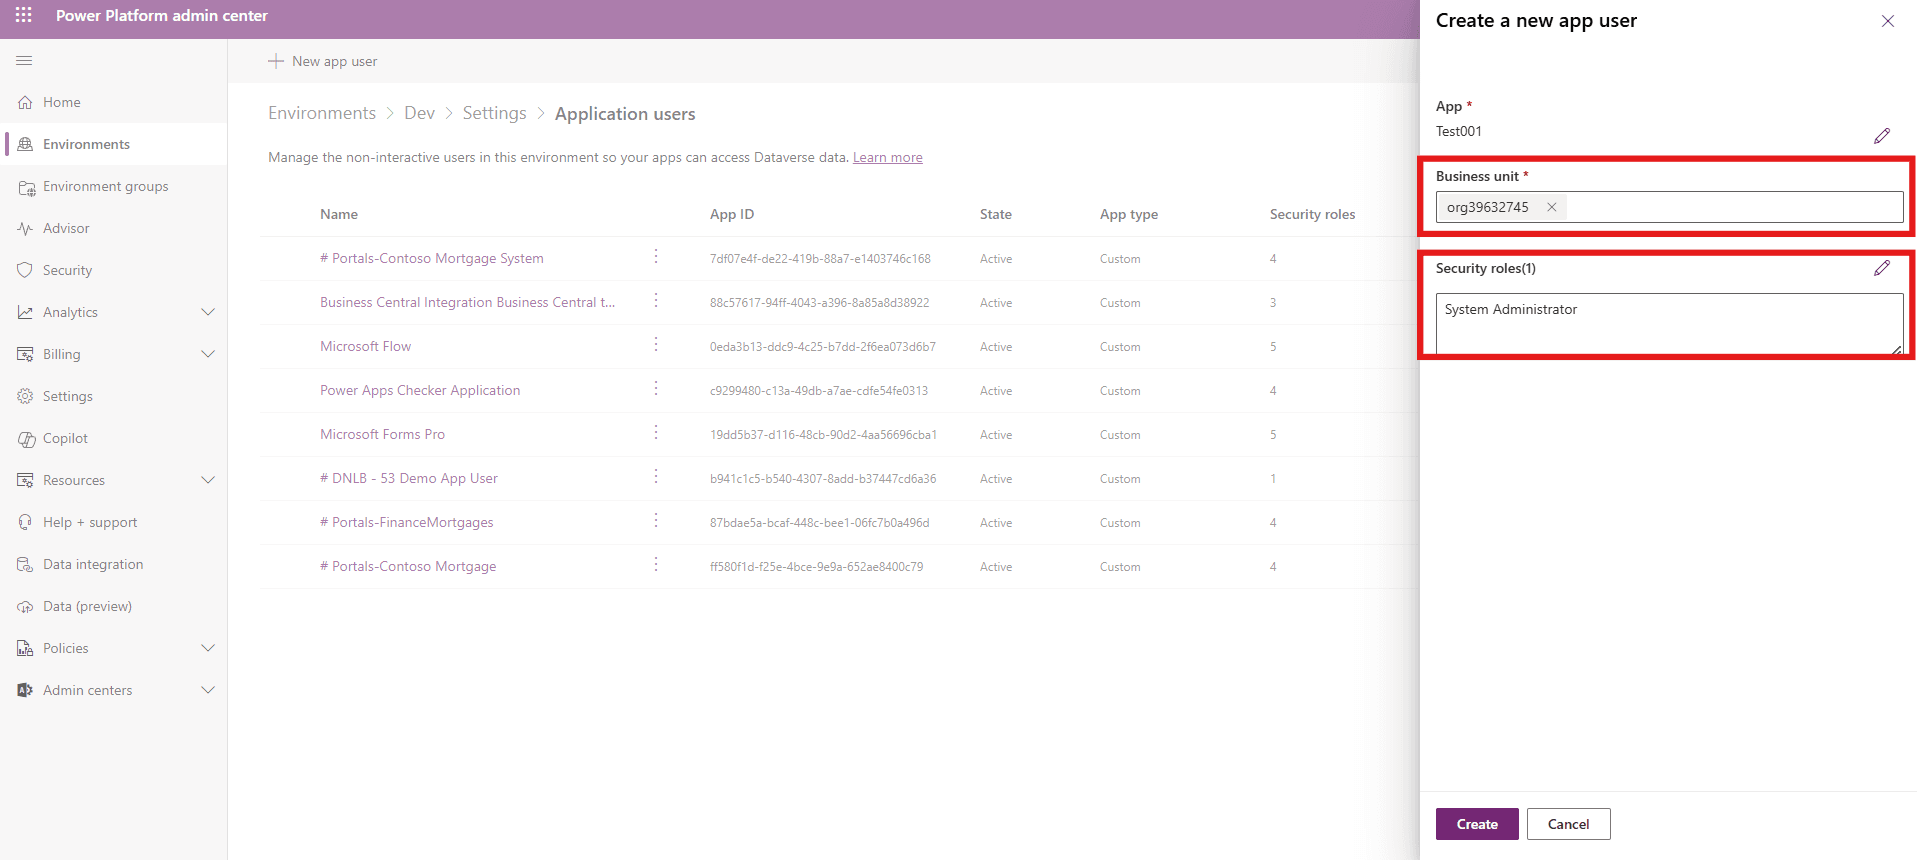
Once you click on New app user, a new screen opens on the right. Click on Add an app.
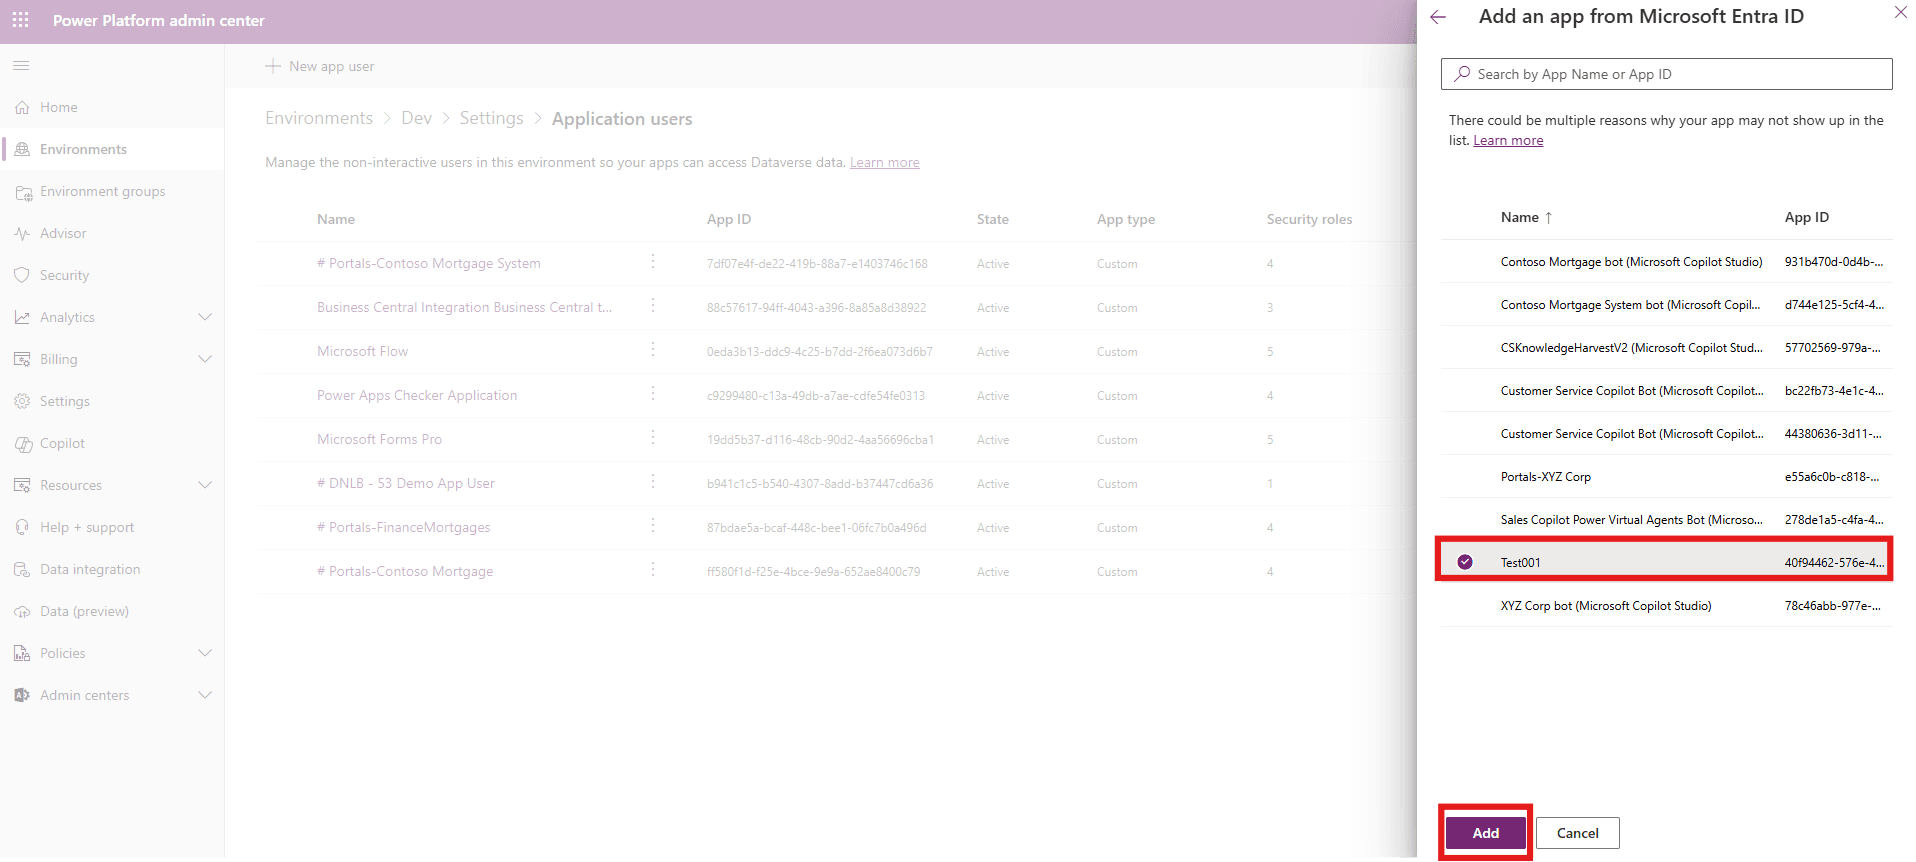
Select your app and add.
Choose your Business Unit and Security role as well and click on Create. Make sure the chosen security role has privileges in the business unit.
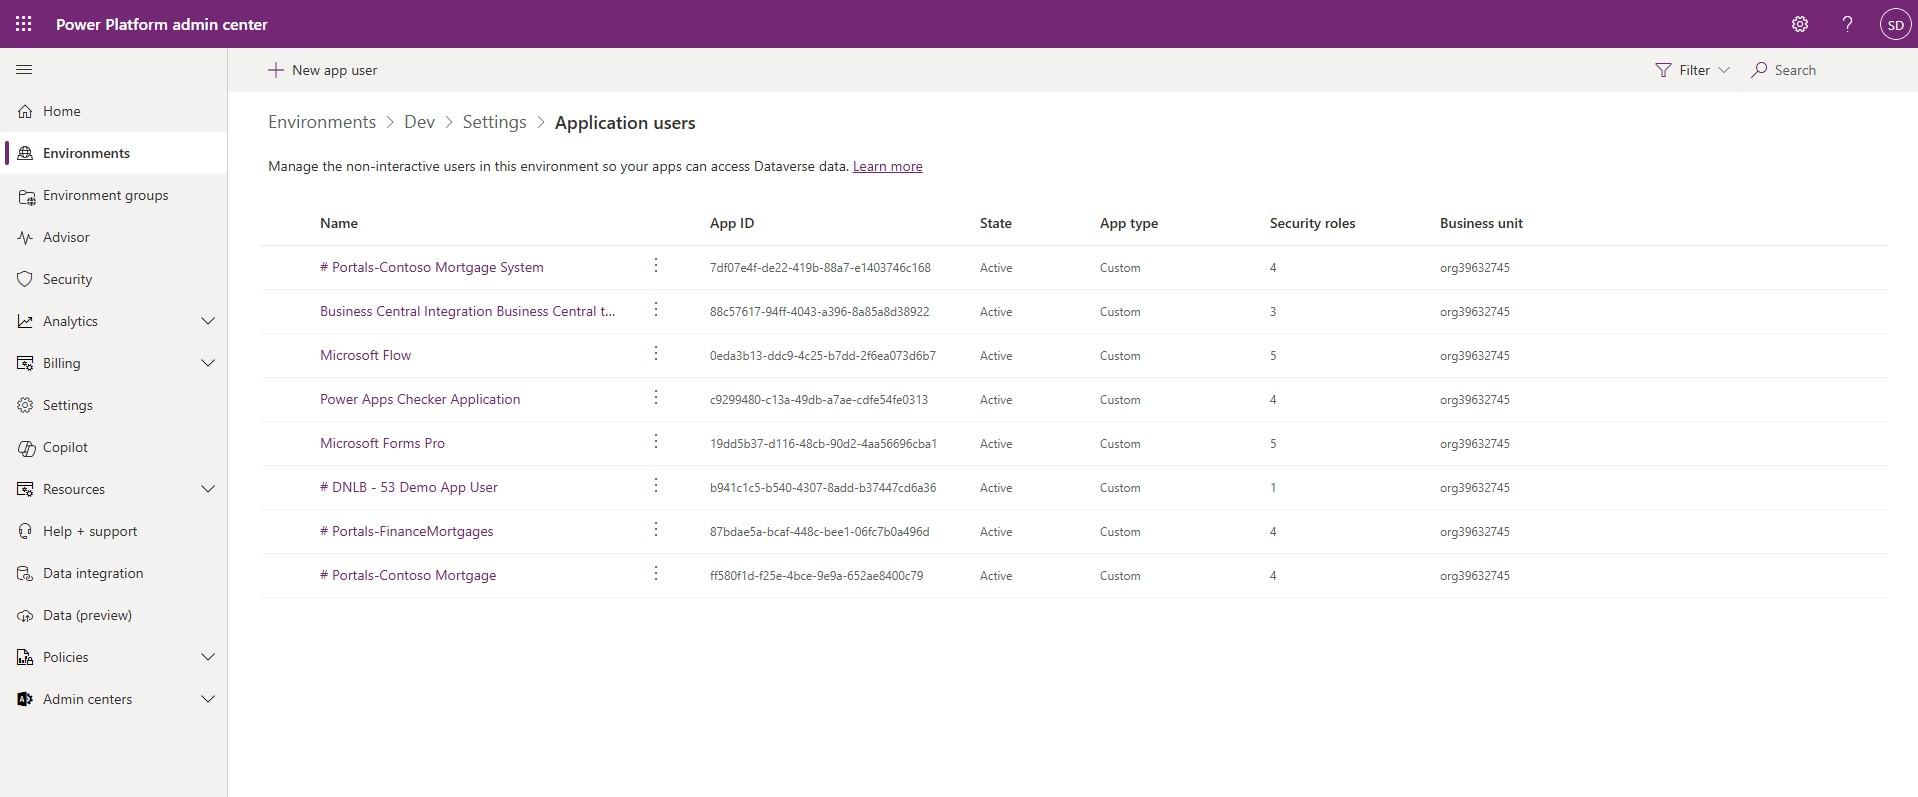
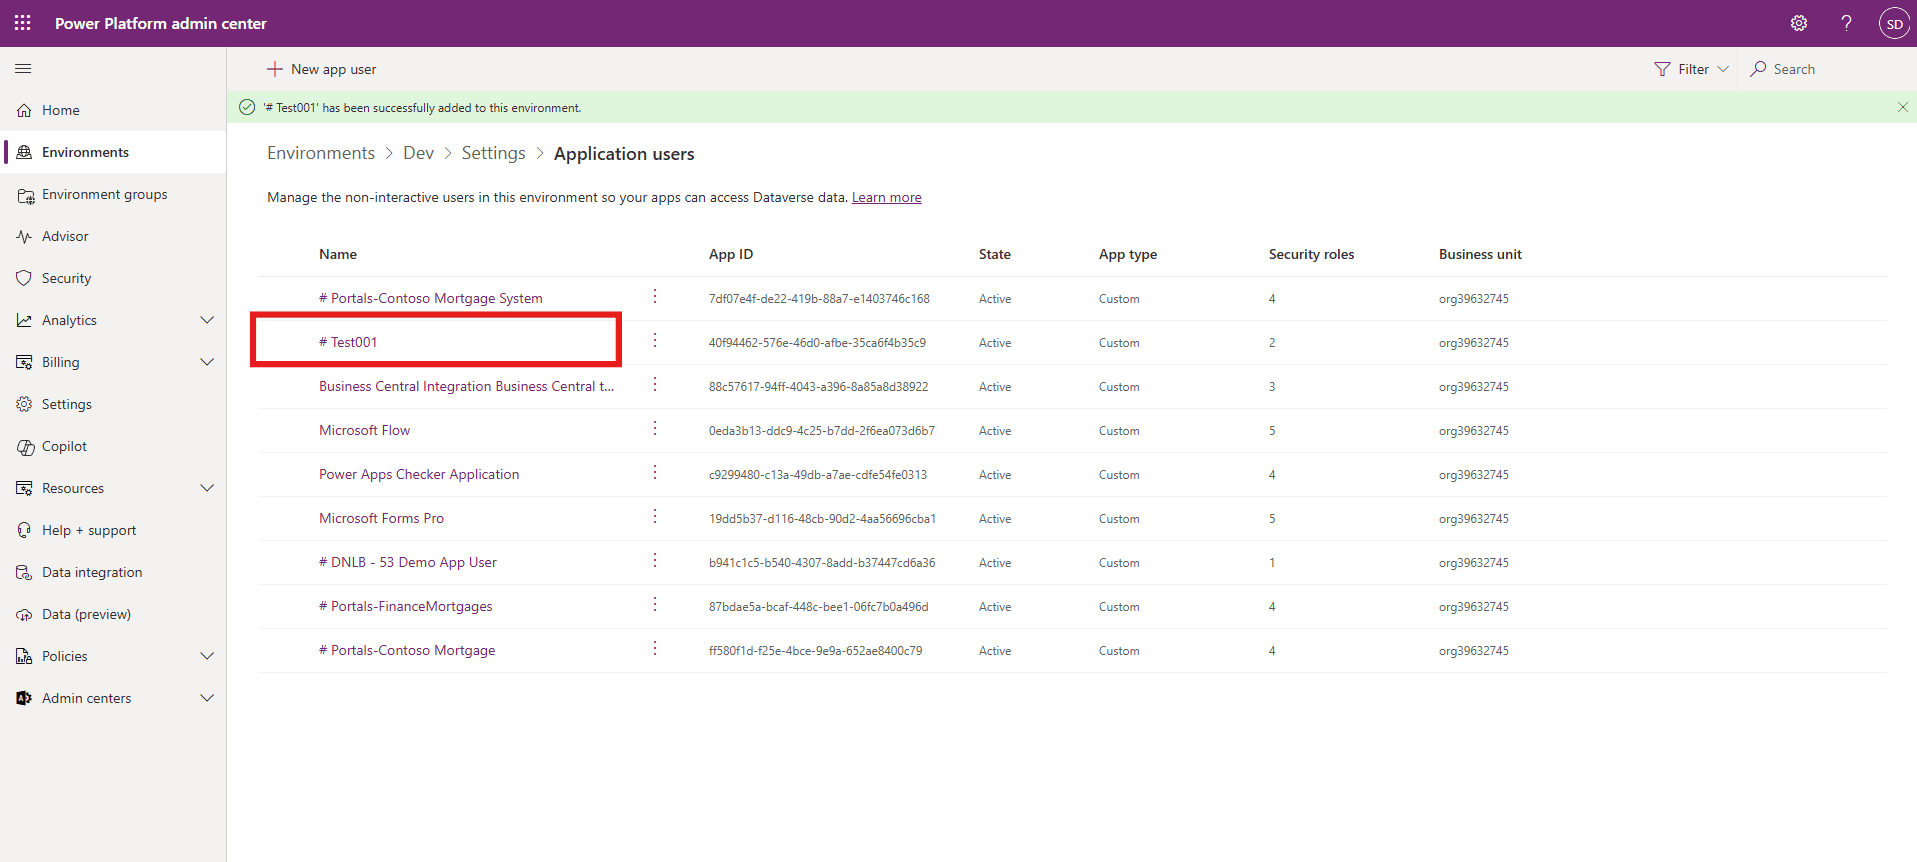
Once done, your app will reflect in the list as shown below.
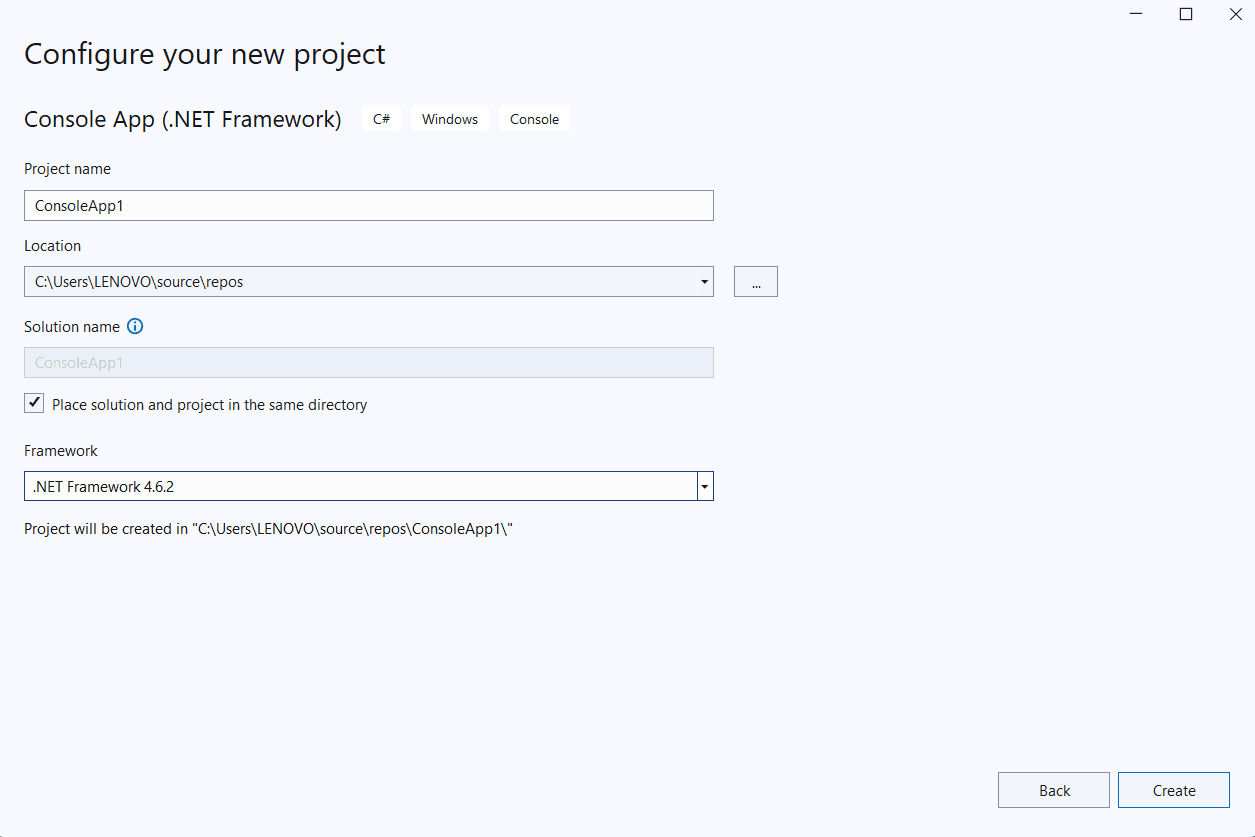
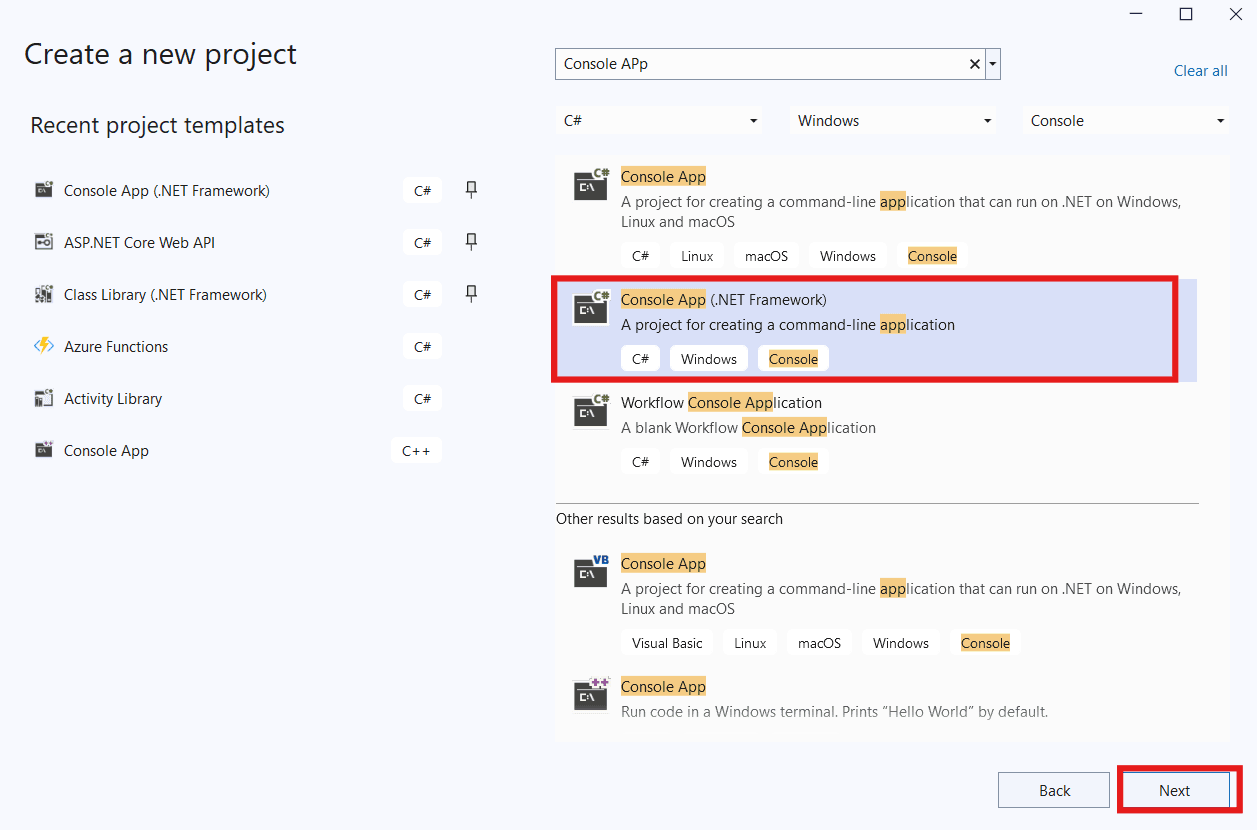
With this the second phase of this integration comes to an end. Finally, we need to connect them using a Dynamics 365 Console Application. Head over to Visual Studio 2022 (choose the latest version) and create a new project. Choose Console App in .NET Framework.
Give your Project a name, choose repository/ path, and framework (It is advised to choose 4.6.2 or 4.8 framework as of the latest update).

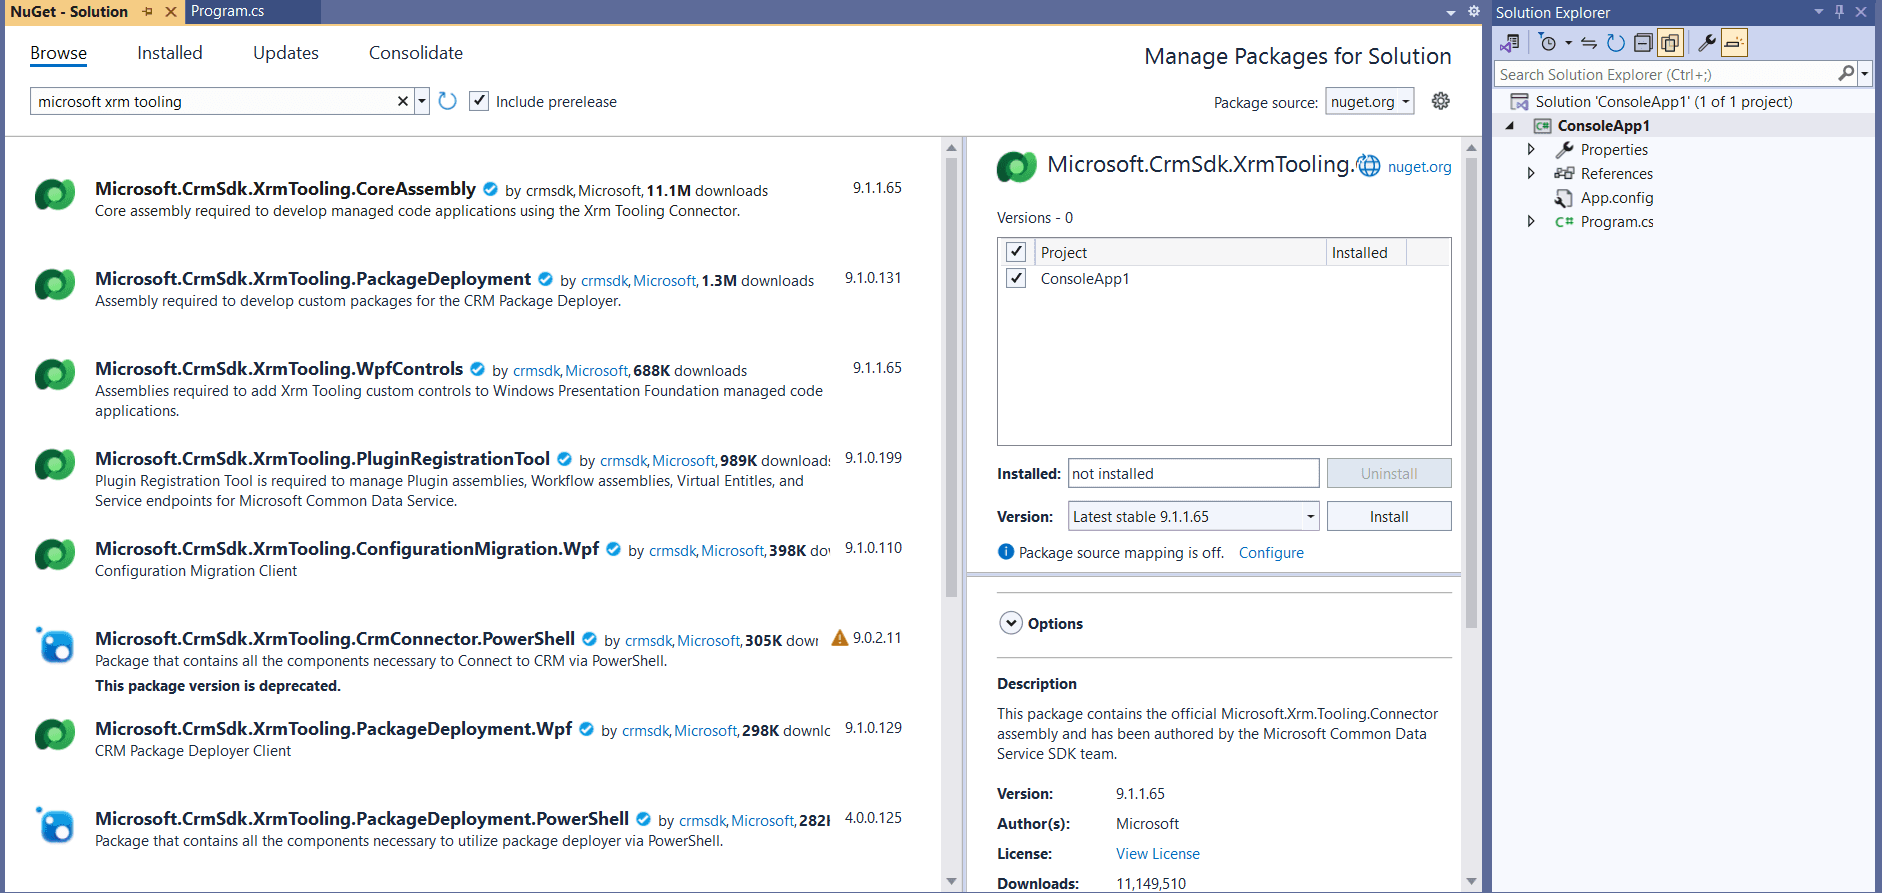
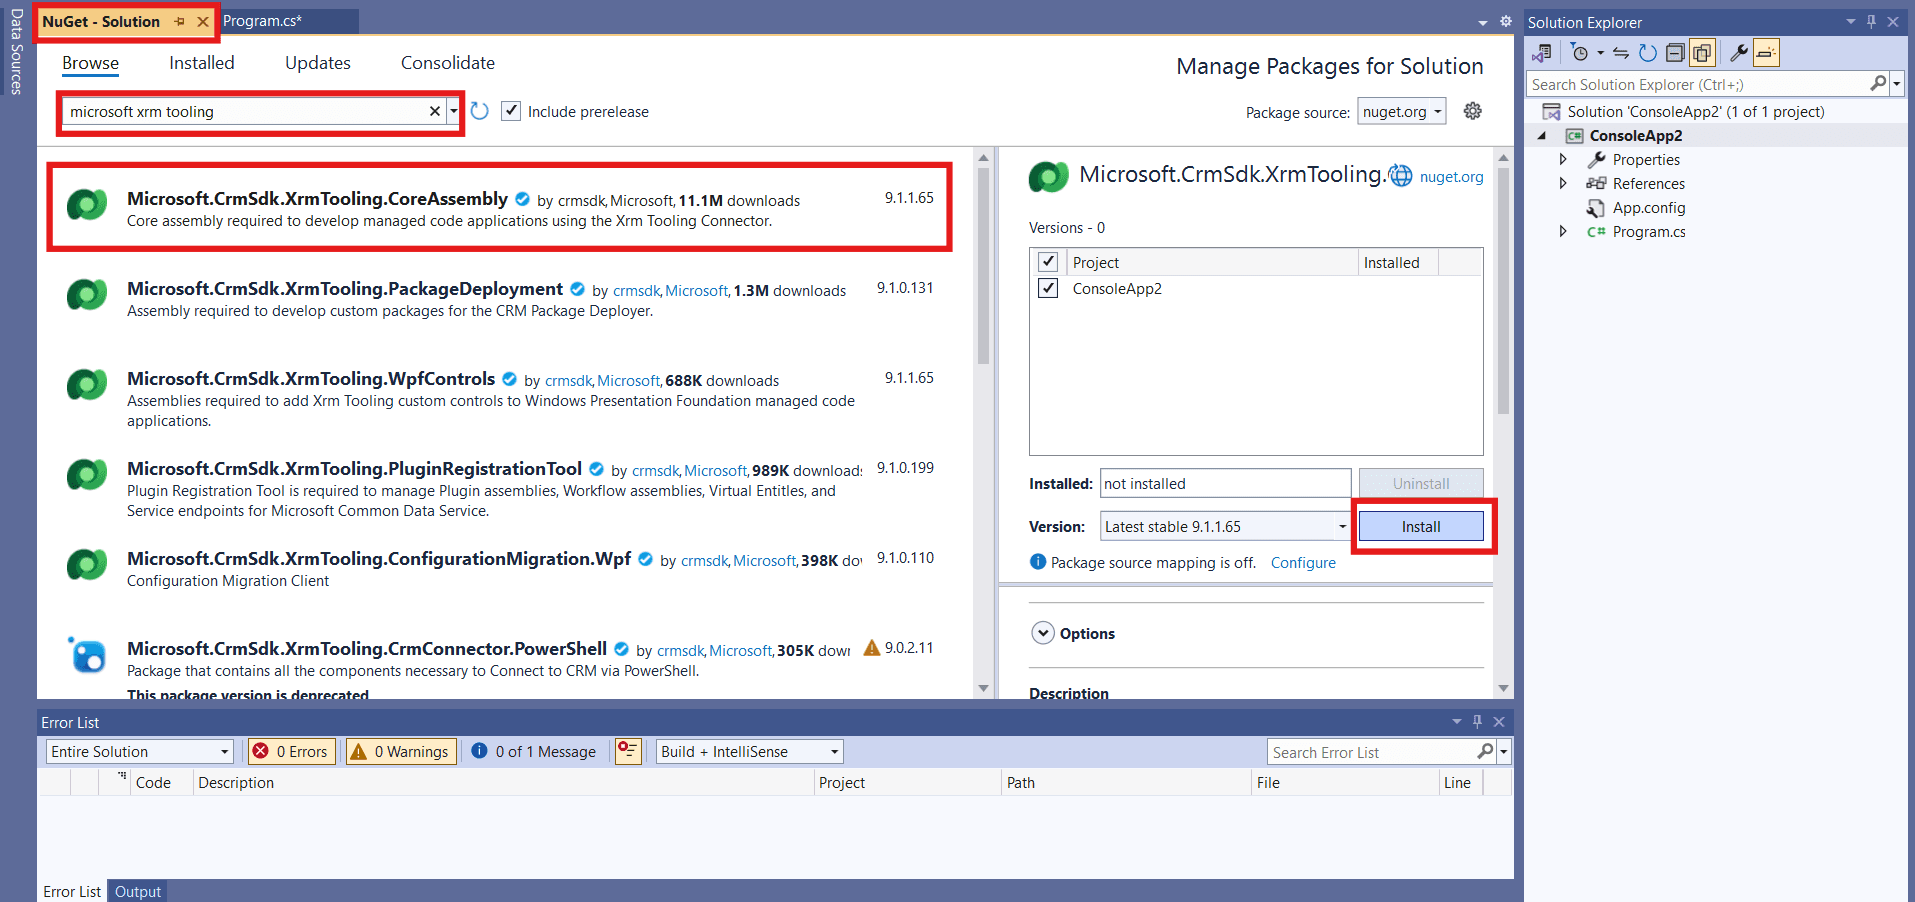
Download Microsoft Xrm Tooling from the NuGet Package Manager.
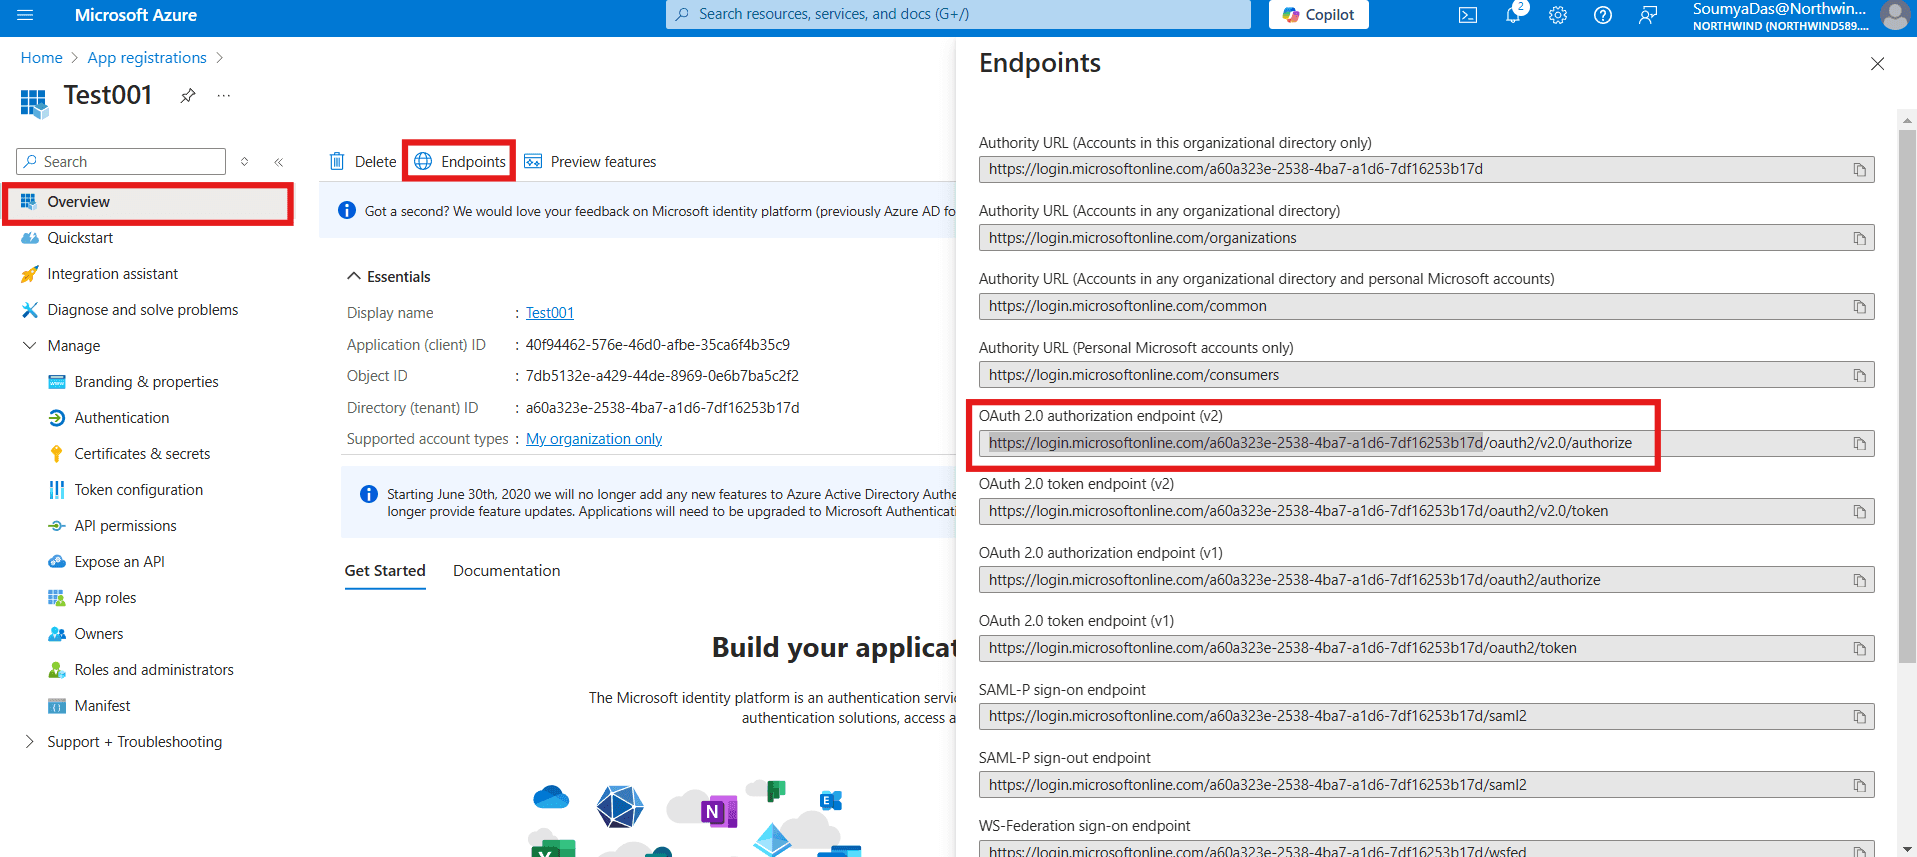
Before connecting to the environment, you will also need the authority id (or redirect URI) which you can find in the Overview Section – go to endpoints and copy the portion of the URL as shown below.
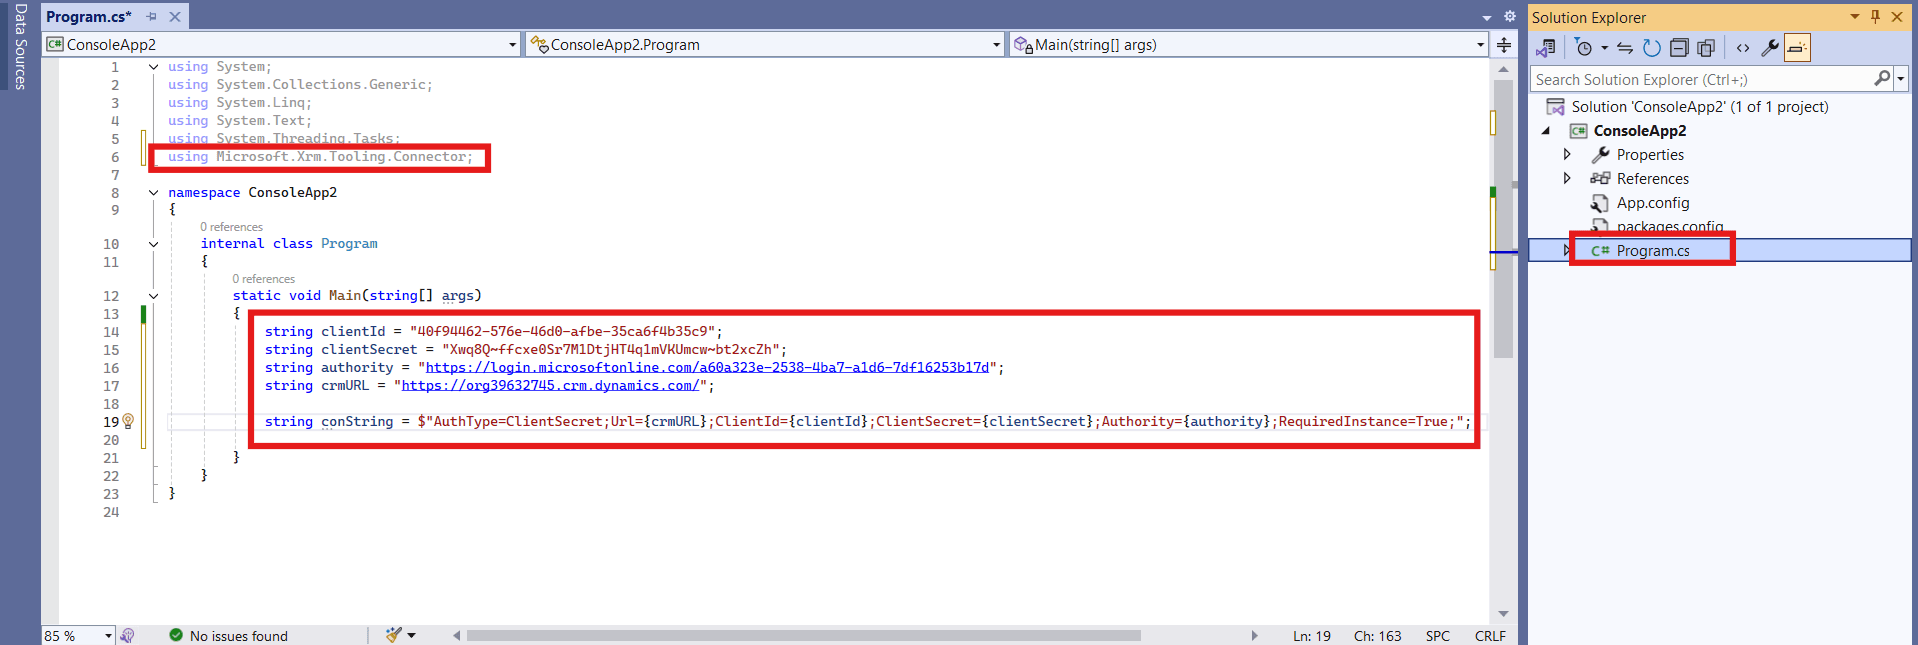
Write the code within the default Program.cs in your VS to establish the connection.
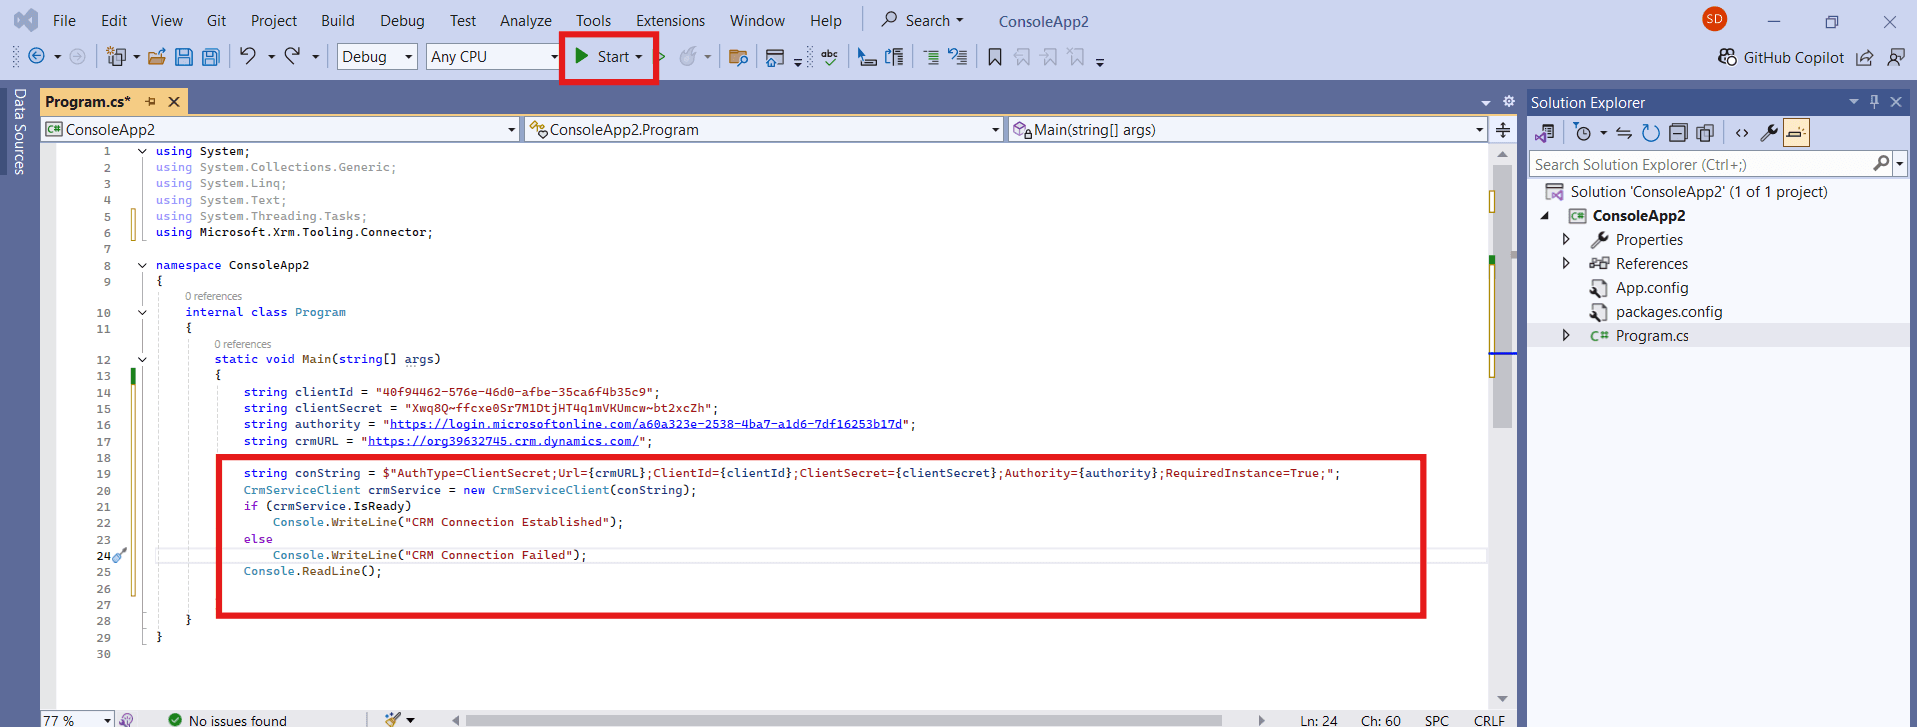
To check for the connection is established or not, you can create a CrmServiceClient object using the provided connection string to connect to the Dynamics 365 CRM environment and click on Start play button.
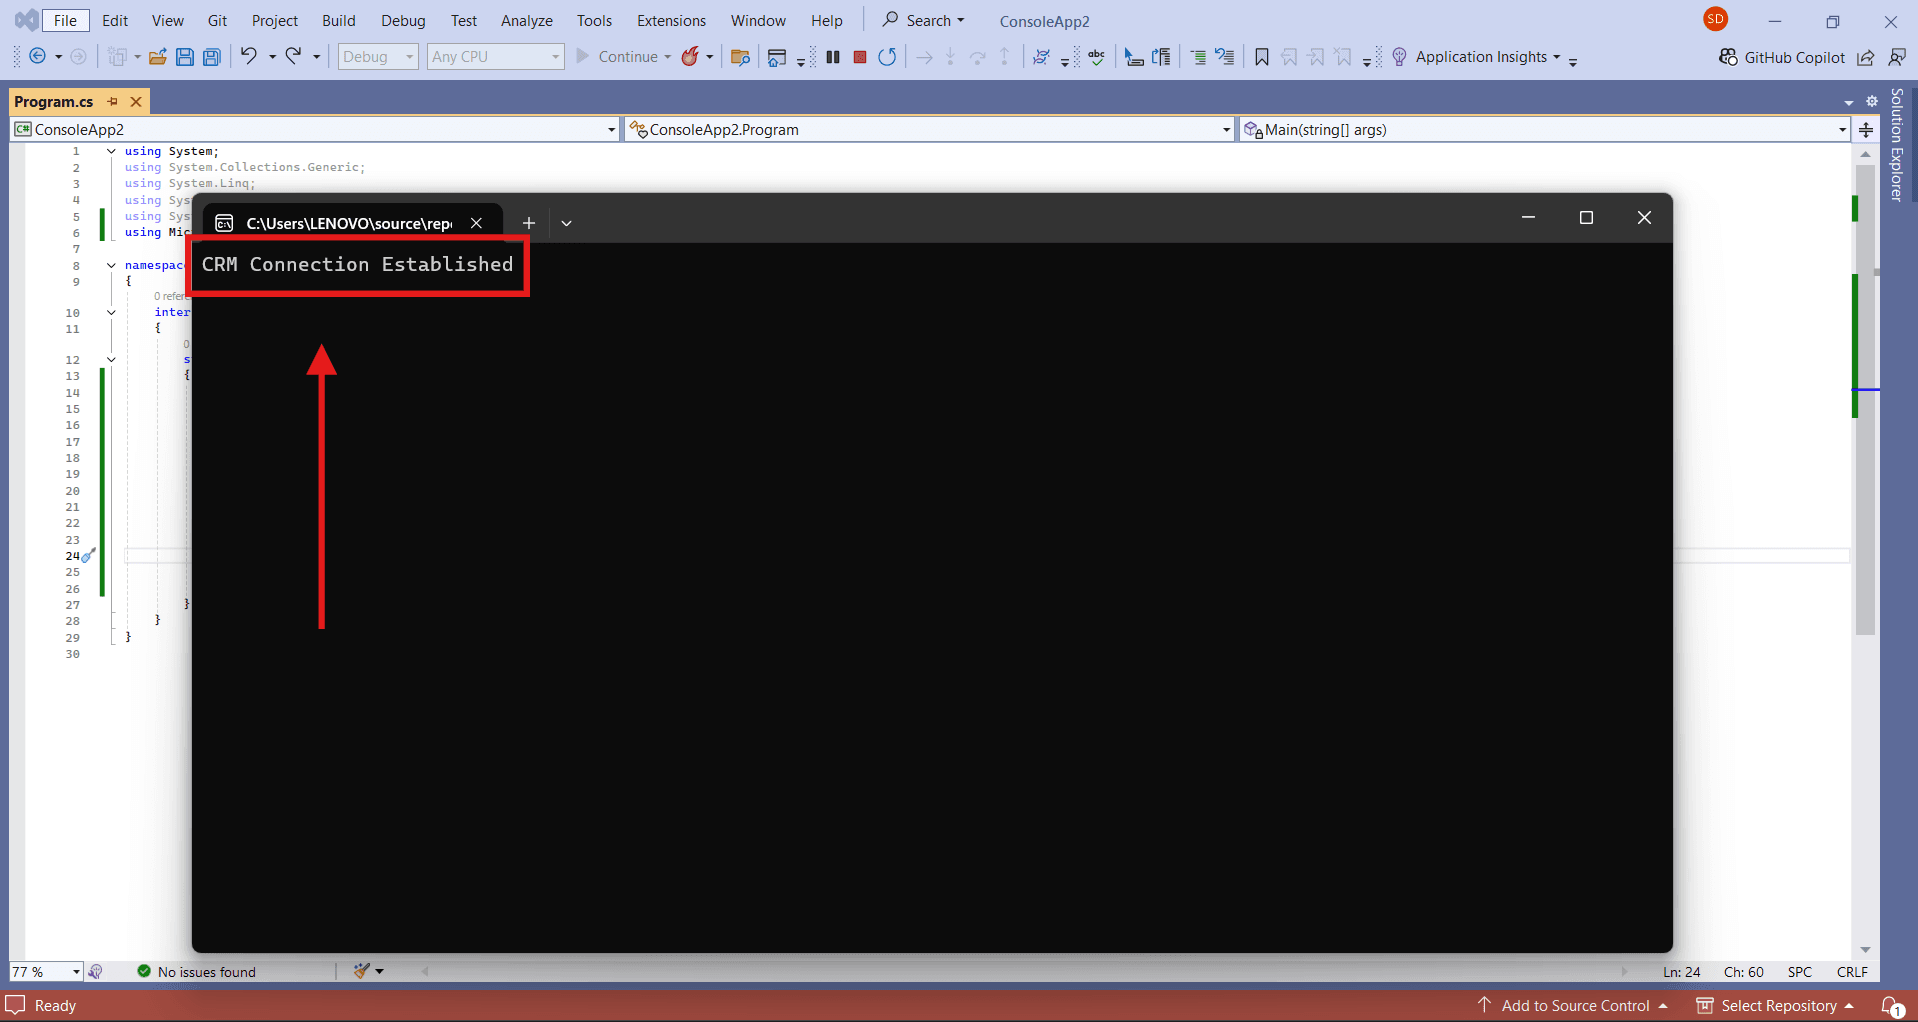
If the connection is established, the same message will reflect on the console.
Frequently Asked Questions (FAQs):
1. What is Application Registration used for in this process?
Application Registration in Azure AD provides the Application ID and Secret needed for the console application to authenticate with Dynamics 365.
2. Why do we need an Application User in Dynamics 365?
The Application User allows the registered application to access Dynamics 365 data based on assigned permissions.
3. Can one application connect to multiple Dynamics 365 environments?
Yes, by creating separate Application Users for each environment and configuring the application to switch between them.
4. Why not use user credentials for this connection?
Using Application Registration is more secure, avoids storing user credentials, and is better for automated processes.
5. Can this setup be used for real-time data updates?
Yes, the application can interact with Dynamics 365 in real time, depending on how the API calls are structured and the application is configured.

