What is a Custom Connector?
In Power Apps, connectors allow you to integrate with various data sources such as Office 365, SharePoint, SQL Server, and more. A custom connector is a wrapper around a web API that allows Power Apps, Power Automate, and Azure Logic Apps to communicate with it. This is particularly useful if you are working with internal systems or third-party services that do not have built-in connectors. By defining your connector, you can leverage the API’s endpoints in your Power Apps and automate workflows.
In this blog, we will walk through the process of creating a custom connector in Power Apps.
Benefits :
Improved Automation: Extend Power Automate workflows to a wider range of services.
Custom API Interactions: Fine-tune how your app interacts with APIs, ensuring relevance and security.
Data Security: Enforce authentication methods like OAuth 2.0 and API keys for secure access.
Reusable: Use custom connectors across multiple apps and environments.
Setting up Custom Connector in Power Apps
Firstly, go to Power Apps Studio and log in with your organizational account.
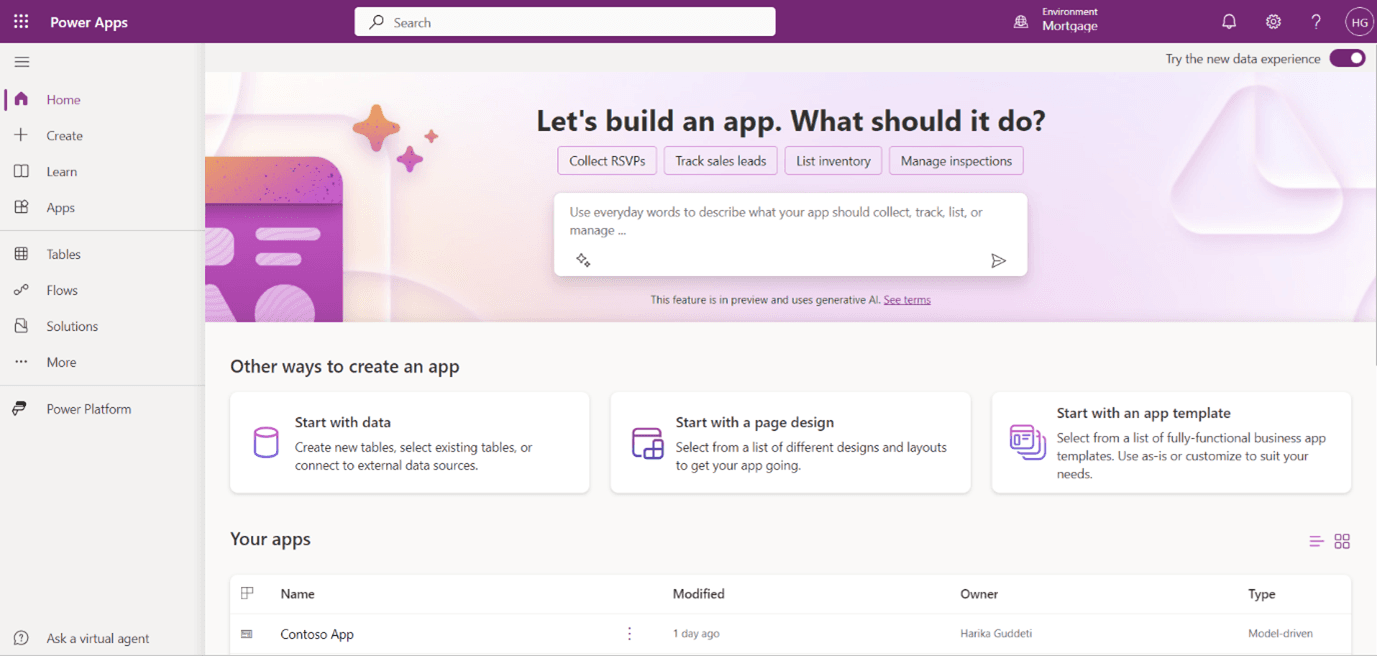
In the left pane of the dashboard, click on Solutions to view and choose your solution.
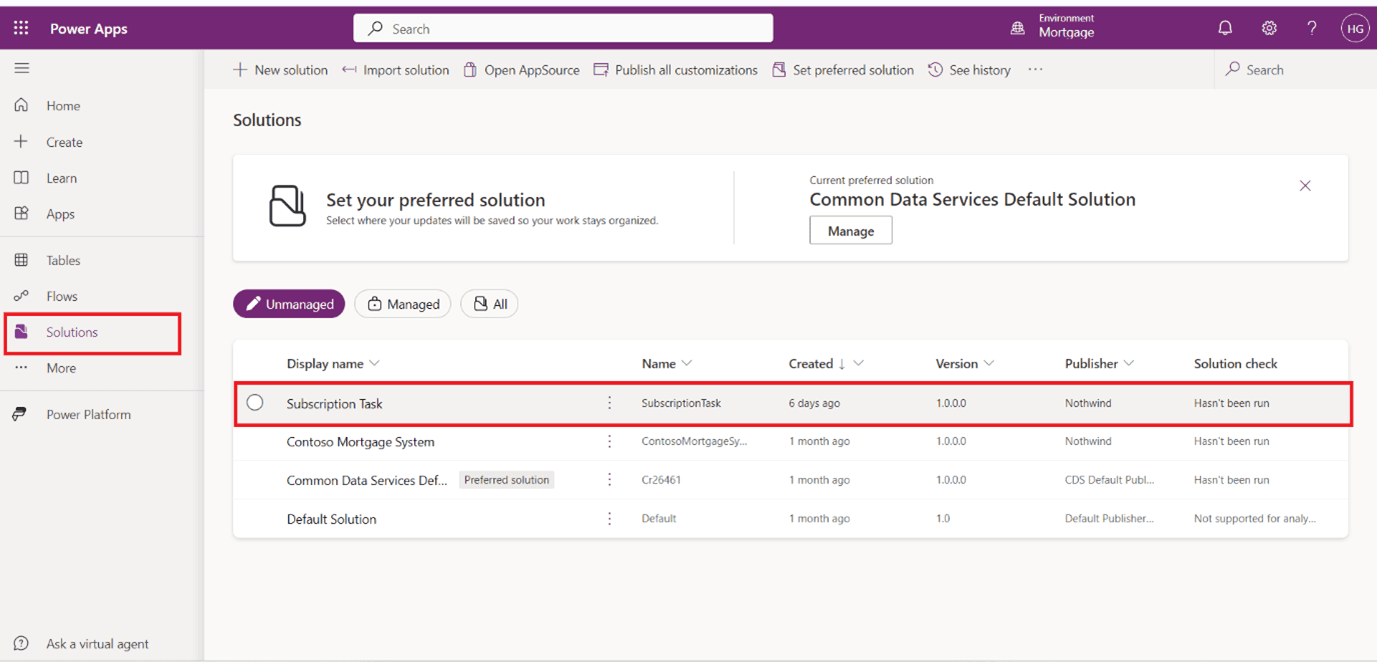
Click on New, then select Automation and choose Custom Connector to begin creating a new connector.
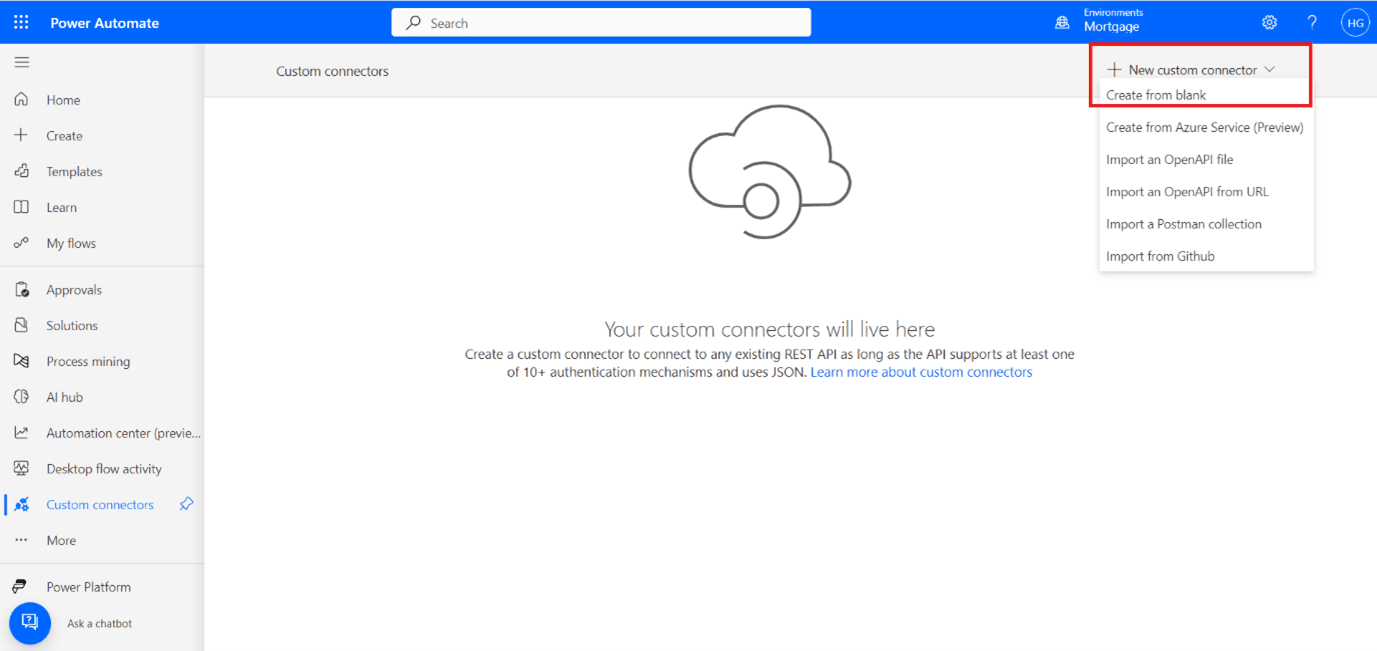
Click on New Connector and then select Create from blank to start defining your custom connector.
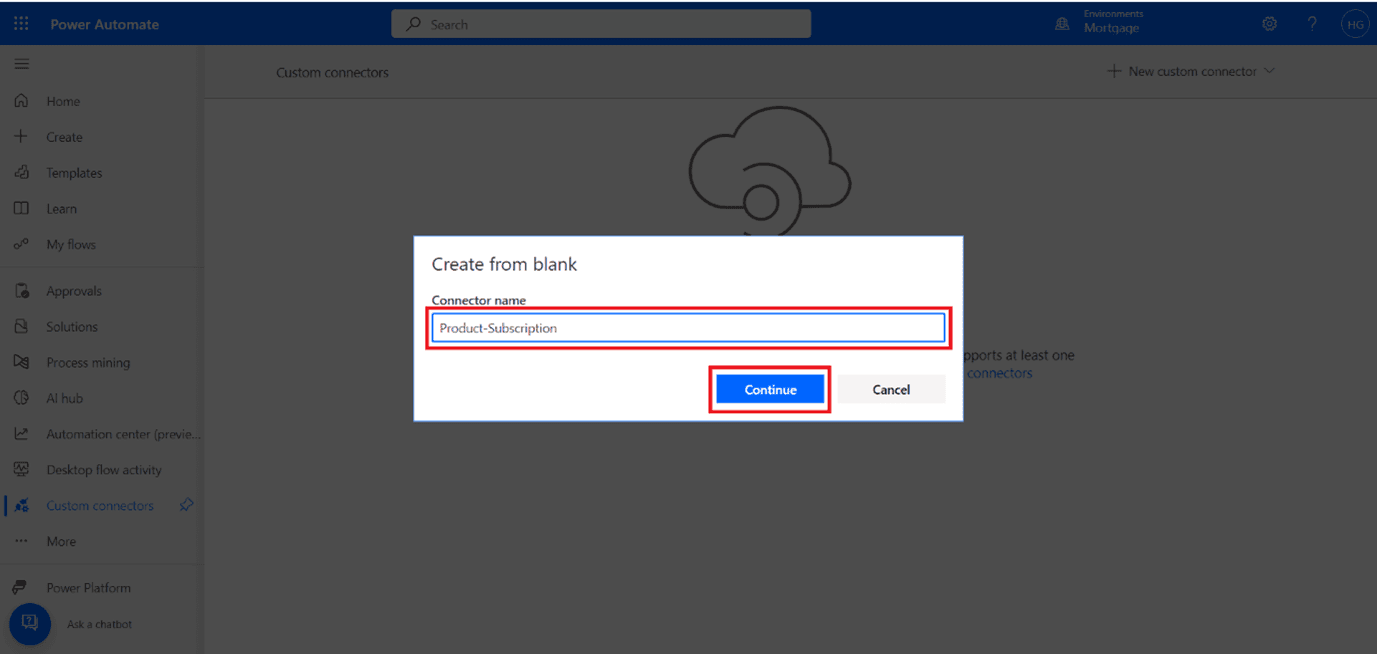
Specify a descriptive name for the connector and click on continue.
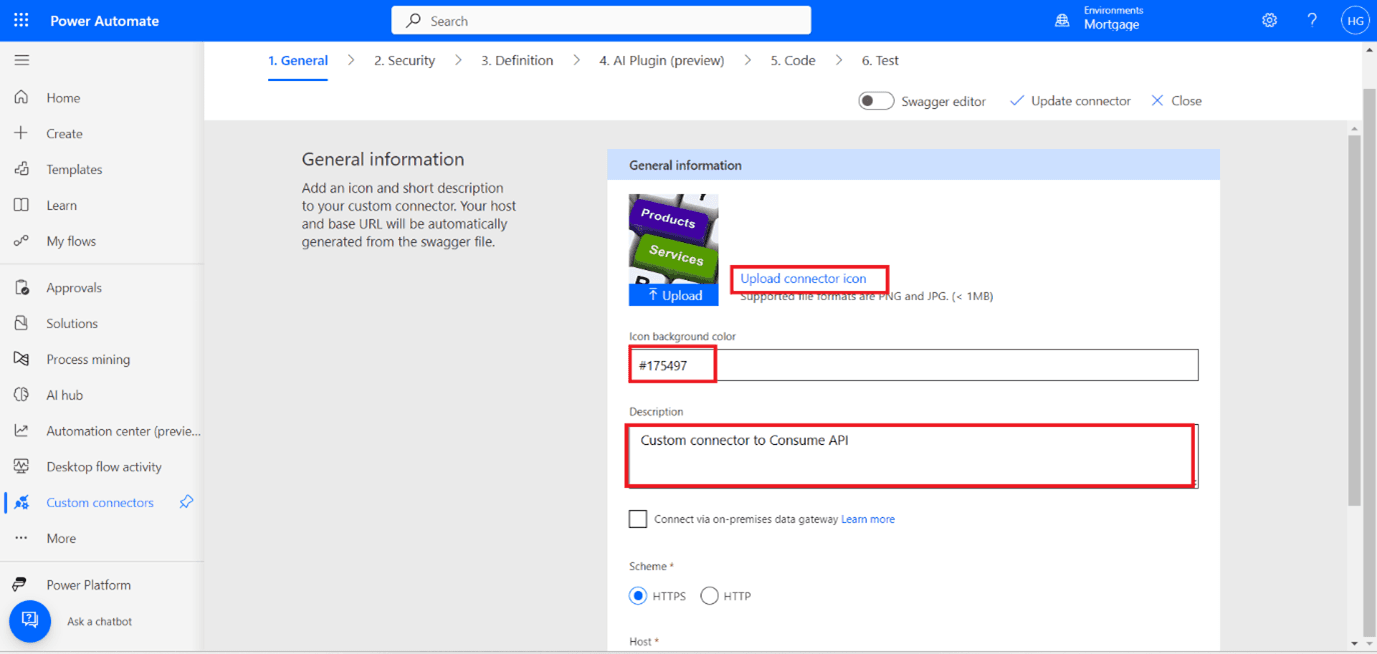
Upload an icon for the connector, select a background colour that complements the design, and add a brief description.
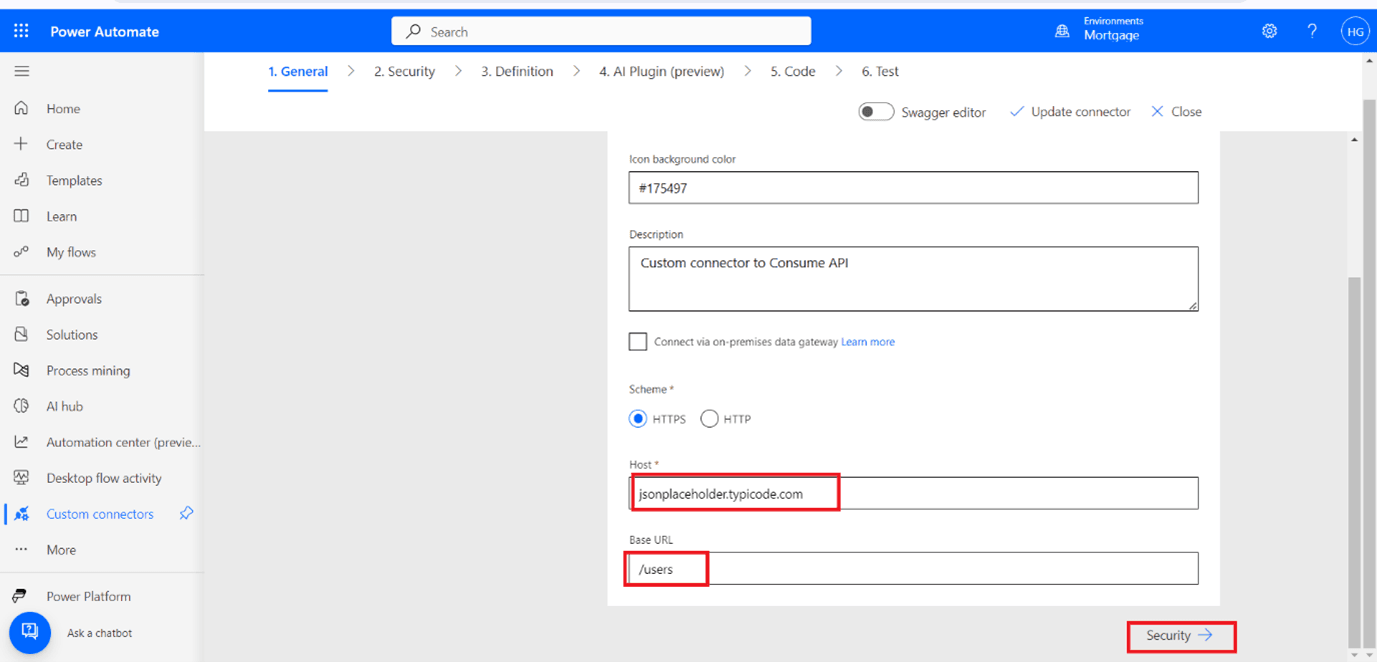
Enter the API host and base URL, then click on the Security tab to set up authentication for your connector.
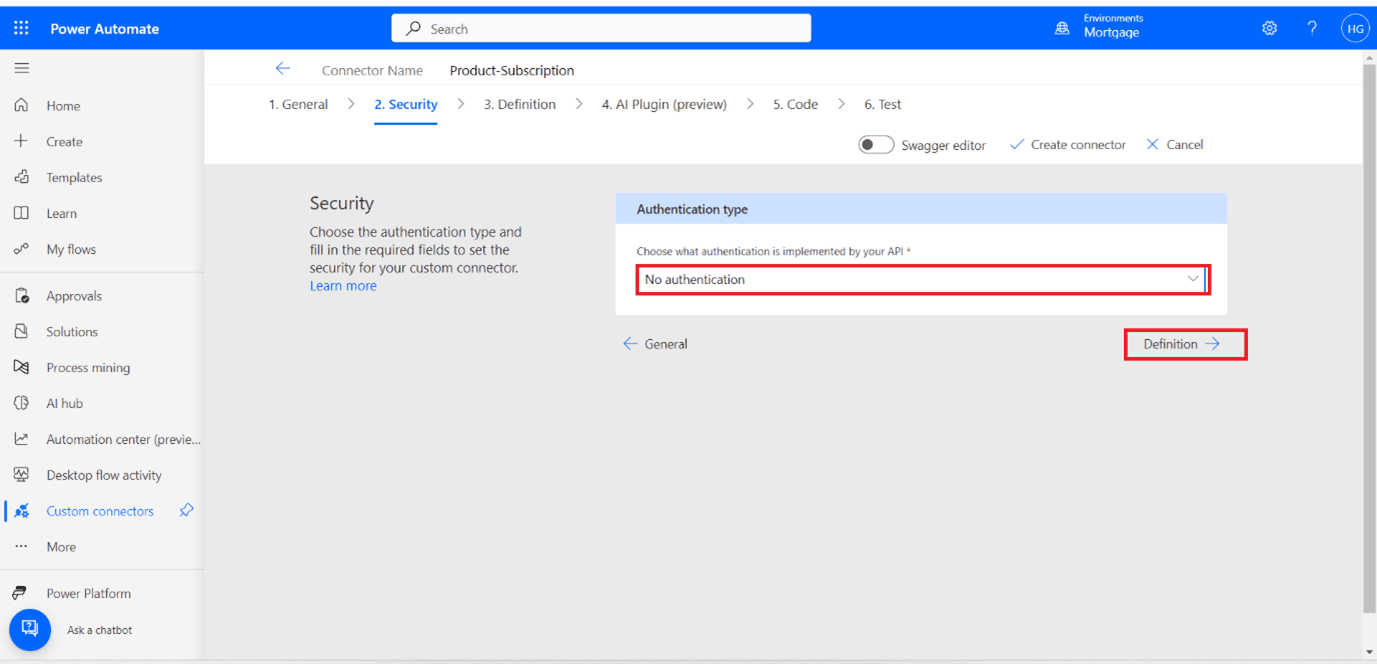
Select No authentication from the dropdown menu to allow access without any authentication requirements and then click on Definition.
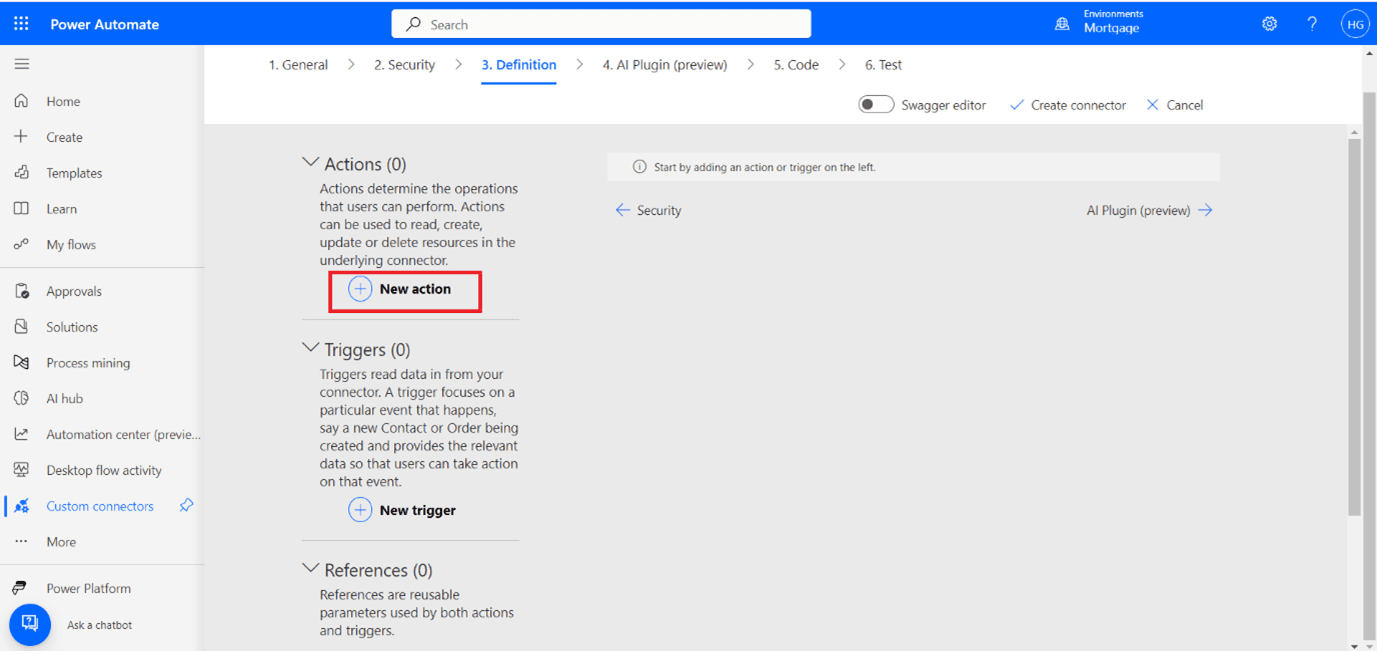
In the Definition section, click on New Action to define the API operations for your connector.
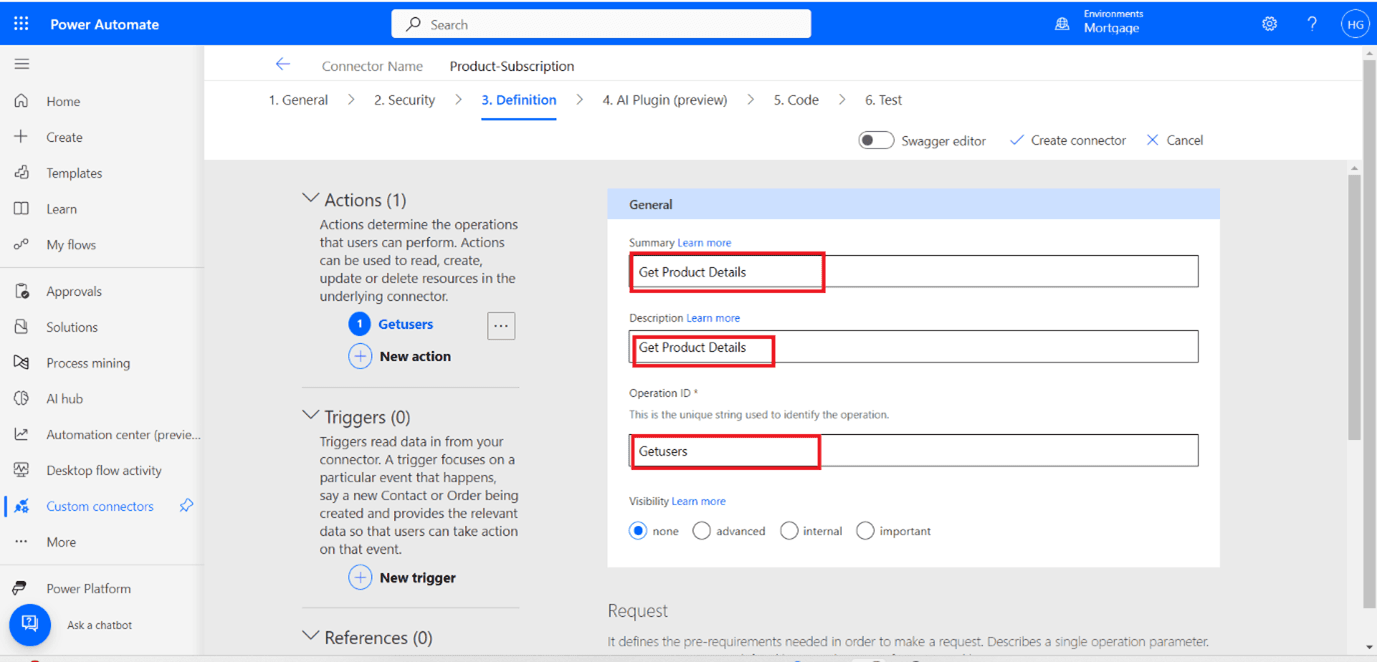
In the Definition section, fill in the Summary, Description, and Operation ID fields to provide details about the API operation.
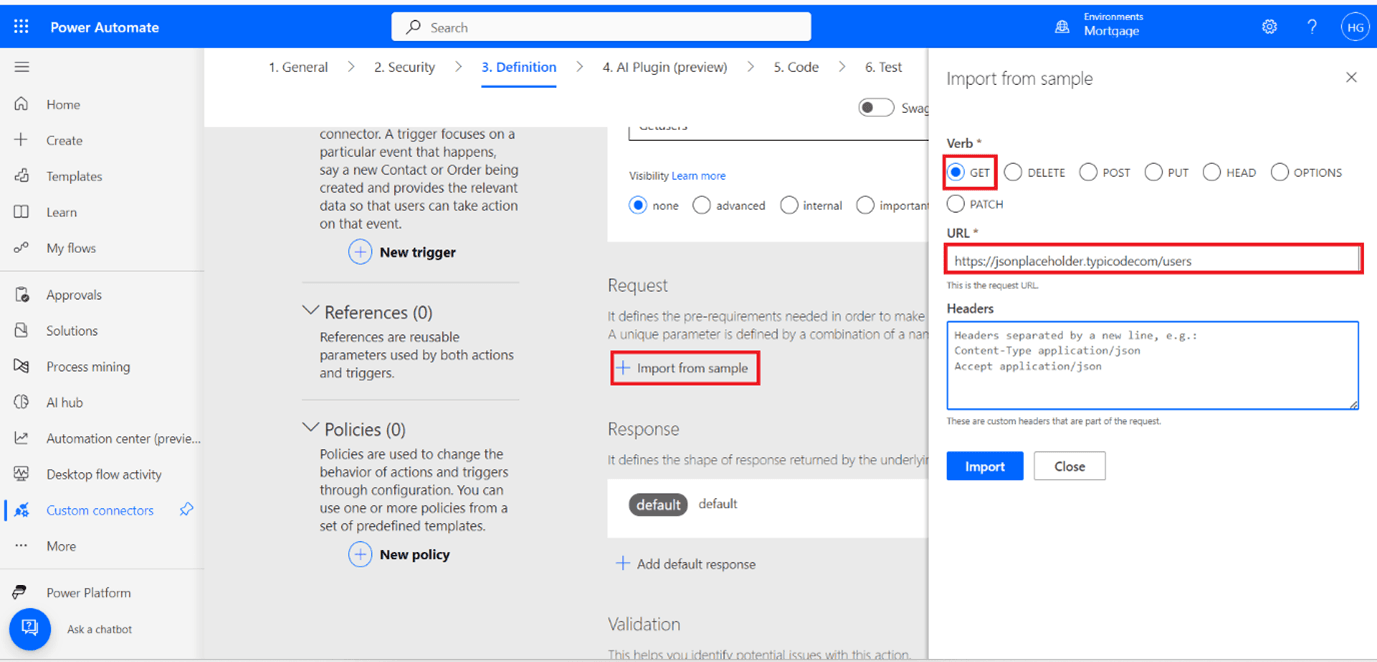
In the Request section, click Import sample, choose the GET method, and provide the URL for the API endpoint.
In the Response section, select Choose default response and enter the JSON response in the body.
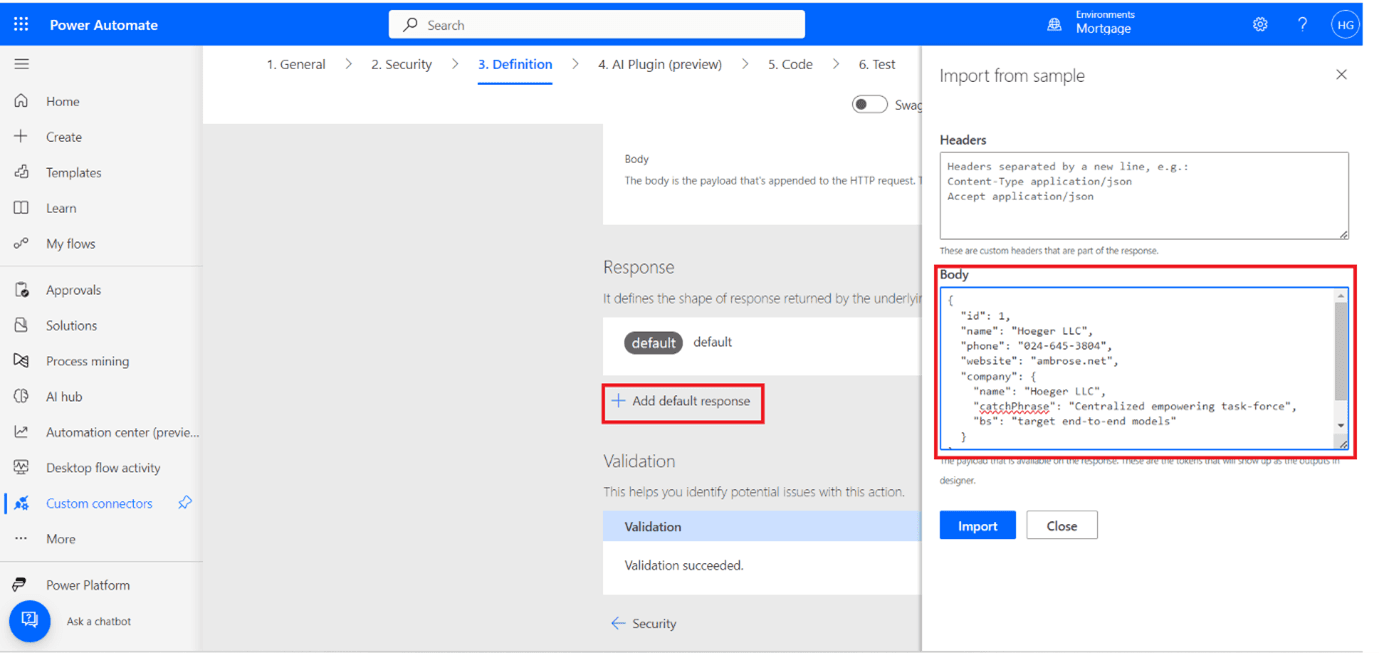
Now click on the AI plugin.
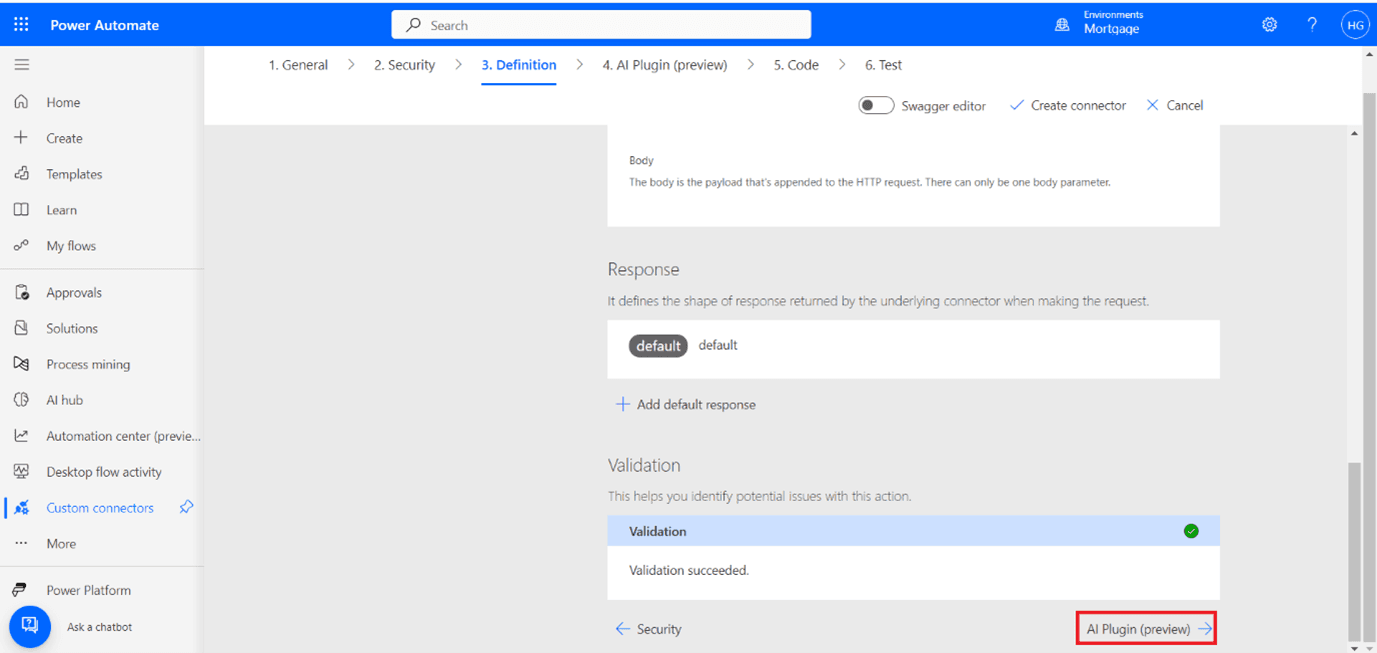
Click on Code and then create or update the code as needed for your connector.
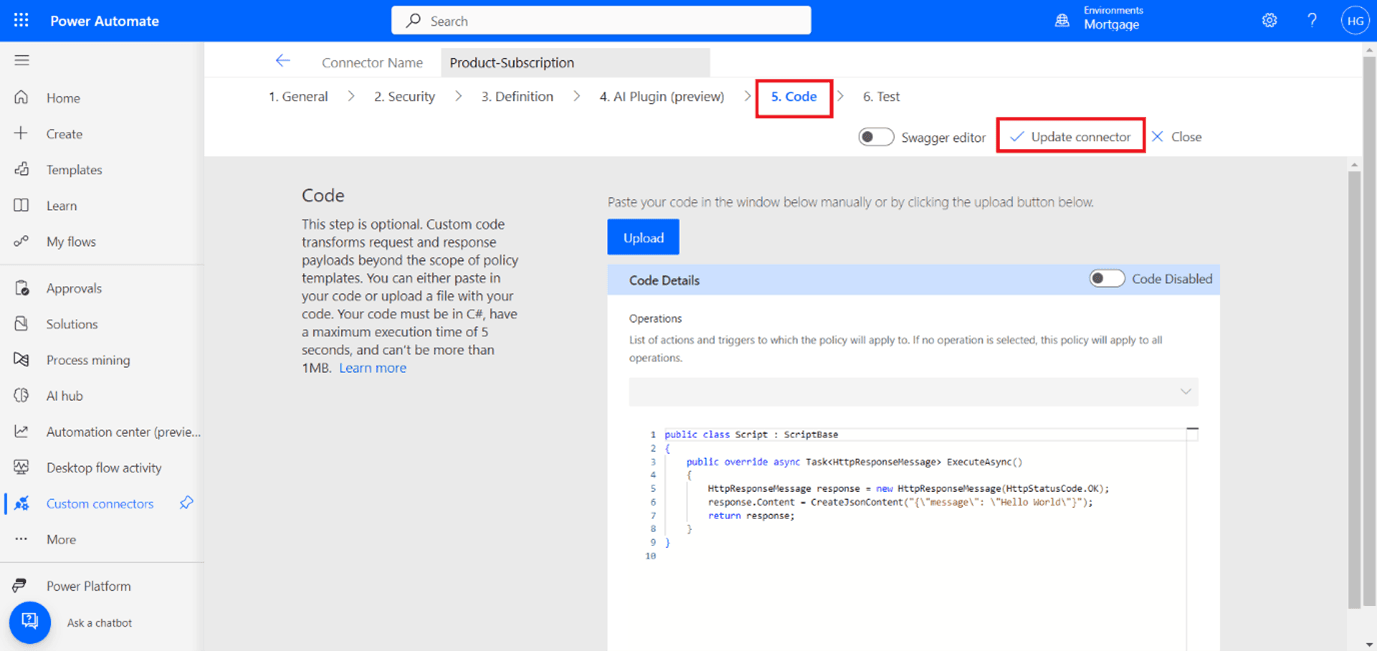
Click on Test, then select the connection to test your connector.
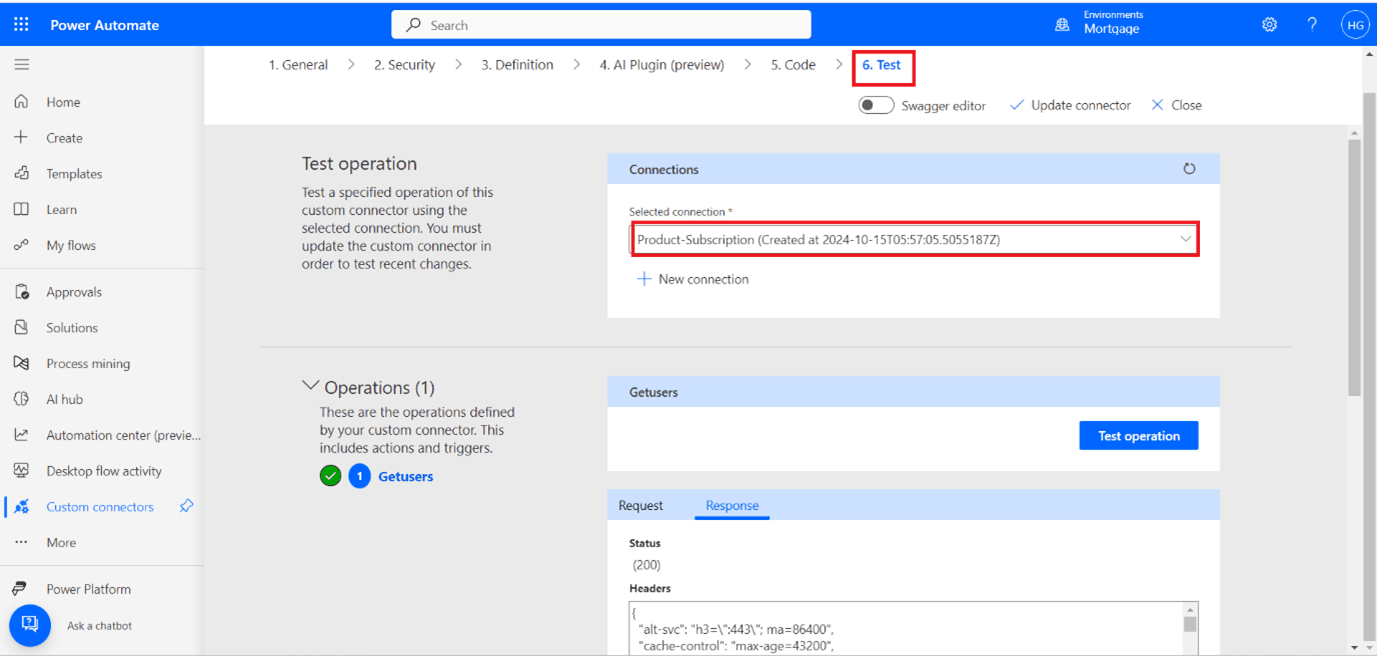
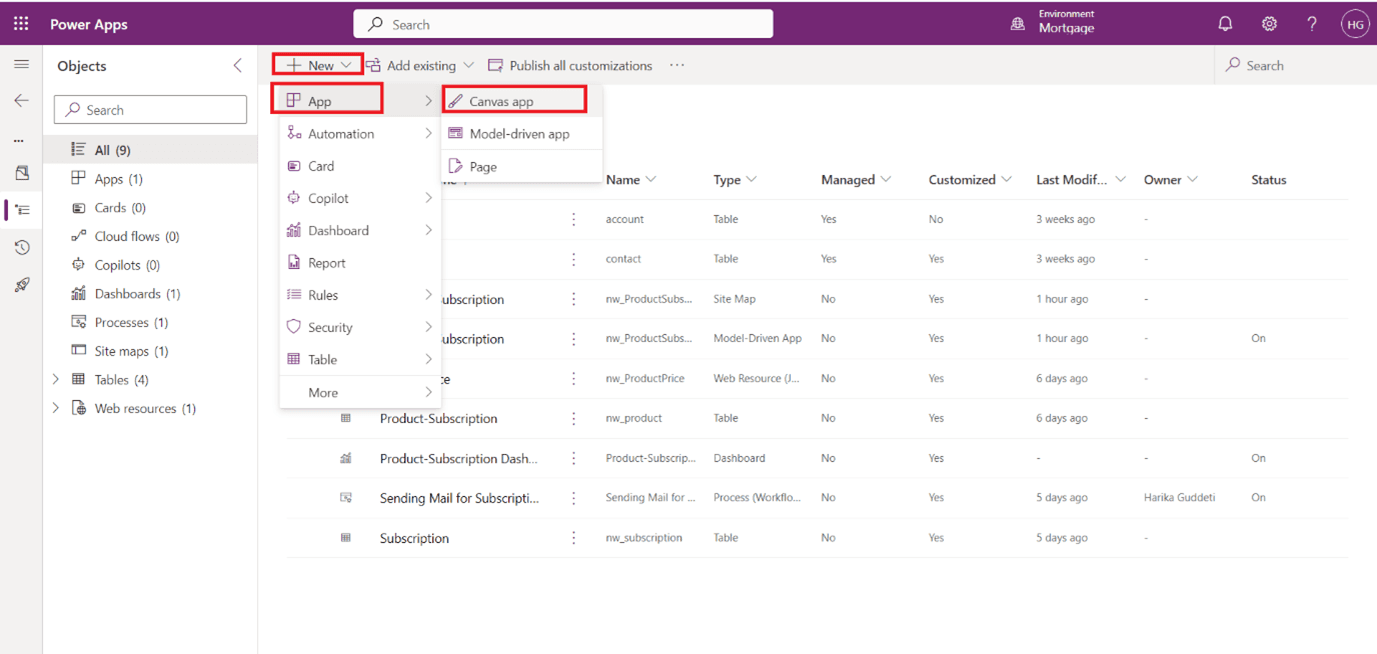
In Power Apps, click on New, select App, and then choose Canvas app to create a new canvas application.
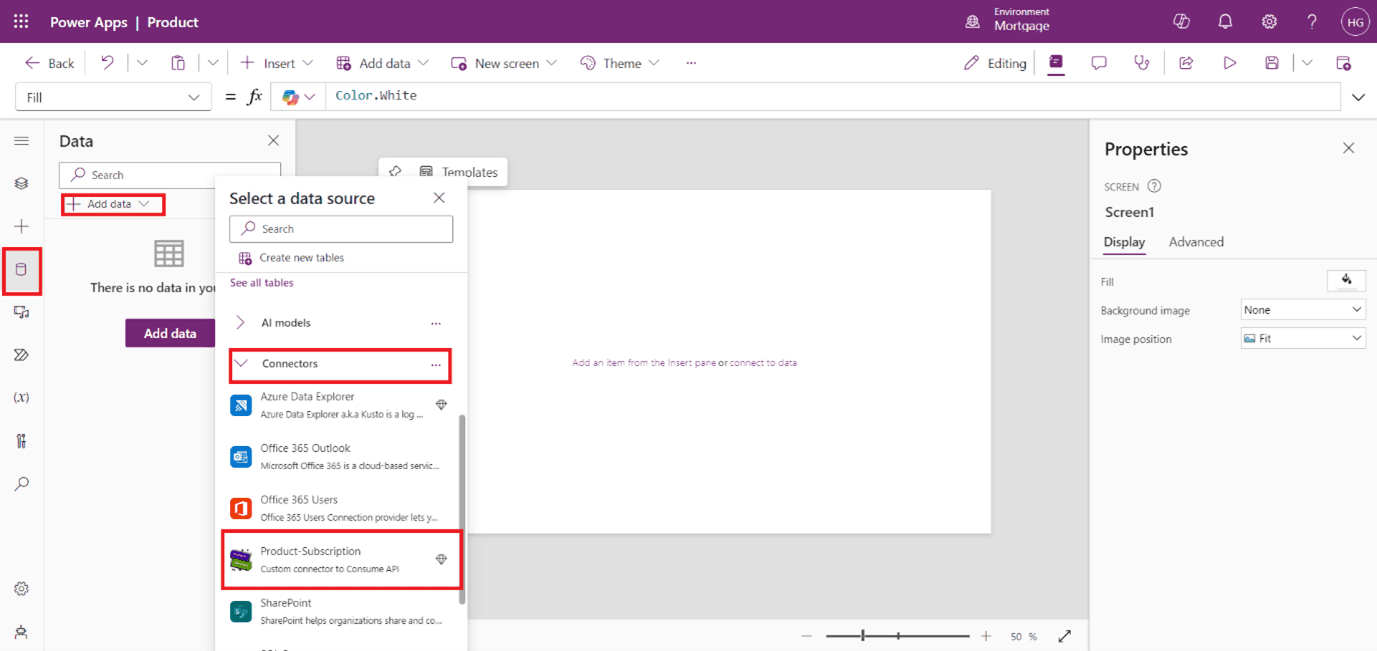
In the left pane, click on Data, then click on Add data, and under Connectors, select the custom connector you created.
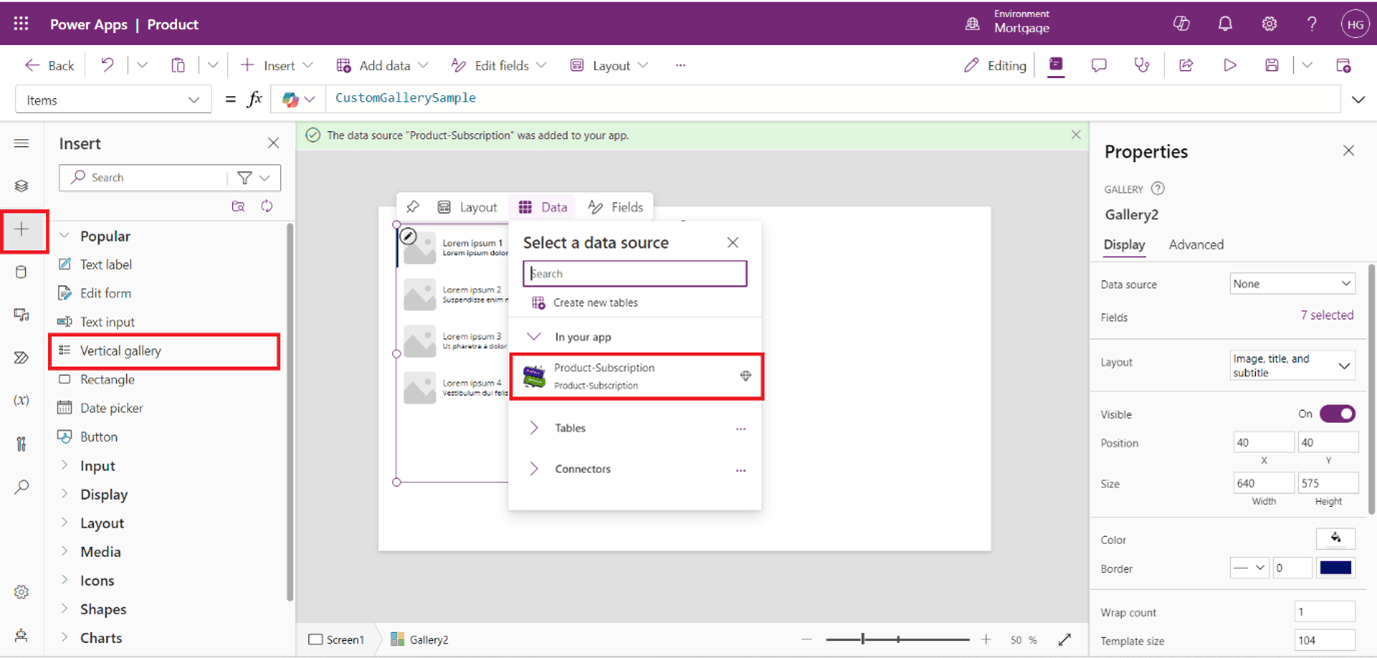
In the left pane, click on Insert, select Vertical Gallery, and then choose the custom connector as the data source.
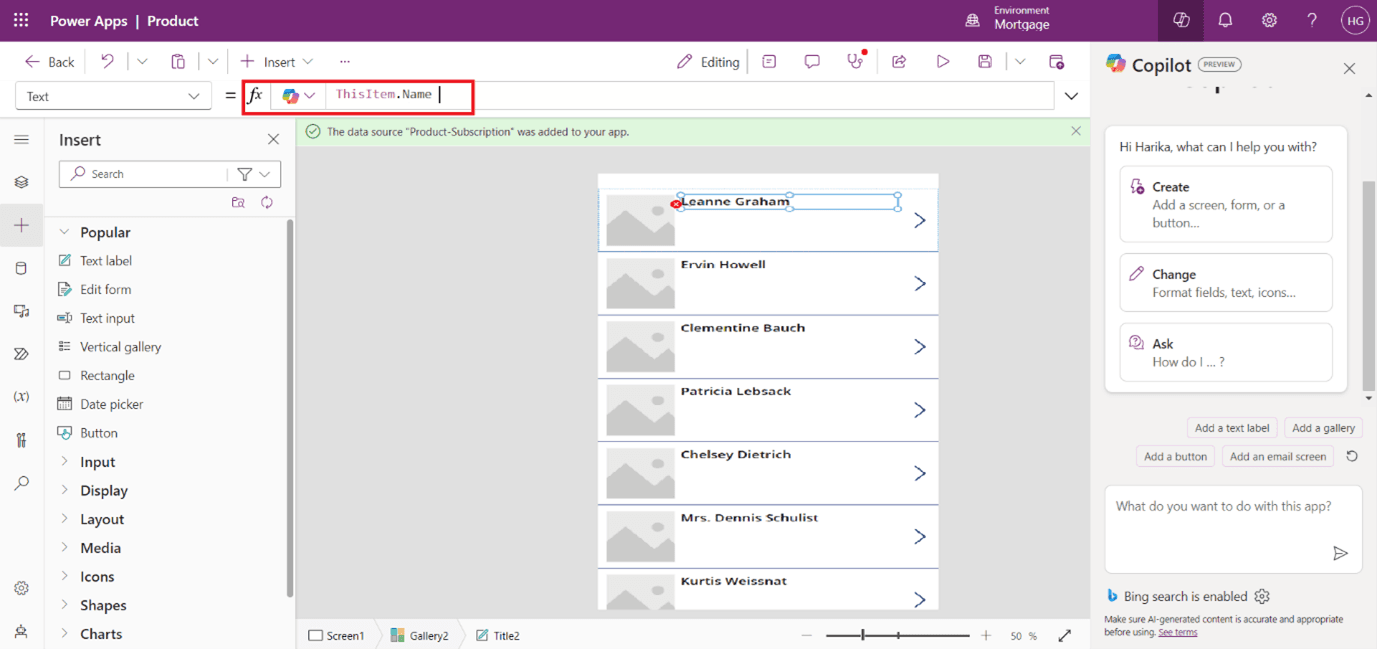
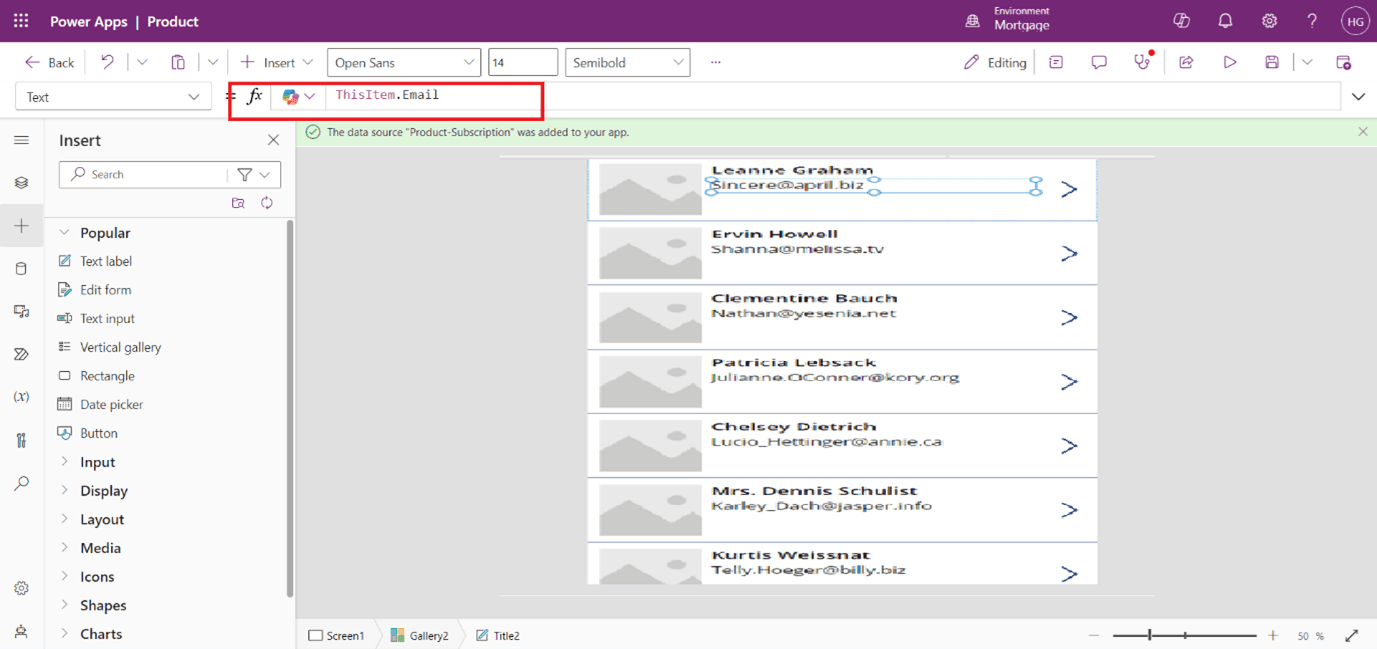
Use the formula to set the gallery's data source to the API response, then edit the label formulas in the formula bar after selecting the label.
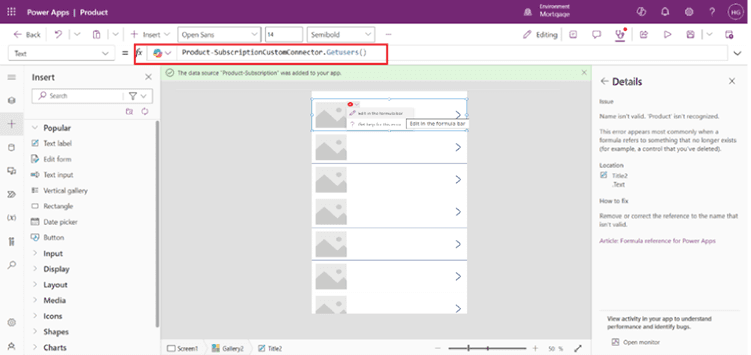
Set the gallery's data source to the API response with ThisItem.Name and edit the label formulas in the formula bar.
Set the gallery's data source to the API response with ThisItem.Email and edit the label formulas in the formula bar.
In the top right corner of Power Apps Studio, click on the Preview icon to run your app.
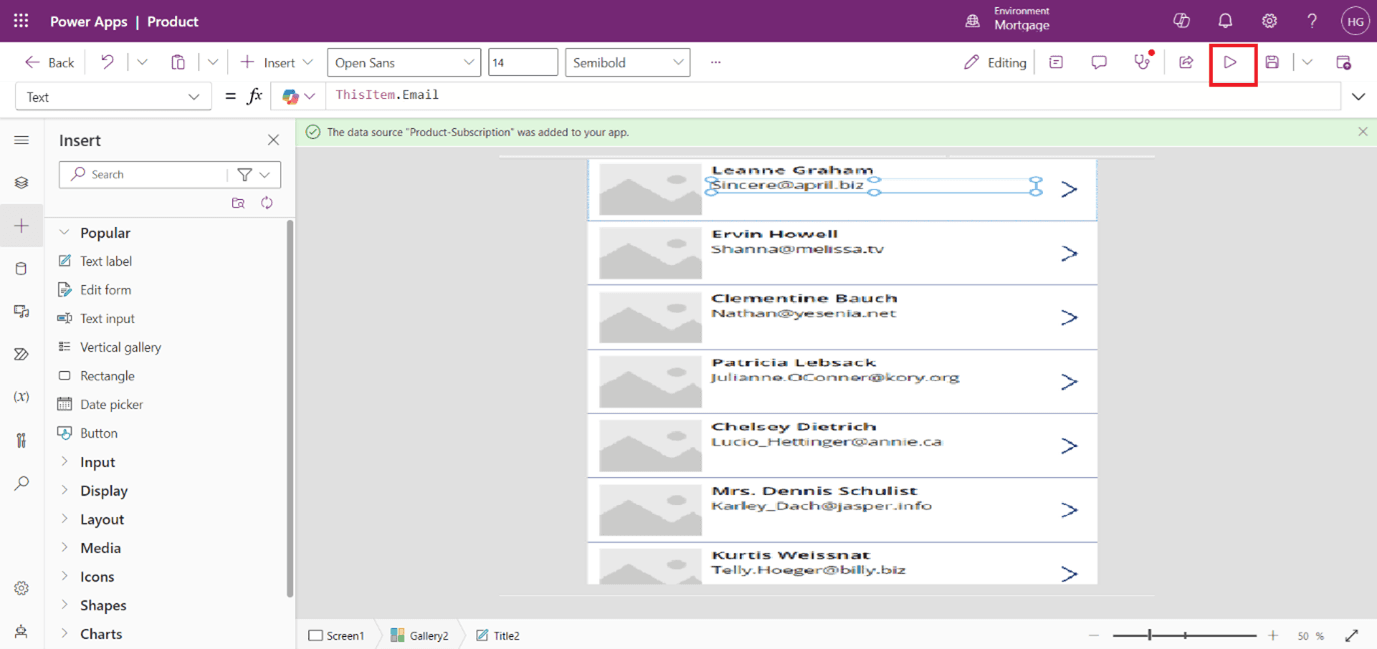
In Preview mode, you can view the data retrieved from the API.

In conclusion, by integrating a custom connector with Power Apps, you can create interactive applications that enable users to seamlessly access and visualize external API data through galleries and other components, thereby enhancing data-driven decision-making within your organization.
Frequently Asked Questions (FAQs):
1. What is a custom connector in Power Apps?
A custom connector allows you to connect Power Apps to external APIs that are not covered by the standard connectors, enabling integration with a wide range of data sources.
2. How do I create a custom connector?
You can create a custom connector by navigating to Power Apps, selecting Automation, and then choosing Connectors to define the connector's properties, authentication, and API operations.
3. What types of authentication can I use with custom connectors?
Custom connectors can support various authentication methods, including no authentication, API key, OAuth 2.0, and basic authentication, depending on the API's requirements.
4. Can I test my custom connector in Power Apps?
Yes, you can test your custom connector directly within Power Apps after creating it to ensure it correctly retrieves data from the API.
5. What kind of data can I pull from an external API?
You can pull any data that the external API exposes, including structured data such as user information, product details, and more, depending on the API’s capabilities.
6. How do I use the data retrieved by the custom connector in my app?
You can use the retrieved data by setting the data source of components like galleries and tables to the custom connector, allowing users to view and interact with the data.
7. What are the benefits of using custom connectors?
Custom connectors enhance application functionality, allow for integration with specific APIs, enable real-time data access, and improve data-driven decision-making.

