LogoLogo

Our Products

Metadata Browser

Edge Add-on

HTML To PDF Converter

Power Automate Connector

Data Mask for Dataverse

Dataverse App

Commission 365

Dynamics 365 App

AI Autocloser

Dataverse App

Flow Monitor

Power Automate App

ServicesAboutCareersBlogContact
Chat on Teams
Metadata BrowserHTML To PDF ConverterData Mask for DataverseCommission 365AI AutocloserFlow Monitor
ServicesAboutCareersBlogContactChat on Teams
HomeBlogCreating a Loading Animation in Power Apps

Creating a Loading Animation in Power Apps

December 18, 2024
#Power Apps
Muthu Gorla
Creating a Loading Animation in Power Apps

Power Apps is a powerful platform for building business applications. However, when an app performs a process or fetches data that takes time, users can become confused or frustrated, if there is no feedback. Adding a loading animation enhances user experience by clearly indicating, that the app is processing a request. 

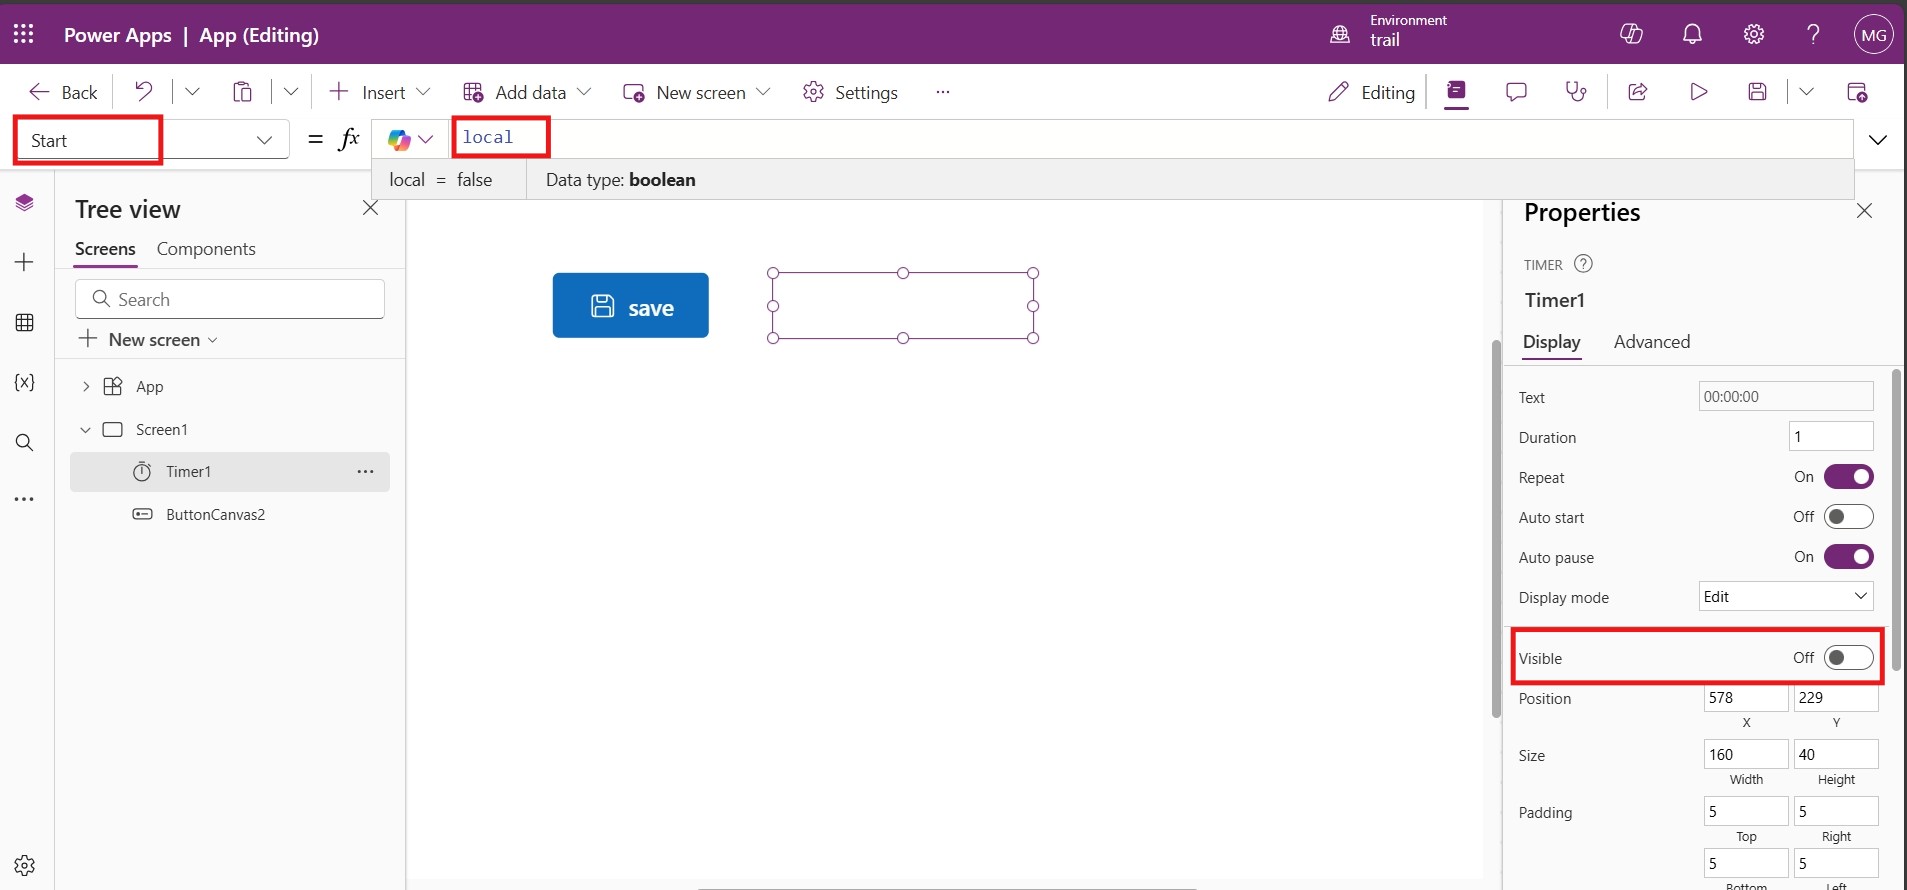
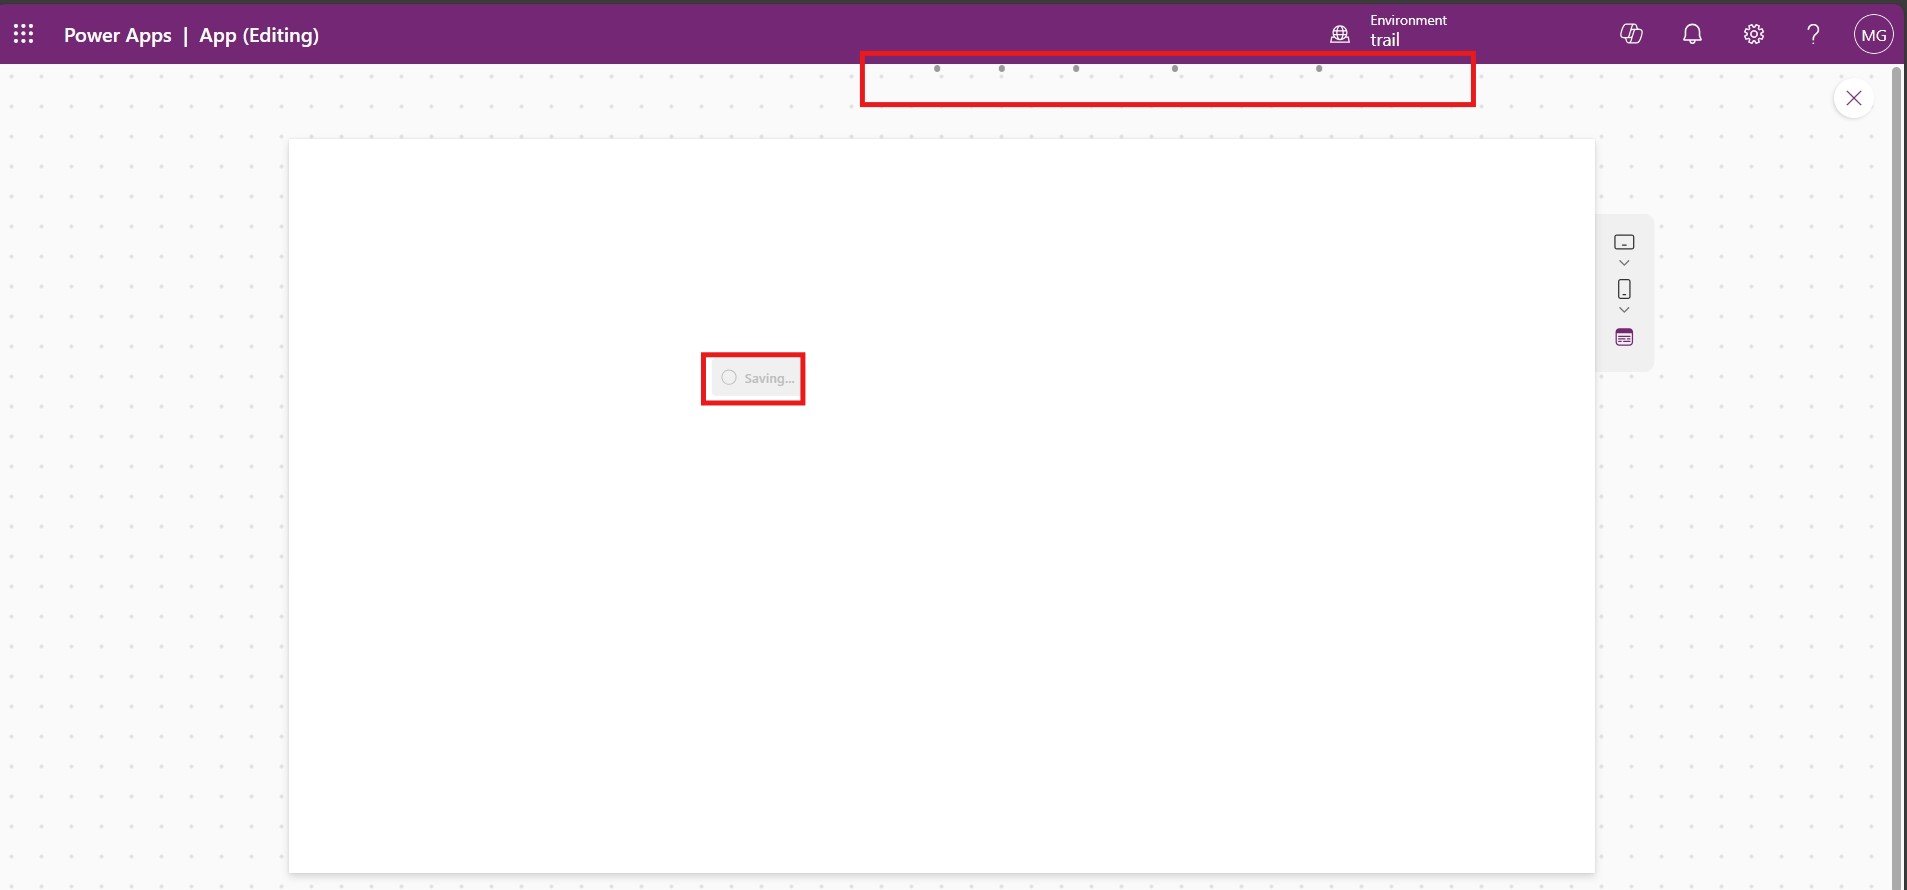
The animation looks like this: A primary button with the label ‘Save’ including a ‘Save’ icon to the left of the label. When the user selects the button, it becomes disabled, the icon changes to an animated loading spinner, and the label now shows ‘Saving…’ Once the operation is completed, the button returns to its original state.  Let’s get started! 

Firstly, log in to  https://make.powerapps.com. 

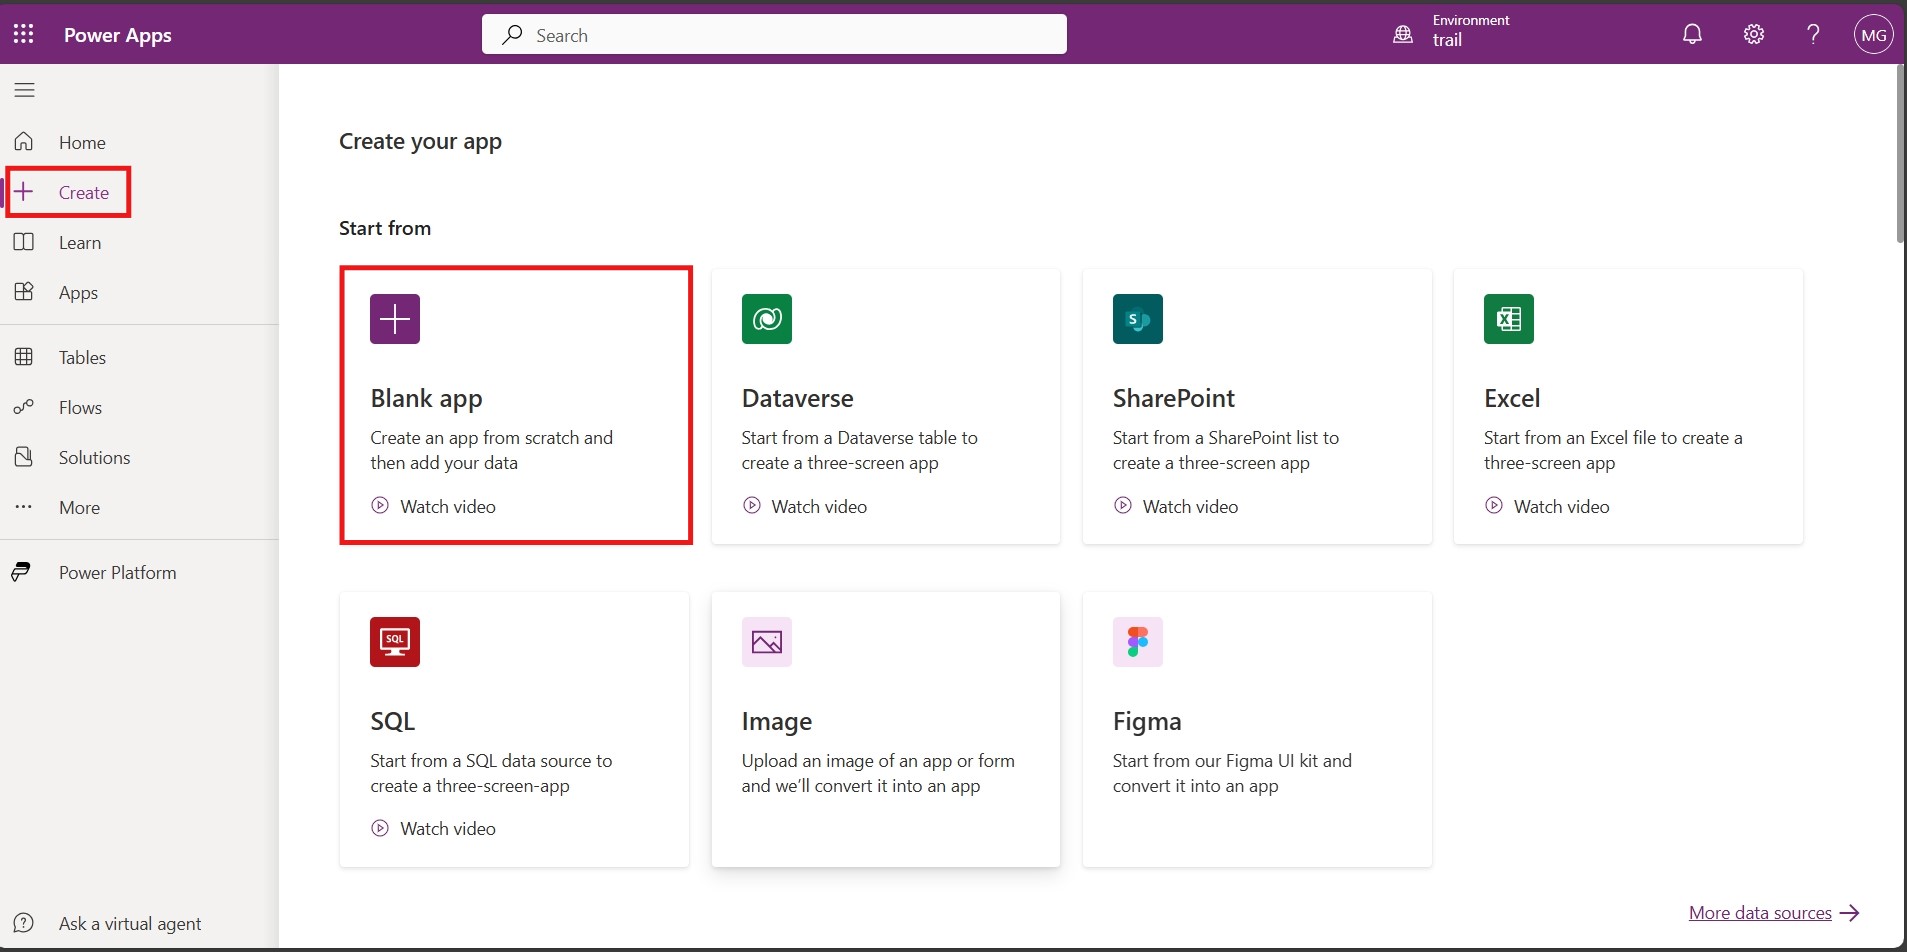
Click Create on the Home page and select the Blank app,

1

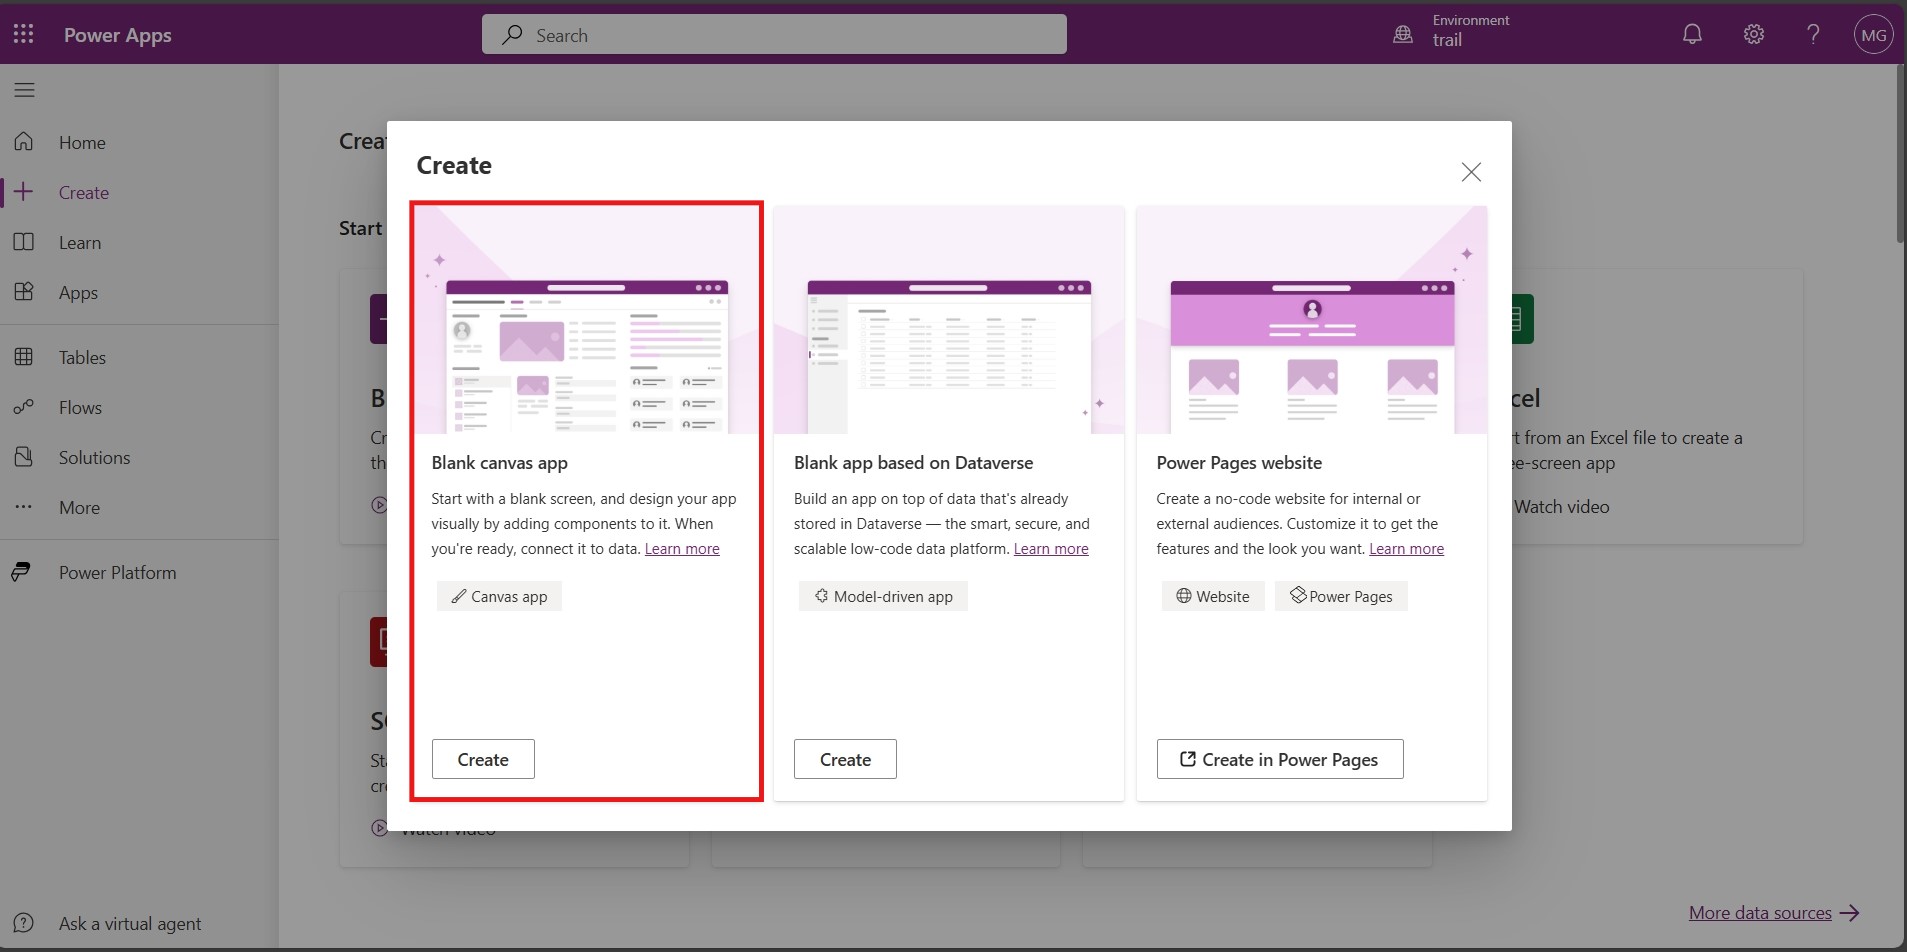
Now click Create button under the Blank Canvas App. 

2

On creating your canvas app, you will see three dots Icon, click on it, select settings. 

3

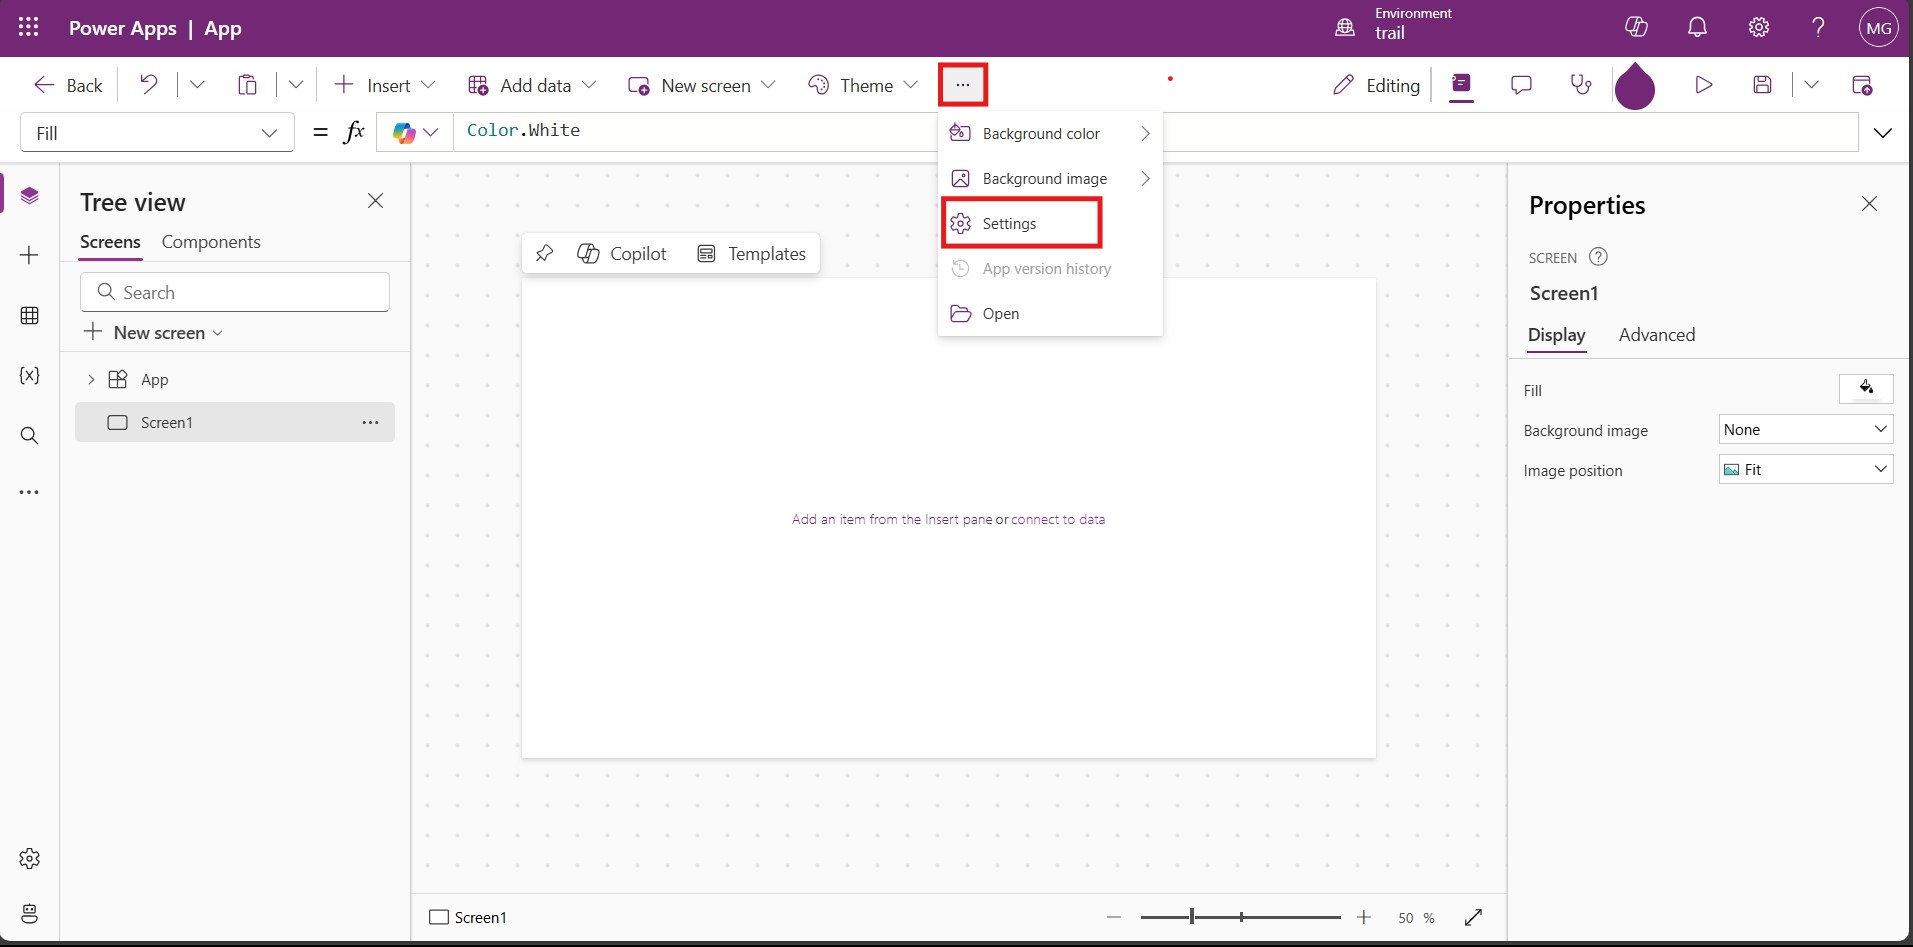
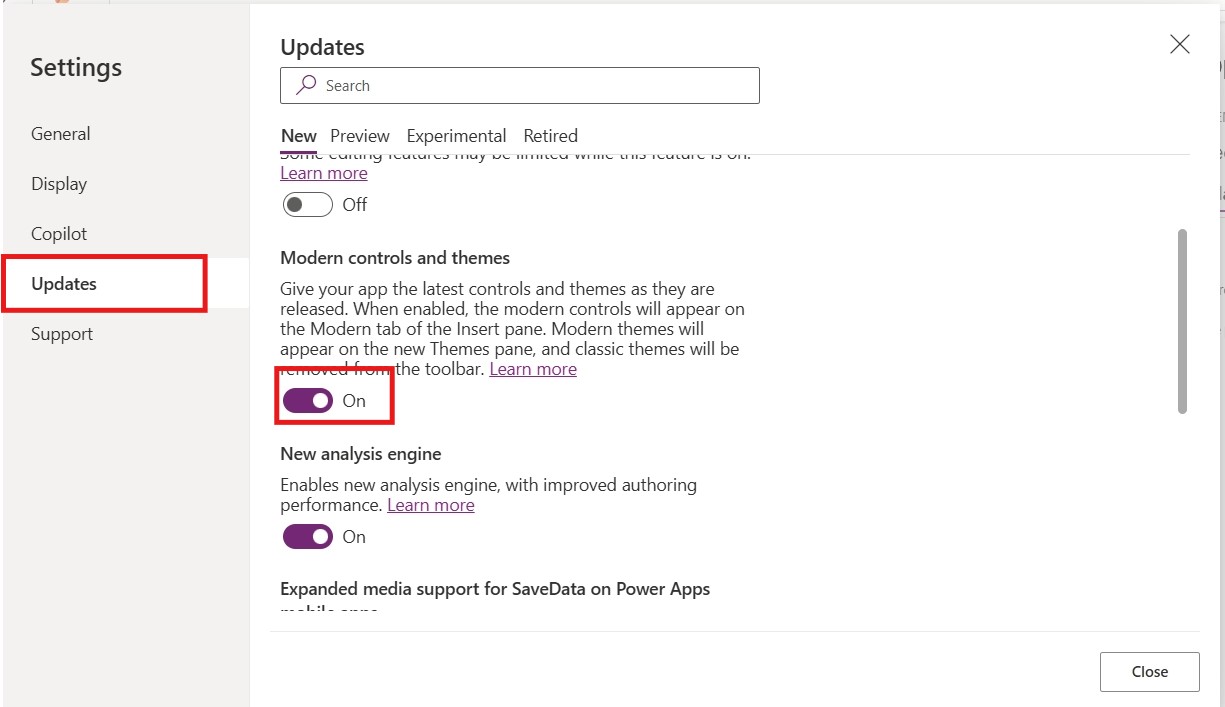
If you haven’t enabled modern controls and themes yet, you can do so in the Settings of your Power Apps Studio.

4

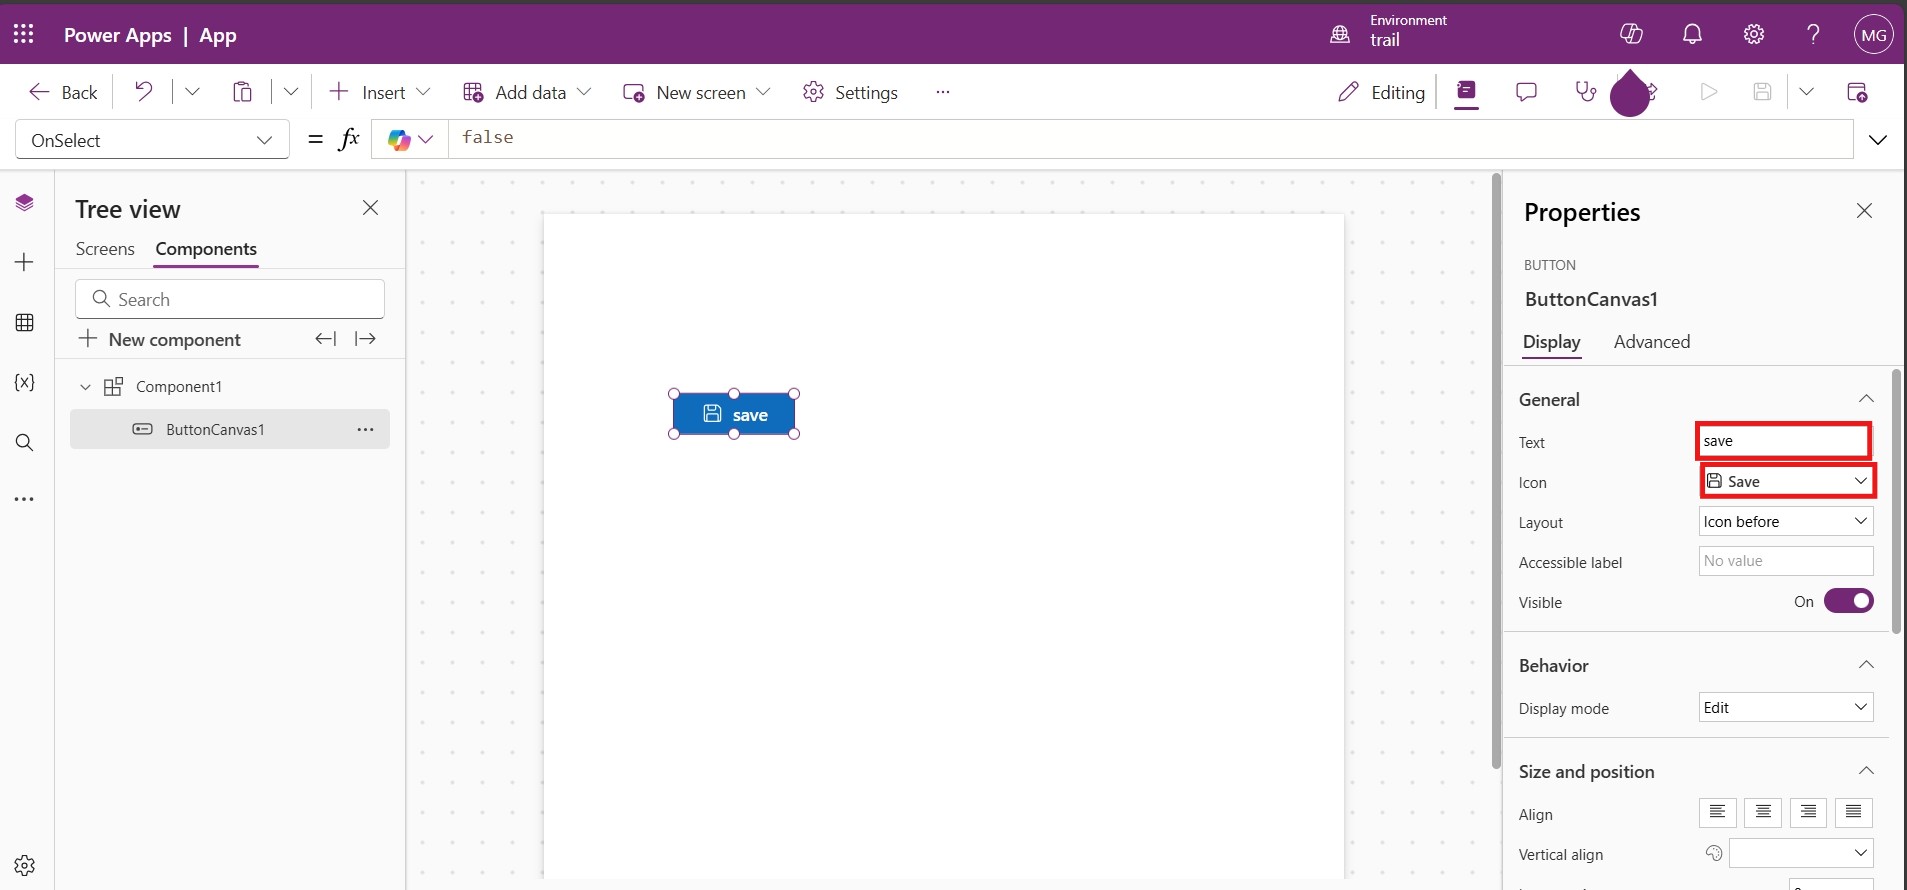
Add a new button to your screen, assign it a proper name, set a clear label for the text, and select an appropriate icon.

5

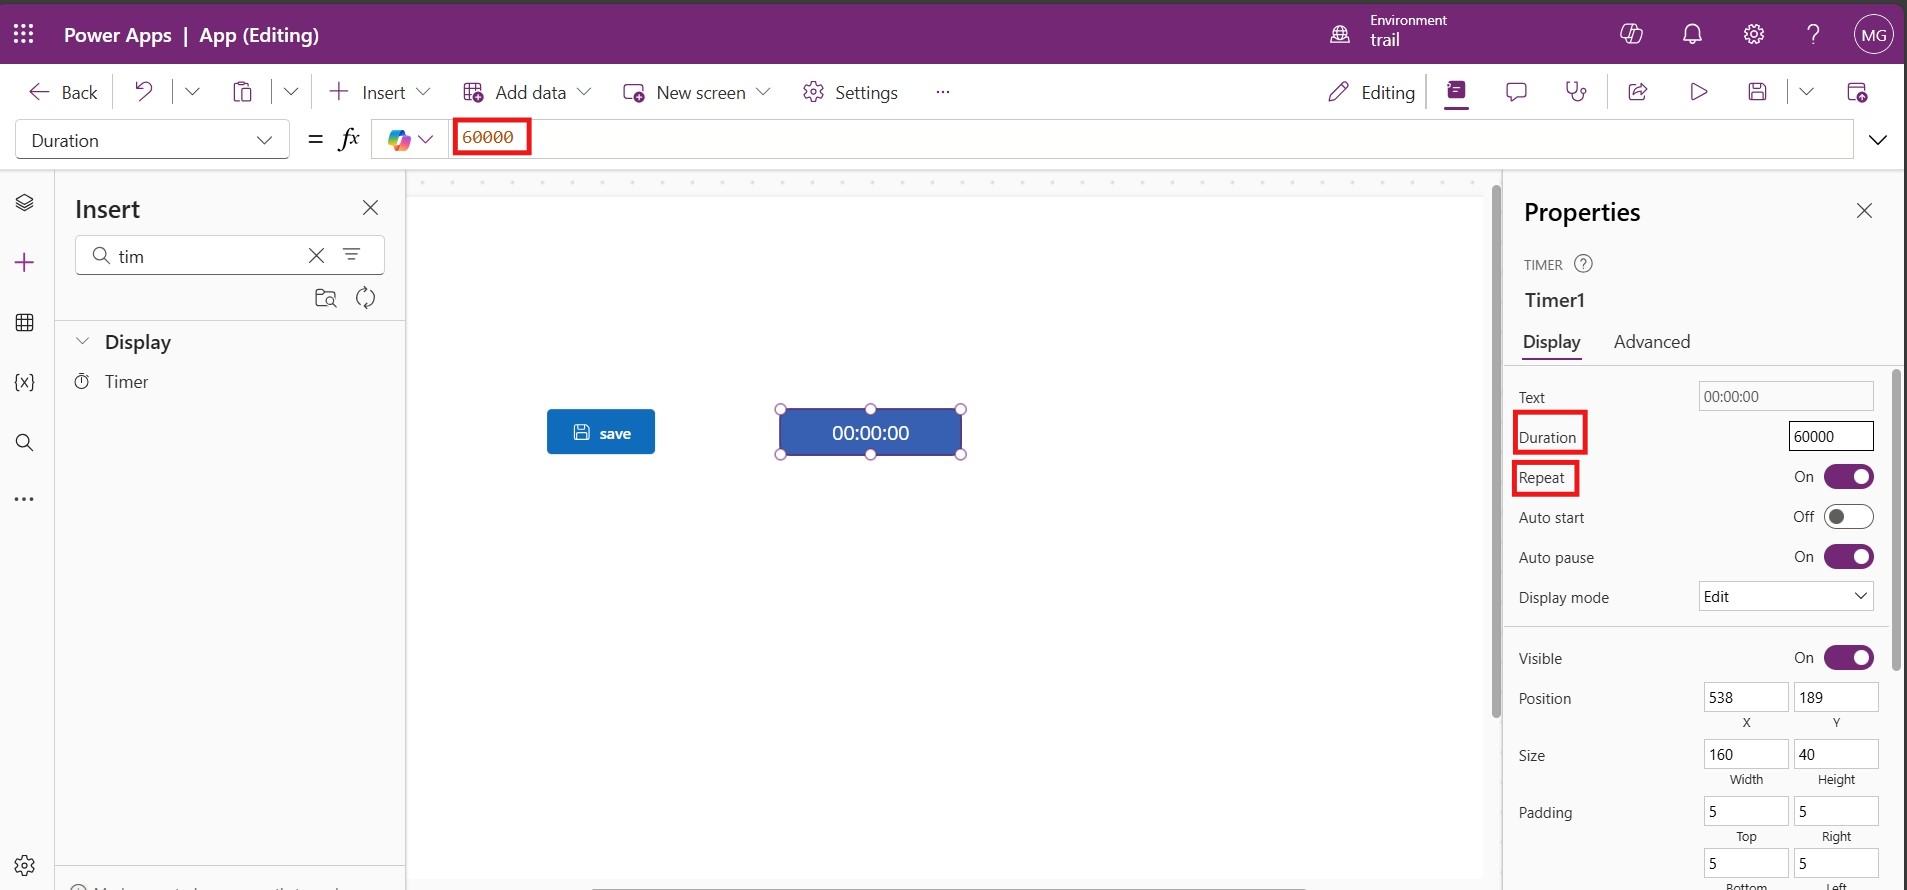
Add a Timer control with the Repeat property enabled to ensure the timer's functionality is recurring for tasks requiring periodic execution. 

Back to all articles

More from the blog

Creating and managing topics in Copilot Studio with Power Apps integration

Automate Image Data Extraction Using Power Apps and AI

Creating Virtual Tables in Power Apps using Share Point Connector

Creating an App from Figma in Power Apps

How to Create Custom Connectors in Power Apps?

Implementing Catalog Manager: A Step-by-Step Guide in Power Apps

How to Install Catalog Manager in Power Apps?

Building Progressive Web Apps with Power Apps

Need help with your business solution?

Our team can help you implement the right solution for your organization.

Get in touch
LogoLogo

Ex-Microsoft experts helping businesses get more from their Dynamics 365 and Power Platform investments.

Products

Set the Duration property based on your requirements to control the time interval for the Timer's execution cycle. 

6

    Repeat 

This ensures that the timer restarts automatically once it completes its duration. It allows the animation to keep running. 

    Duration 

This is the speed of your animation. You can tweak this value to adjust the animation speed to your reference 

  OnTimerEnd 

  We create a context variable since we are staying on the same screen. The variable is updated each time by 15 and it will reset to 0 once it exceeds 359. 

Use the OnTimerEnd property to define actions that should occur automatically when the Timer completes its cycle, ensuring seamless task execution.

7

In the OnSelect property, create a new variable to indicate the start of the operation, setting it to true initially; once the operation is completed, reset the variable to false to track the process status effectively. 

8

I have included a flow to introduce a short delay, allowing sufficient time to observe the animation, which enhances the tutorial's clarity and effectiveness.

9

Now, click the button. In the display content, choose the icon. 

Use the expression If(local, "Arrowsync," "Save") to dynamically select the appropriate action or label based on the local condition's value, ensuring context-specific functionality. 

10

Click on the IconRotation and use the following expression.  If(local, ctxRotatingAngle, 0)   It dynamically adjust the icon's rotation angle and ensures the icon visually reflects the current state by rotating when the condition is true and resetting to its default position otherwise.

11

Then update the following properties in your button control: 

       Text 

  If(local, ctxRotationgAngle ,0) 

      DisplayMode 

  If(local, DisplayMode.Disable, DisplayMode.Edit) 


The timer starts as soon as the operation (ctxRotationgAngle) begins. Update the start property of the timer with: ctxRotationgAngle.

12

Save and preview the app to test it.  Finally, you’ve successfully transformed your button into a UX-friendly, animated loading spinner.

13
Frequently Asked Questions (FAQs)
1. Why is a loading animation important in PowerApps? 

A loading animation provides visual feedback to users that the app is processing data or performing an action. It prevents users from assuming the app is unresponsive, improving overall user experience and reducing frustration.

2. How can I show and hide a loading animation in PowerApps? 

You can control the visibility of a loading animation using a variable. For example: Use Set(varLoading, true) before starting a process. Set Set(varLoading, false) after the process completes. Set the Visible property of the animation to varLoading. 

3. Where can I get loading animations for PowerApps? 

You can create or download loading animations (GIFs) from websites like: 

  • Loading.io 

  • Giphy 

  • Use tools like Adobe After Effects or Canva to design custom animations.

 4. Can I use a timer instead of a loading animation for processes? 

Yes, you can simulate a loading process using the Timer control. For example: Start a timer when a process begins. Set the timer’s OnTimerEnd to finish the process and hide the animation.

5. How do I make the loading animation appear on top of everything else? 

To ensure the loading animation appears on top: Place the animation image at the top layer of the screen using the Reorder option. Add a transparent rectangle behind the animation to dim the screen, improving visibility. 

Metadata Browser
  • HTML To PDF Converter
  • Data Mask for Dataverse
  • Commission 365
  • AI Autocloser
  • Flow Monitor
  • Services

    • D365 Marketing
    • D365 Sales
    • D365 Customer Service
    • D365 Field Service

    Company

    • About Us
    • Blog
    • Contact
    • Careers

    Copyright ©2026 Pascalcase Software Private Limited. All rights reserved.

    Privacy PolicyTerms of Service