It is essential for any business that offers products or services online to provide a seamless and secure payment experience. Whether you are running a small e-commerce store or managing a service-based website, the ability to easily accept payments can significantly impact the user experience.
In this blog, we’ll guide you through how to use the Power Pages design studio to add a payment section to your multi-step forms and connect it with a trusted payment provider like Stripe. We’ll explore the step-by-step process, the benefits of no-code solutions, and how this integration can enhance the overall user experience on your site.
Scenario: A nonprofit organization is looking to simplify its donation process by allowing donors to contribute directly through their website. They want to offer a secure, user-friendly payment option for one-time and recurring donations, without the need for any custom development.
Set up payment integration in your power apps
To accept payments on your Power Pages site, follow these steps:
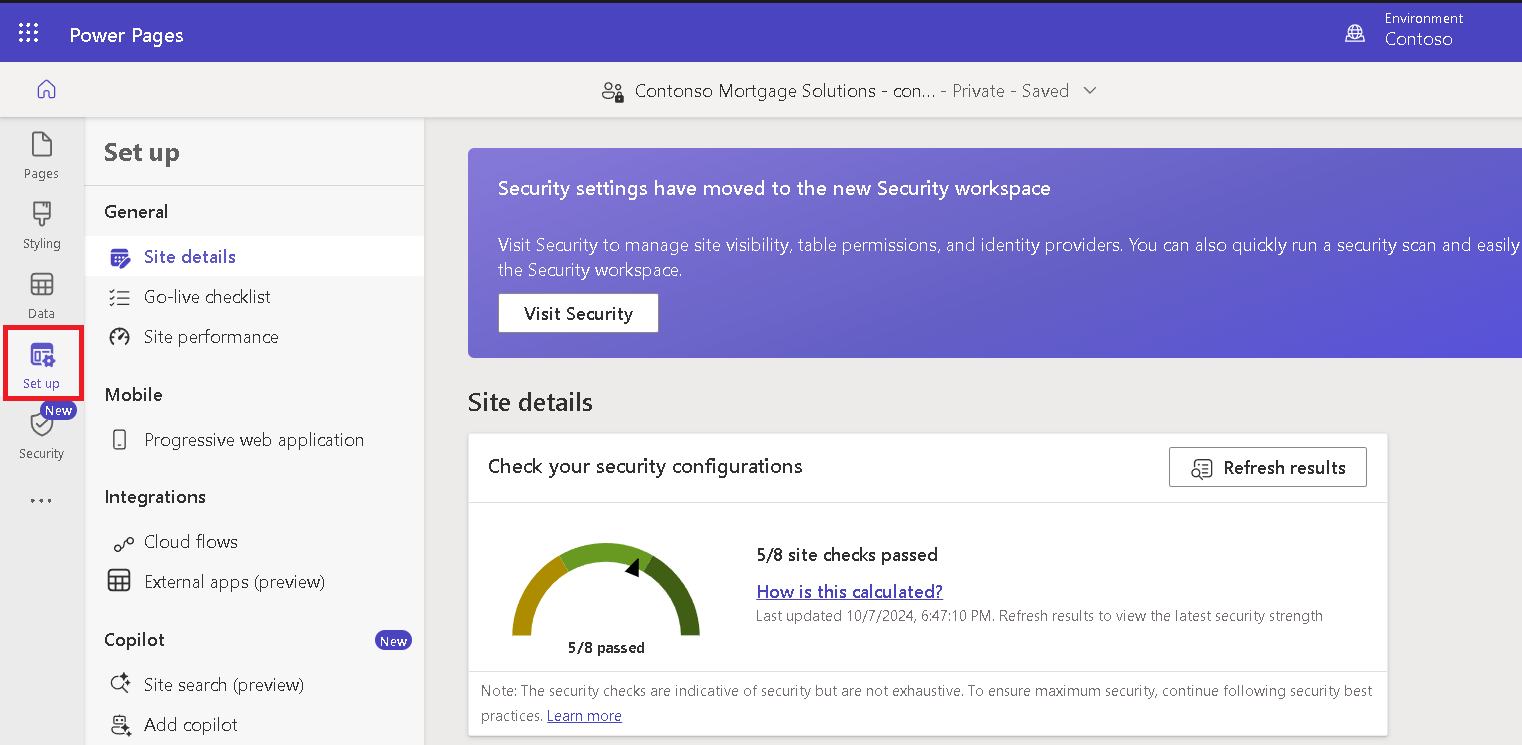
Firstly, open Power Pages.
In the design studio, select Set up.
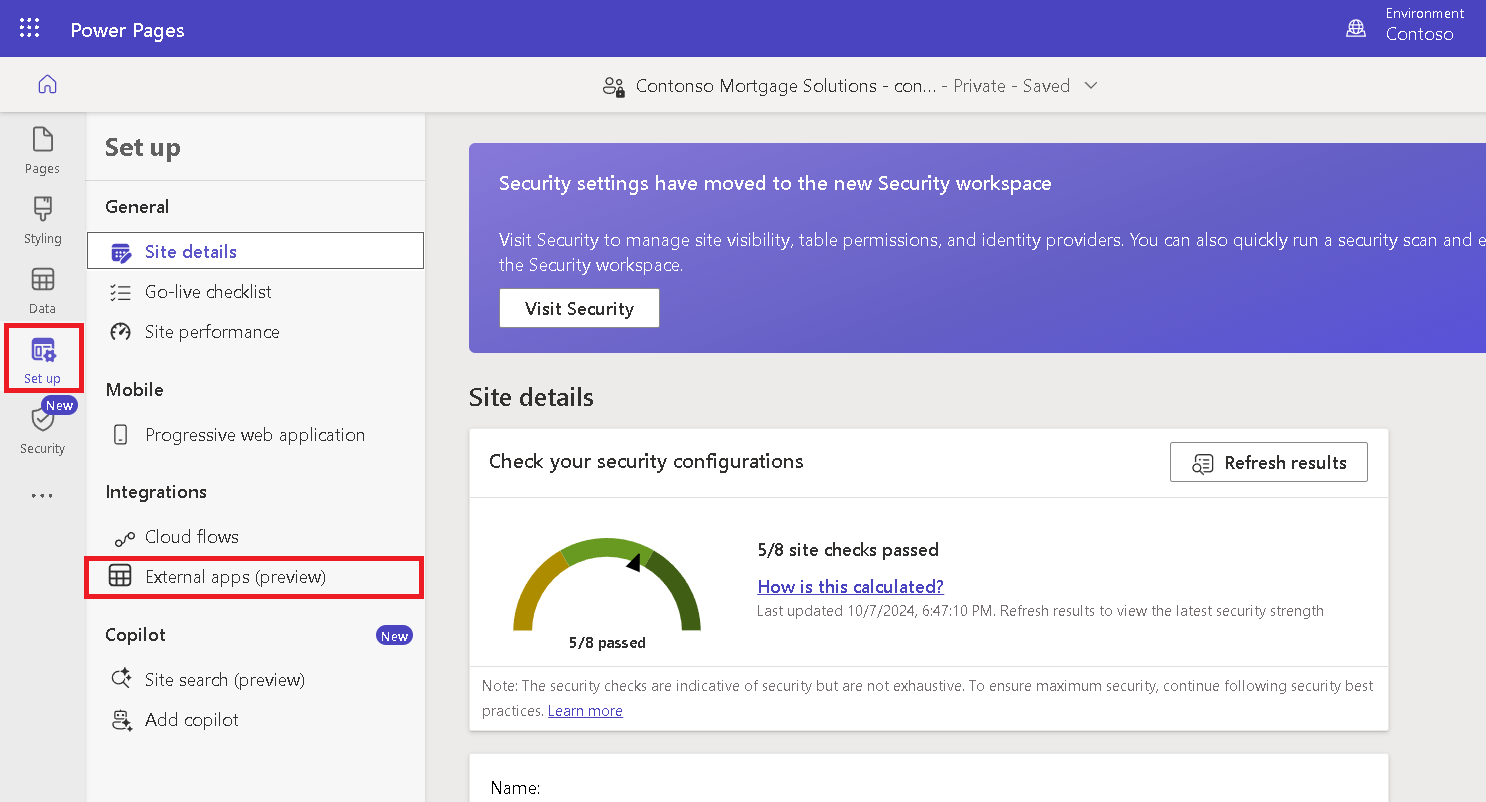
Under Integrations, select External apps (preview).
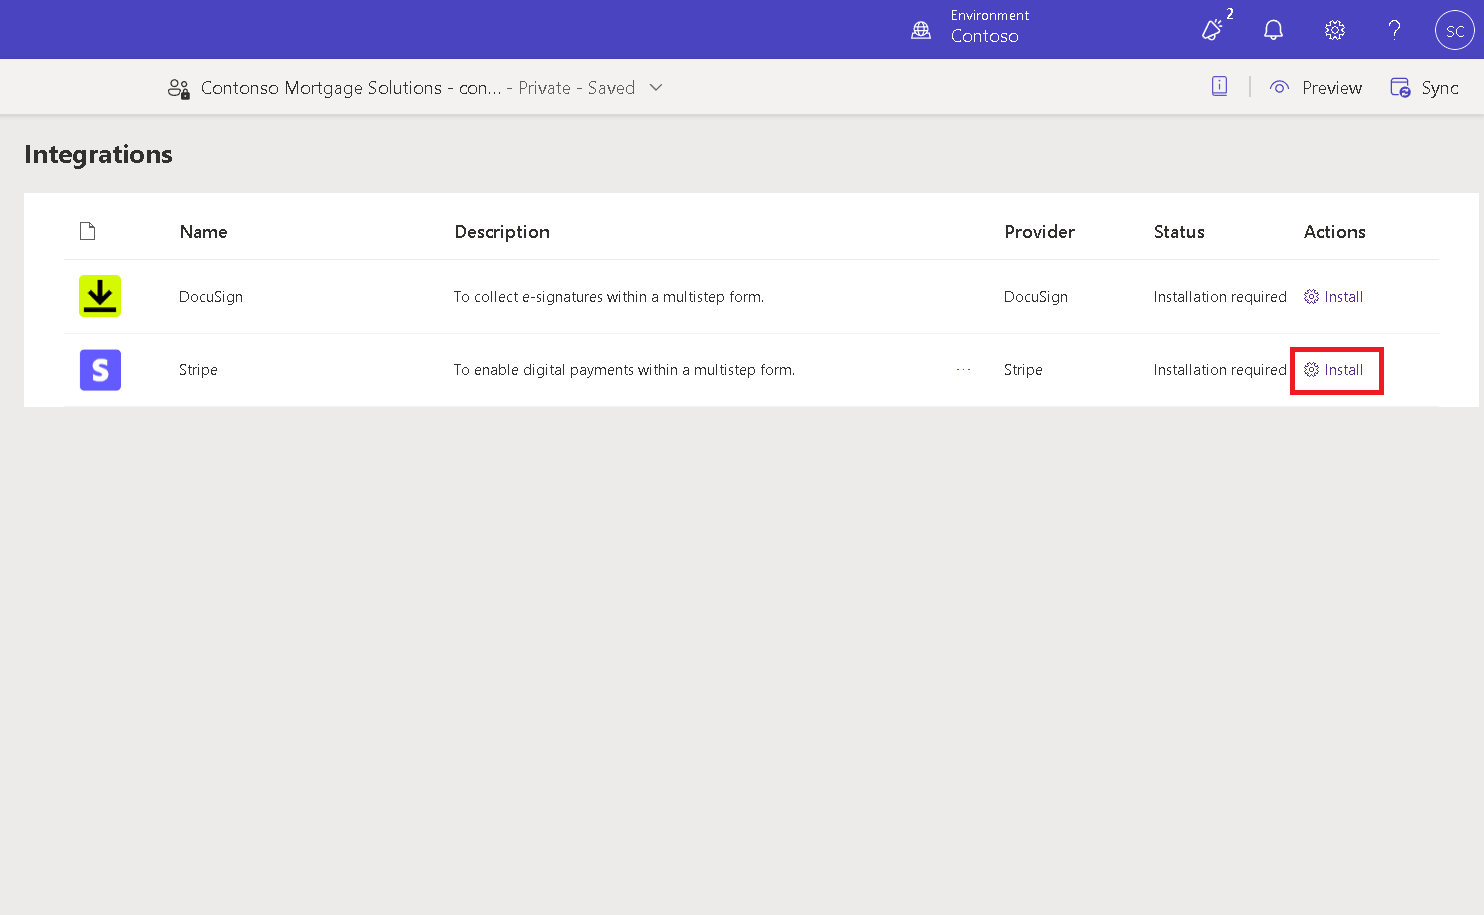
Find and install the Stripe application.
Once installed, click on the “Manage” option in the action column.
Need help with your business solution?
Our team can help you implement the right solution for your organization.
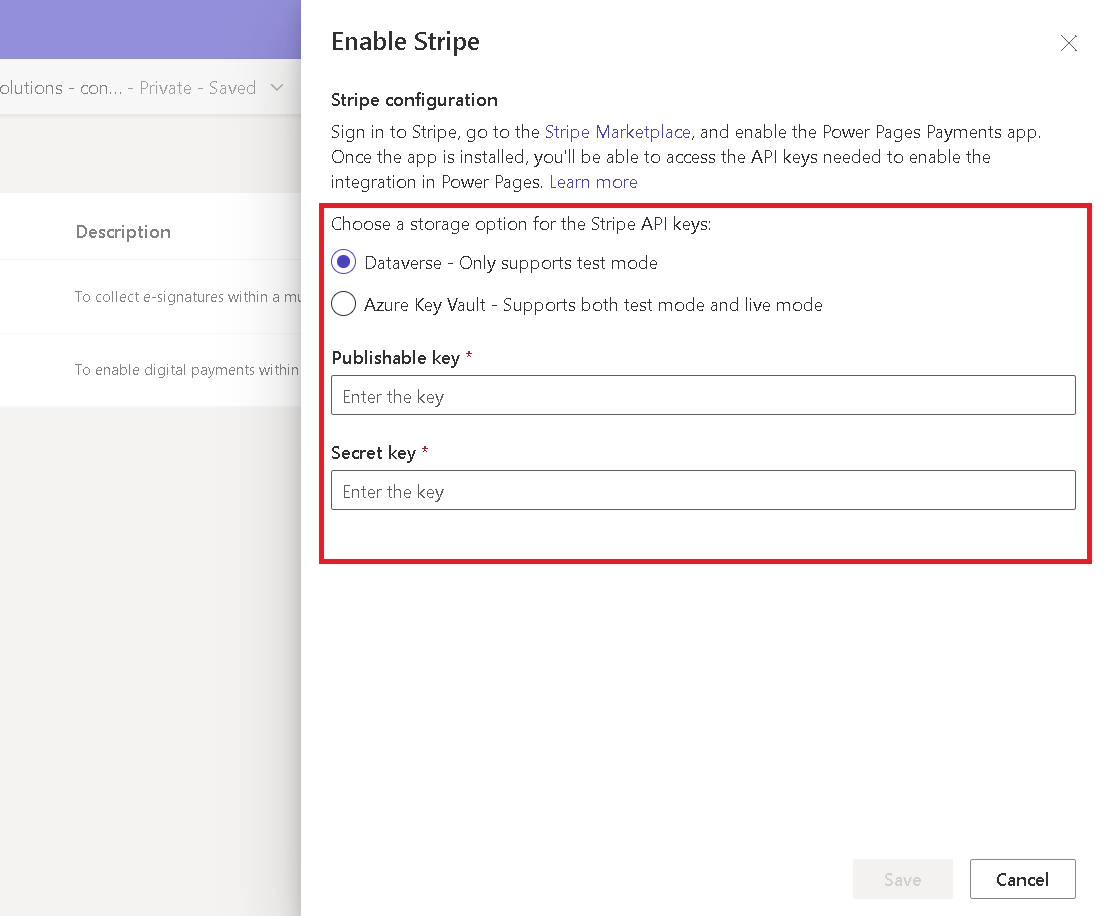
It requires publishable and secret keys, which support only test mode.
2. Azure Key Vault Storage:
Requires the Publishable and Secret keys and an additional Azure Key.
To get your publishable & secret key:
Visit the Stripe Marketplaceand install the Microsoft Power Pages Payments app.
Once installed, obtain your Stripe publishable and restricted key.
Note: It’s recommended to use the Restricted keys provided by Stripe for your secret key. These keys help restrict access and permissions to specific areas of your account data, ensuring greater security within Stripe.
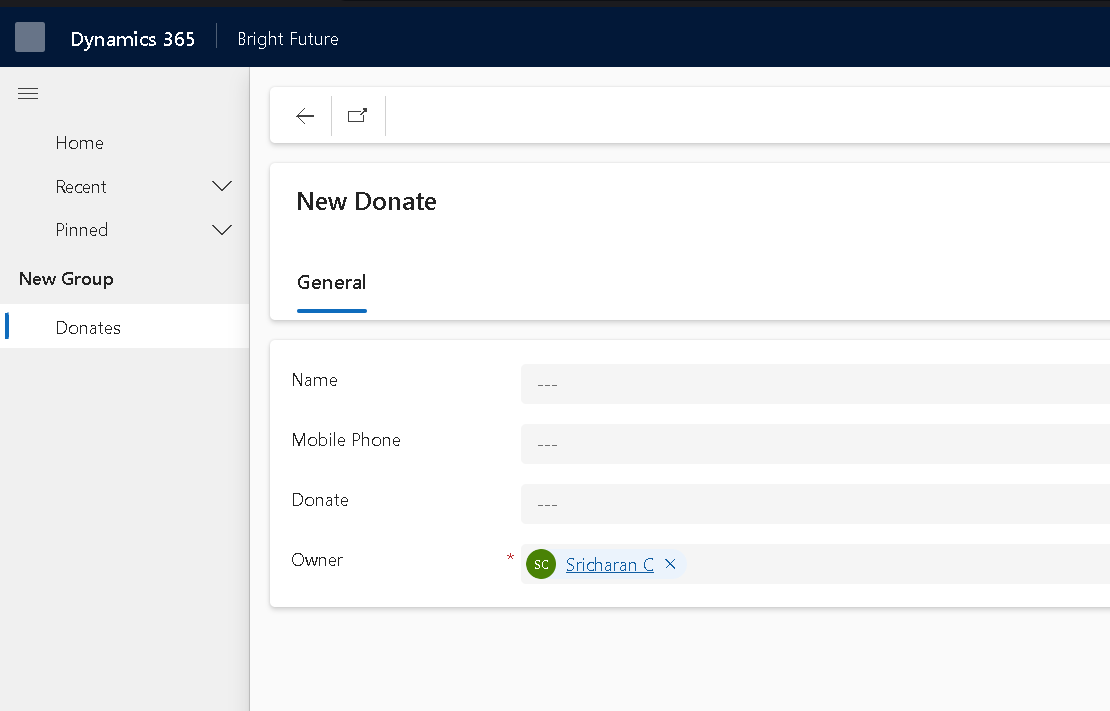
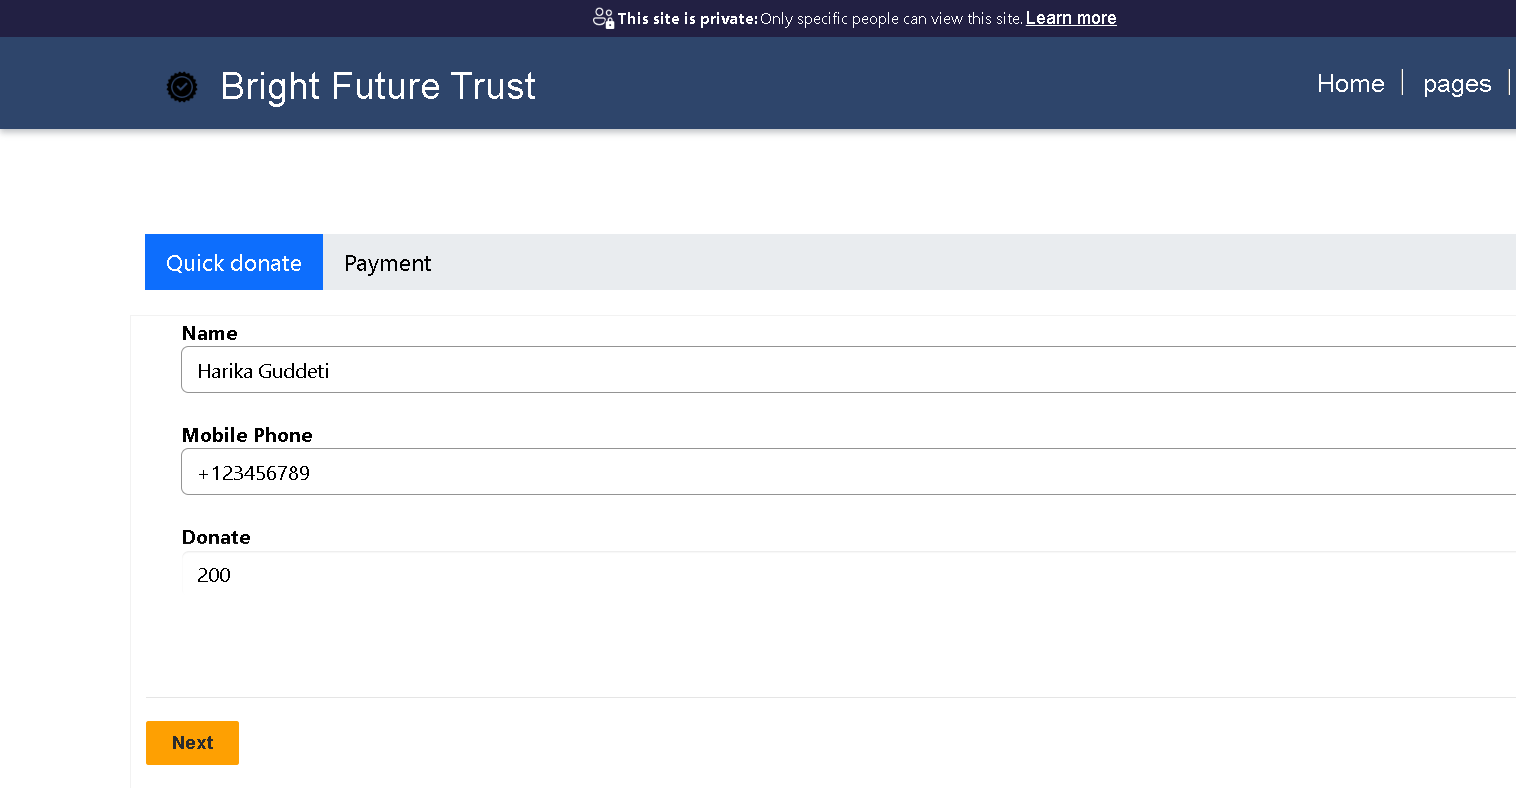
To implement this scenario, we created a Donation Portal with a multistep form and linked it to a custom entity called ‘Donate’. This entity includes the following fields:
1. Name
2. Mobile number
3. Donate
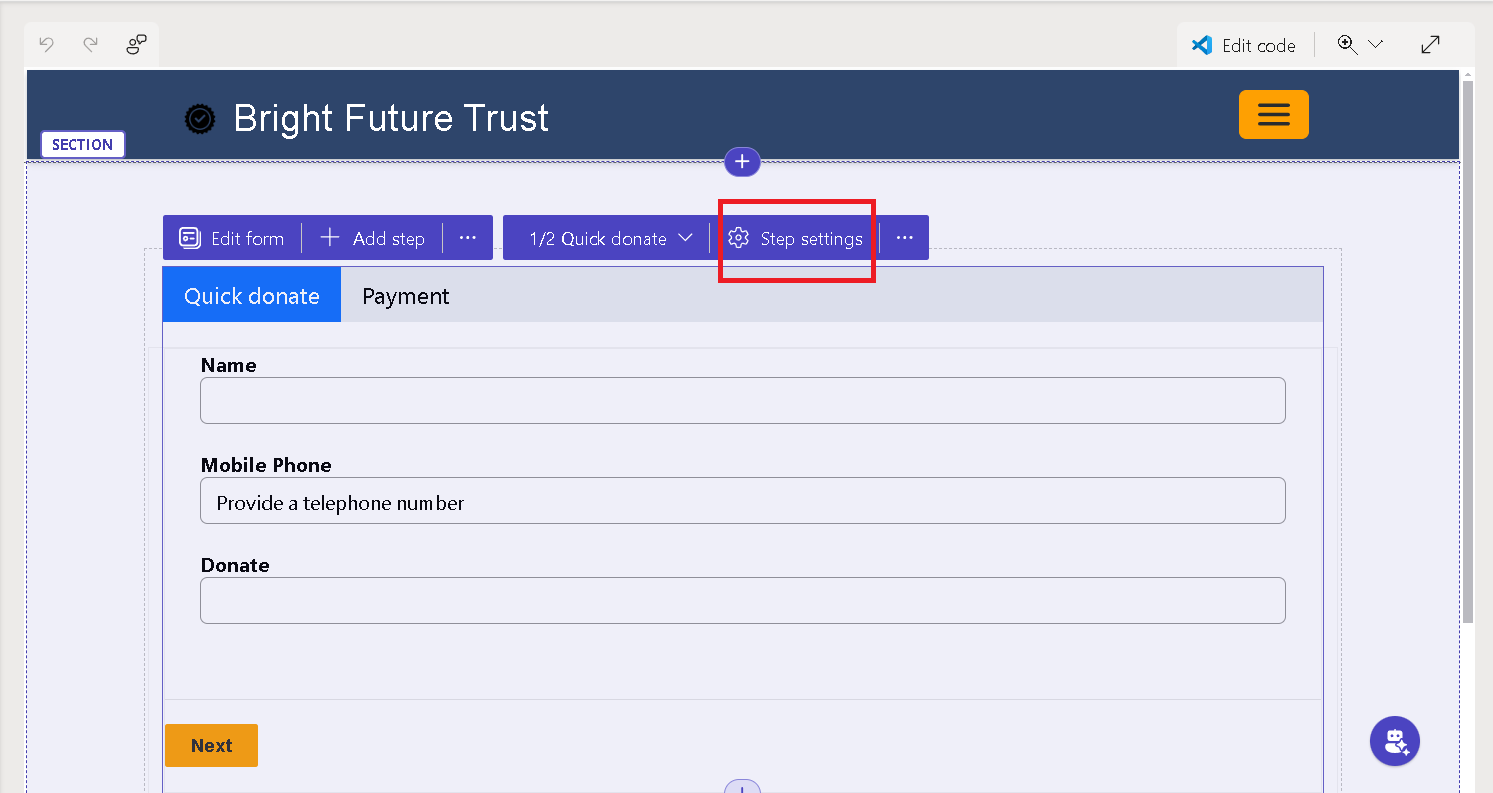
We included this form as the initial step in the multistep form. Payment integration is only available for multistep forms and cannot be applied to single-step forms.
In the next step of the multistep form, you will enable the payment mode:
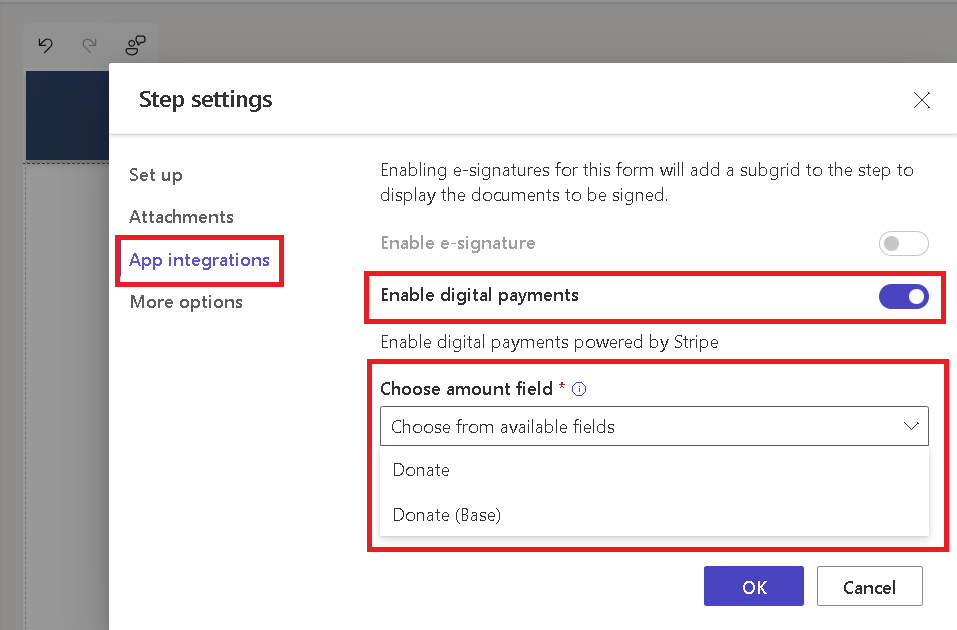
A. Click on the step settings for the second step of your multistep form. Select “App Integrations”.
B. Find the “Enable Digital Payment” option and enable it.
C. After enabling it, you will need to bind the payment (Currency) field to the form
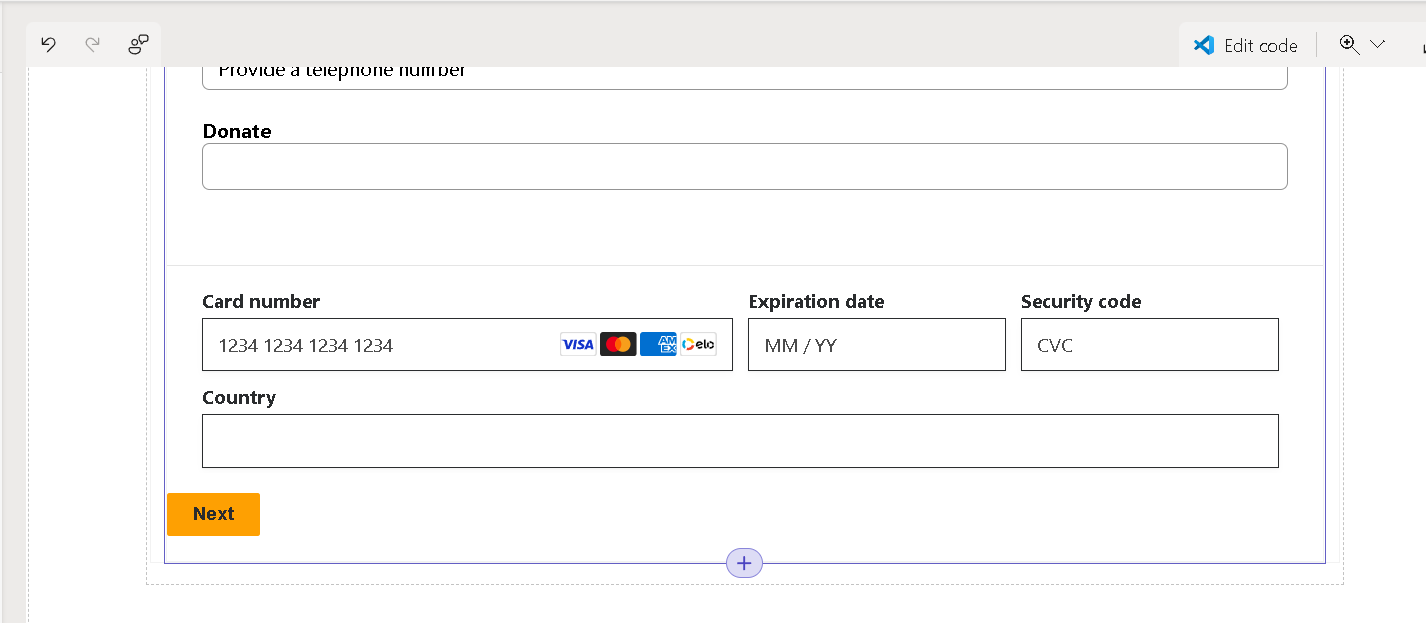
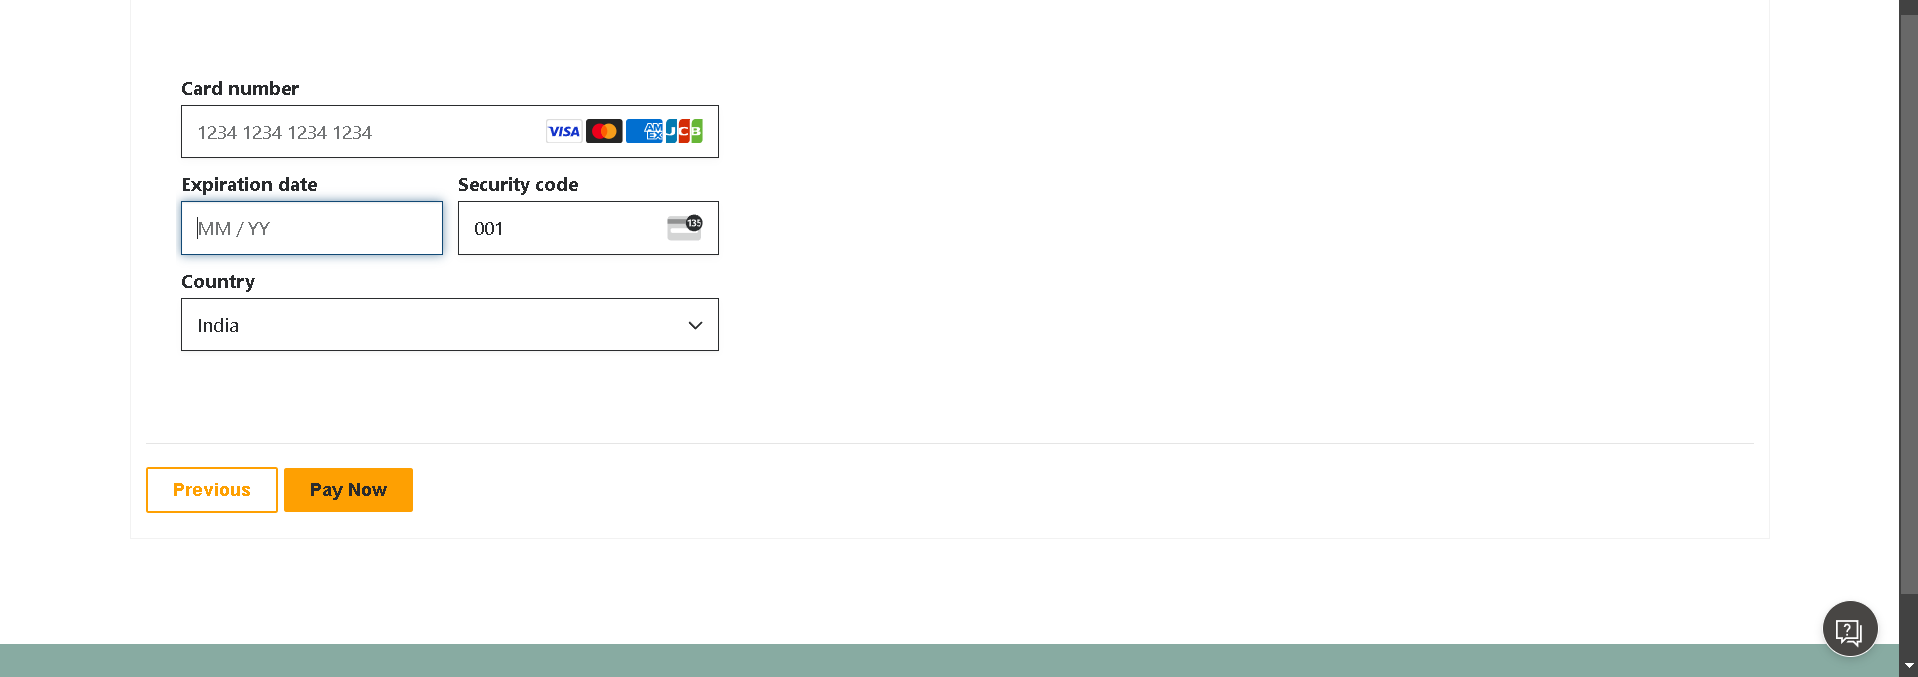
Once the setup is complete, a new payment field will appear just below your form. This intuitive interface enables customers to securely enter their payment details directly on your Power Pages site, removing the need for redirects or external payment gateways.
Now, sync the site and preview it on your desktop. Complete the form with the necessary details and click "Next." This action will create a record in the CRM and initiate the payment process.
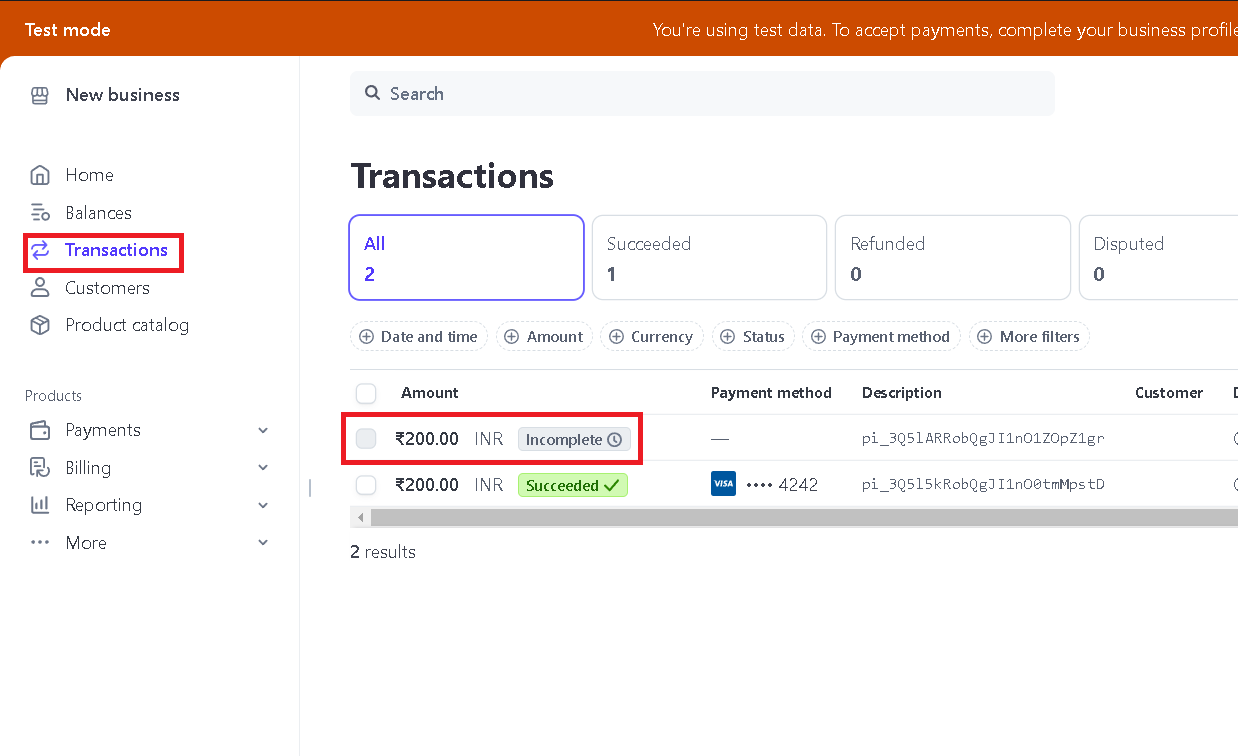
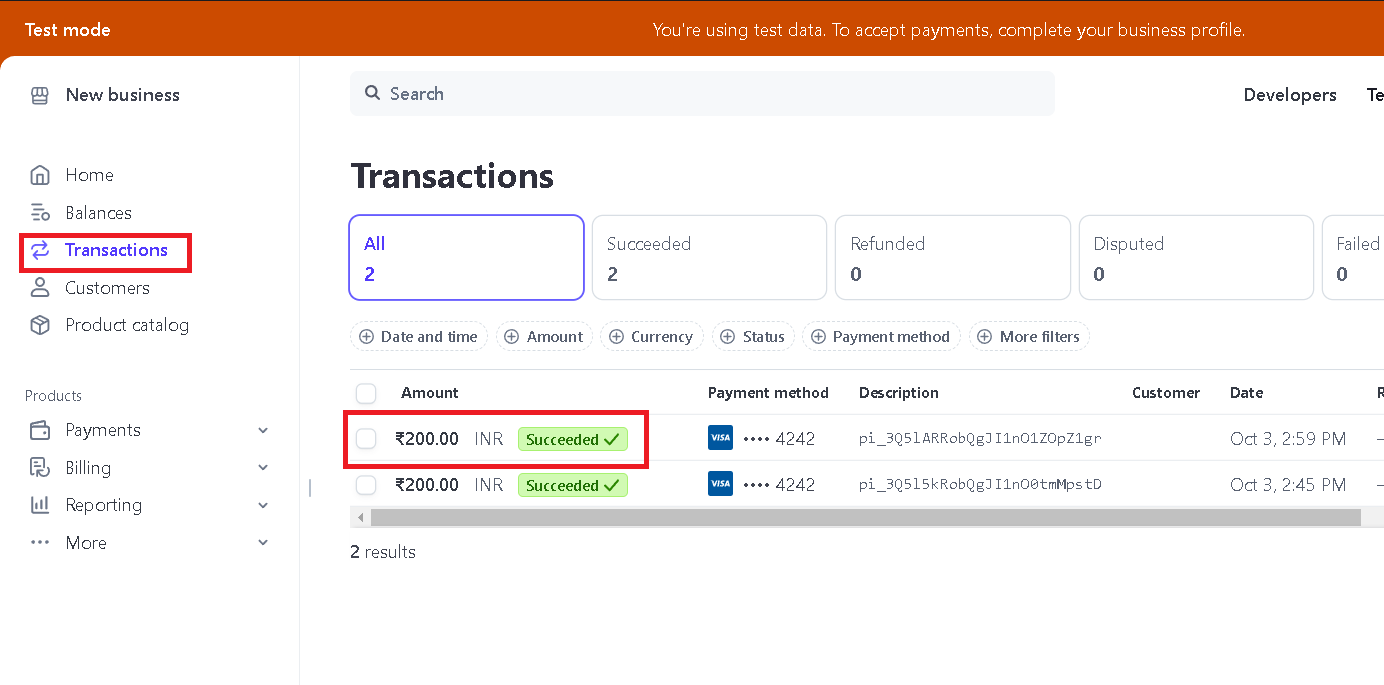
As shown in the screenshot below, you’ll see the Rs.200 payment will appear in the transaction section of your Stripe dashboard.
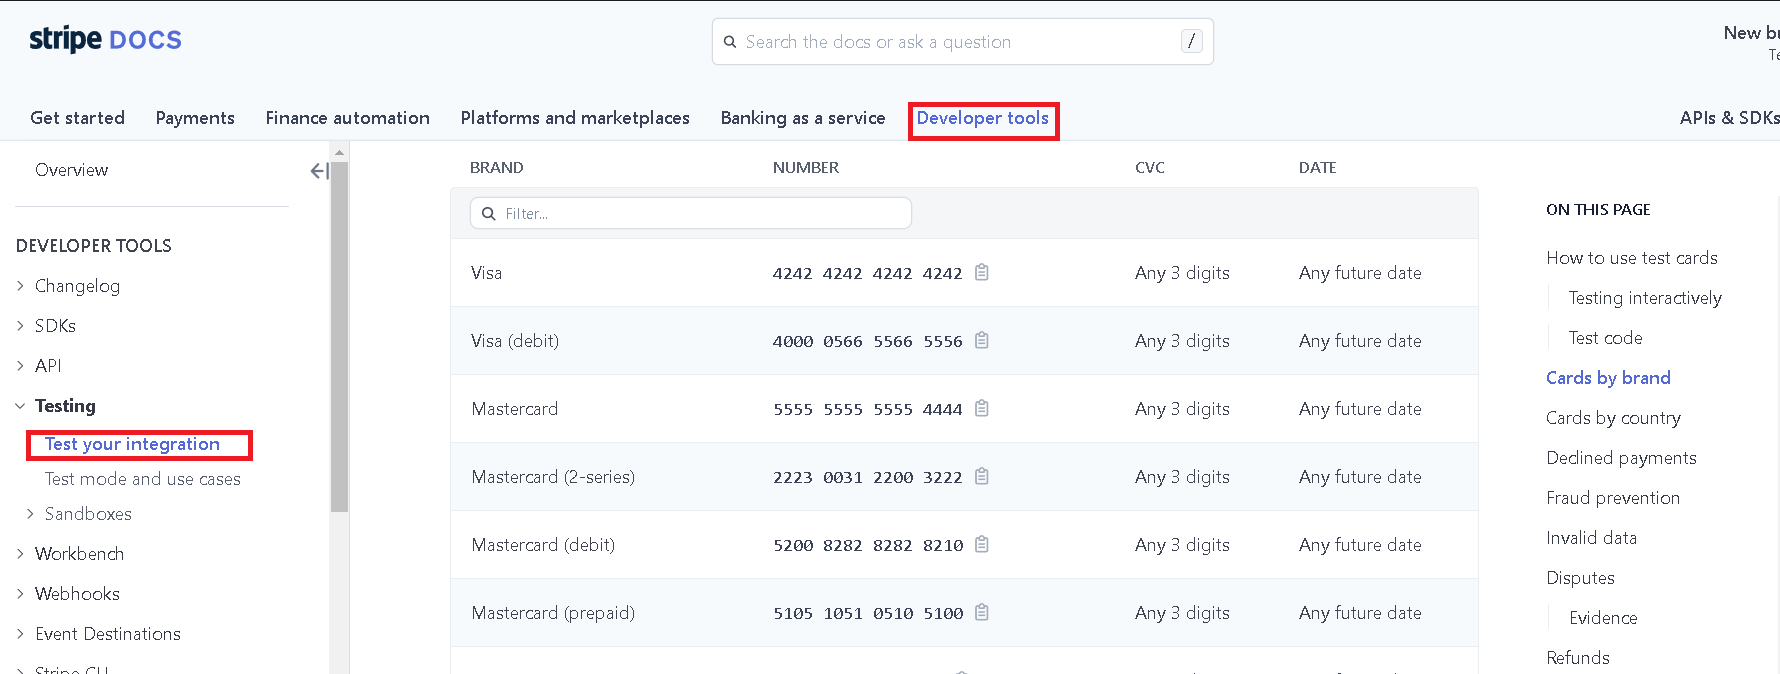
To test the portal’s payment functionality, Stripe offers dummy card details. You can use these to see how digital payment integration operates. For further information, refer to Stripe’s Developer Tools documentation for testing card details.
You can enter any card details, regardless of the region or brand (e.g., Visa, MasterCard). Once the information is entered, click the "Pay Now" button to finalize the payment.
After completing the payment, you’ll see the status of the initiated payment change from “Incomplete” to “Succeeded.”
Integrating Stripe payments into your Power Pages site streamlines the payment process, making it more convenient for members and customers to pay for memberships, classes, and sessions. By following the set-up and testing procedures, you can guarantee a smooth and secure payment experience, ultimately improving customer satisfaction.
Frequently Asked Questions (FAQs):
1. What is the Design Studio’s Setup Workspace?
The Design Studio’s Setup Workspace is a user-friendly tool within Power Pages that allows you to quickly add payment options to your website. It enables you to integrate a payment section into your multi-step forms without any coding knowledge.
2. Can I integrate payments into single-step forms?
No, payment integration can only be added to multi-step forms. The Setup workspace is designed to streamline the payment process within these forms, enhancing the user experience.
3. Which payment providers can I link to my Power Pages site?
You can link your Power Pages site to various payment providers, including popular options like Stripe. This integration allows for seamless and secure payment processing for your users.
4. Do I need coding skills to add payment options to my site?
No, you do not need any coding skills to add payment options. The Design Studio’s Setup workspace provides a no-code solution, making it accessible for anyone to integrate payments into their Power Pages site easily.