Exploring Forms in Canvas Apps

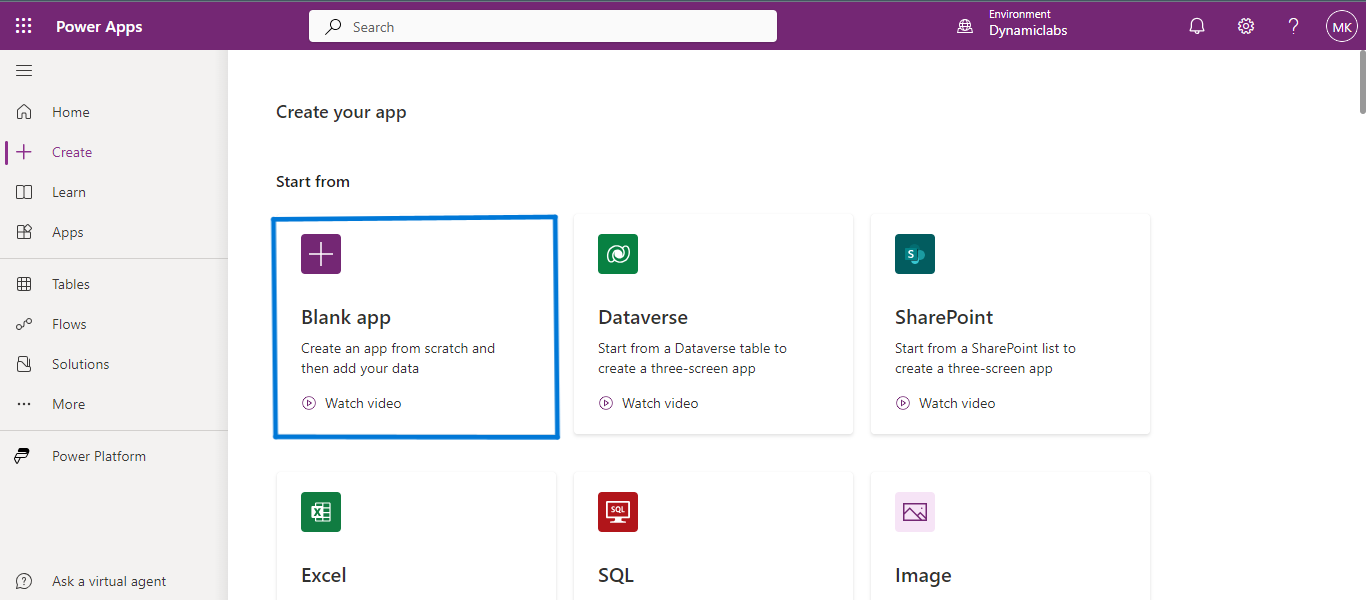
To create a canvas application on the Power Platform, navigate to make.powerapps.com, the central hub for app creation. Here, you will find various options, each offering distinct functionalities for app creation. Among these options, locate and select the "Blank App".
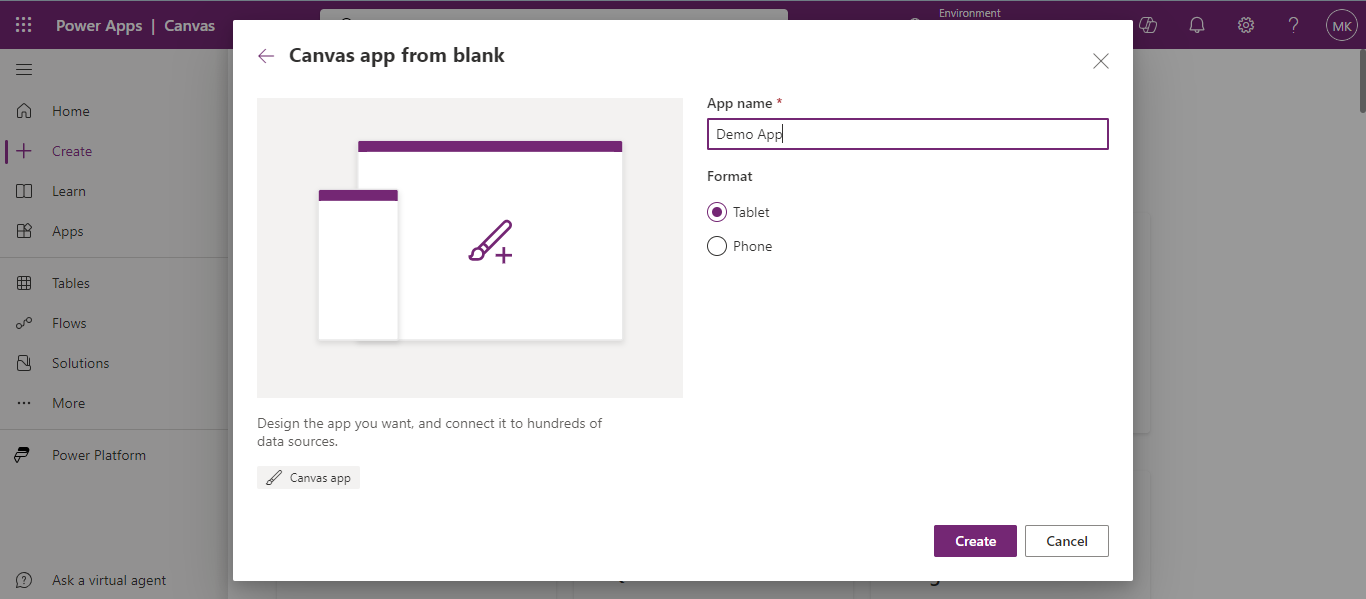
Click on ‘Create’ on the Blank Canvas app tile.

Enter the desired name for your app into the provided input field, and then select the preferred app format according to your requirements.
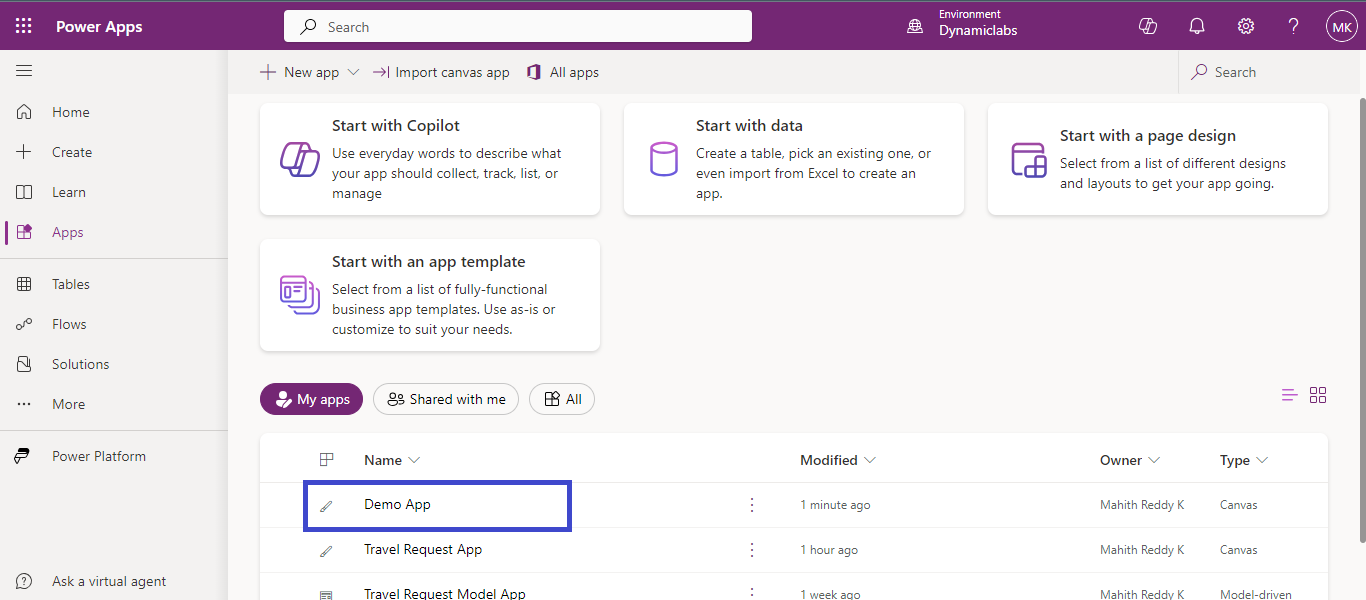
After clicking the create button, your app will appear in the list below with the name you provided. Click the ellipsis icon button, then select "Edit" from the dropdown that appears. The app will then open in editable (developer) mode.
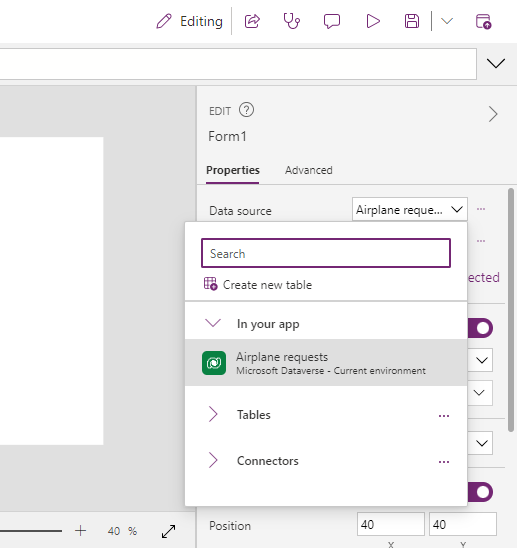
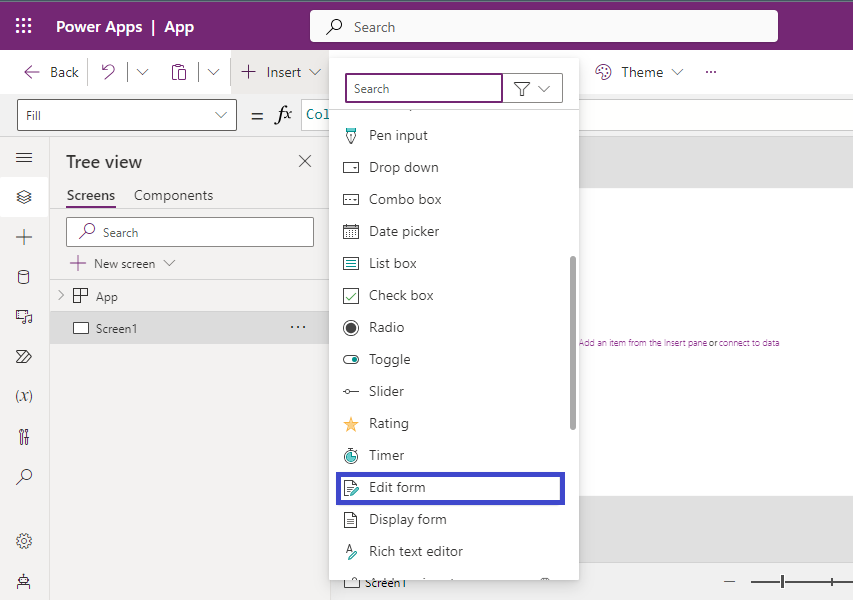
Open a blank screen in the canvas app, from the insert drop-down from the input section select the Edit form option.
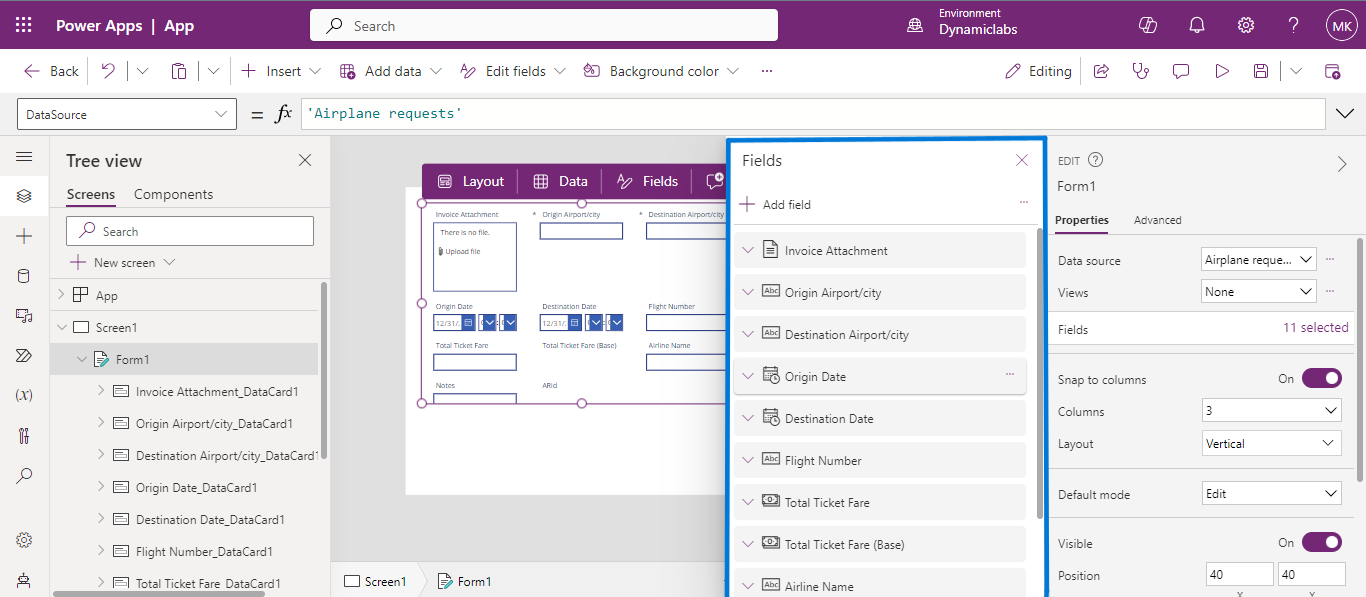
On the properties tab of the right-side pane, select the data source which would be a table that you have created earlier.