How to Add a Smart Export Button to the Dynamics 365 Command Bar
July 05, 2026
#Dynamics 365#JavaScript
Chetan Jha
Introduction
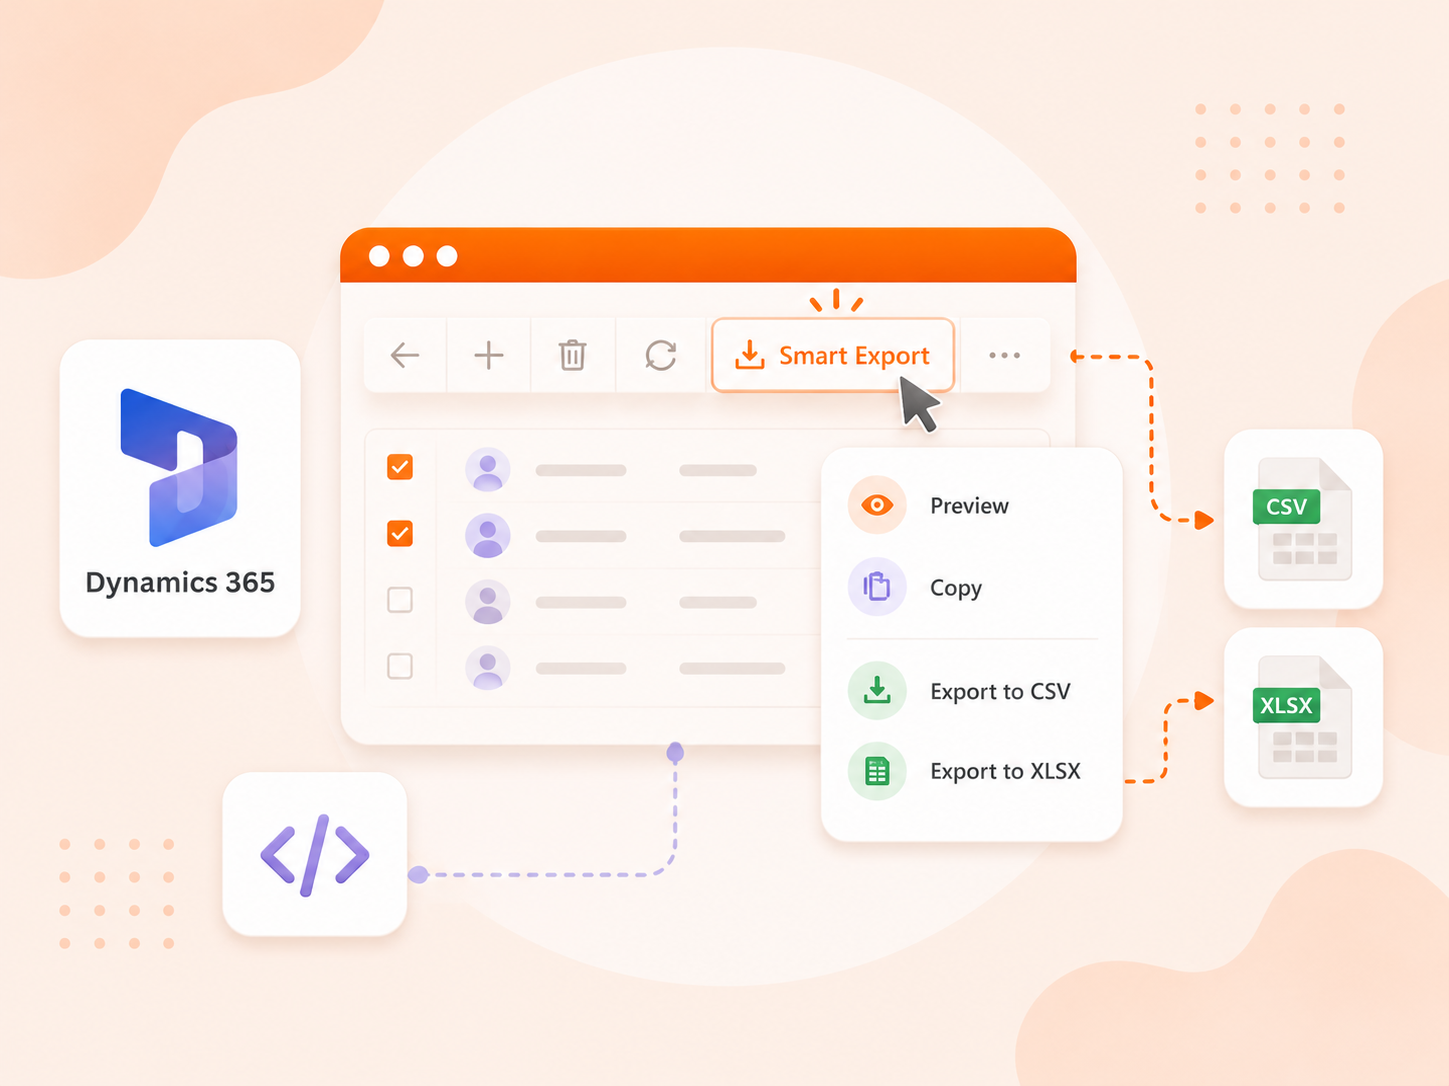
Exporting contact information from Dynamics 365 is a common requirement for reporting, collaboration, and data sharing. While the built-in Export to Excel feature works well for full datasets, it is not ideal when users need to quickly export only selected records or specific fields.
In this guide, you'll build a custom Smart Export button for the Contact entity command bar. With a single click, users can preview selected contact records, choose the fields they want, and either copy the data to the clipboard or download it as a CSV or XLSX file. The solution uses a JavaScript web resource for the ribbon command and an HTML web resource for the interactive preview dialog, providing a faster and more user-friendly export experience.
Prerequisites
A Dynamics 365 environment with System Administrator or System Customizer permissions, because we will be creating web resources and editing the command bar.
Basic familiarity with Dynamics 365 web resources
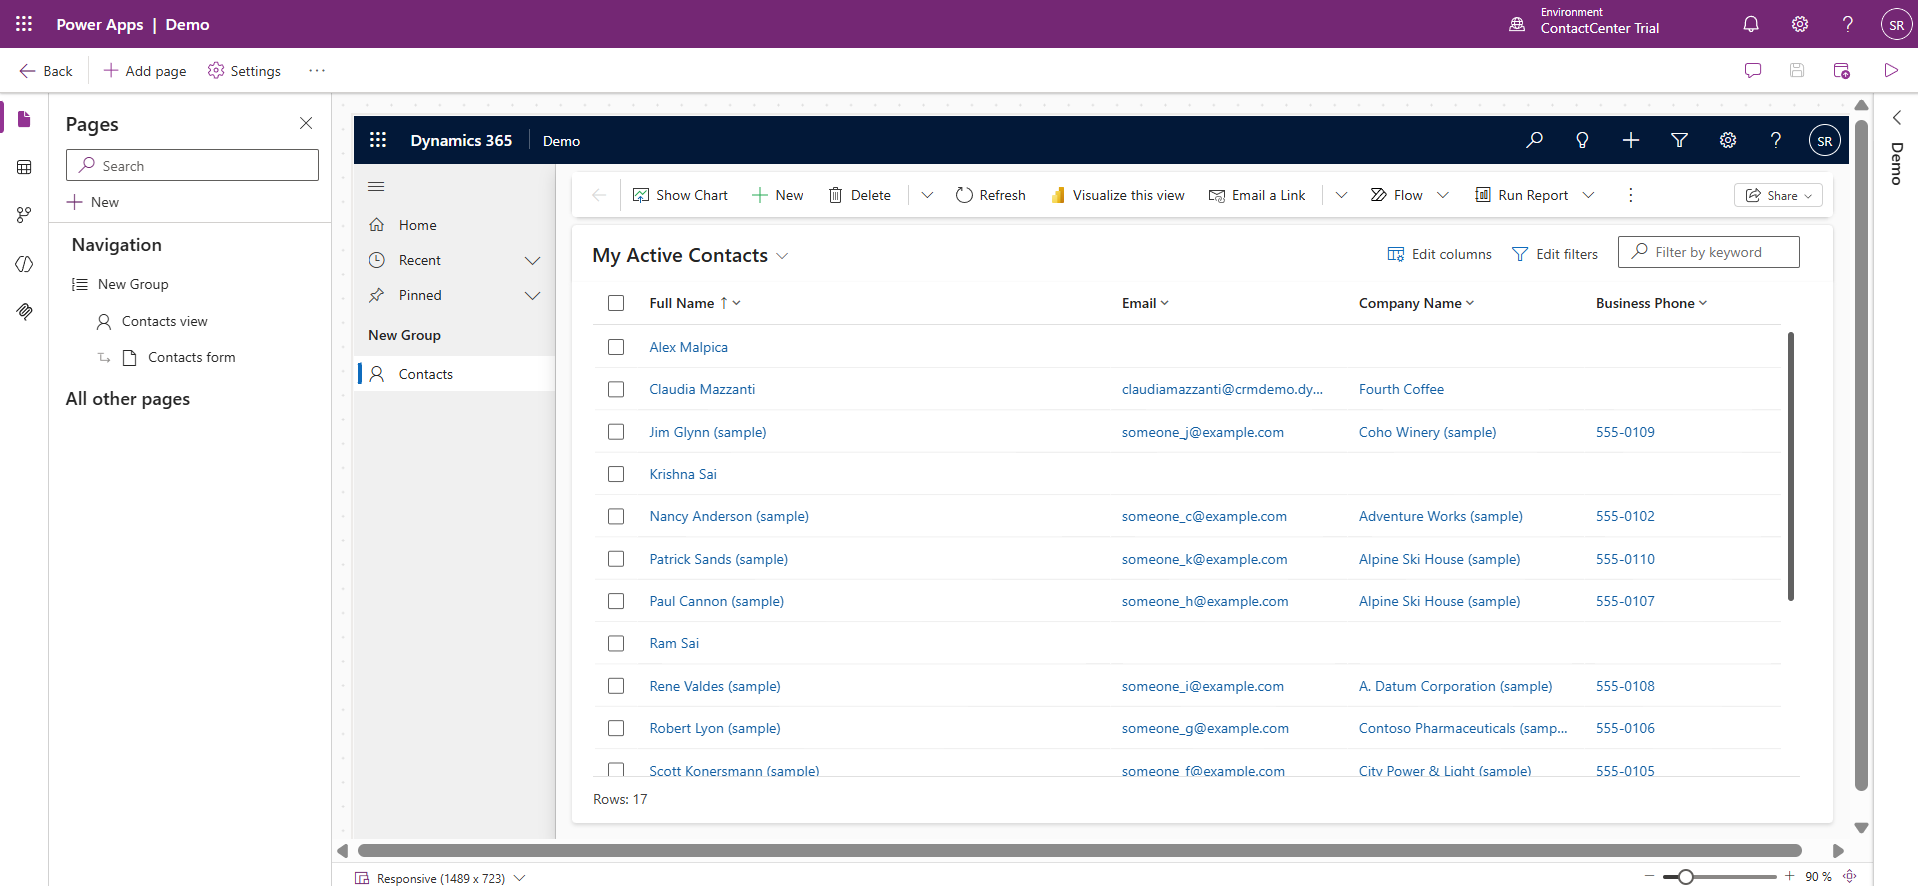
Create Model driven app and add contact entity in navigation.
Step by Step Guide
Step 1: Create the Button in the Command Bar
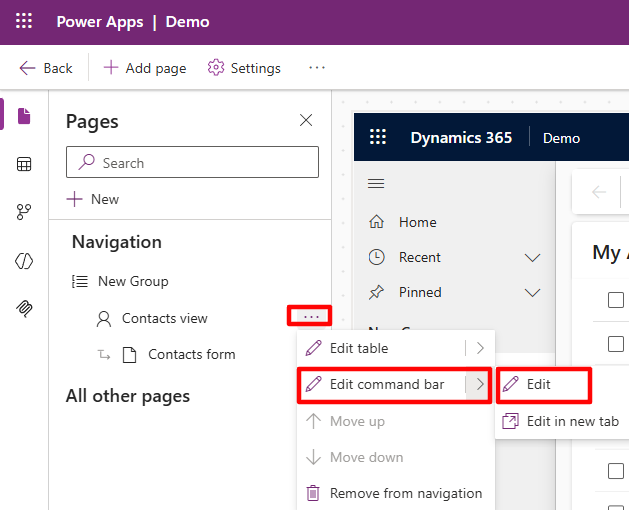
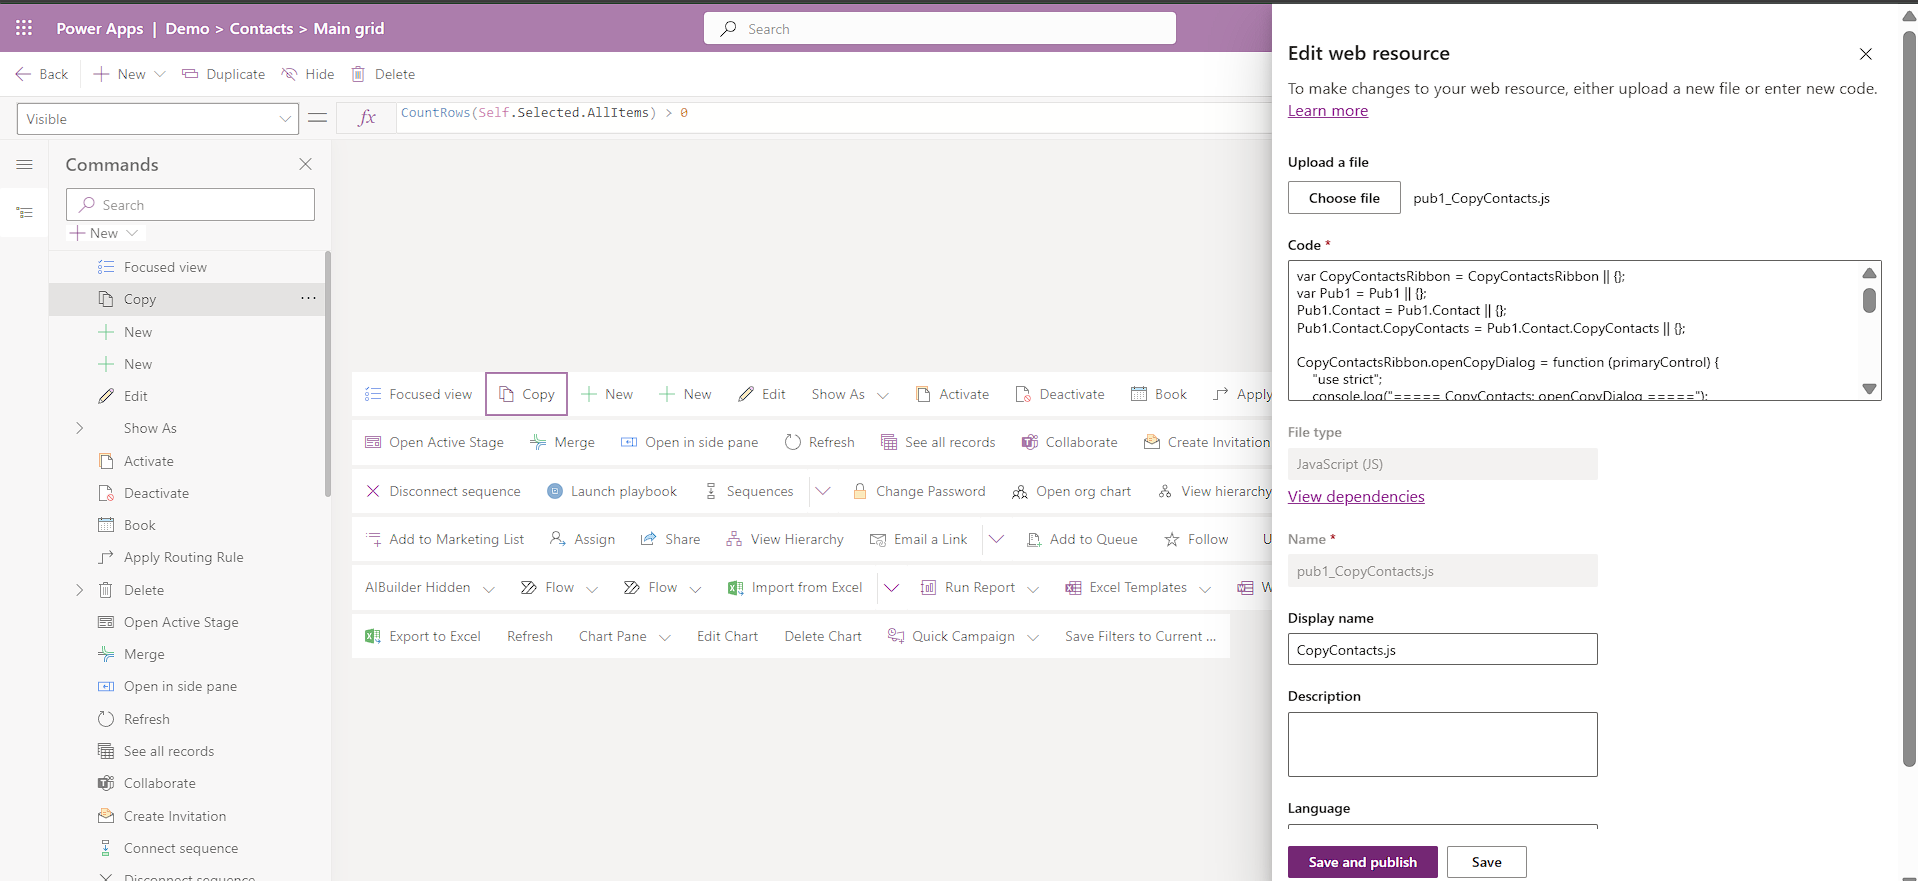
Open the Command Bar Editor
Now open your Model Driven App in the app designer. Navigate to the Contact entity and select the Main Grid view. Click on Edit Command Bar and choose the Main Grid option. This is where we will add our Smart Export
Need help with your business solution?
Our team can help you implement the right solution for your organization.
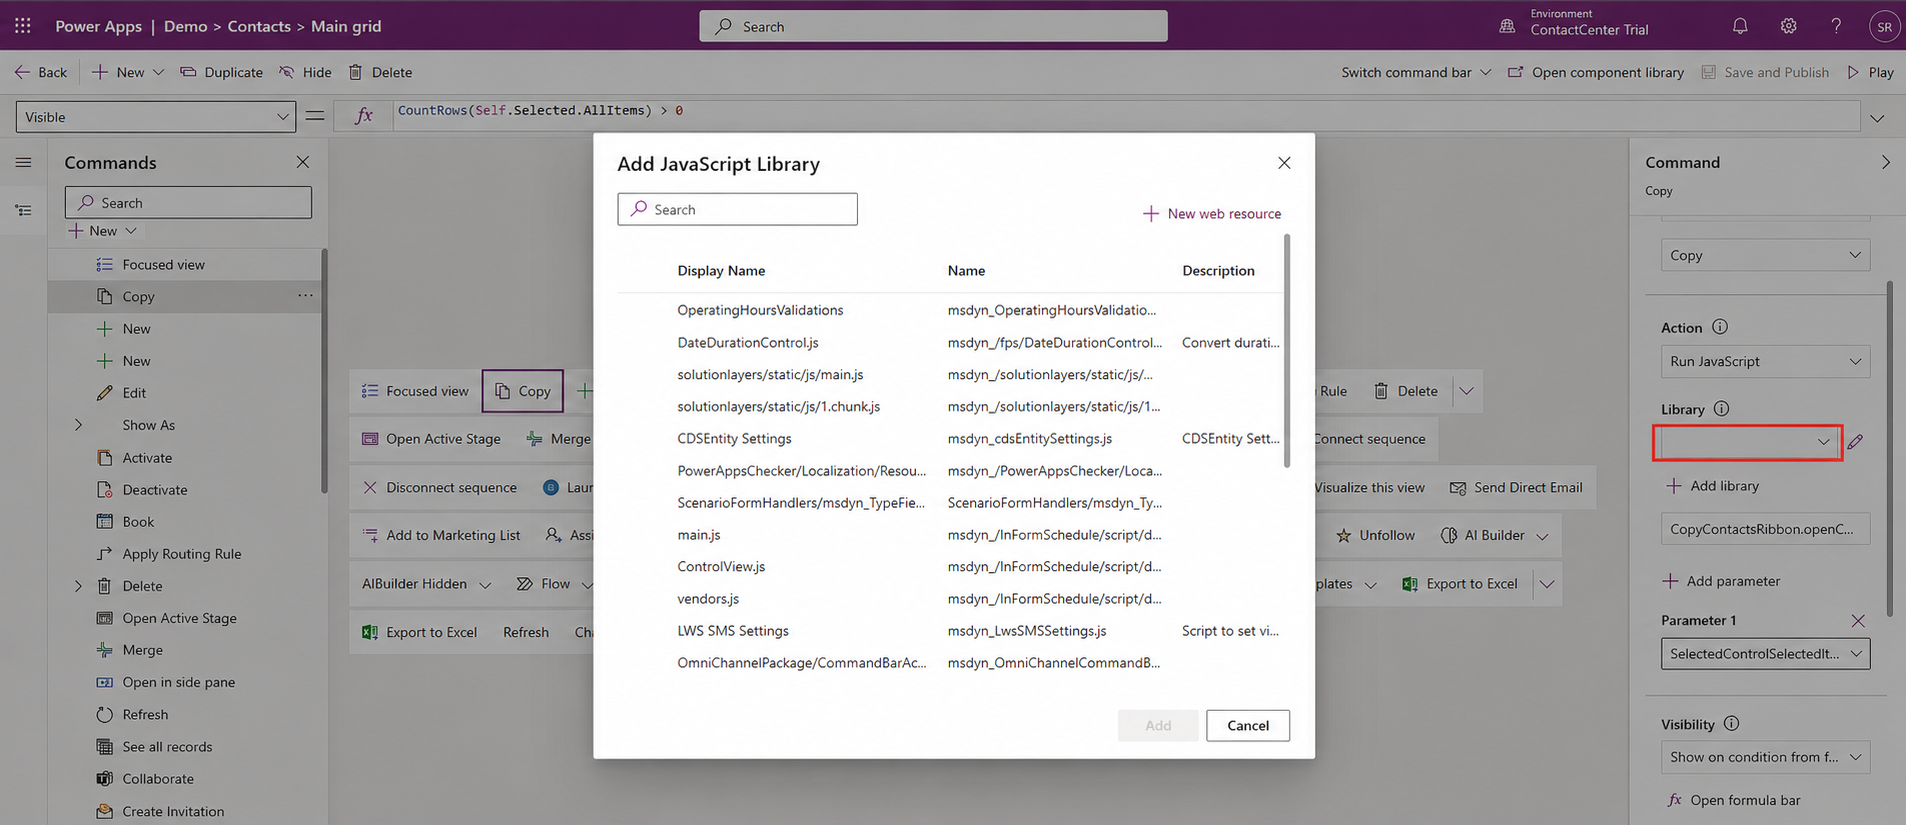
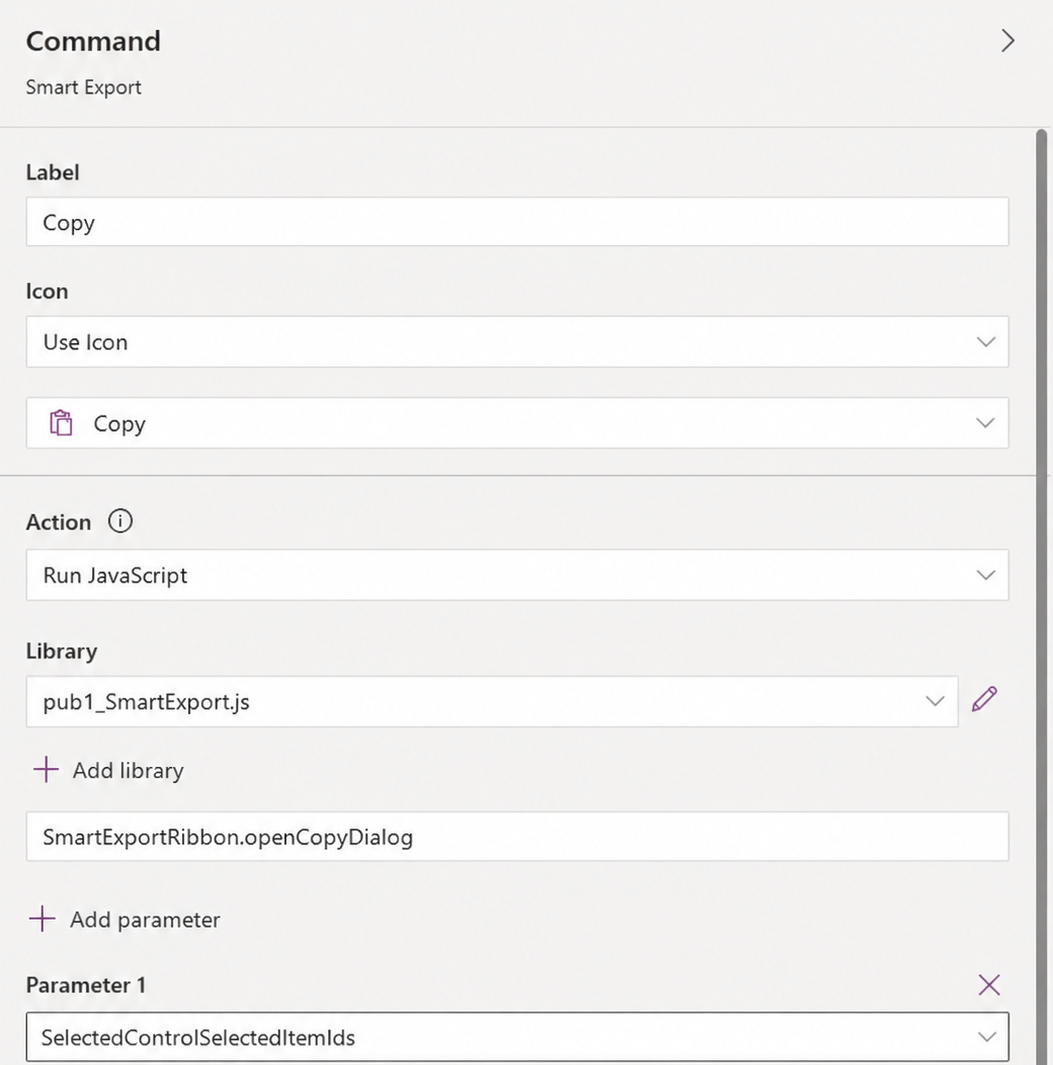
Now in function field enter the full function name
SmartExportRibbon.openCopyDialog
Click Add Parameter and from the dropdown select SelectedControlSelectedItemIds. This parameter passes the grid control reference to our JavaScript function so it can read which records the user has selected.
Your command configuration should look like this.
Command configuration with JavaScript action, library, function, and parameter
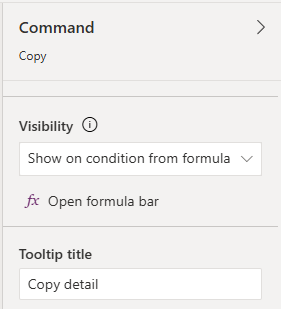
Visibility set to show on condition and tooltip configured
Click on open formula bar and enter CountRows(Self.Selected.AllItems) > 0.
Save and publish the command bar. Then go back and publish your Model Driven App as well so the changes take effect.
Step 2: Add the HTML Web Resource
Open your solution and navigate to Web Resources. We need to create a web resource here.
Create an HTML web resource with the display name SmartExport, name SmartExport, and type Web Resource (HTML). Copy code from below github gist and past in code section.
This file is the Export Contacts dialog that users interact with. You can design the UI however you want. The styling and layout are up to you. What matters is the core logic, which works in six parts.
First, the page reads the selected contact IDs from the URL parameter that the JavaScript web resource passed when it opened the dialog.
Second, it calls the Dataverse Web API to fetch the actual contact records. It sends IDs in batches of 15 and uses the odata.include-annotations header so that option sets, lookups, and dates come back as readable labels instead of raw codes.
Third, if the direct API call fails, it falls back to using the parent window Xrm.WebApi which is already authenticated inside the Dynamics 365 session.
Fourth, it processes each raw API record by collecting the formatted value annotations first, then building a clean display map so every field has a human readable string.
Fifth, it uses a field registry, a simple array where each entry has the API field name, a display label, and a default checked state. Custom fields not in this list are detected automatically and shown with a CUSTOM tag.
Sixth, it builds the export output in three formats. CSV with quoted values, tab separated for clipboard paste into Excel, and plain text in a card layout. It also generates XLSX files entirely in the browser using a built in Office Open XML builder with no external libraries.
Step 3: Understanding the Dataverse Web API Integration
The Smart Export dialog retrieves Contact data directly from Dataverse using the Web API. The Web API logic is already included inside the HTML web resource that you copied from the GitHub Gist. No additional setup is required.
After creating the HTML web resource, open the code and locate the fetchFromApi() function.
async function fetchFromApi(ids) {
    var all = [], BATCH = 15;

    for (var i = 0; i < ids.length; i += BATCH) {

        var batch = ids.slice(i, i + BATCH);

        var filter = batch
            .map(function(id) {
                return 'contactid eq ' + id;
            })
            .join(' or ');

        var resp = await fetch(
            '/api/data/v9.2/contacts?$filter=' +
            encodeURIComponent(filter),
            {
                headers: {
                    'OData-MaxVersion':'4.0',
                    'OData-Version':'4.0',
                    'Accept':'application/json',
                    'Prefer':'odata.include-annotations="*"'
                },
                credentials:'same-origin'
            }
        );
    }
}
What This Web API Does
This function:
Receives the selected Contact IDs from the command bar button.
Builds a Dataverse Web API query.
Calls the Contact table using:
/api/data/v9.2/contacts
Retrieves the selected Contact records.
Returns formatted values for lookups, choice fields, and dates.
Where to Customize the Web API
If you want to export additional fields, modify the field list inside the FIELD_DEFS array.
var FIELD_DEFS = [
['fullname', 'Full Name', true],
['emailaddress1', 'Email', true],
['telephone1', 'Business Phone', true]
];
If you want to use another table, update the Web API endpoint.
Example:
/api/data/v9.2/accounts
or
/api/data/v9.2/leads
How to Find the Logical Name of a Field
1. Open Power Apps Maker Portal.
2. Navigate to Tables.
3. Open the Contact table.
4. Select Columns.
5. Copy the column's Logical Name.
6. Add it to the FIELD_DEFS array.
The solution also includes a backup method called fetchViaXrm().
xrm.WebApi.retrieveRecord(...)
This method automatically runs if the direct Web API request fails, ensuring the dialog can still retrieve Contact data while users are working inside Dynamics 365.
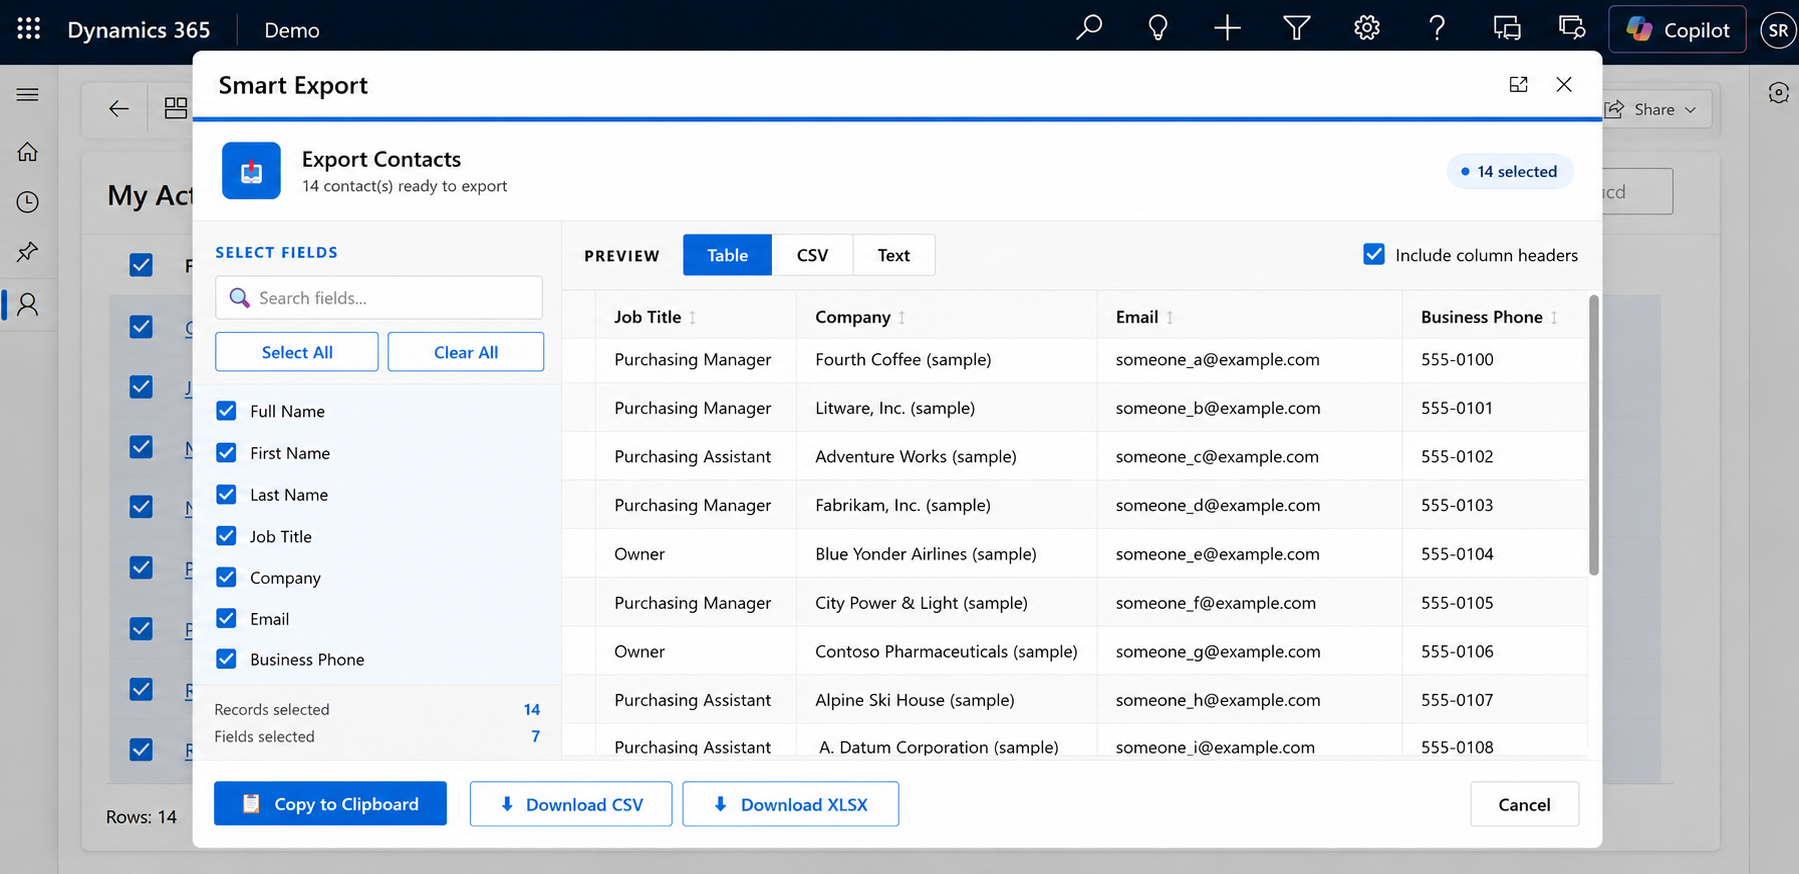
Preview
Click the Smart Export. The Export Contacts dialog opens up showing all the selected records with the default fields checked on the left panel and a live table preview on the right.
Conclusion
That covers everything you need to build a custom Export Contacts button in Dynamics 365. The solution is entirely self contained with no external dependencies. The JavaScript web resource handles the ribbon integration and passes selected record IDs to the HTML web resource, which takes care of data fetching, field selection, preview rendering, and all three export formats.
The HTML page reads directly from the Dataverse Web API, so it always gets the latest data with properly formatted values for option sets, lookups, and dates. The XLSX generation happens entirely in the browser without any third party library.
You can extend this further by adapting it for other entities, adding more export formats, or saving field selection presets. The core logic is flexible enough to build on.
Frequently Asked Questions
1. Can I use this with entities other than Contact?
Yes. Update the field registry in the HTML file to match the fields of your target entity, change the API endpoint from contacts to your entity set name, and update the JavaScript file to reference the correct web resource name.
2. What happens if the user selects a large number of records?
The page fetches records in batches of 15 to keep API calls efficient and avoid URL length issues. It handles dozens of records smoothly. For very large selections, the dialog may take a moment to load but will still work.
3. Does the XLSX download need any external library?
No. The HTML file includes a built in XLSX builder that generates a valid Office Open XML package using pure JavaScript. It creates the ZIP structure, shared strings, and worksheet XML entirely in the browser.
Both intro and busniess scenario explains the same thing (the agenda of this blog), Keep either one of them, or merge important points and make it short