In the Power Pages, customization is key to delivering solutions tailored to specific business needs. Power Pages provides an accessible way to create customer-facing web applications, but its true strength emerges when paired with robust backend integrations.
In this blog, we will explore how custom forms in Power Pages can be used to capture user input and initiate Power Automate flows, enabling seamless creation of Dataverse records while preserving flexibility for customization.
Step-by-step guide:
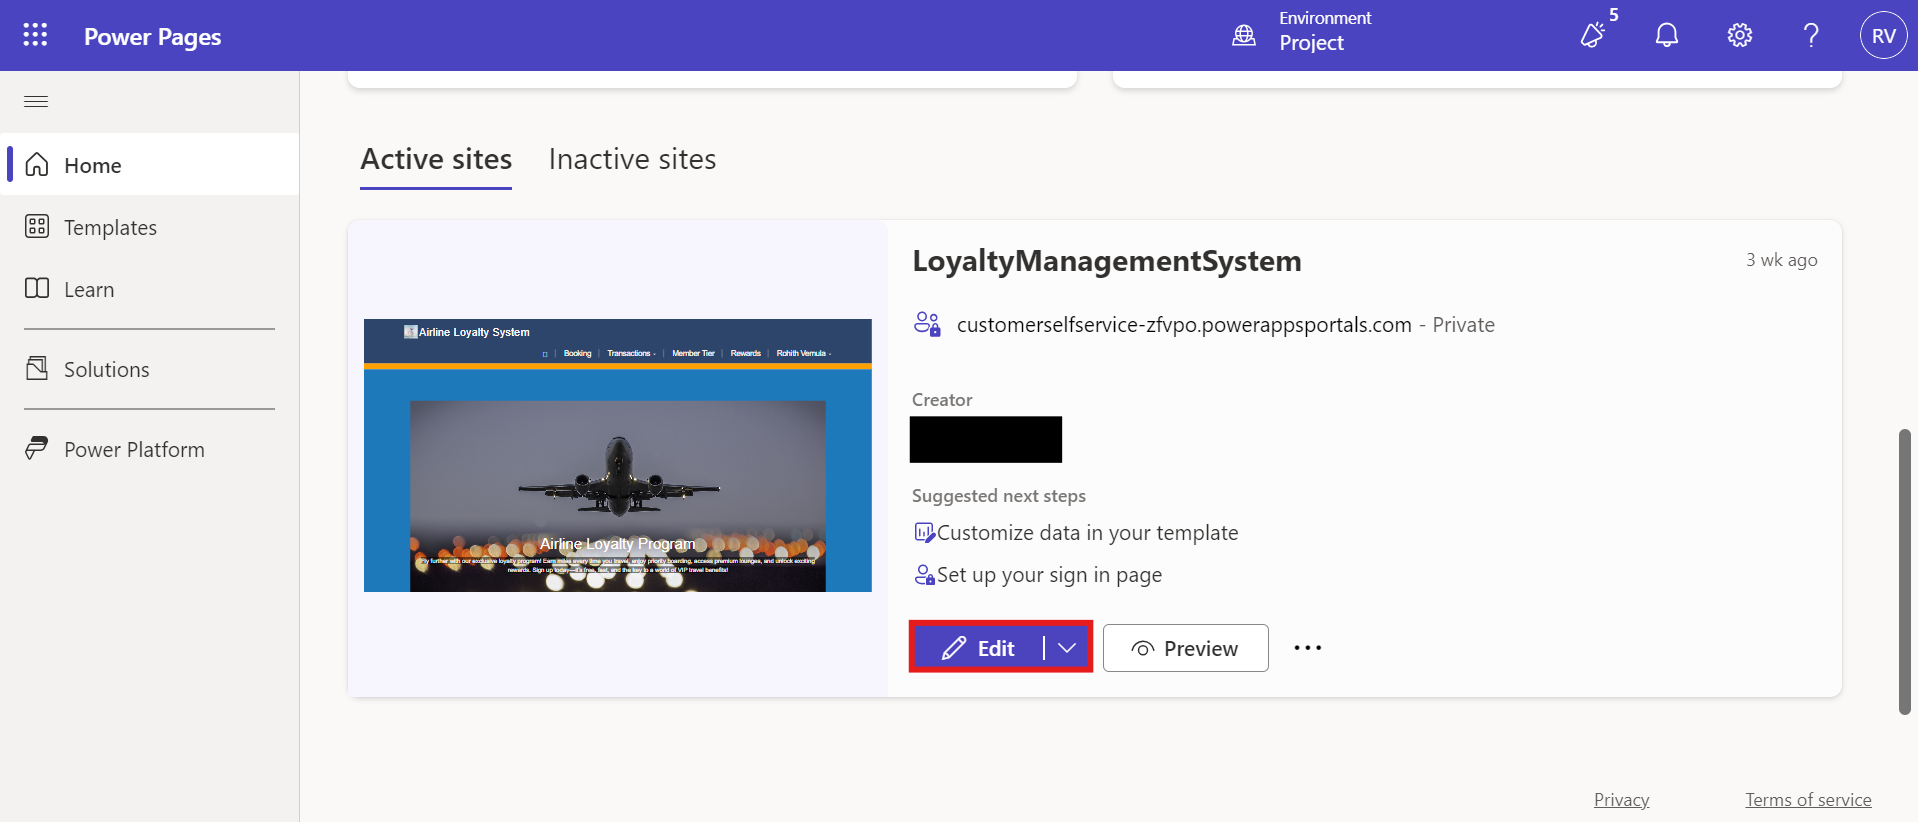
Open Power Pages Studio and edit your site or create a new site.
Locate or Create the Page:
1. If you have an existing page:
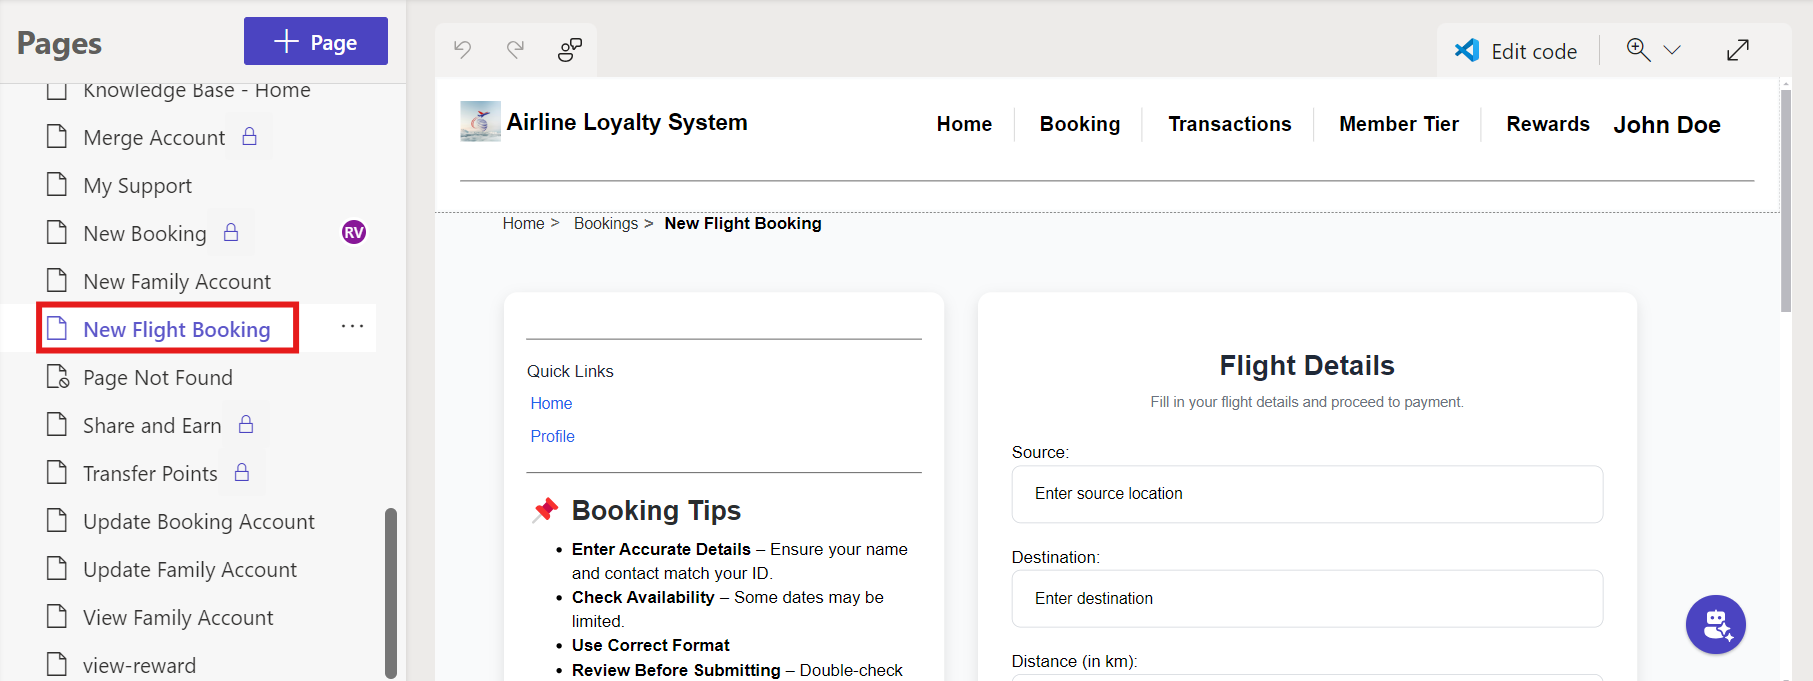
Go to the "Pages" section and find the page with the custom form.
2. If you’re creating a new page:
Click on “New Page" and name it appropriately (e.g., NewBooking), and choose a layout that fits your design needs.
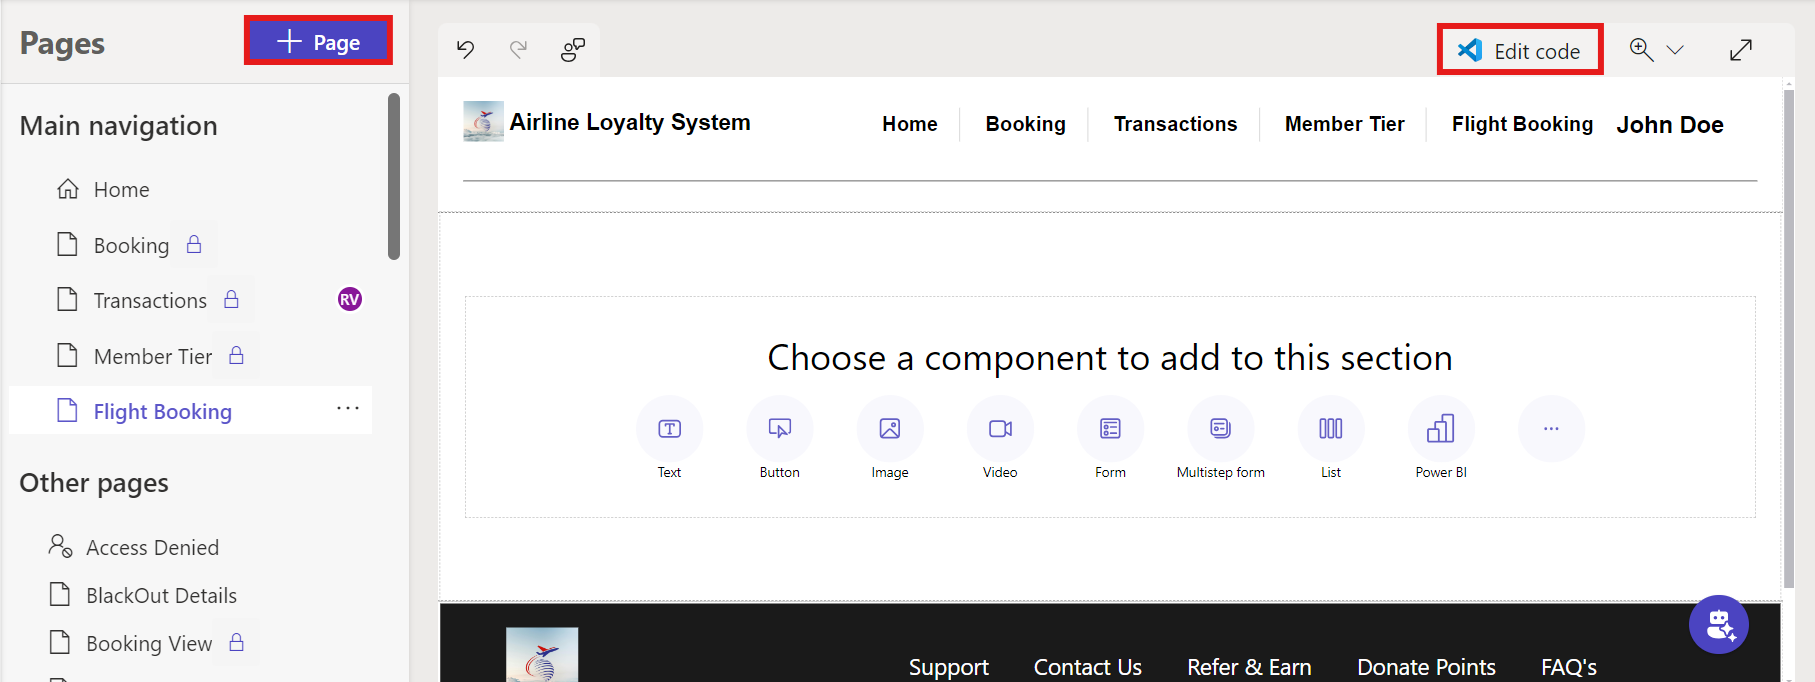
If you want to create a new custom form to collect user data, add a new page and click on “Edit Code,” located at the top-right corner of the Power Pages studio.
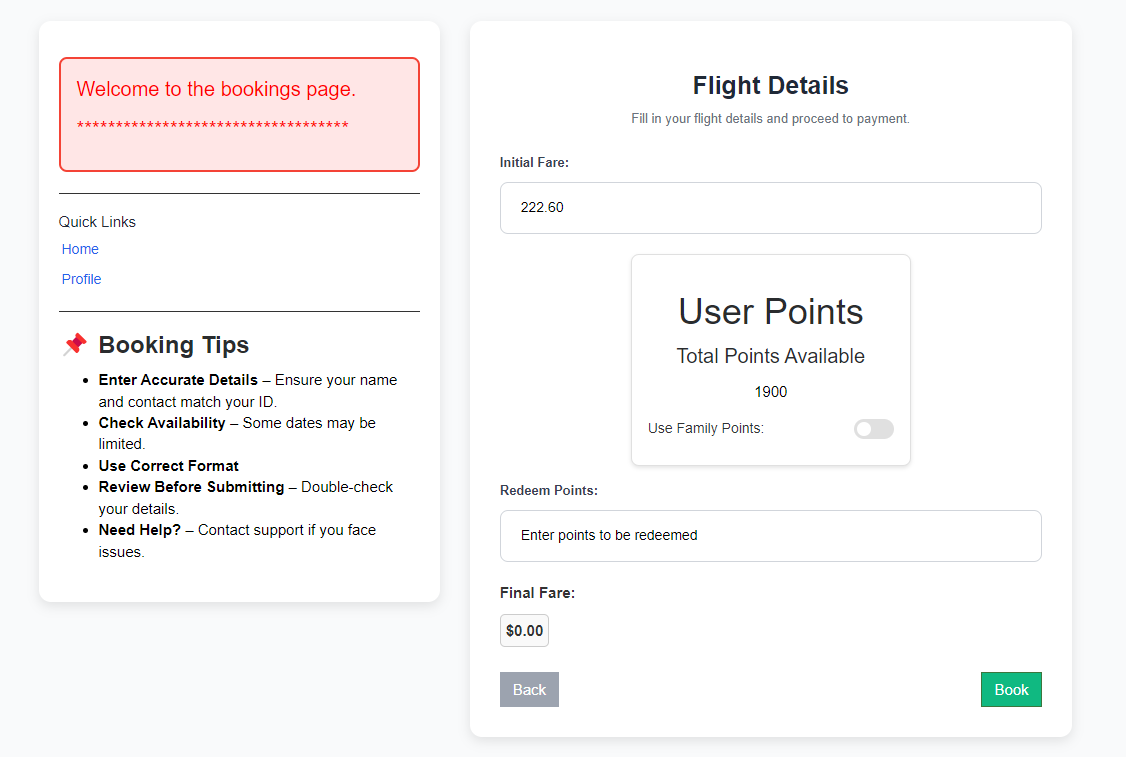
Now, you can tailor the page to your specific needs by adding custom HTML and CSS, plus JavaScript for validation. Feel free to check out online articles to find a template that fits your use case better.
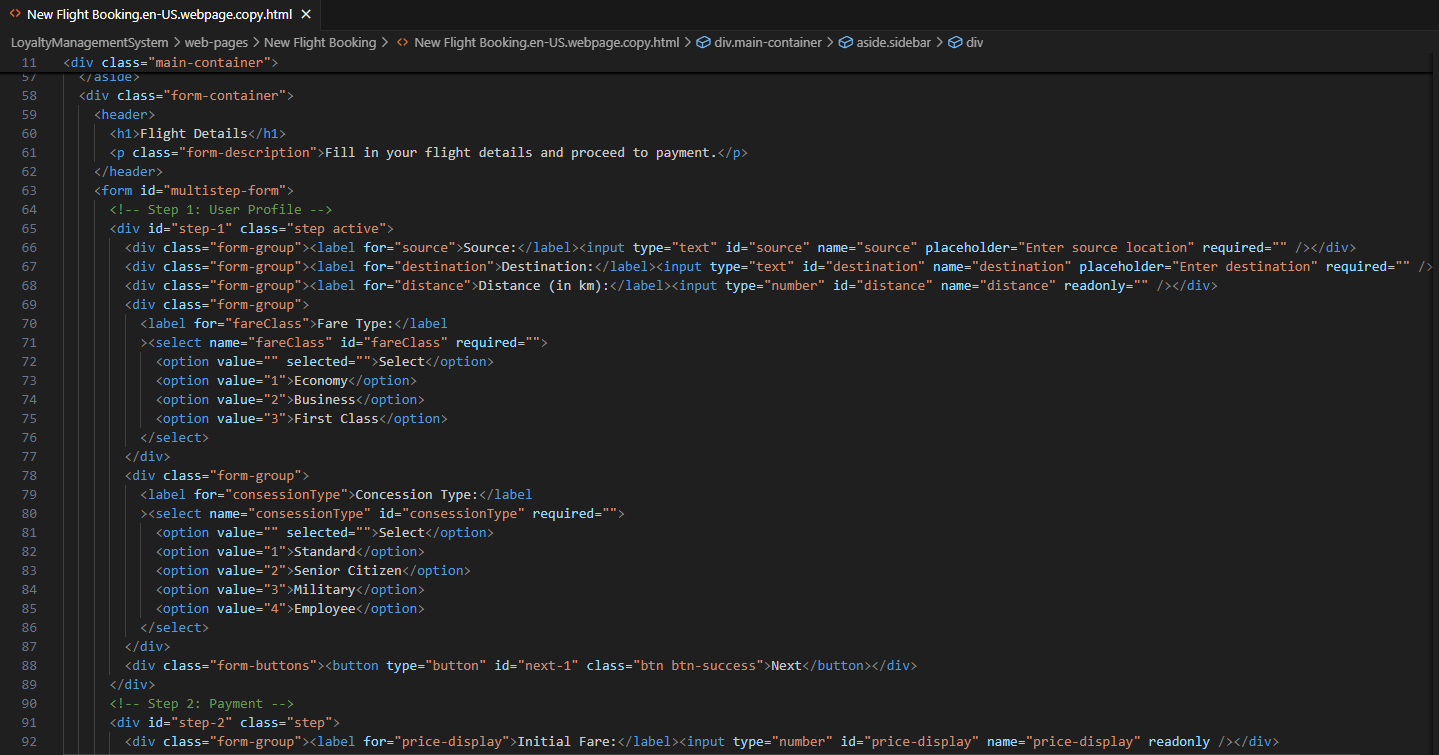
Once you’ve created a form that fits your needs, go ahead and add a submit button. Make sure to give it the ID 'submit' so that we can use it in our Java Script to add functionality.
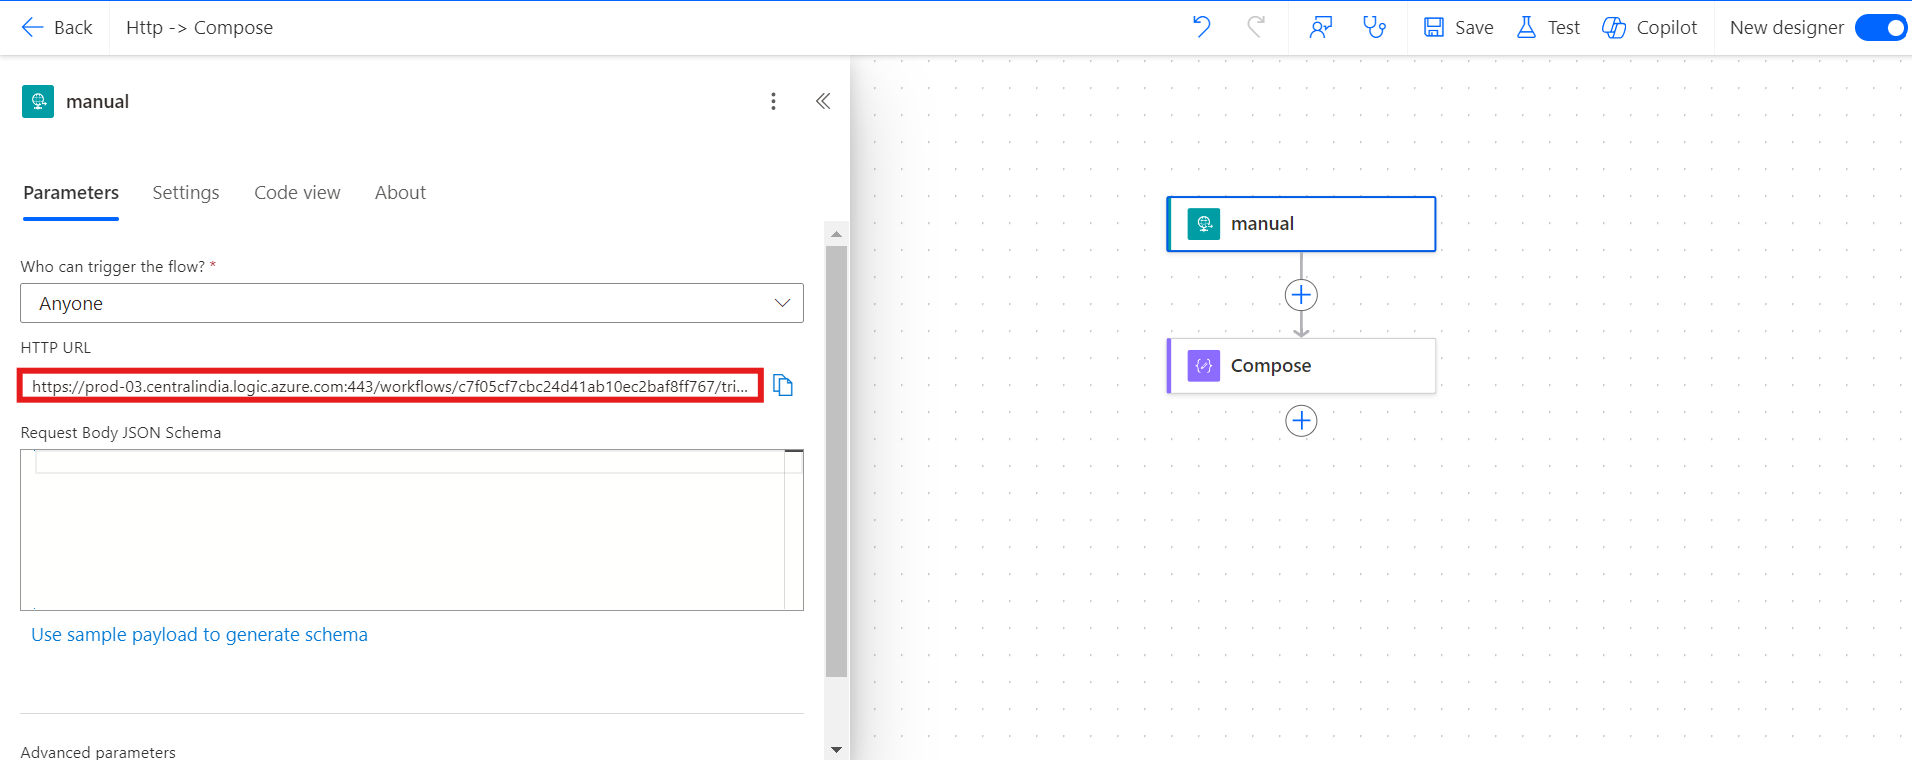
Now, head over to Power Automate and set up a new automated cloud flow. Choose the trigger as 'When an HTTP request is received'.

Next, add a 'Compose' action to your flow. Set the body of the HTTP request as the input for this action. Once that’s done, save the flow this will generate a URL that triggers the flow. Finally, copy the URL so you can use it later.
Back in Power Pages, create a new function that fires when the submit button is clicked. Then, add the following code in the code editor.
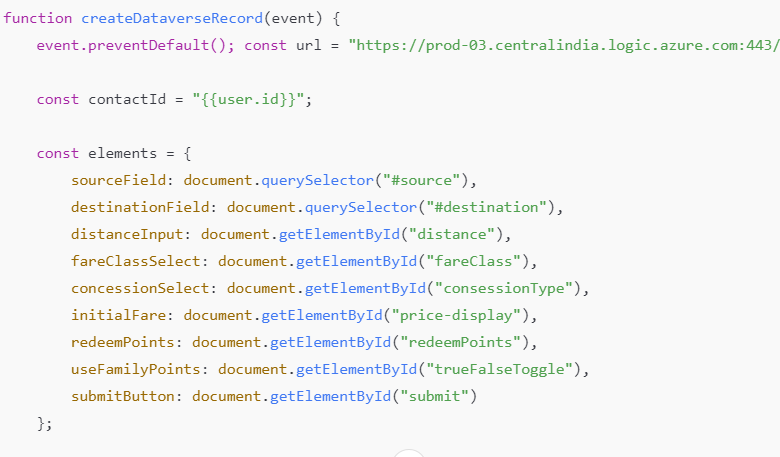
Explanation
This part initializes the API URL, which is the endpoint of your Automate Flow.
The contactId holds the user’s unique ID by retrieving it using LIQUID.
The elements object stores references to various HTML input fields present in the custom form.
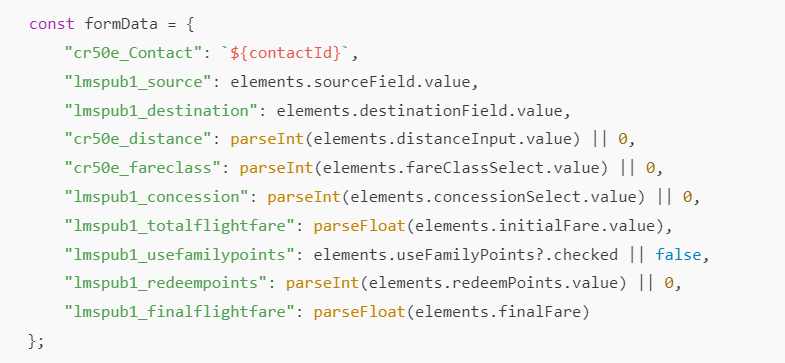
Explanation
This part builds the formData object, which holds the data to be sent in the API request.
It retrieves the values from HTML elements and converts them into the necessary format expected by the dataverse.
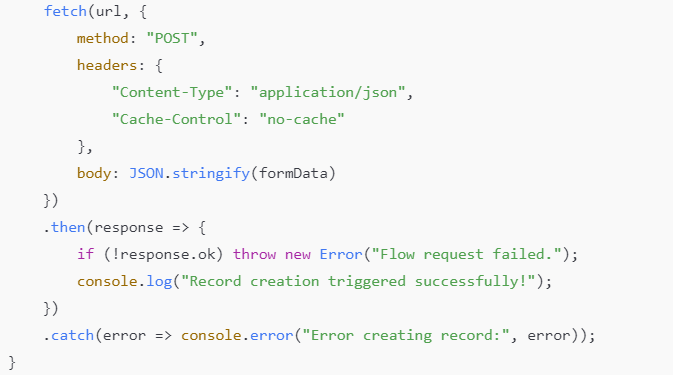
Explanation
This part uses the Fetch API to make an HTTP POST request to the Automate Flow.
The request sends the formData in JSON format with appropriate headers.
If the request is successful, it logs a success message.
If something goes wrong, it logs an error message.

Explanation
The first line selects the submit button from the page using getElementById().
The second line listens for the click event on the submit button and triggers the createDataverseRecord function when the button is clicked.
Now, test your flow by submitting the form with some sample data and copying the HTTP request body.
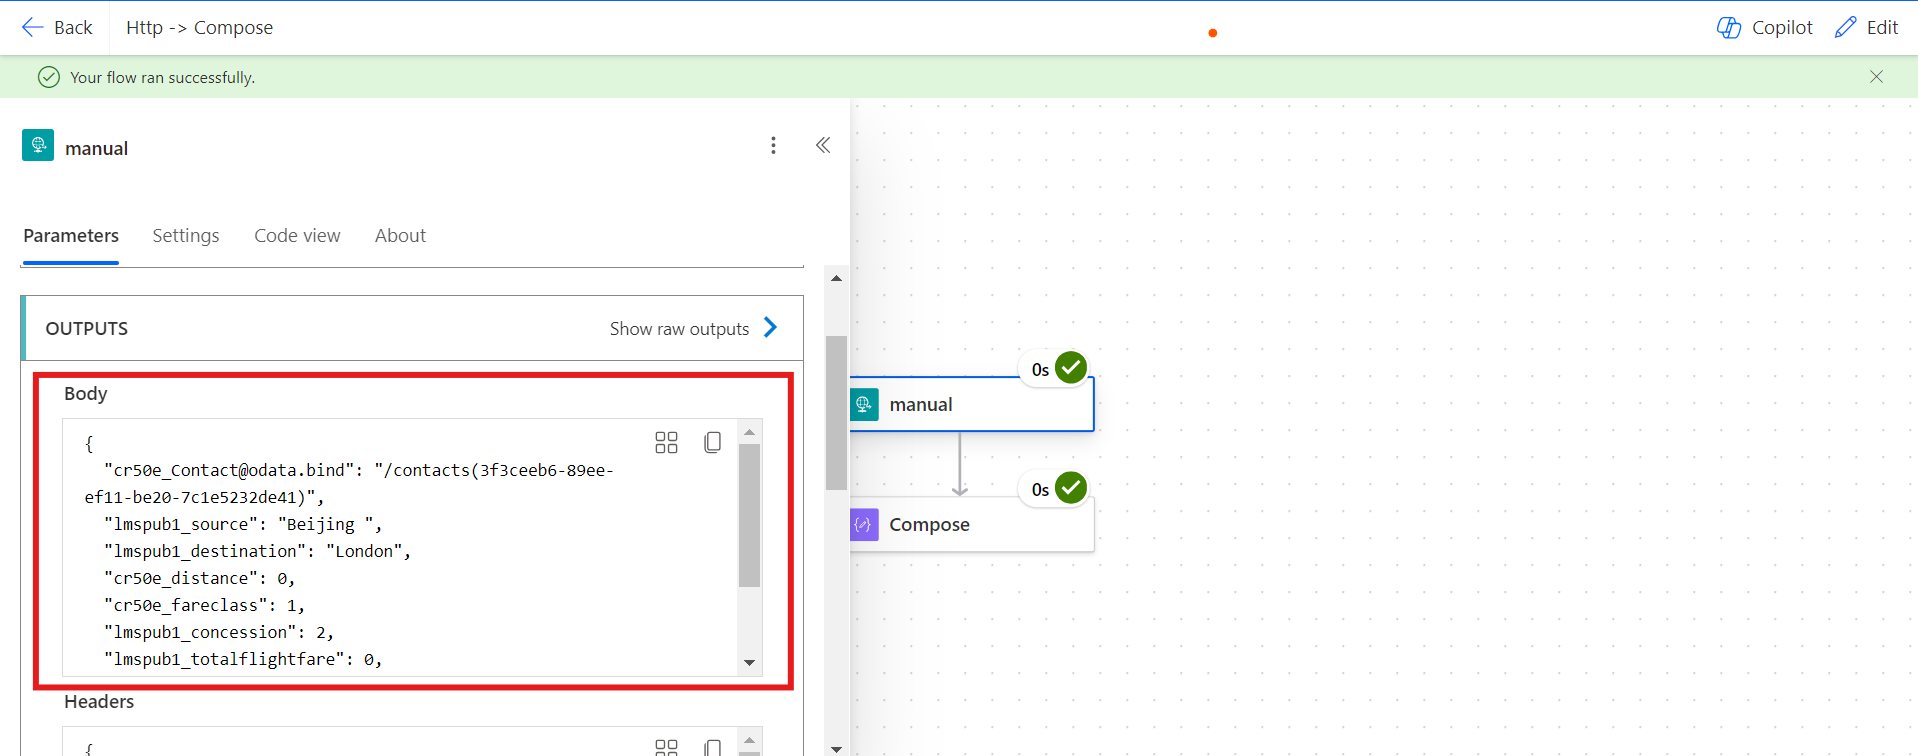
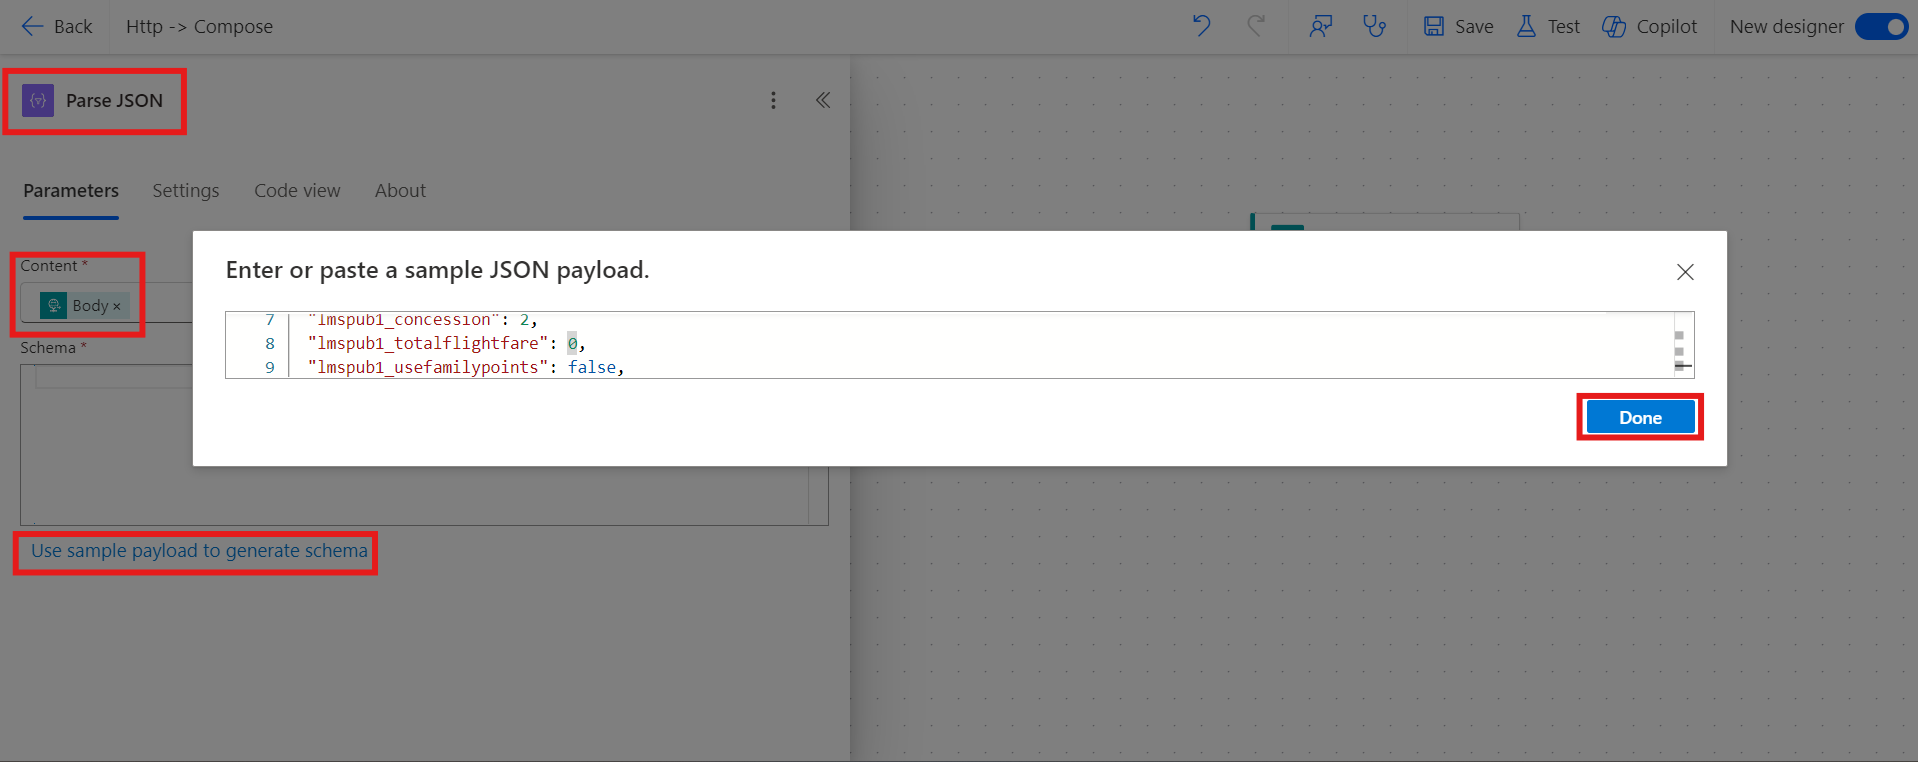
Remove the Compose action and add the Parse JSON action. Set the Content field to the Body output from the HTTP request. Then, paste the previously copied request body into the Use sample payload to generate schema section to automatically generate the schema.
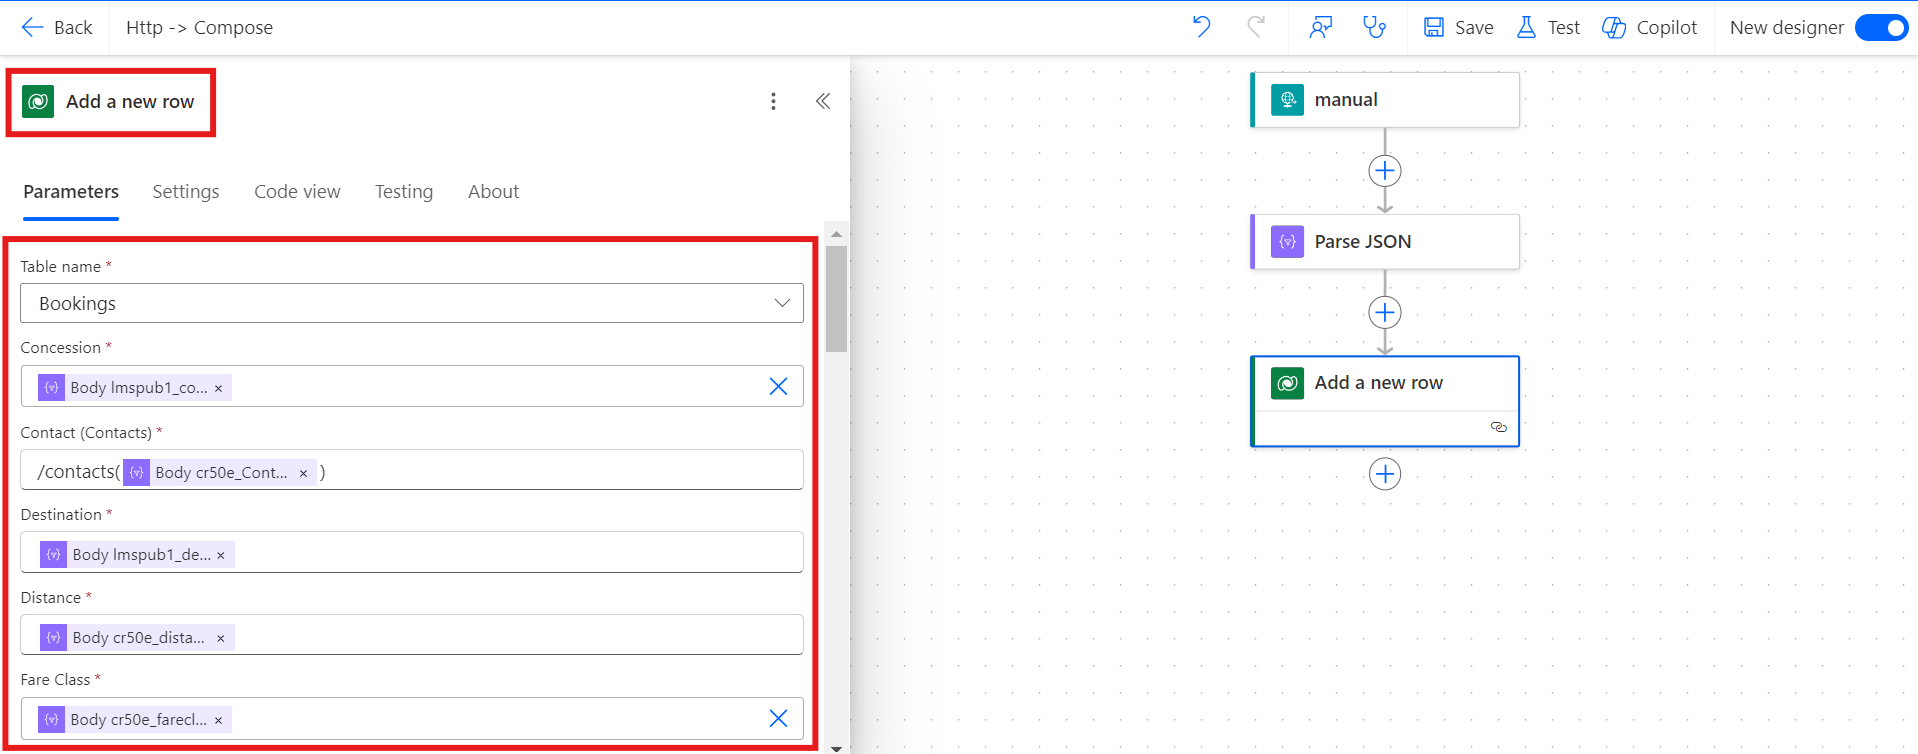
Next, add the Add a new row action from the Dataverse connector to create a new record. Select the desired table, then map all the form fields from the Parse JSON action outputs to the corresponding Dataverse columns in the Add a new row action.
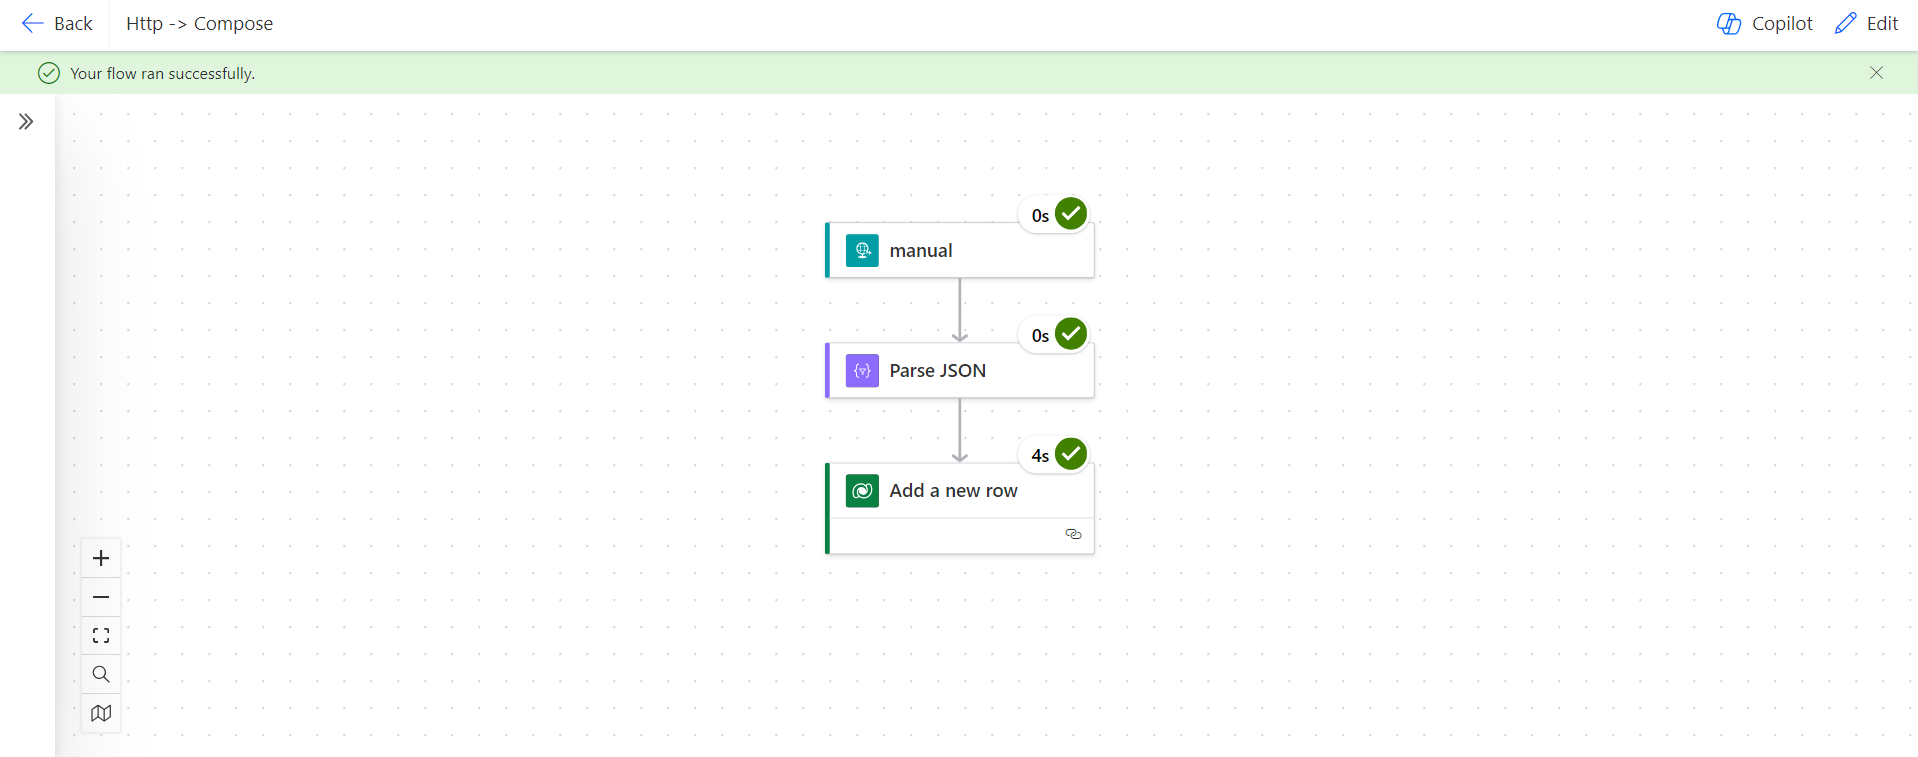
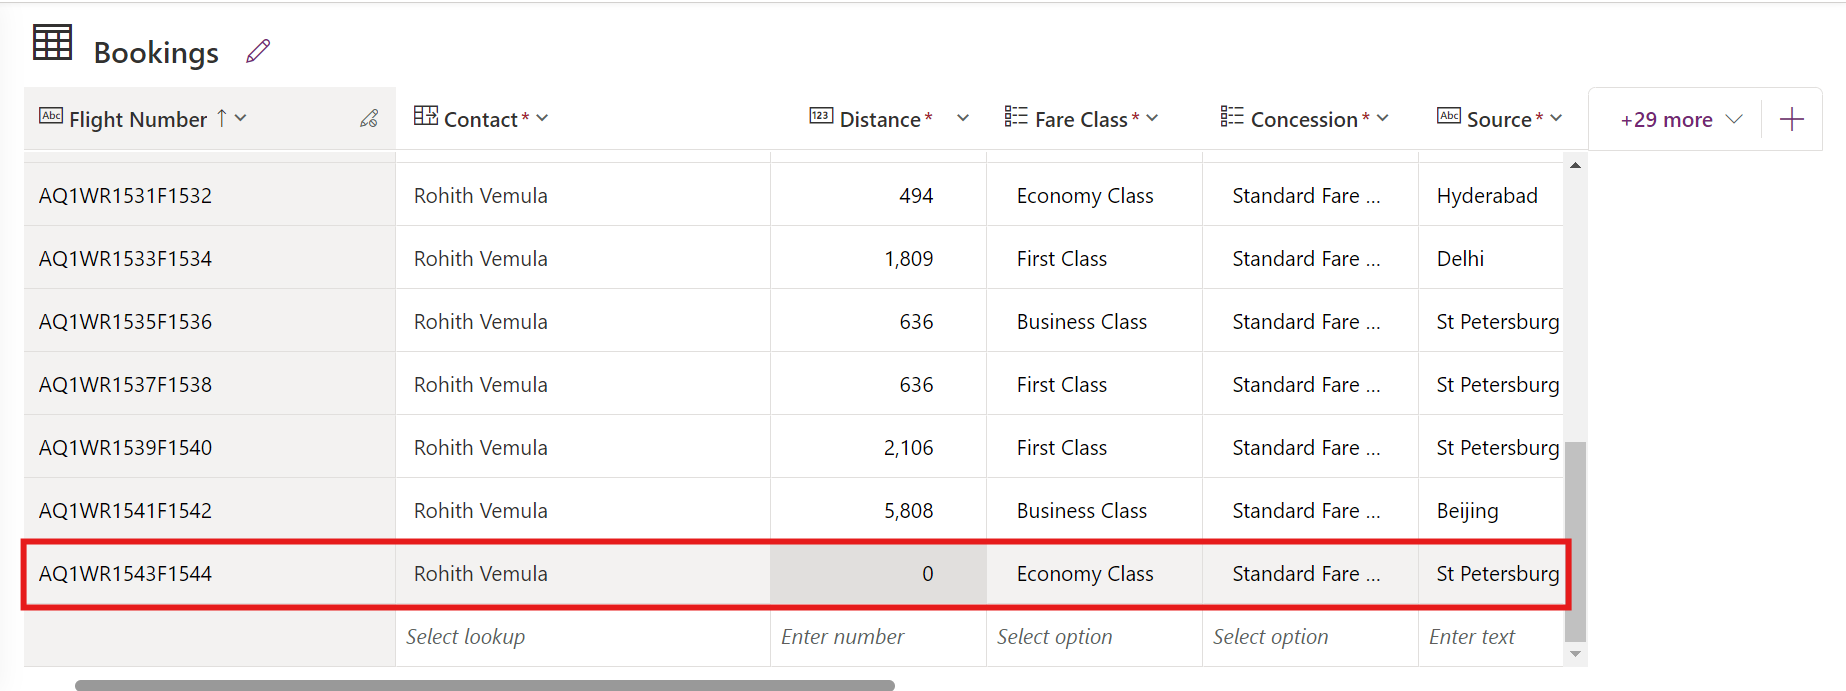
Finally, test your Power Automate flow by submitting the custom form. Ensure that the flow triggers successfully and creates a new record in Dataverse with the form fields mapped correctly.
Frequently Asked Questions:
1. How do I trigger a Power Automate flow from a custom form in Power Pages?
You can trigger a Power Automate flow from Power Pages by making an HTTP POST request using the JavaScript fetch() method with the flow's HTTP trigger URL.
2. What is the purpose of the Parse JSON action in Power Automate?
The Parse JSON action extracts data from the incoming HTTP request body, making it easier to access and map the individual form fields to Dataverse columns.
3. How do I handle empty form fields while sending data to Power Automate?
You can use conditional (ternary) operators or || in JavaScript to assign default values like 0 or empty strings when form fields are left empty.
4. Can I trigger the flow without showing the endpoint URL in the frontend?
No, since the HTTP request URL is public, it will be visible in the browser's network requests. However, you can secure it by using API keys or OAuth authentication.
5. What happens if the Power Automate flow fails?
If the flow fails, the catch block in JavaScript will log an error message to the console. You can enhance this by showing custom toast notifications or alerts on the UI.