Approval workflows are vital in modern business operations, ensuring such processes are efficient, accountable, and error-free. With the advent of automation tools like Power Automate, organizations can streamline their approval processes, saving time and improving productivity. In this guide, we will explore how Power Automate simplifies the creation and management of approval workflows.
What is an Approval Workflow?
An approval workflow is a sequence of steps that involves submitting a request, reviewing it by designated approvers, and providing feedback or comments before the request is determined. Traditionally, these workflows were often manual and time-consuming, but with Power Automate, they can lead to significant time savings and improved efficiency.
Getting Started with Power Automate.
Power Automate is a part of the Microsoft Power Platform, offering an online workflow and integration service to automate tasks seamlessly.
What does the Power Automate UI Look Like:
Go to https://make.powerautomate.com
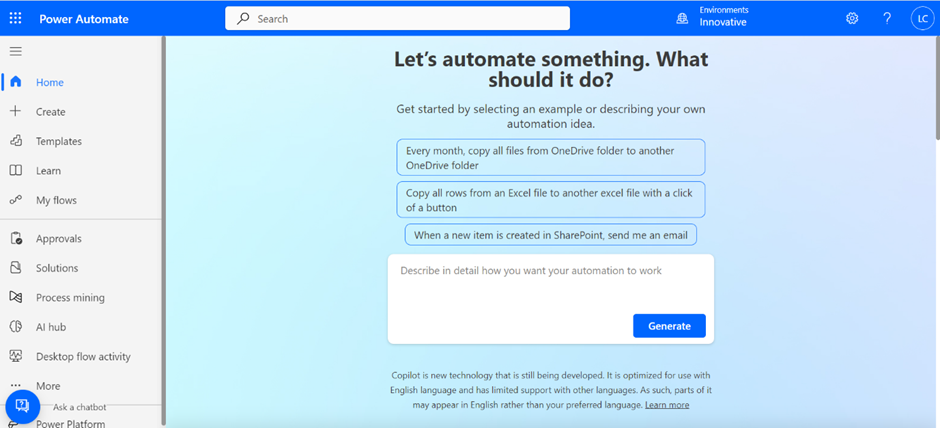
Creating an Approval Workflow with Power Automate:
We can walk through the process of creating an approval workflow using Power Automate:
1. Triggering the Workflow:
Create a new automated flow,
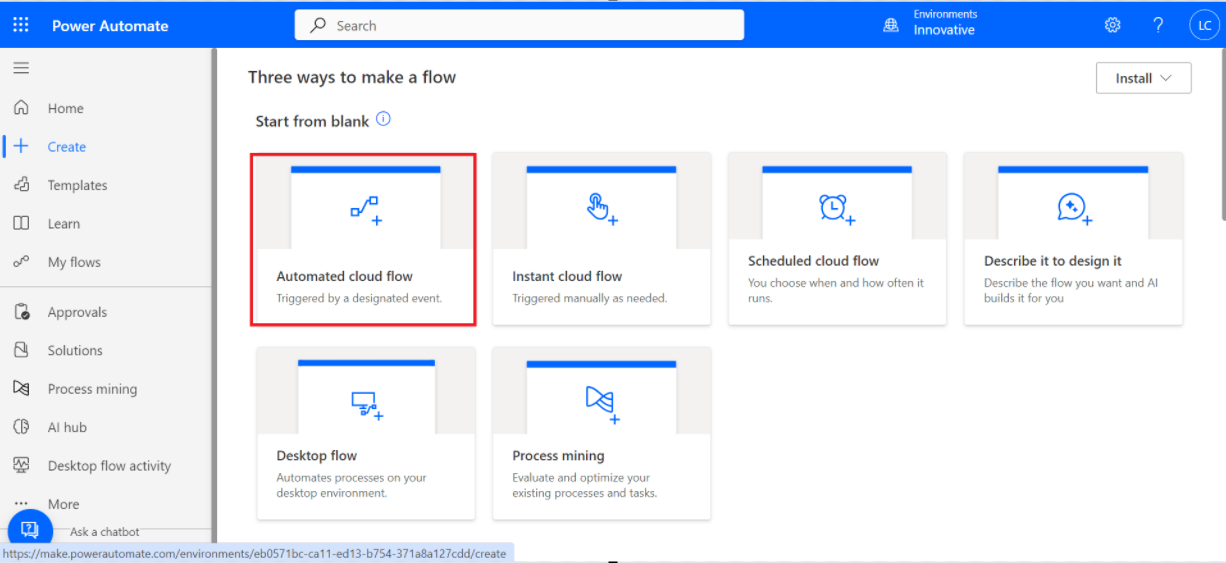
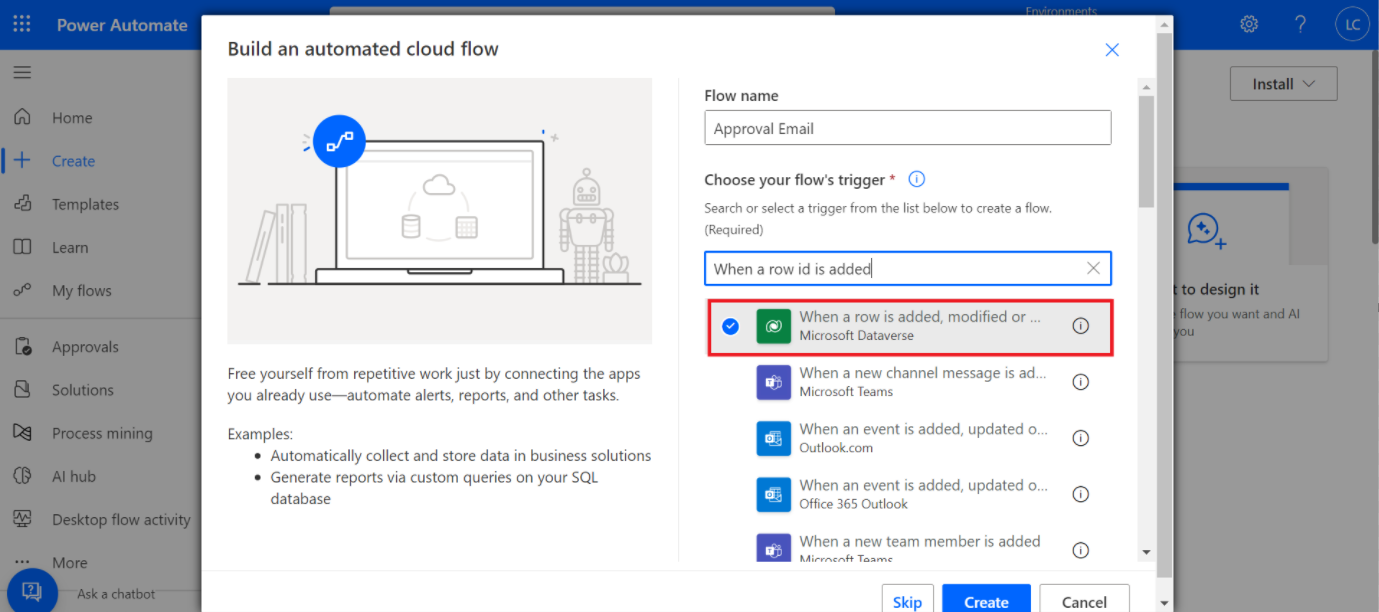
Choose the connector as Microsoft Dataverse and the trigger as when a row is added, modified, or deleted, and create it. Ensure you connect to the instance and provide the table name, such as 'accounts' or 'contacts.' Then, add an action.
2. Retrieving Owner of the record Information:
Use actions like 'Get a row by ID' to retrieve the owner information from Dataverse.
To retrieve the record, use the action 'Get a row by ID' and set the table name as 'users' and the row ID as an Owner ID (owner is the column, which you can access from dynamic content).
Note: ‘Get a row by ID’ retrieves a single record using the Record ID.
The Record ID is a unique identifier associated with a record in a data source such as Microsoft Dataverse Table.
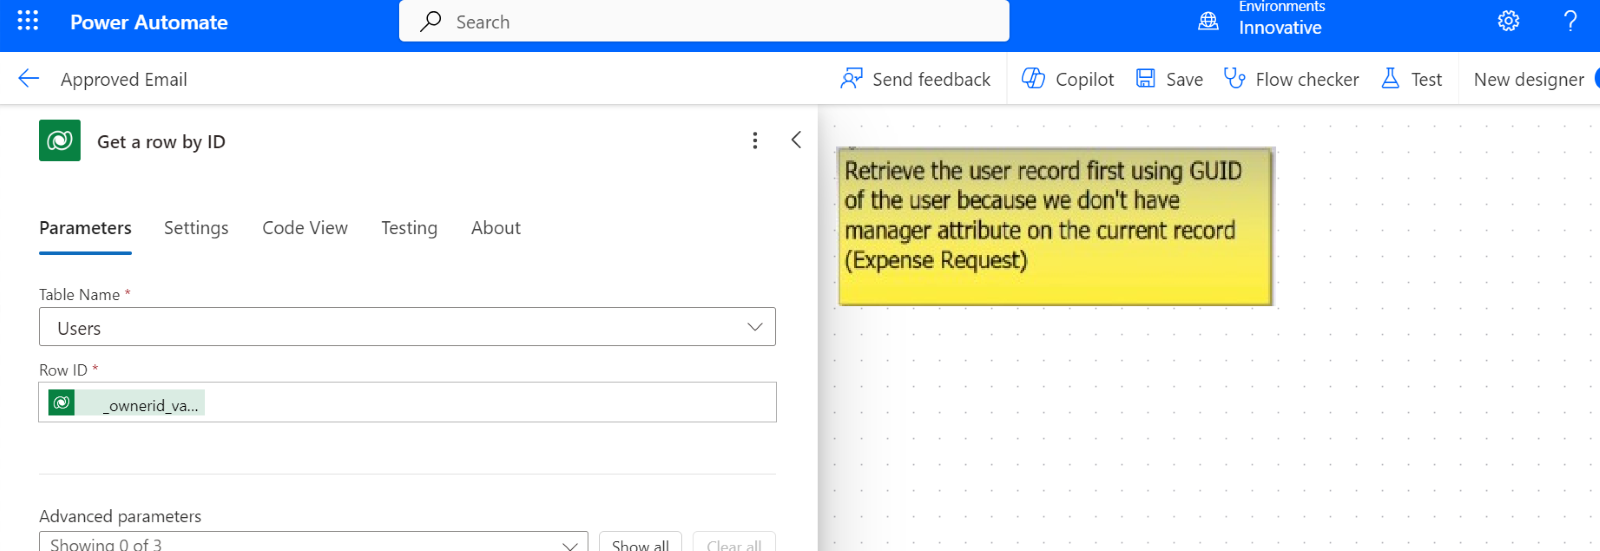
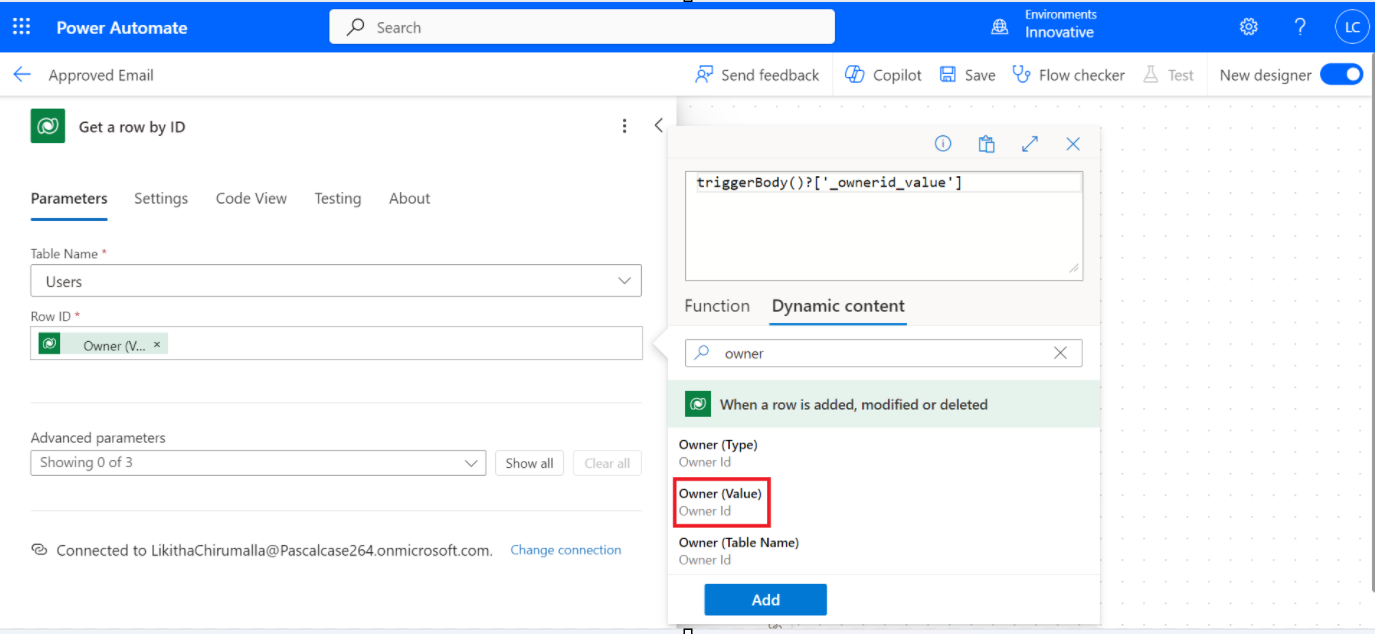
So, here we get the user information from this action. Now, we must retrieve the manager of this user. "To do that, we must use the 'Get a row by ID' action again, bypassing the user details."
Add another action, 'Get a row by ID,' to retrieve the necessary information as the manager email from your data source. Set the table name as 'users' and the row ID as the Manager ID.
We must use the 'Get a Row by ID' action to obtain the Manager ID.

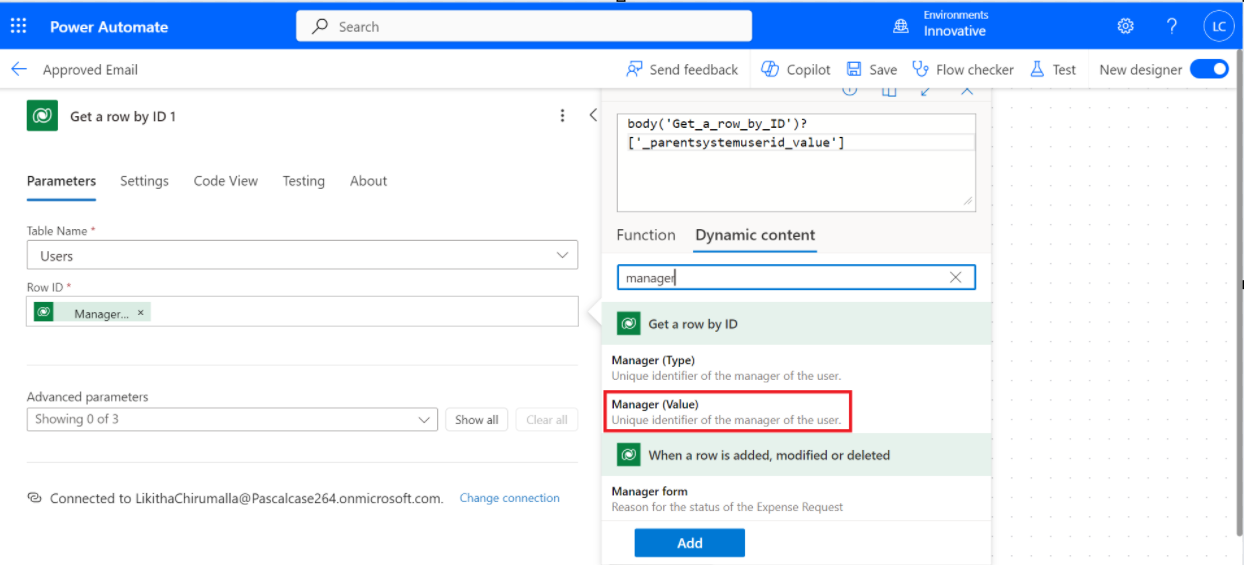
3. Creating the Approval:
Select another action, 'create an approval,' to generate an approval request, specifying the type, title, and assigned approver(s). Various approval types exist; for example, there may be participation from multiple managers.
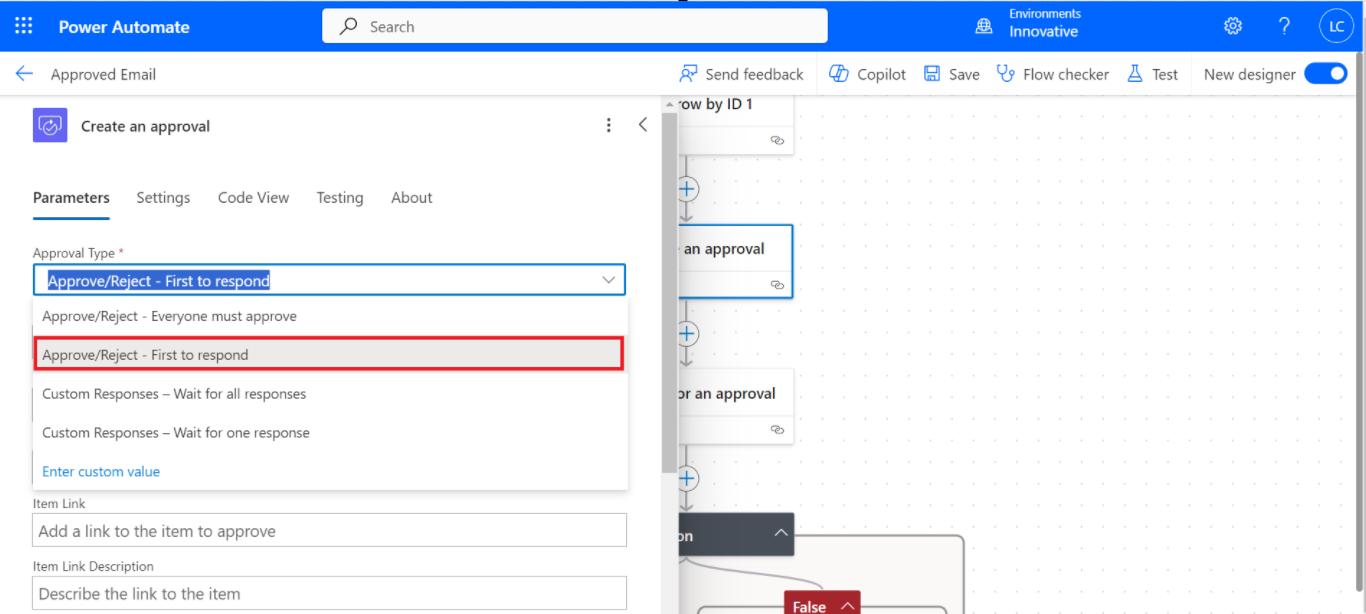
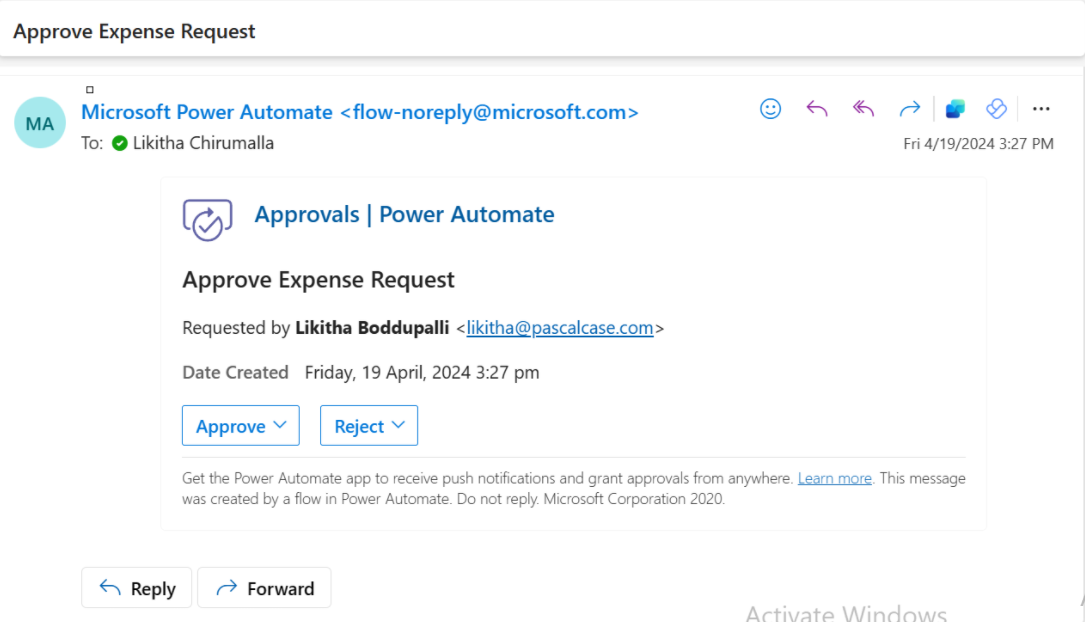
To create an approval action, add an Approval type as 'Approve/Reject – First to respond,' Title as 'Approve Expense Request,' and assign it to the primary email of the manager (access it from dynamic content).
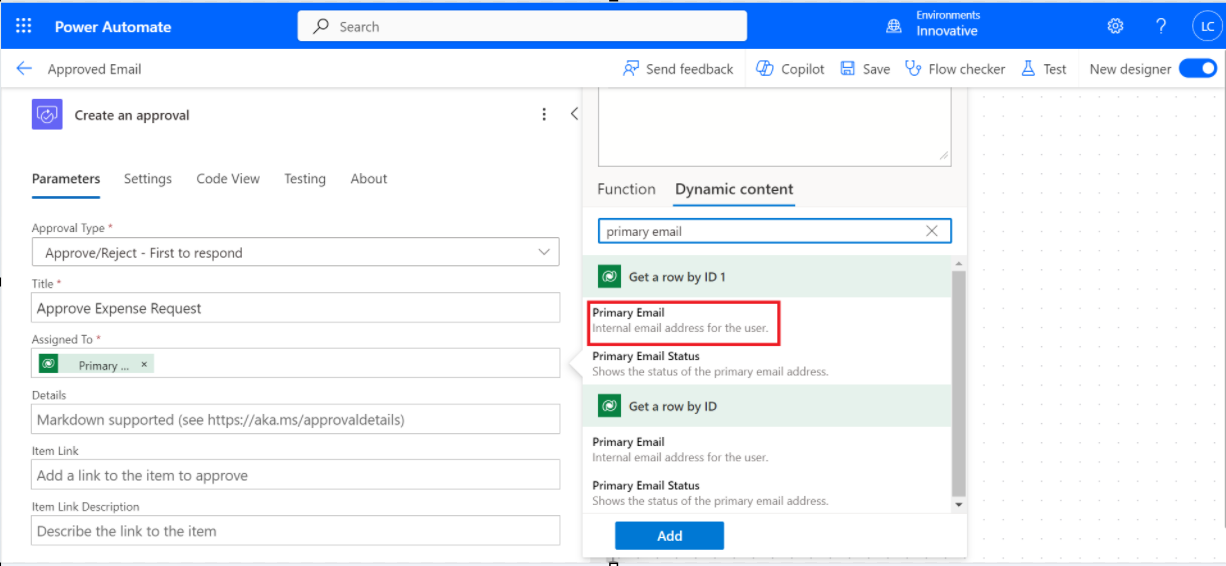
Once we create the approval, we have to wait until the manager approves it."
4. Waiting for Approval:
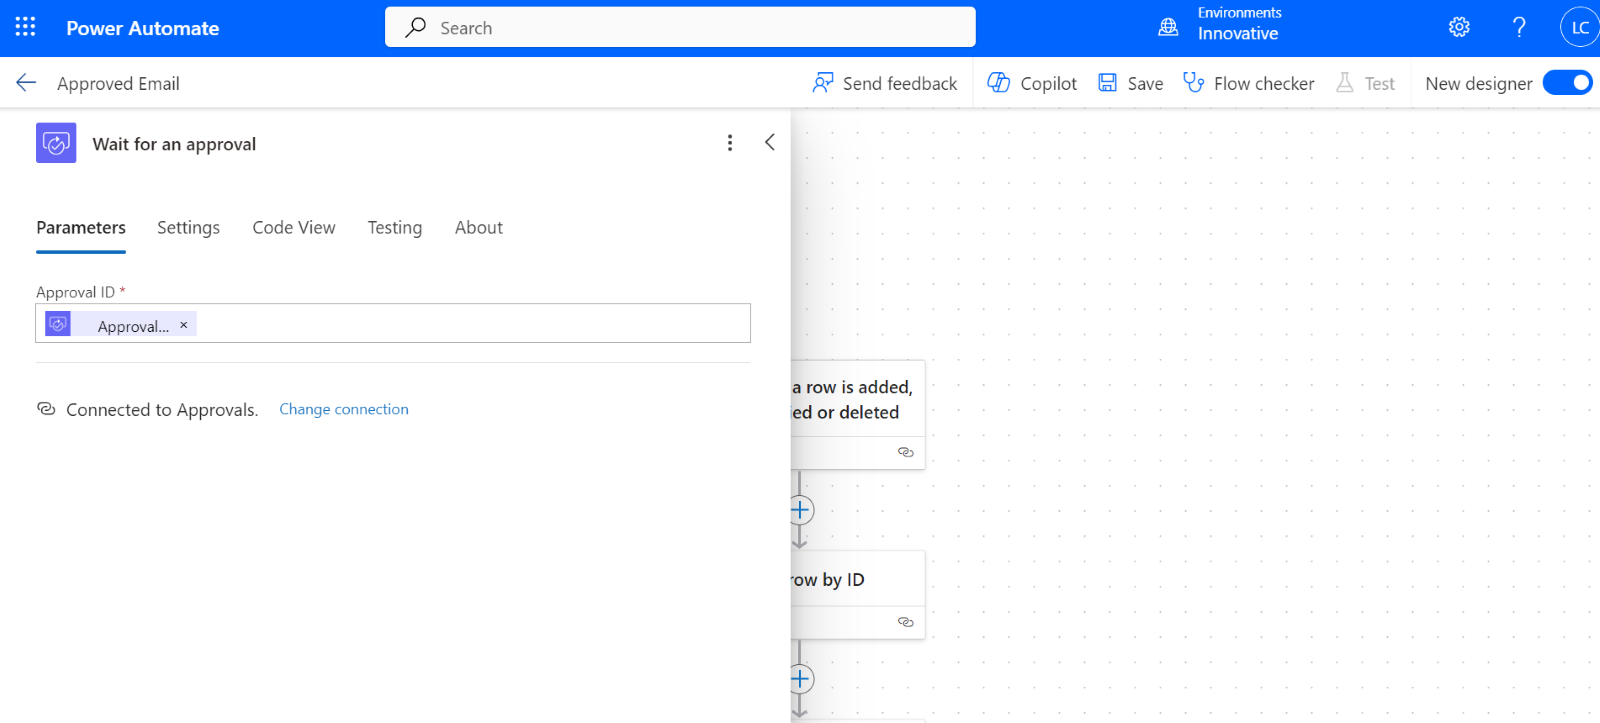
Add a step 'wait for approval' and await the approval decision, ensuring the workflow pauses until the approver takes action.
5. Handling Approval Outcomes:
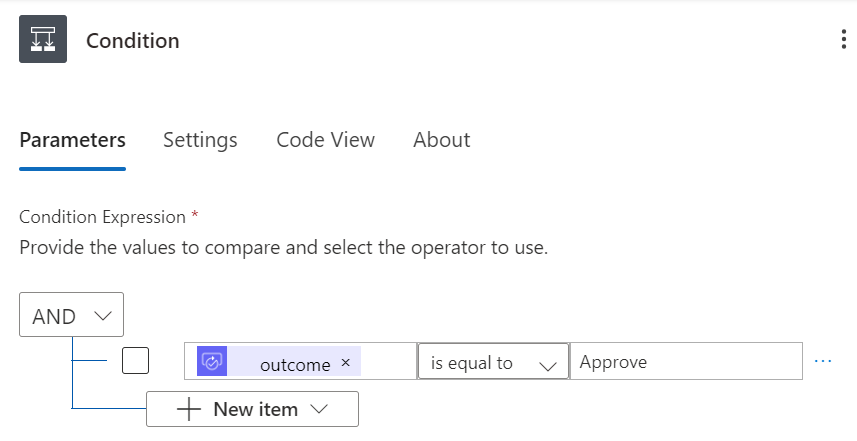
Add a new step to verify the condition, as it can be either approved or rejected. Under 'Control,' you will find all fundamental logic statements, beneath which lies an action called 'Condition.' The approval process yields an outcome (approval result) of either approved or rejected, allowing us to verify whether the outcome is approved.
If it is 'Yes,' we can update this in Microsoft Dataverse. Add an action called 'Update a row,' and choose the correct table names and row IDs, such as 'accounts or contacts.' We can update the status reason value as approved.
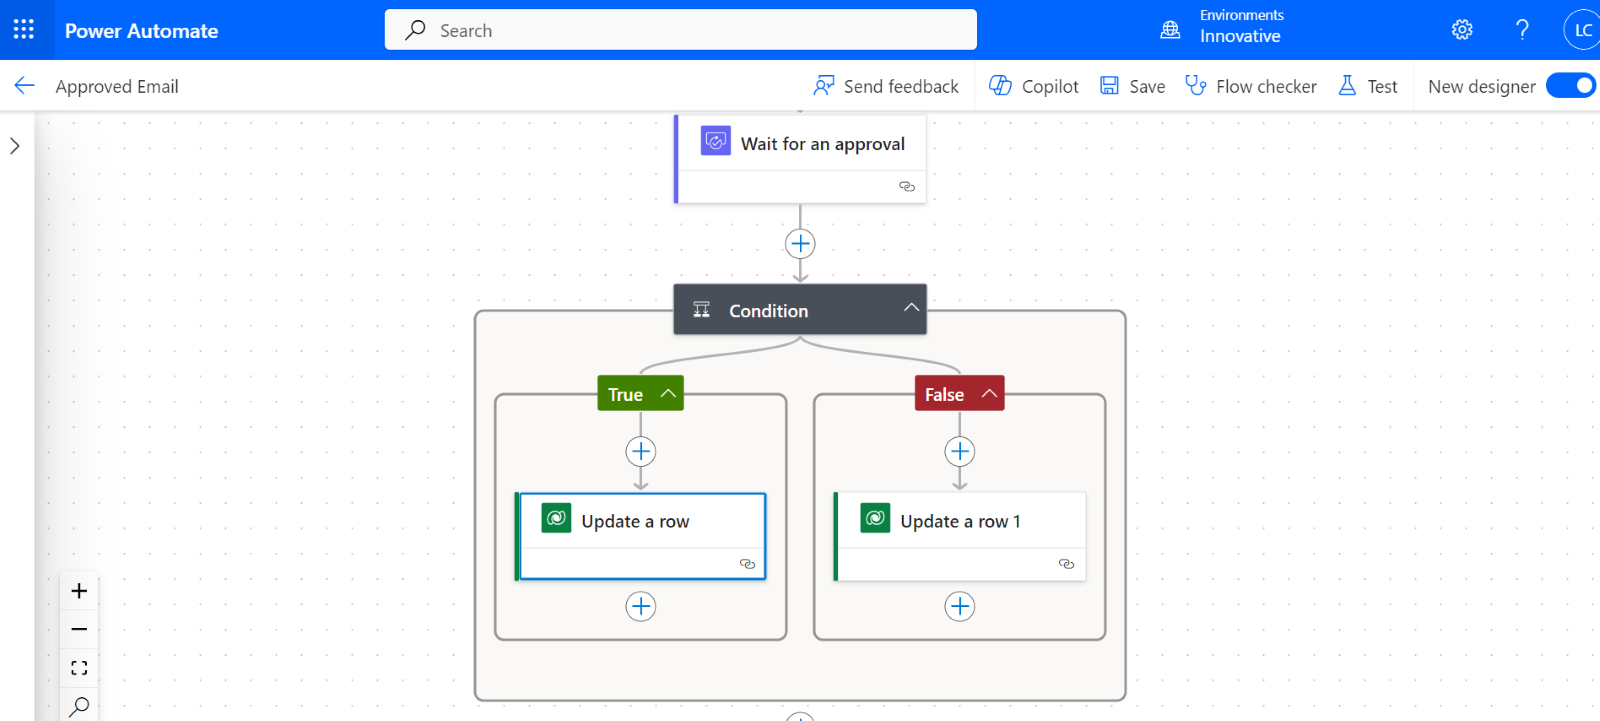
If it is 'No,' we can update in Microsoft Dataverse. Use the 'Update a row' action, and choose the correct table name and row ID as 'Expense Request.' We can update the status reason value as Rejected. Click on Save. It completes the workflow process.
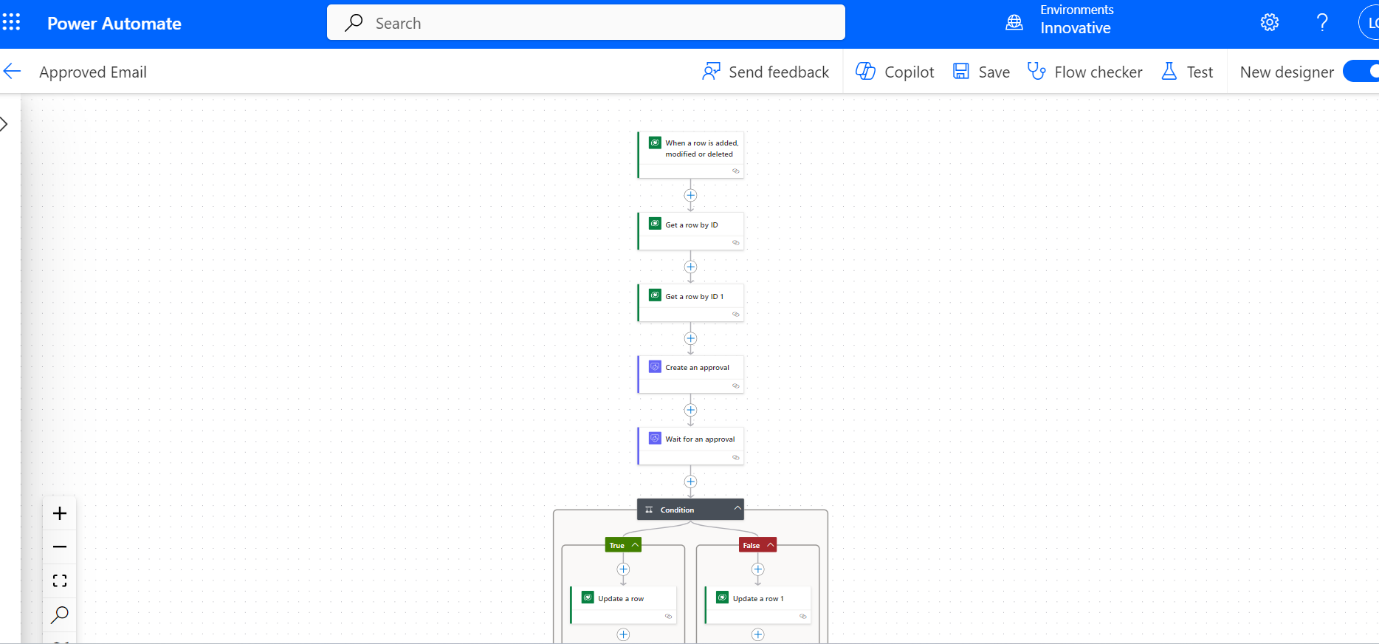
Execute a test to validate the functionality and then enact the trigger action based on the outcome of the approval process. Below is an image illustrating the process of receiving an email regarding an Approved Expense Request sent to the manager.
Advantages of Power Automate for Approval Workflows:
• The manager does not need to log in to the system; they can directly take action from their email systems.
• By automating approval processes with Power Automate, organizations can save time, reduce manual errors, and ensure consistency and accountability in decision-making.
• The flexibility of Power Automate allows users to customize approval flows to suit their specific requirements and integrate them with other applications and services within the Microsoft ecosystem.
Conclusion:
By leveraging Power Automate, organizations can transform their approval workflows, making them faster, more efficient, and less prone to errors.
