Canvas apps empower users, even those without coding experience, to craft dynamic applications using Microsoft Power Apps. What's even more remarkable is the ability to use these apps on mobile devices without an internet connection. All the necessary data for the app is stored directly on your device. Any edits you make will be synced with the app server once your device reconnects to the internet.
Let’s get started!!
Begin by logging in to your Power Apps account, if you don't have an account create one.
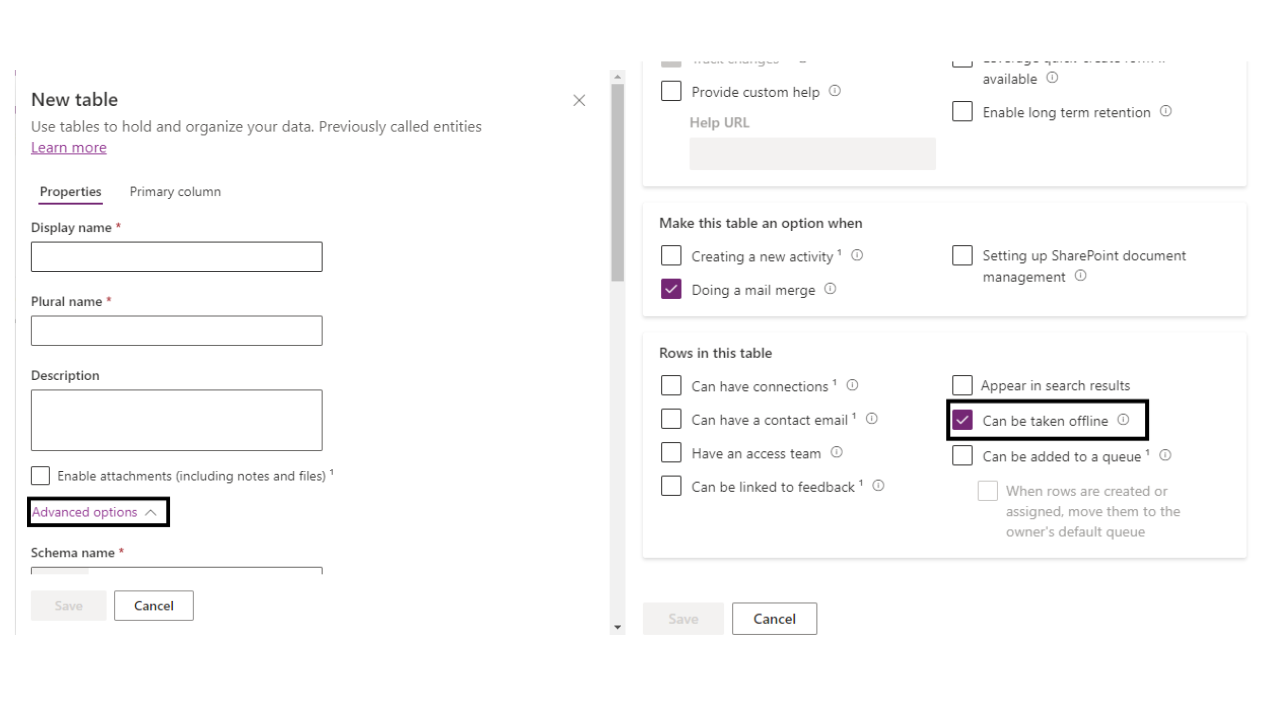
Navigate to the Tables section and create a new table. Ensure to enable the 'Can be taken offline' option under advanced settings.
Create a new solution.
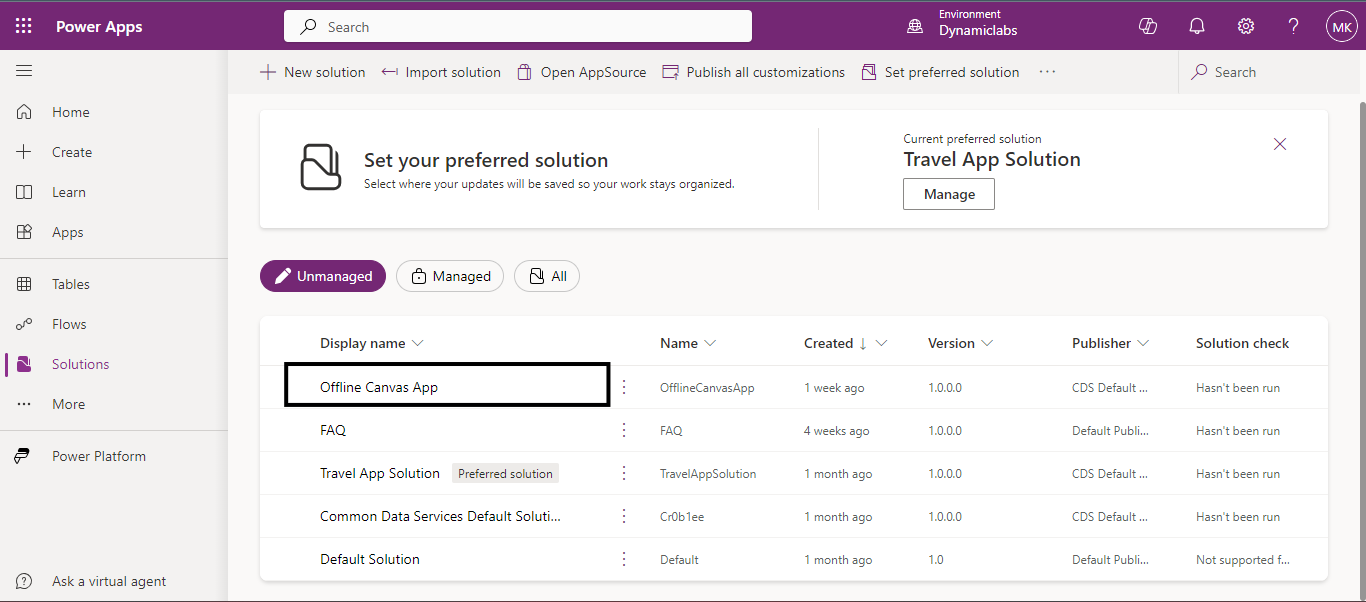
And in that solution, click on ‘New’ to create a new canvas app.
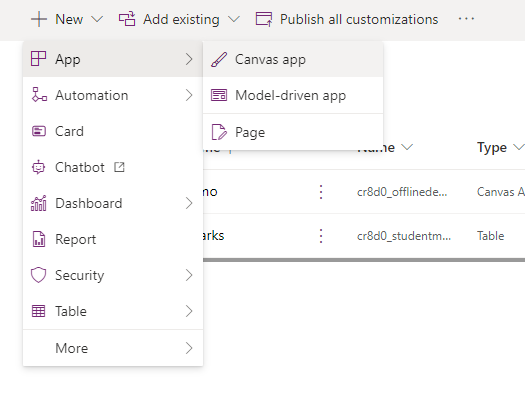
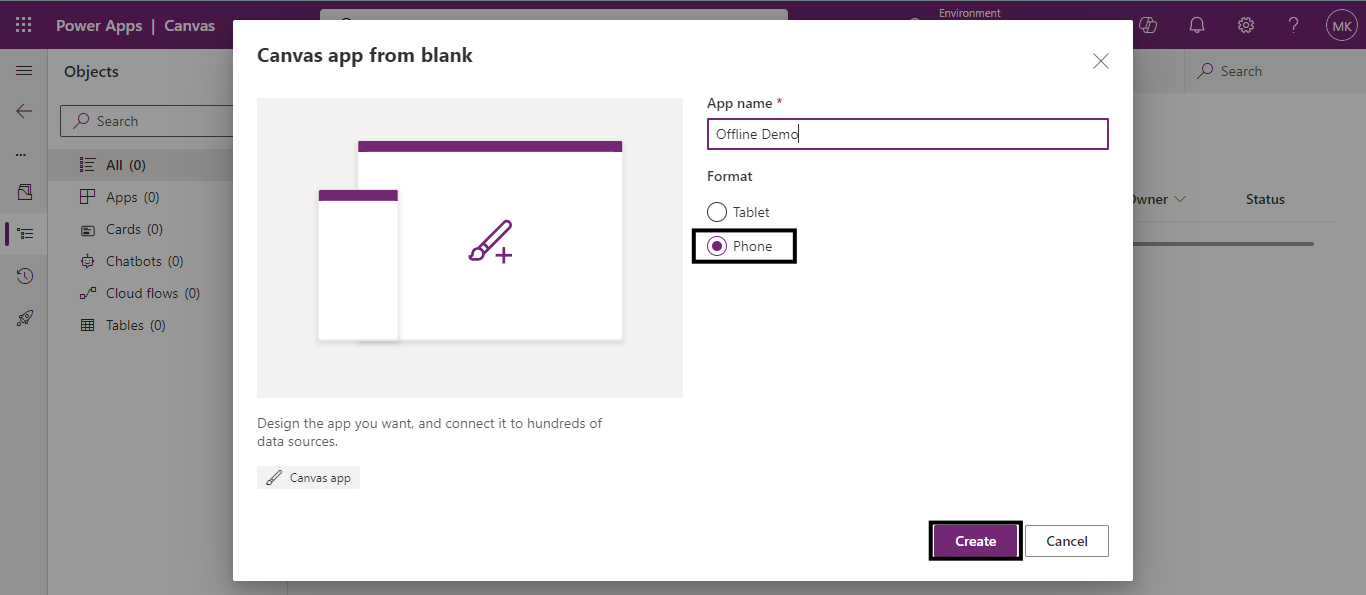
Name your canvas app, select the Phone format because we are creating an offline app for phone format and click on create to proceed.
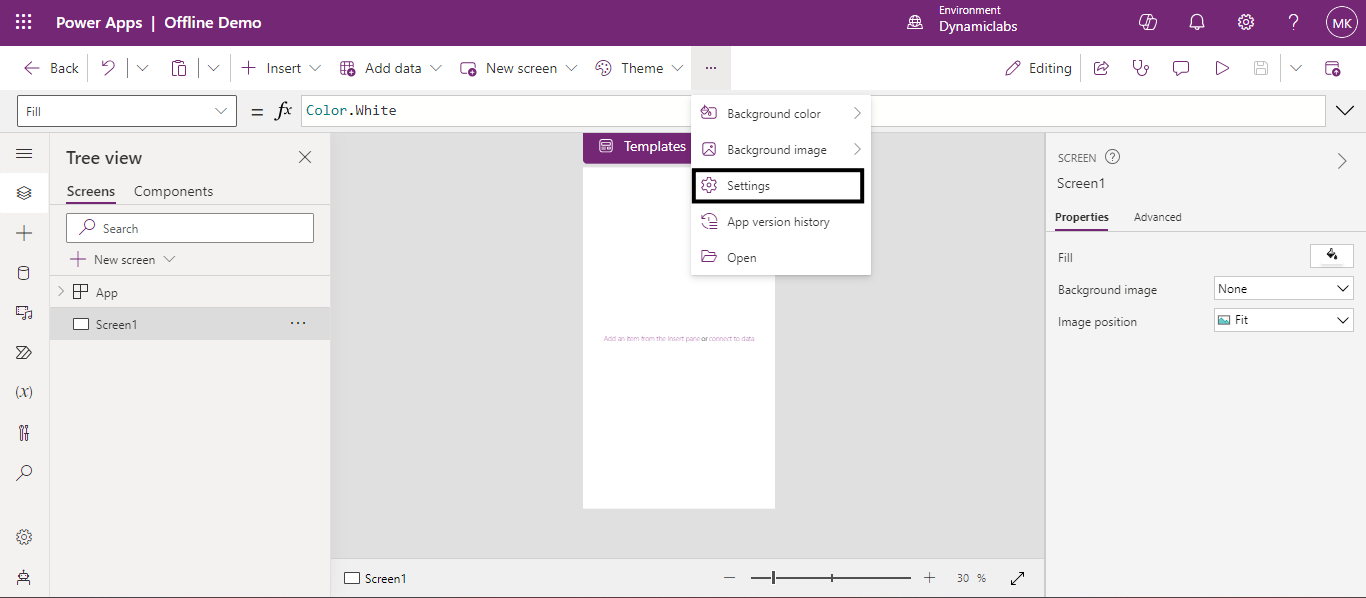
Once the canvas app is created, access its settings by clicking on the ellipsis icon.
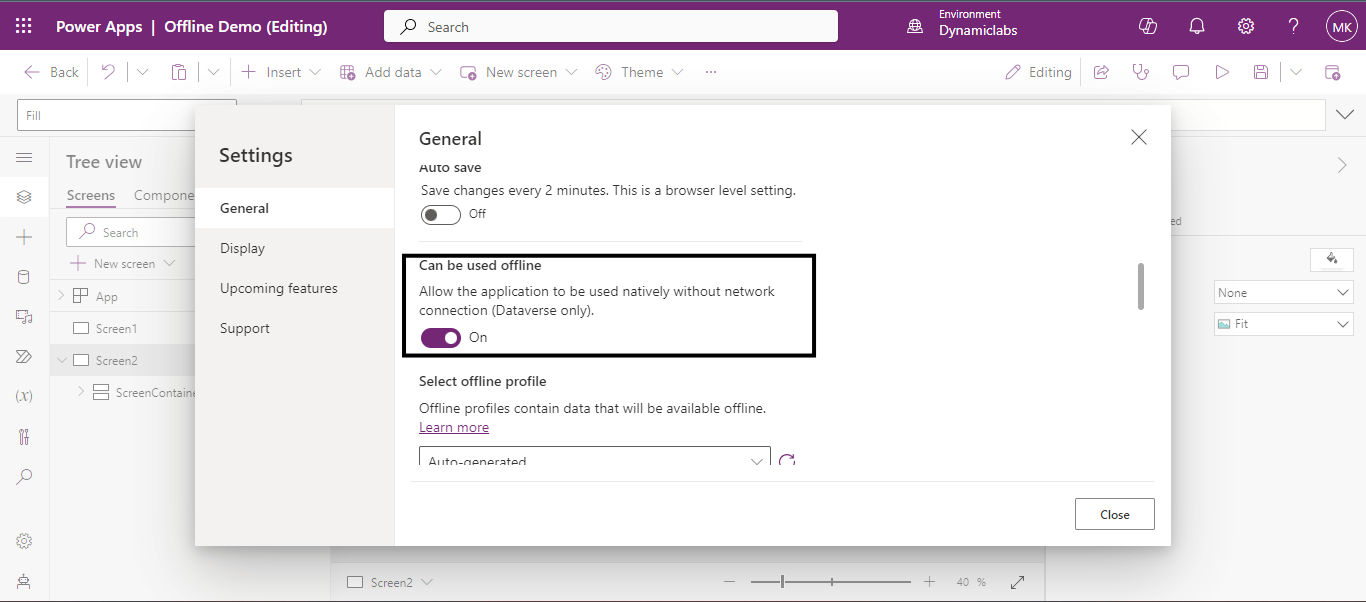
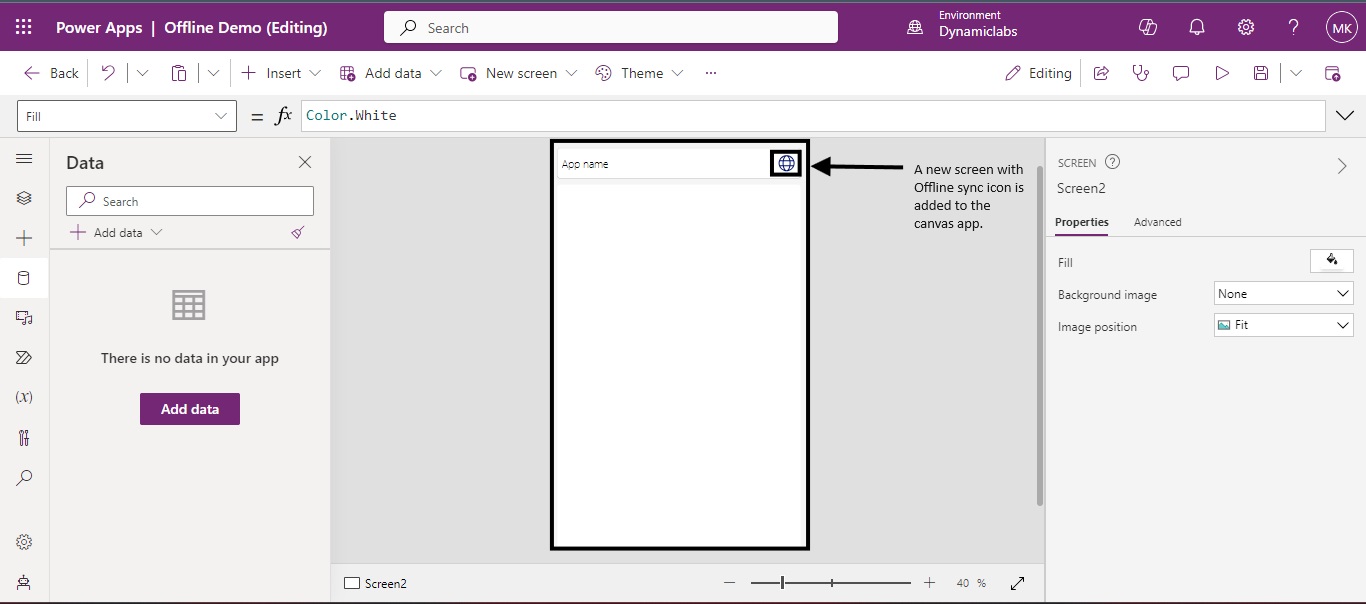
Navigate to the General tab and toggle the 'Can be used Offline' setting to enable offline usage. This setting not only allows native offline functionality but also adds a new screen for your offline app.
Delete the default screen added during app creation because a new screen compatible with offline functionality is added.
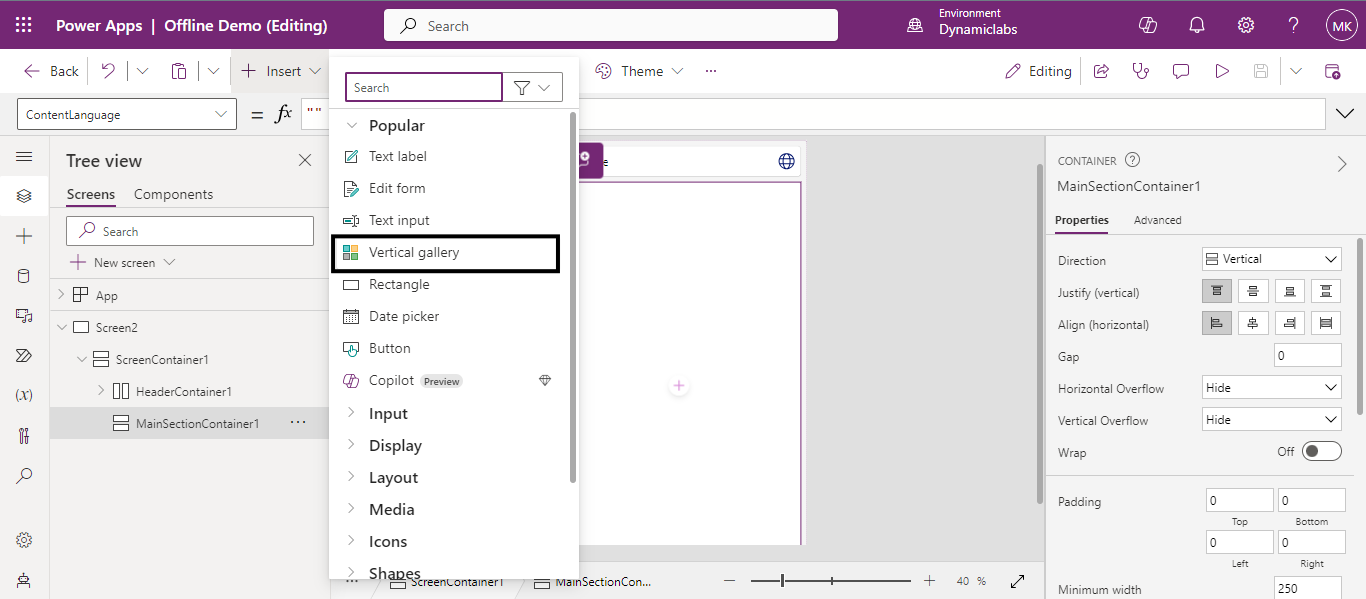
Add a vertical gallery from the Insert dropdown menu.
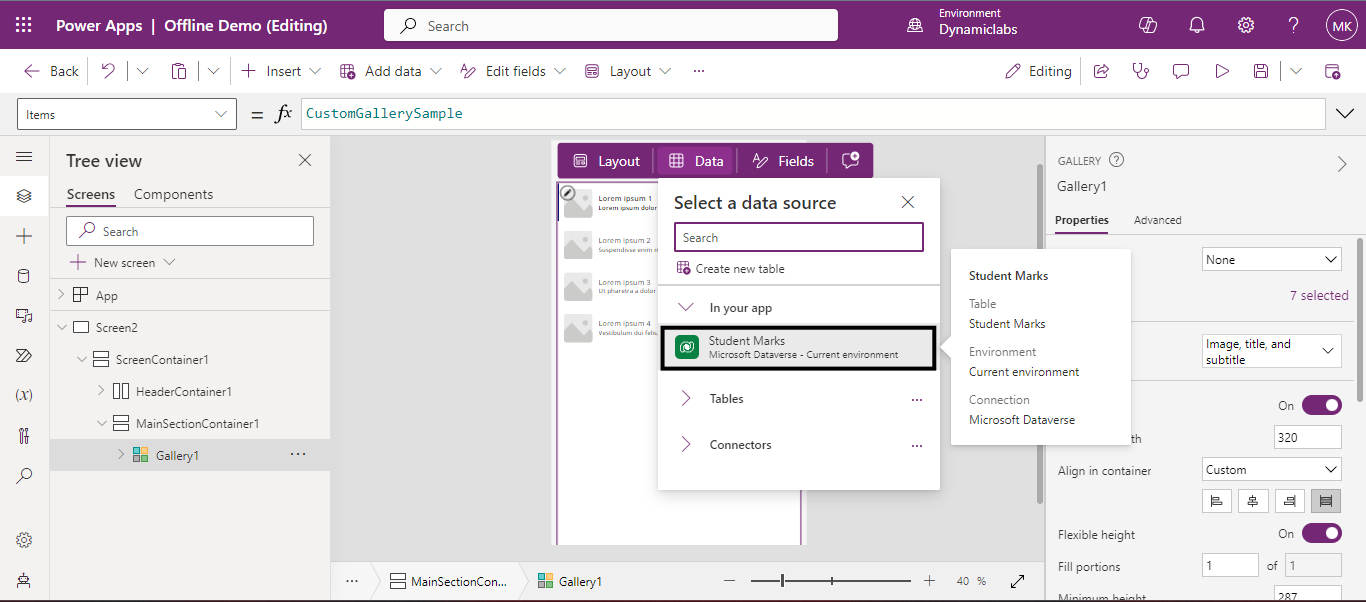
After the gallery is added, select the data source or table that can be used offline as instructed previously.
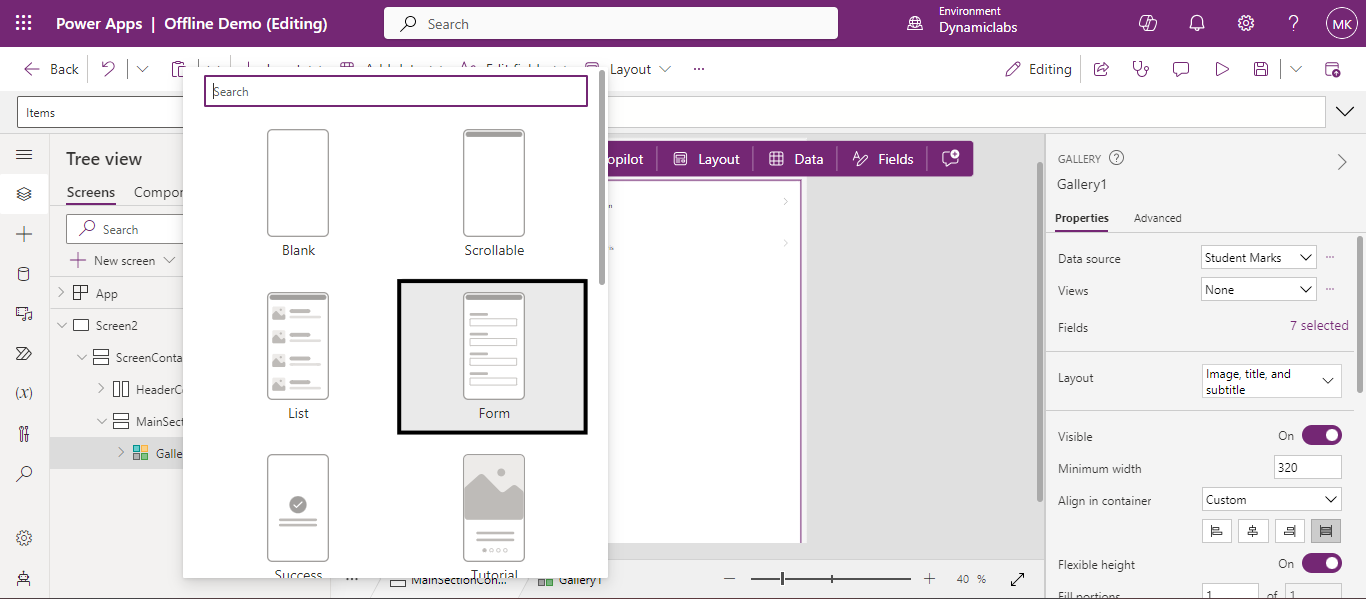
After adding the data source to the gallery, create another screen by clicking the new screen button. This new screen will enable us to view the selected records from the gallery.

From the New-Screen drop-down select Form screen.
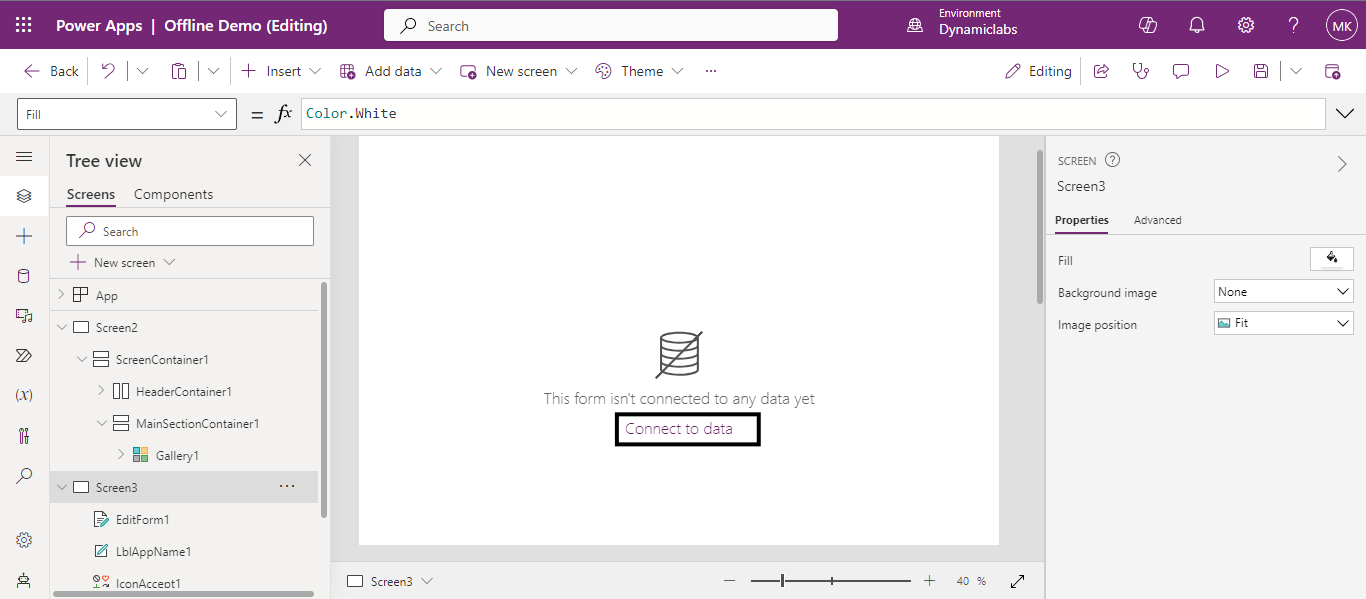
Now that the new form screen is added, we must connect it to the data source to fetch the columns. To do that click on connect data on the screen.
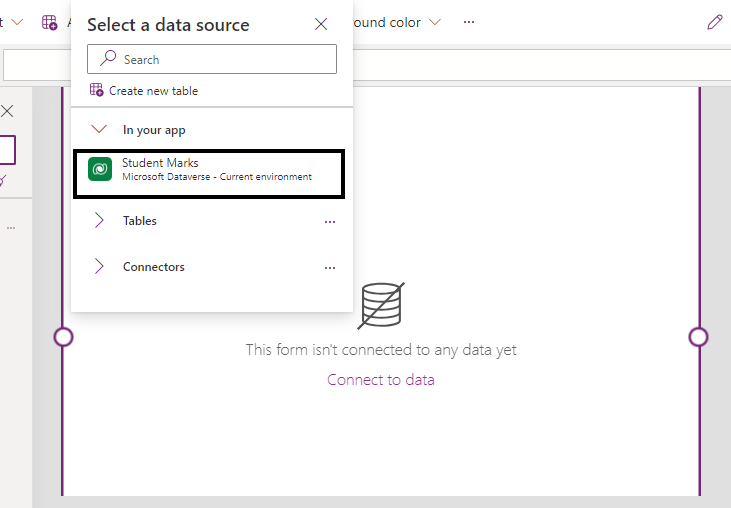
Connect the form screen to the same data source used for the gallery.
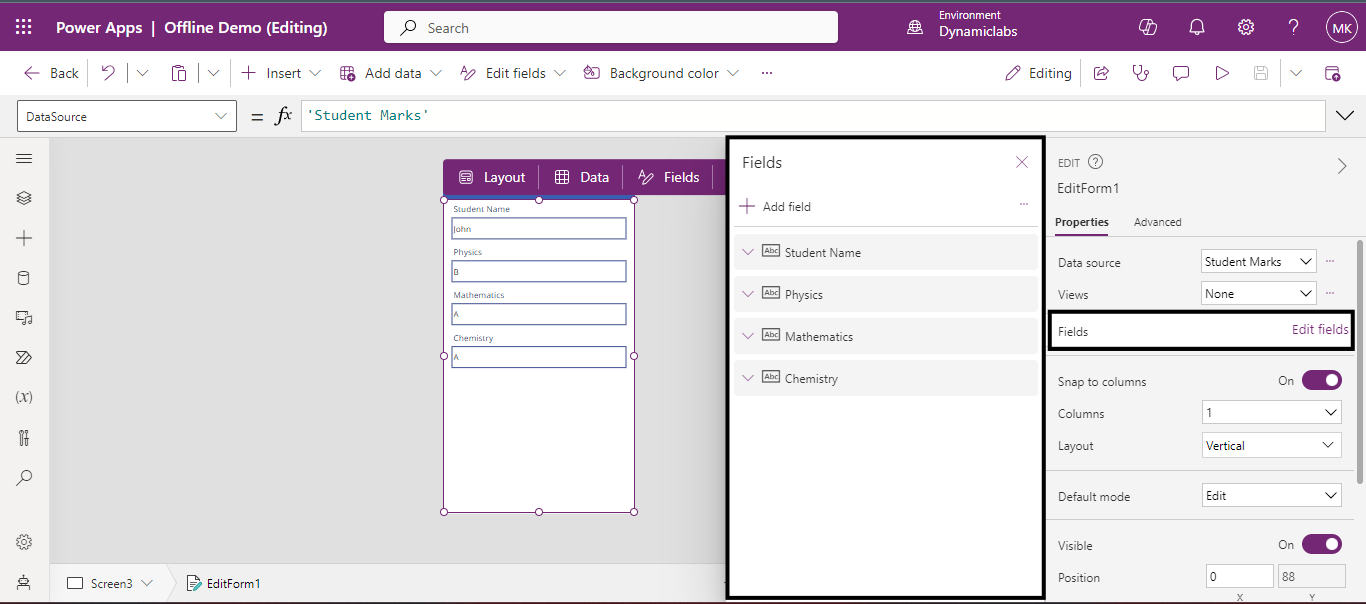
Customize the form fields by selecting the Edit fields from the properties panel.
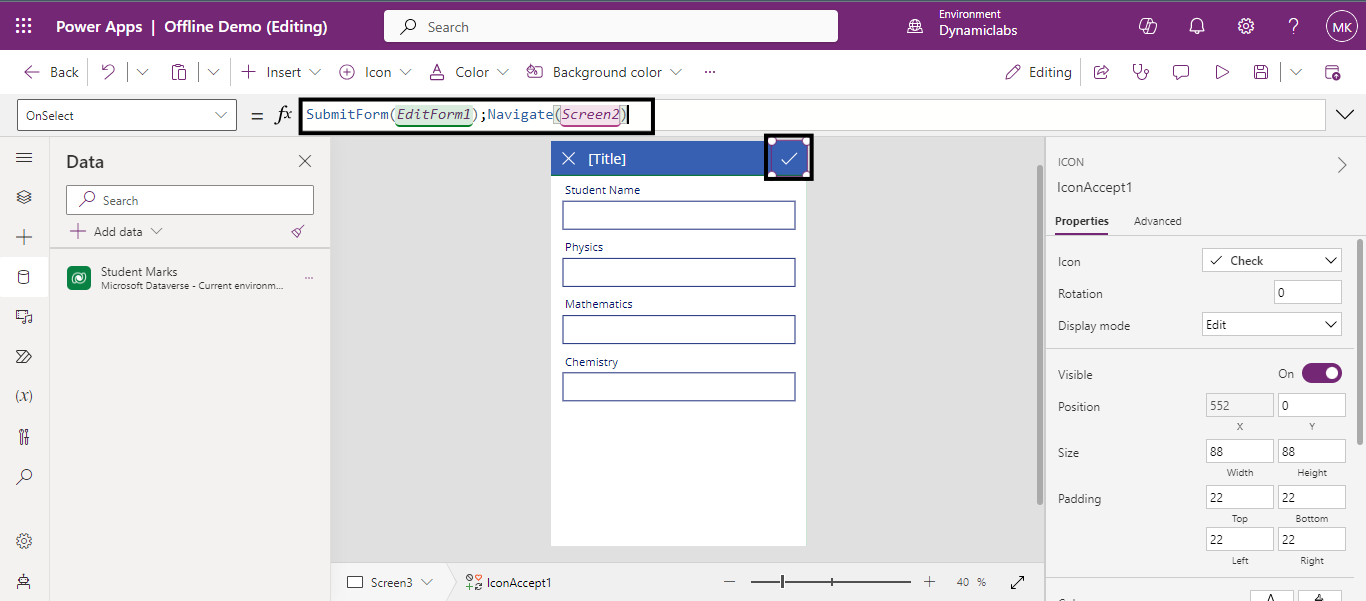
Now select the checkmark (✔) icon from the screen and write a formula on its Onselect property, so that it saves the form data and returns to previous screen.
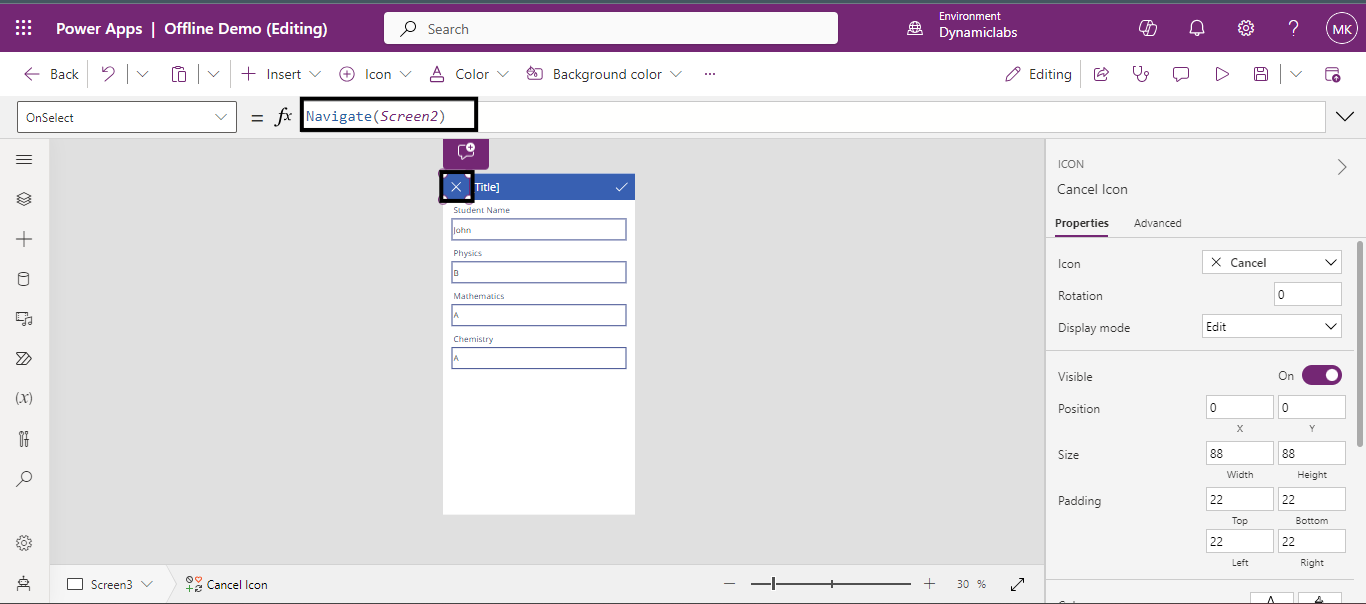
Select the Cancel (X) icon from the screen and write a formula on its Onselect property, so that when we click it cancels and navigates to previous screen.
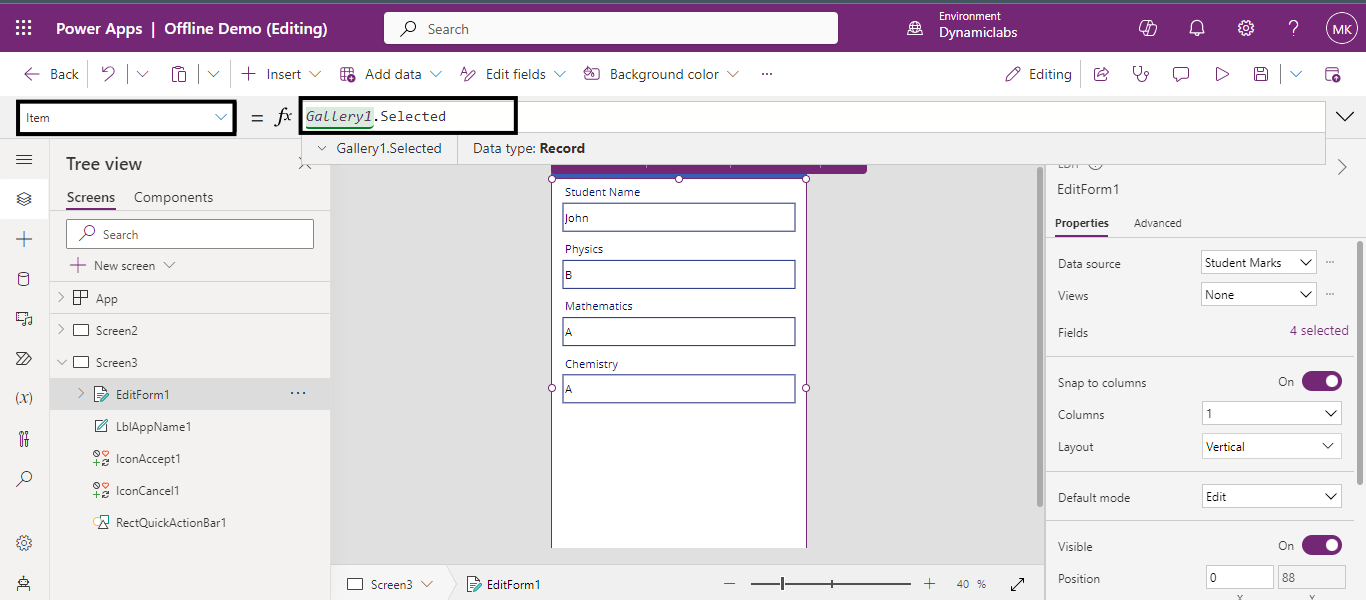
Now click on the drop-down list from the top left-side of the screen and select “Item” property of the form. Write galleryname.Selected formula in formula box, because This property allows you to access the data of the selected item within the gallery. You can use it to display details of the selected item or perform actions based on its data.
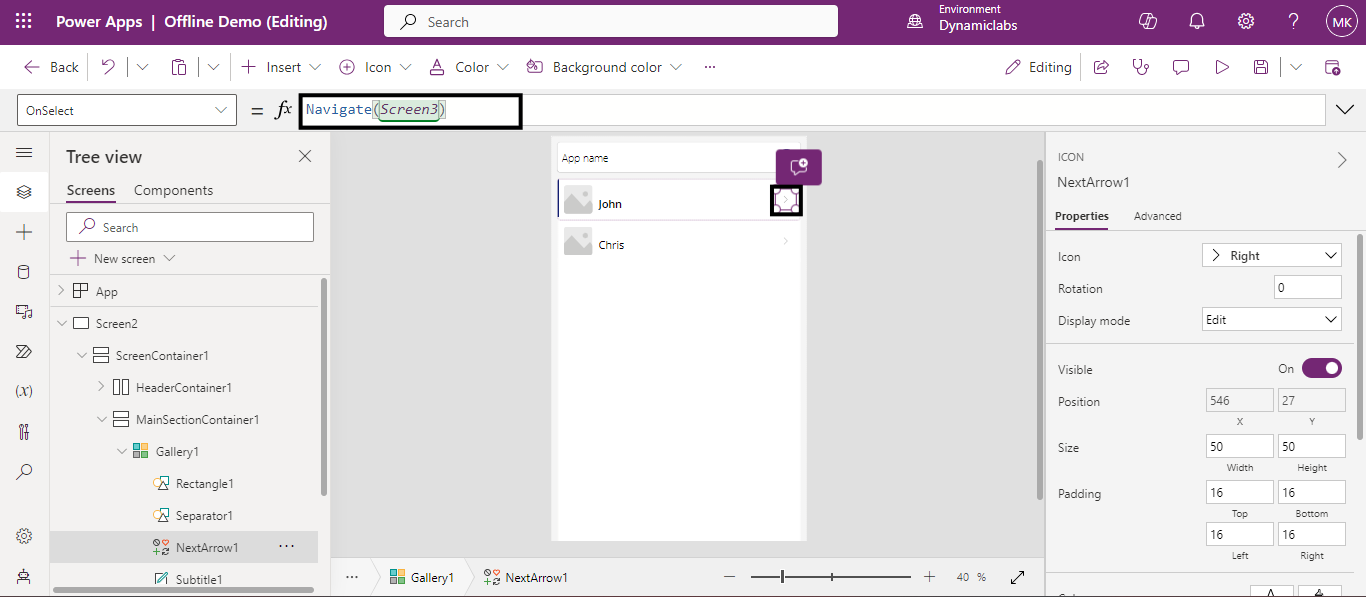
Now go to the gallery in the previous screen and click on the Next Arrow (>) and write a navigation function in the formula box so that it navigates to the next screen when clicked.
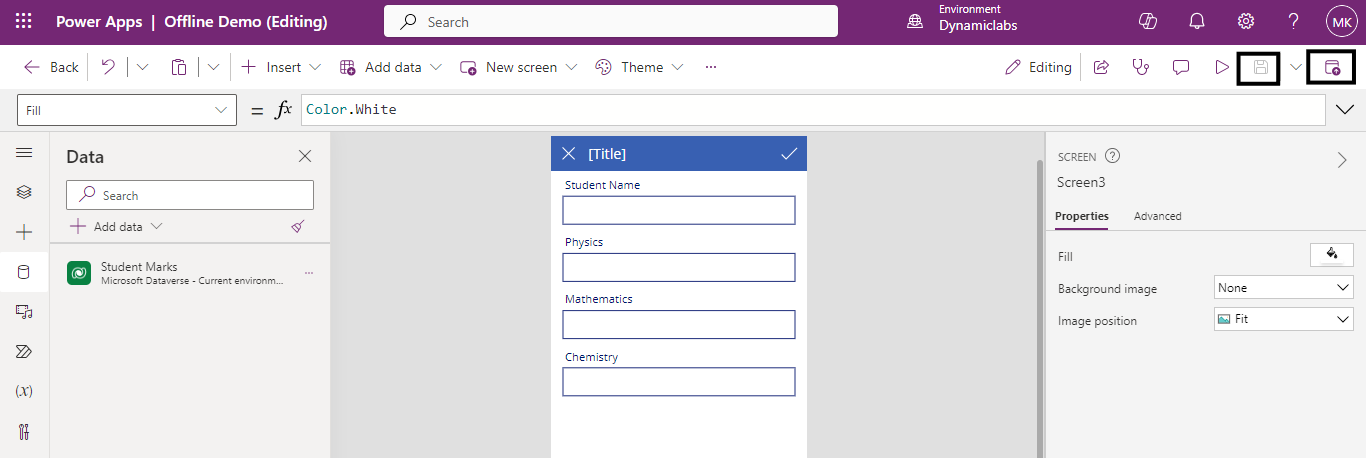
Finally, save and publish the app.
To test the app, Open the app using Power Apps Mobile on a mobile device that's connected to the Internet. Existing records appear in the gallery, and the status shows Connected.
Verify offline functionality by disconnecting the device from the internet and ensuring that data can still be modified and saved. The status label shows that the app is Offline.
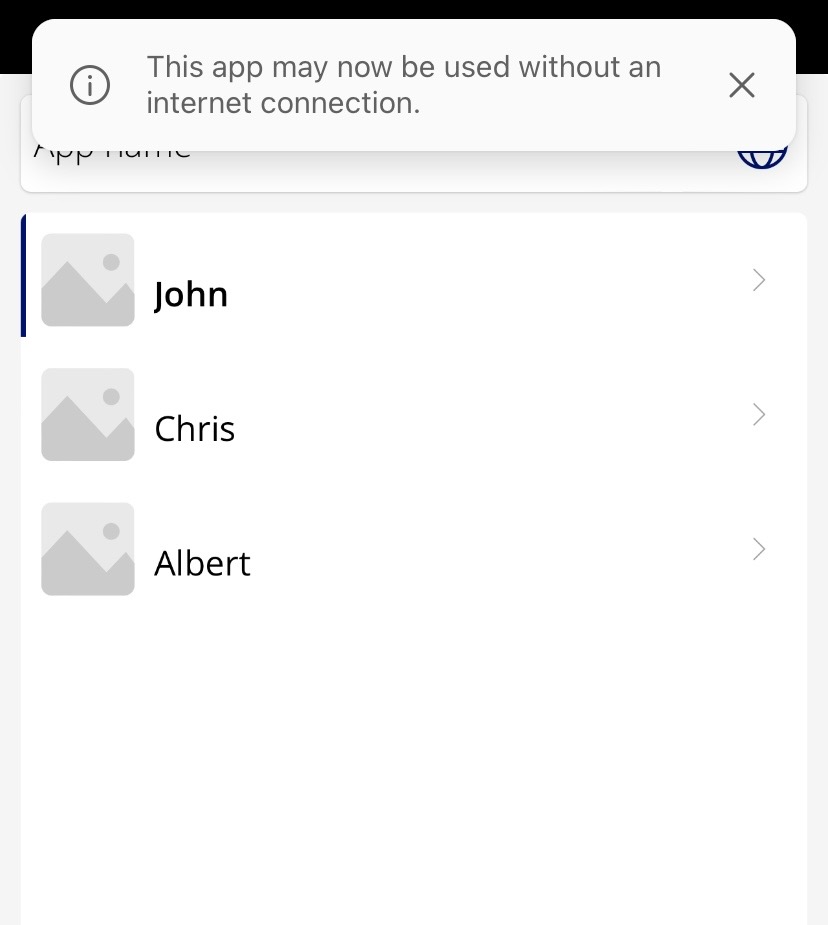
Now you can modify and save data without internet connection.
With the ability to seamlessly work with Dataverse data online or offline, your canvas app offers flexibility and accessibility wherever you are. By following these steps, you've unlocked the power of offline functionality, allowing users to stay productive regardless of internet connectivity.
