What Is Generative AI in Cloud Flows?
Generative AI in Cloud Flows allows you to integrate AI-powered automation into your workflows. Using AI prompts, you can automate tasks, generate content, and personalize user experiences without manual intervention.
Why Use Generative AI in Cloud Flows?
Automation: Automate repetitive tasks, saving time and reducing manual effort.
Speed: Quickly generate blog content, reports, or data insights based on AI-driven suggestions.
Personalization: Tailor your outputs and experiences to specific user needs.
In this blog, we’ll walk you through how to integrate and use generative AI prompts in your Cloud Flows to streamline your operations and enhance content creation.
Scenario:
Summarizing Employee Feedback Using AI and Power Automate
Creating a Prompt for Your Cloud Flow
To get started with adding AI prompts to your Cloud Flows, the first thing you’ll need to do is create a prompt that will trigger the actions you want.
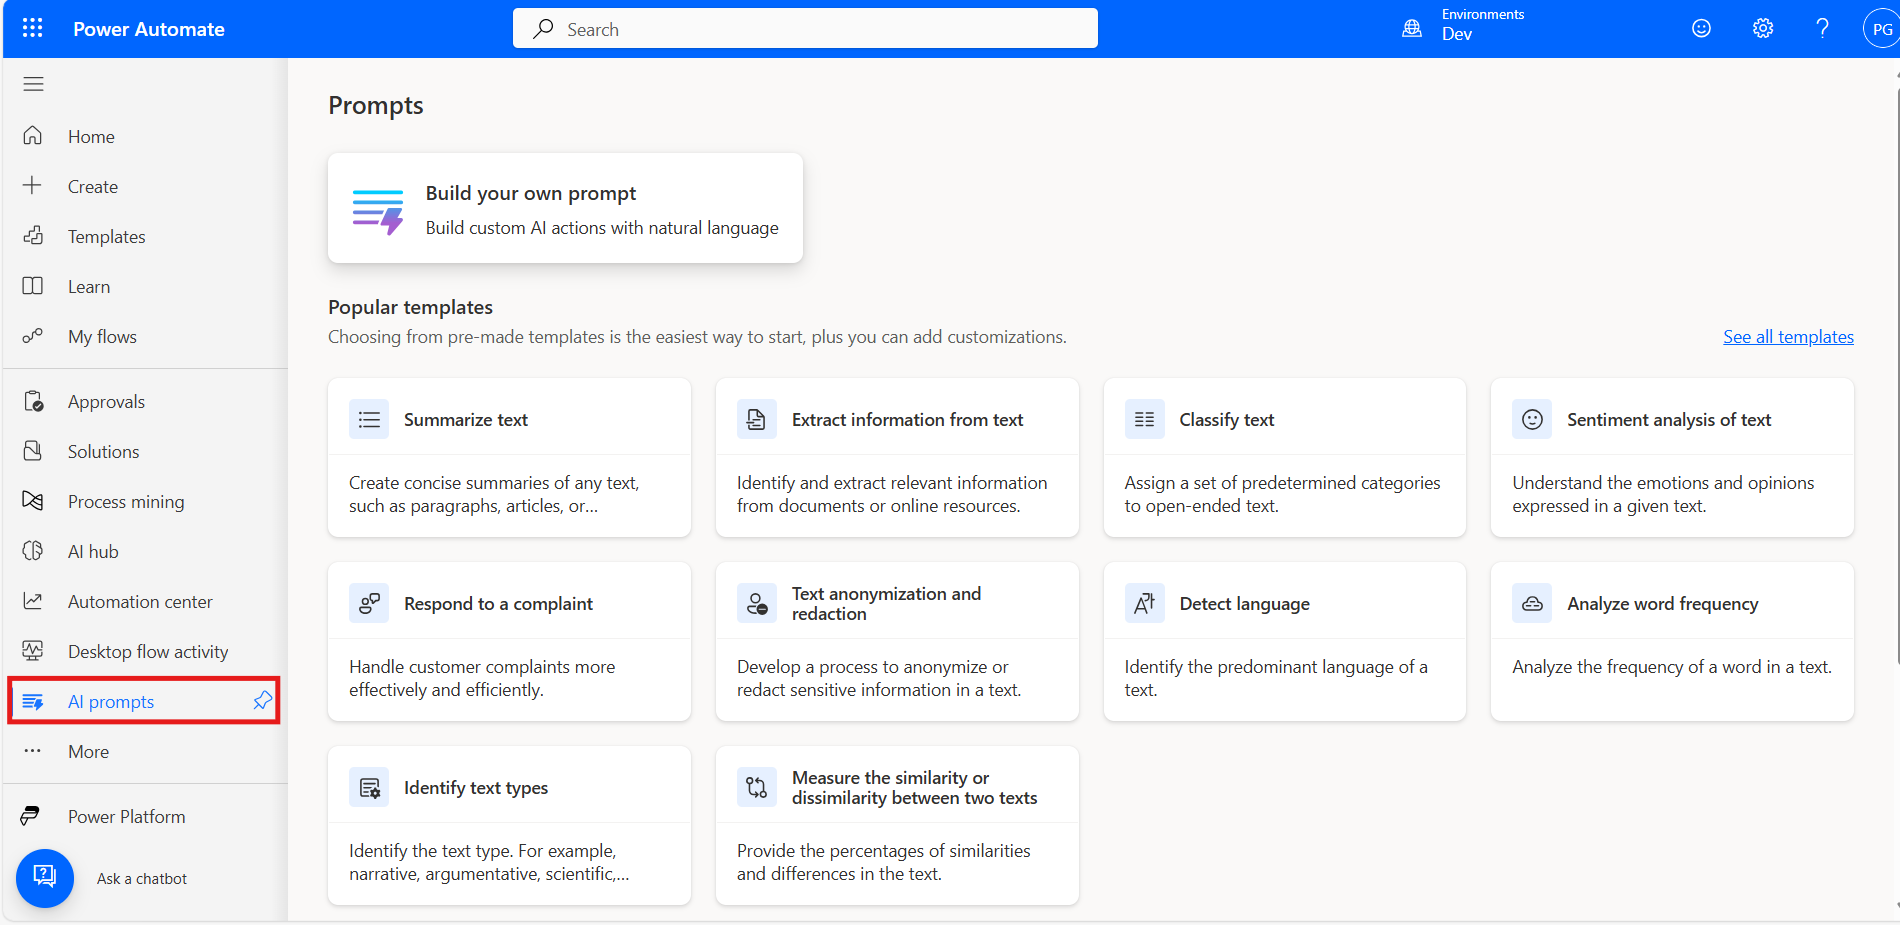
Open Power Automate (https://make.powerautomate.com)and navigate to the AI Prompts section.
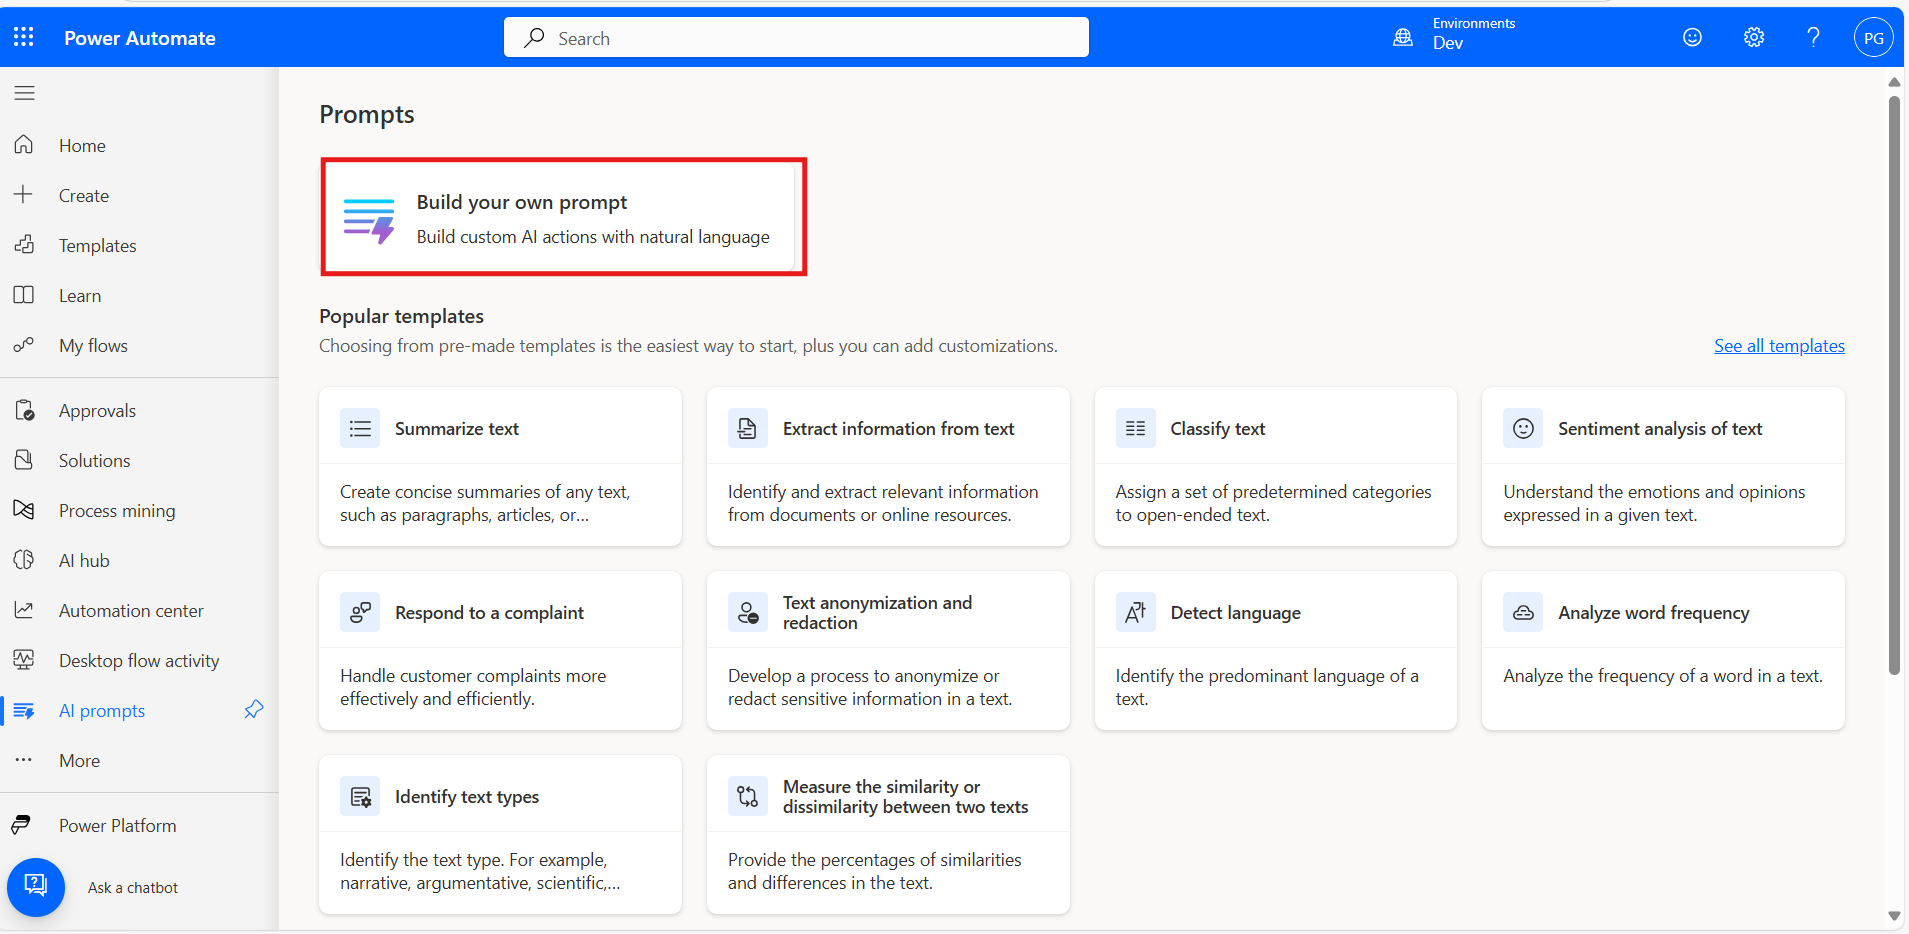
Click on Build Your Own Prompt to start creating a new one.
Enter a title that describes your prompt.
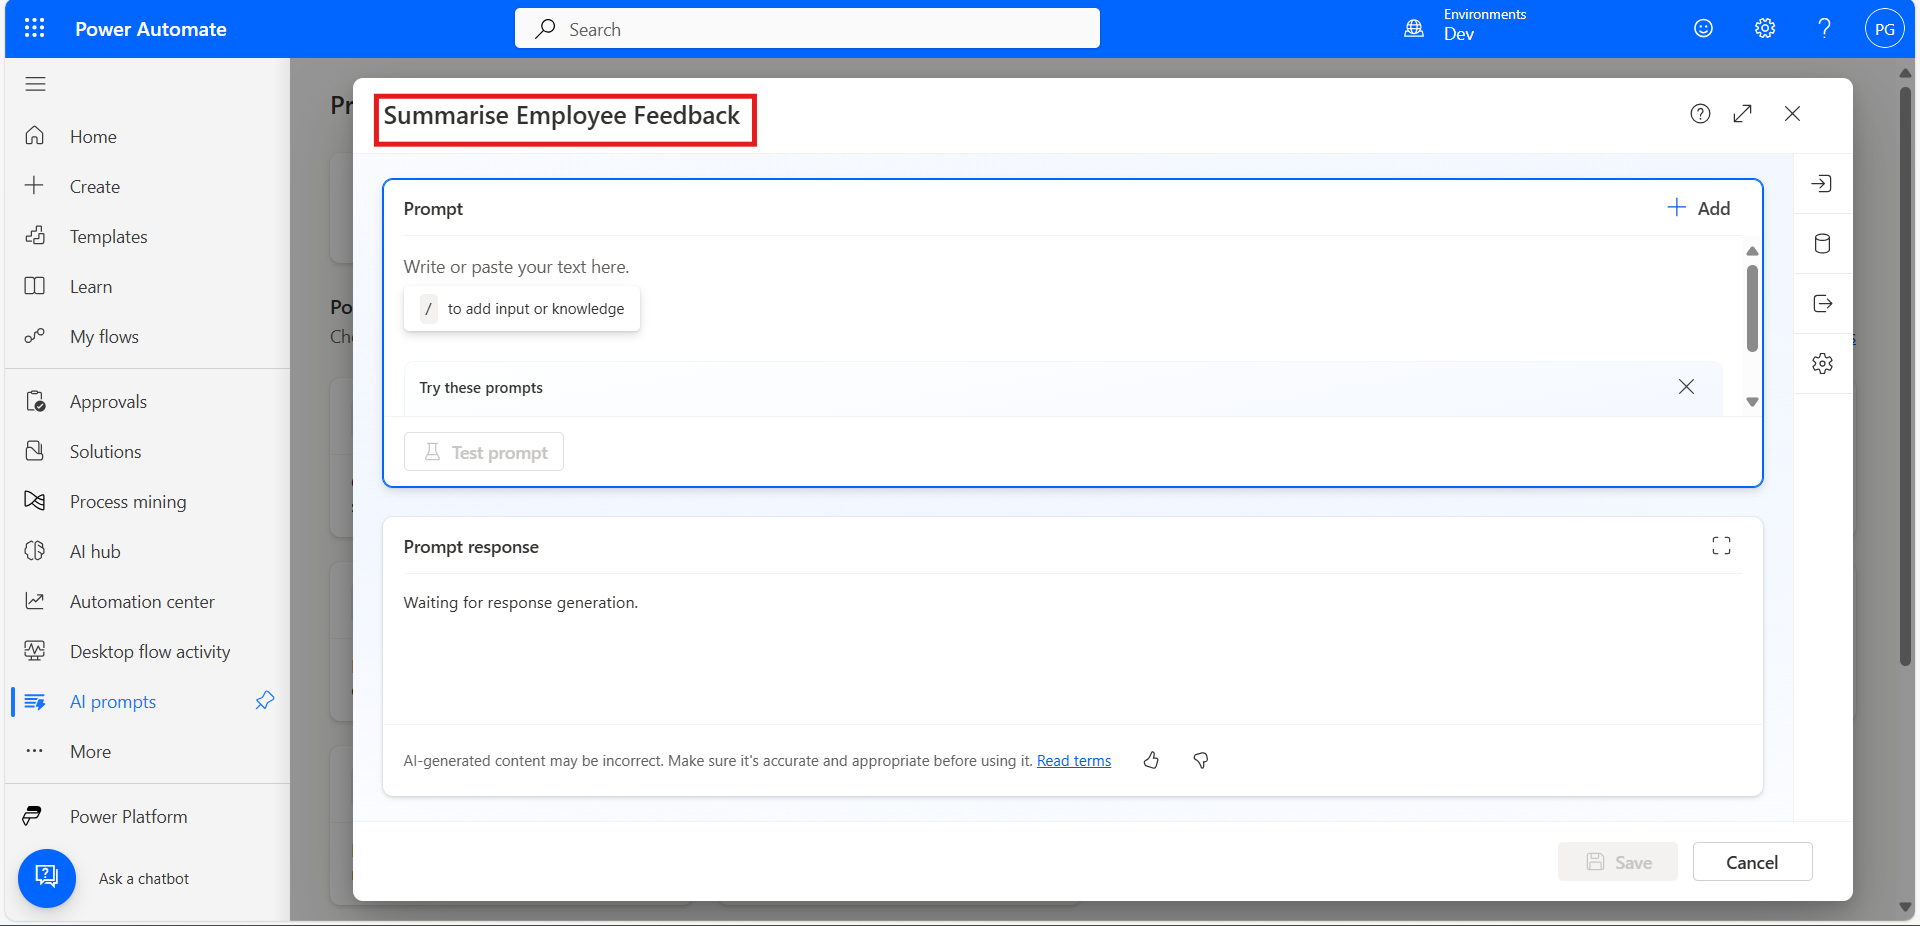
In the prompt section, type out the instructions or details you want the AI to follow.
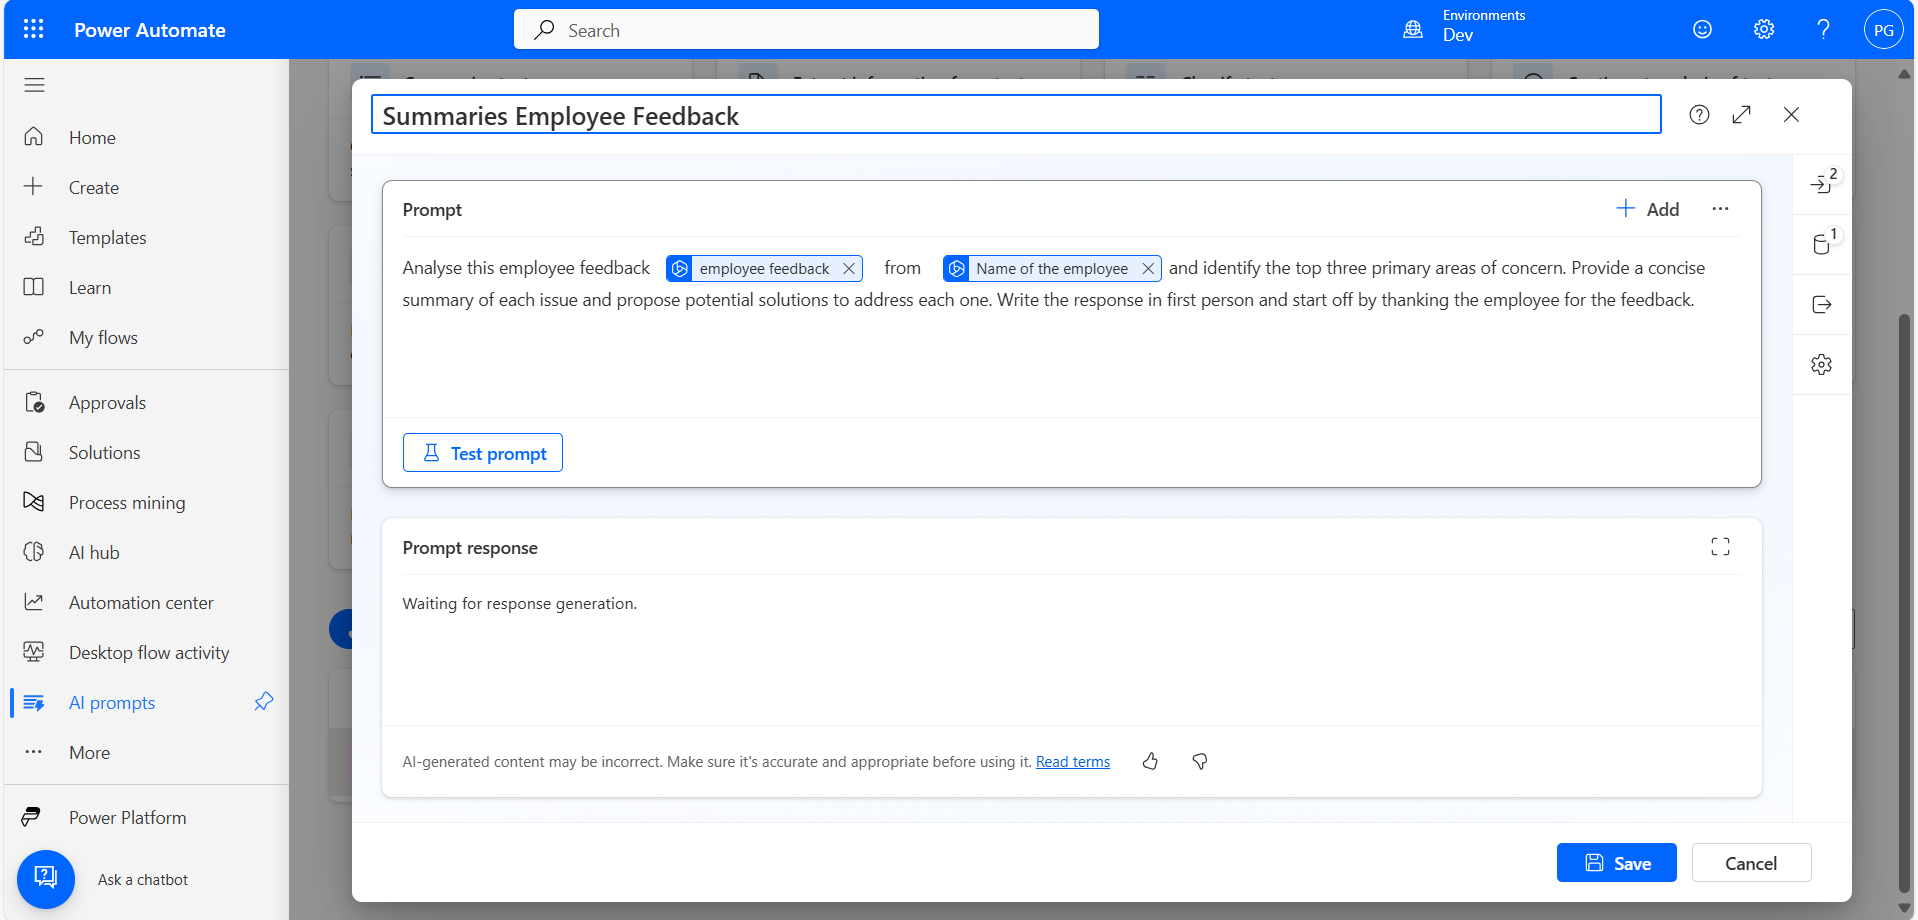
If the prompt requires input parameters, define them accordingly (e.g., text, number, or other data types) by clicking on the right-side input symbol.

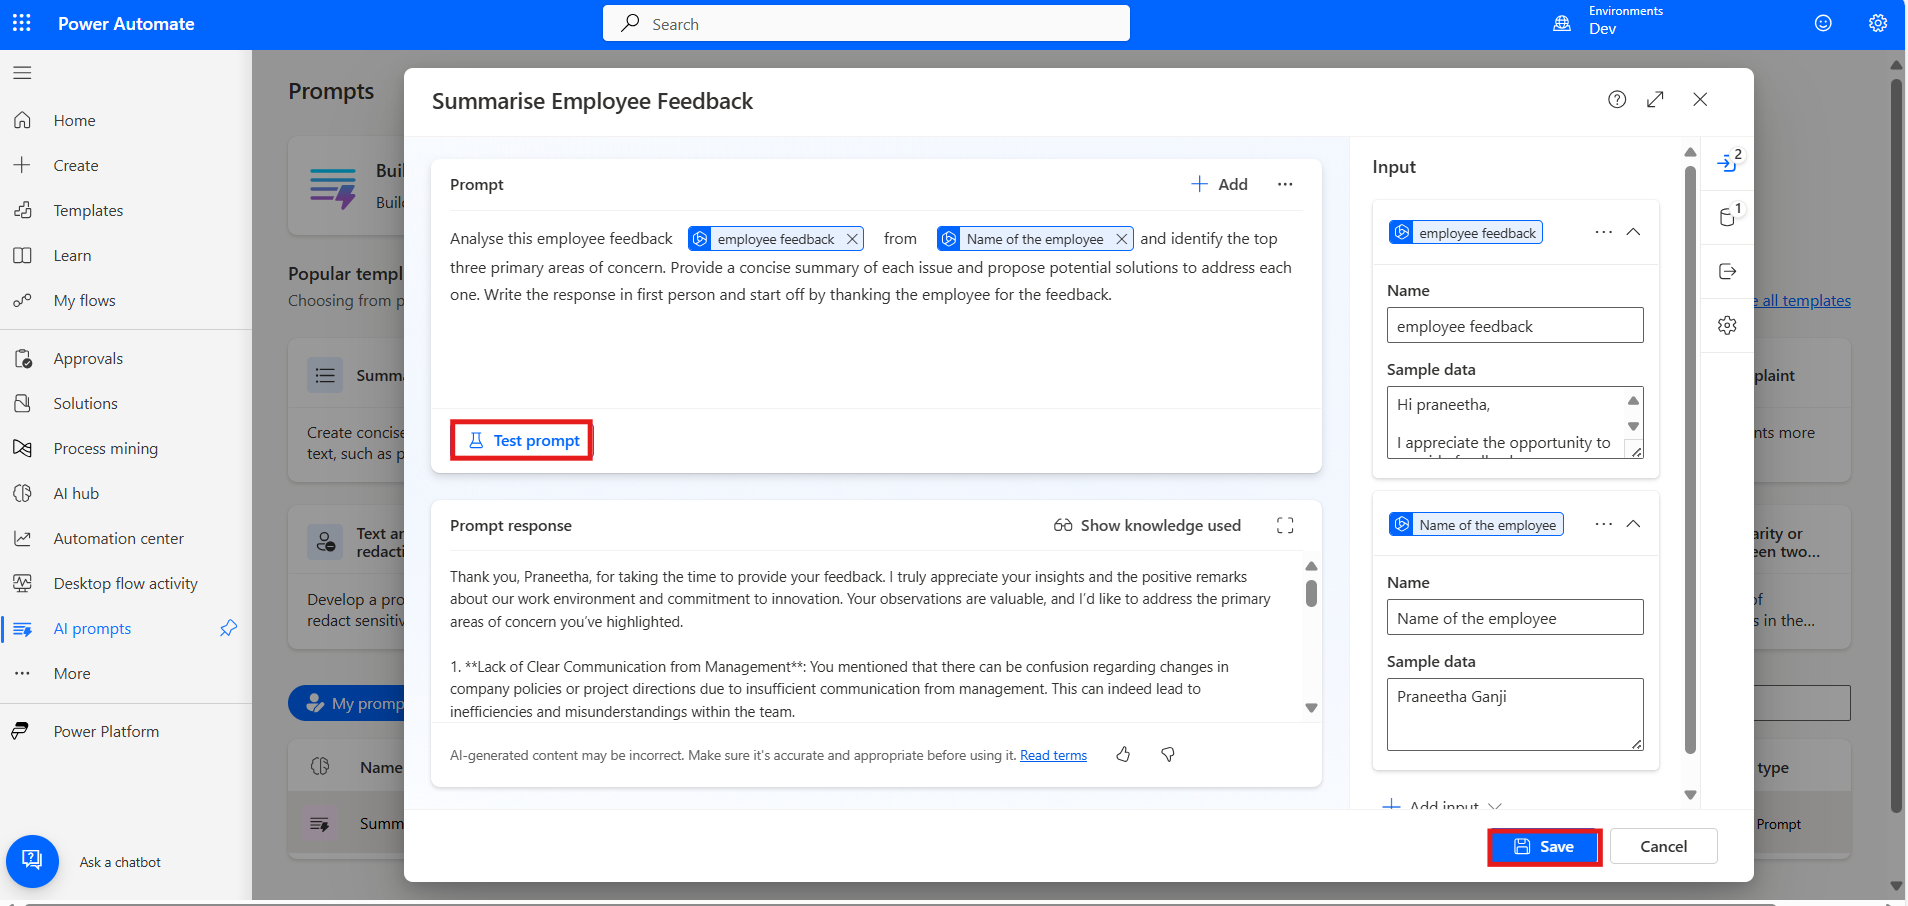
Save your prompt and test it if needed, and you can see the AI response in return.
Set Up a Cloud Flow
This flow automatically triggers when a new row is added to a table, processes the data using AI (GPT), requests approval, and finally sends an email based on the approval decision.
Let's dive into the details step by step.
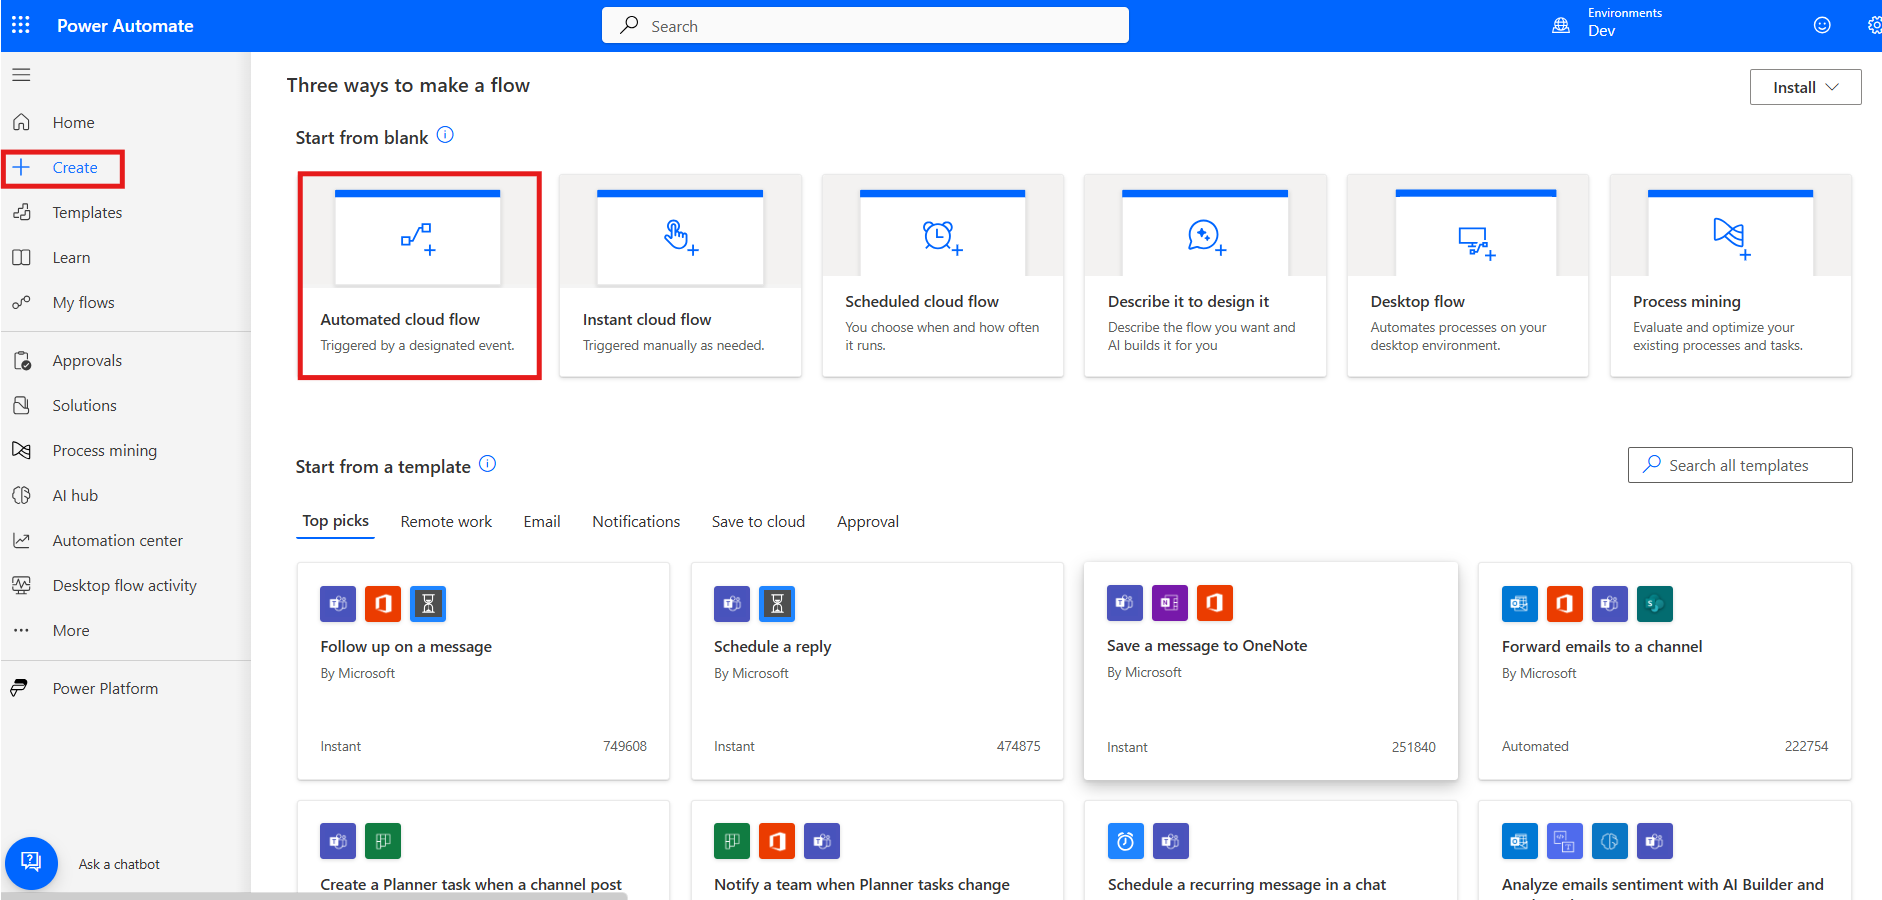
Create an Automated Flow:
To begin, open Power Automate, go to the left-side menu, click on Create, and select Automated cloud flow to start building a new automated workflow.
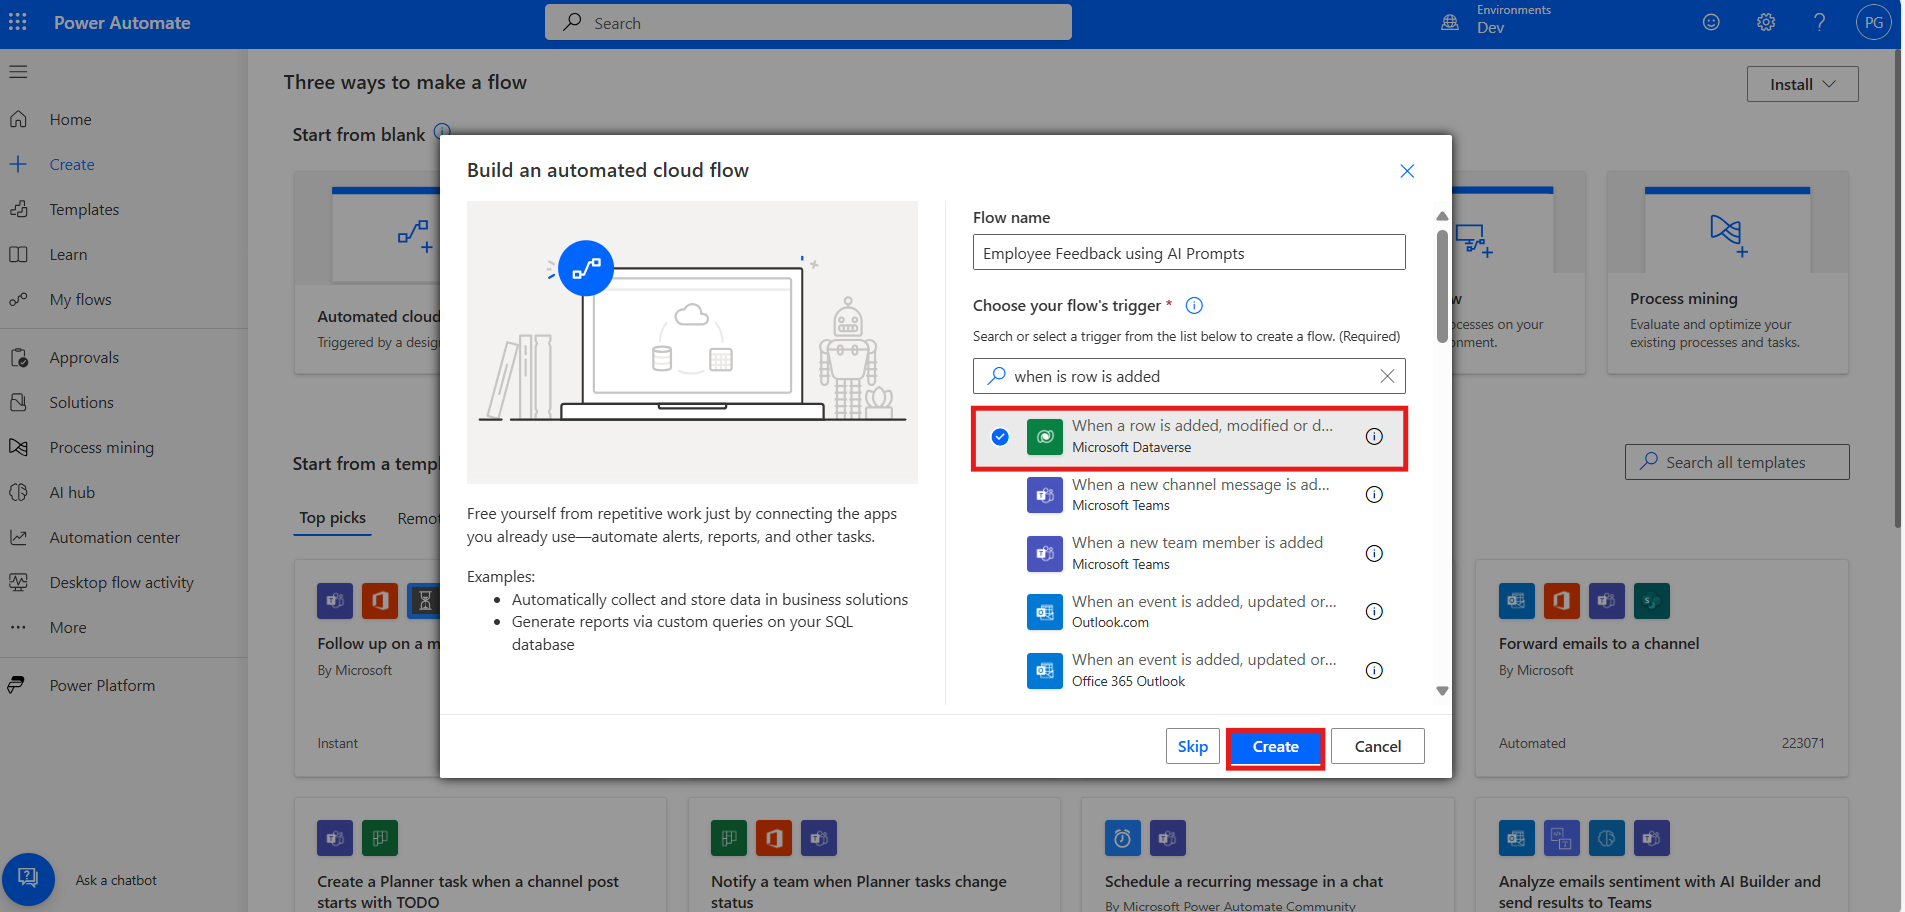
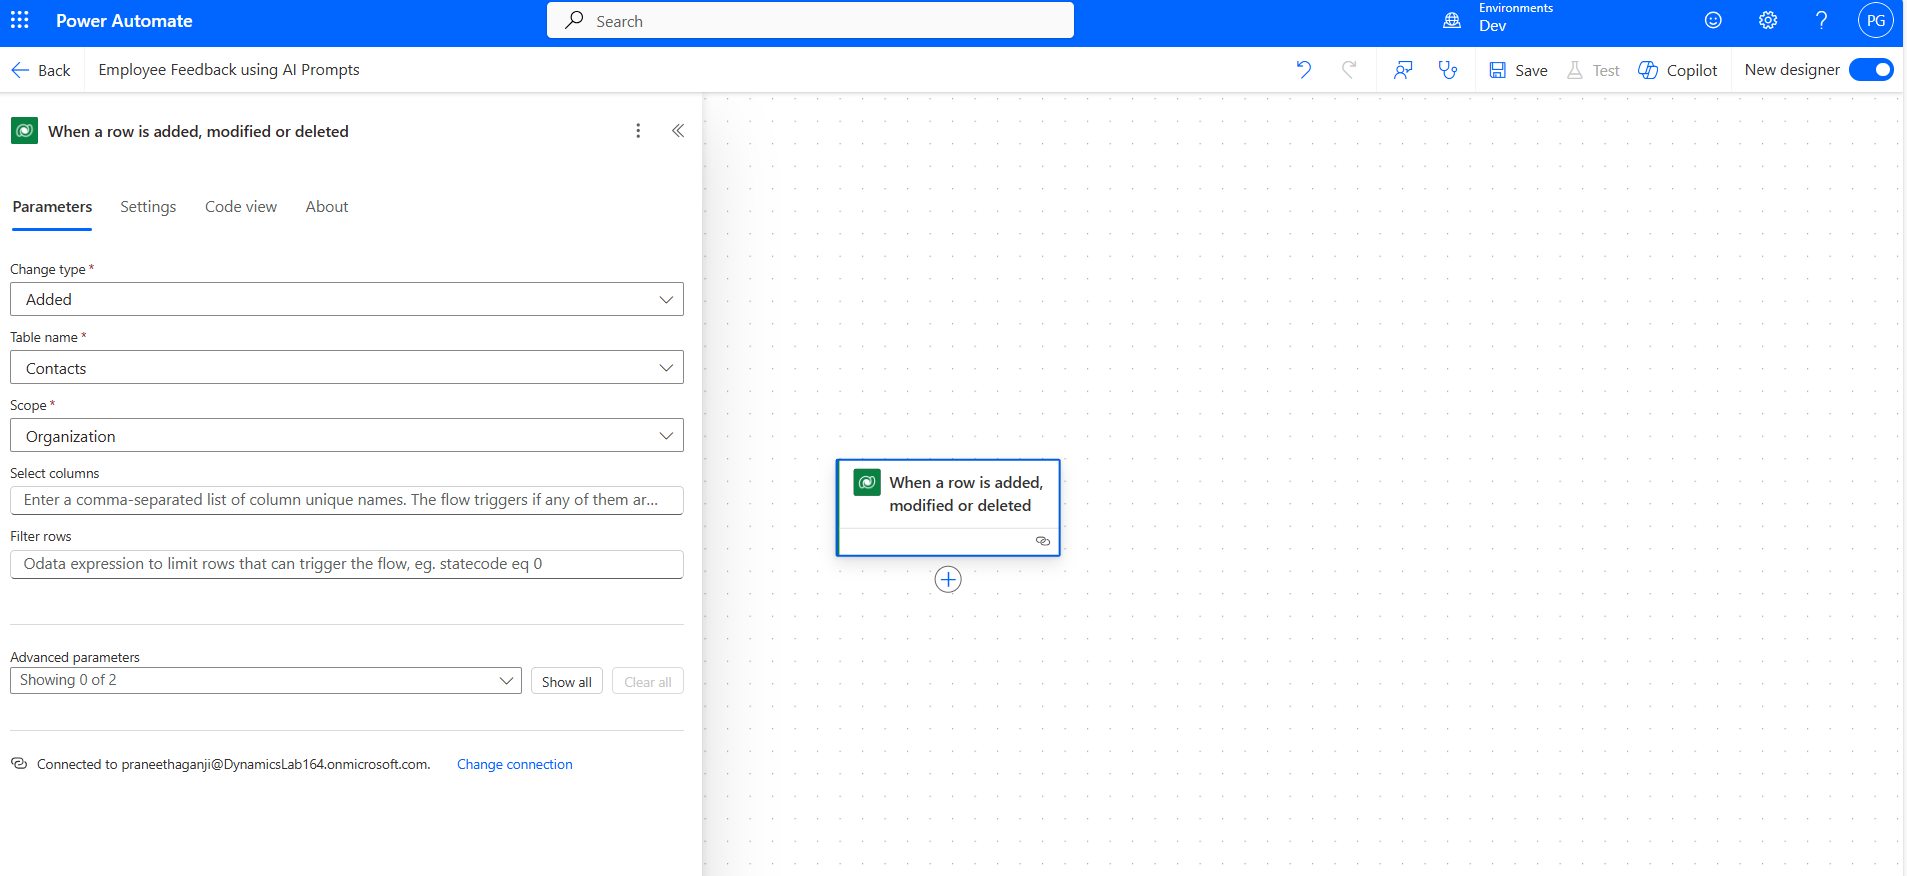
Trigger - When a row is added, modified, or deleted:
Add a new trigger by selecting "When a row is added, modified, or deleted" from the Dataverse connector, then click the Create button.
Configure the trigger settings by setting Change Type to "Added," Table Name to "Contacts," and Scope to "Organization" to apply the flow organization-wide.
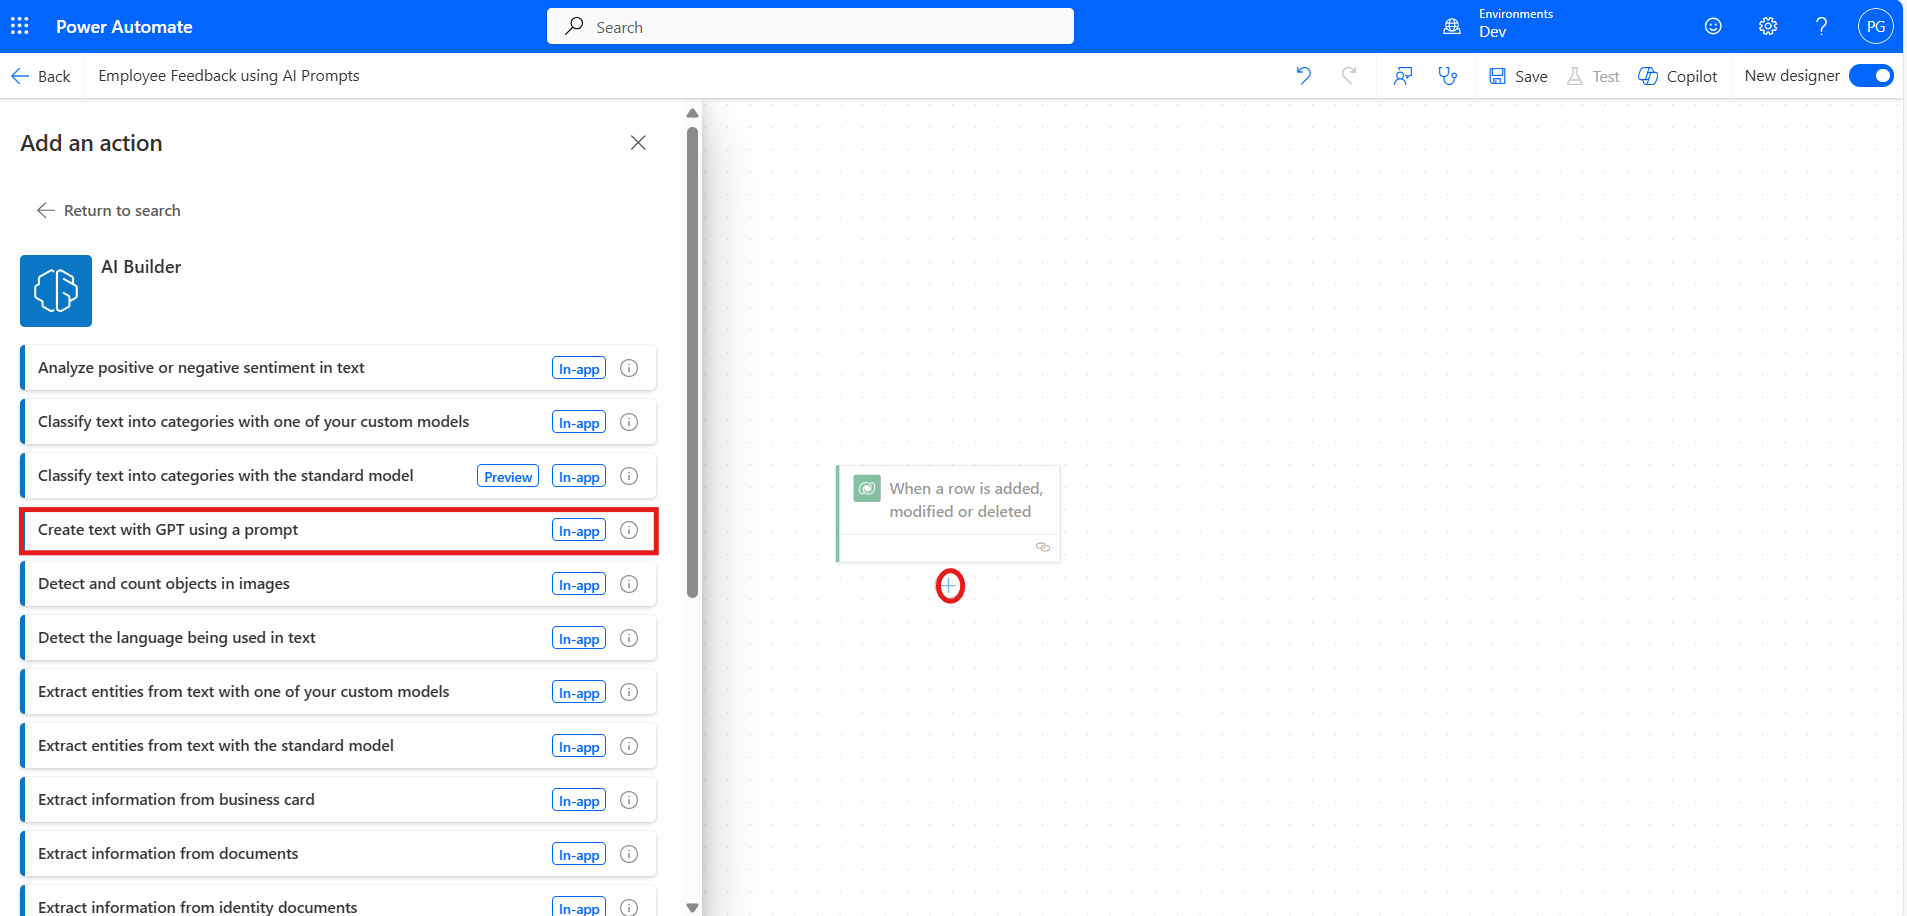
Create Text with GPT Using a Prompt:
Now, click on the Add an action symbol, search for "Create text with GPT using a prompt" in AI Builder, and add it to the flow.
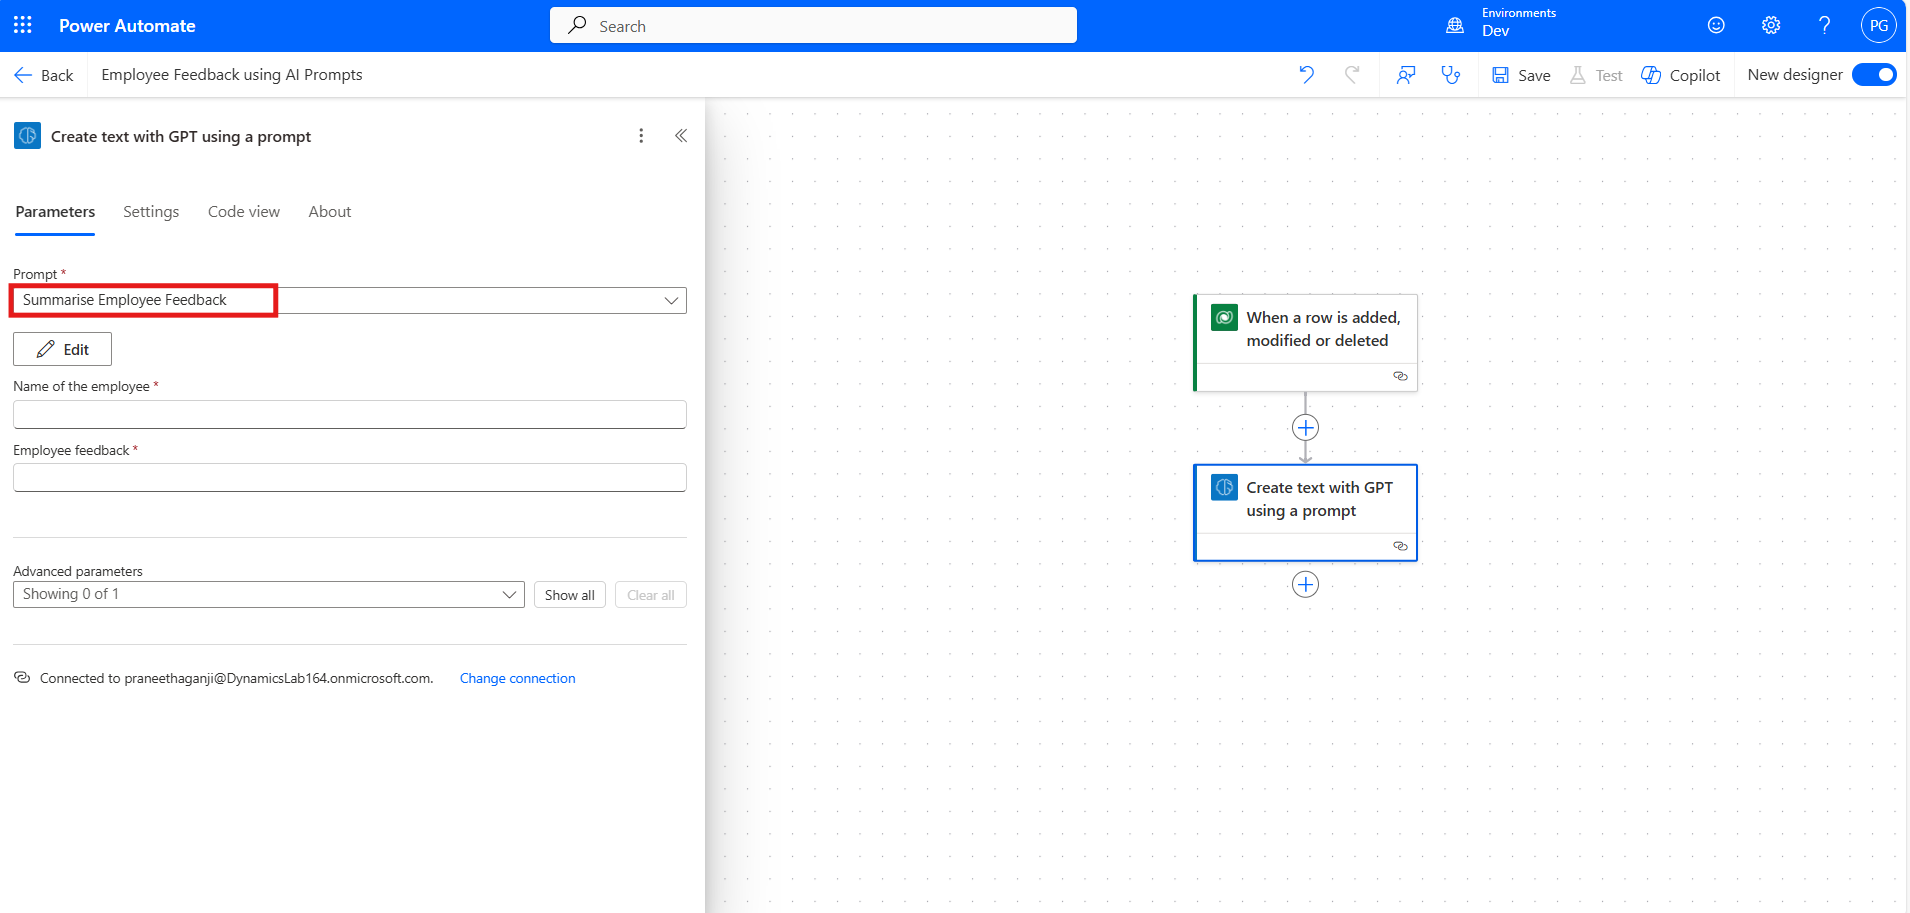
Configure the fields by setting up a created prompt or selecting an existing one, but in this case, we are using the one we created earlier, "Summarize Employee Feedback."
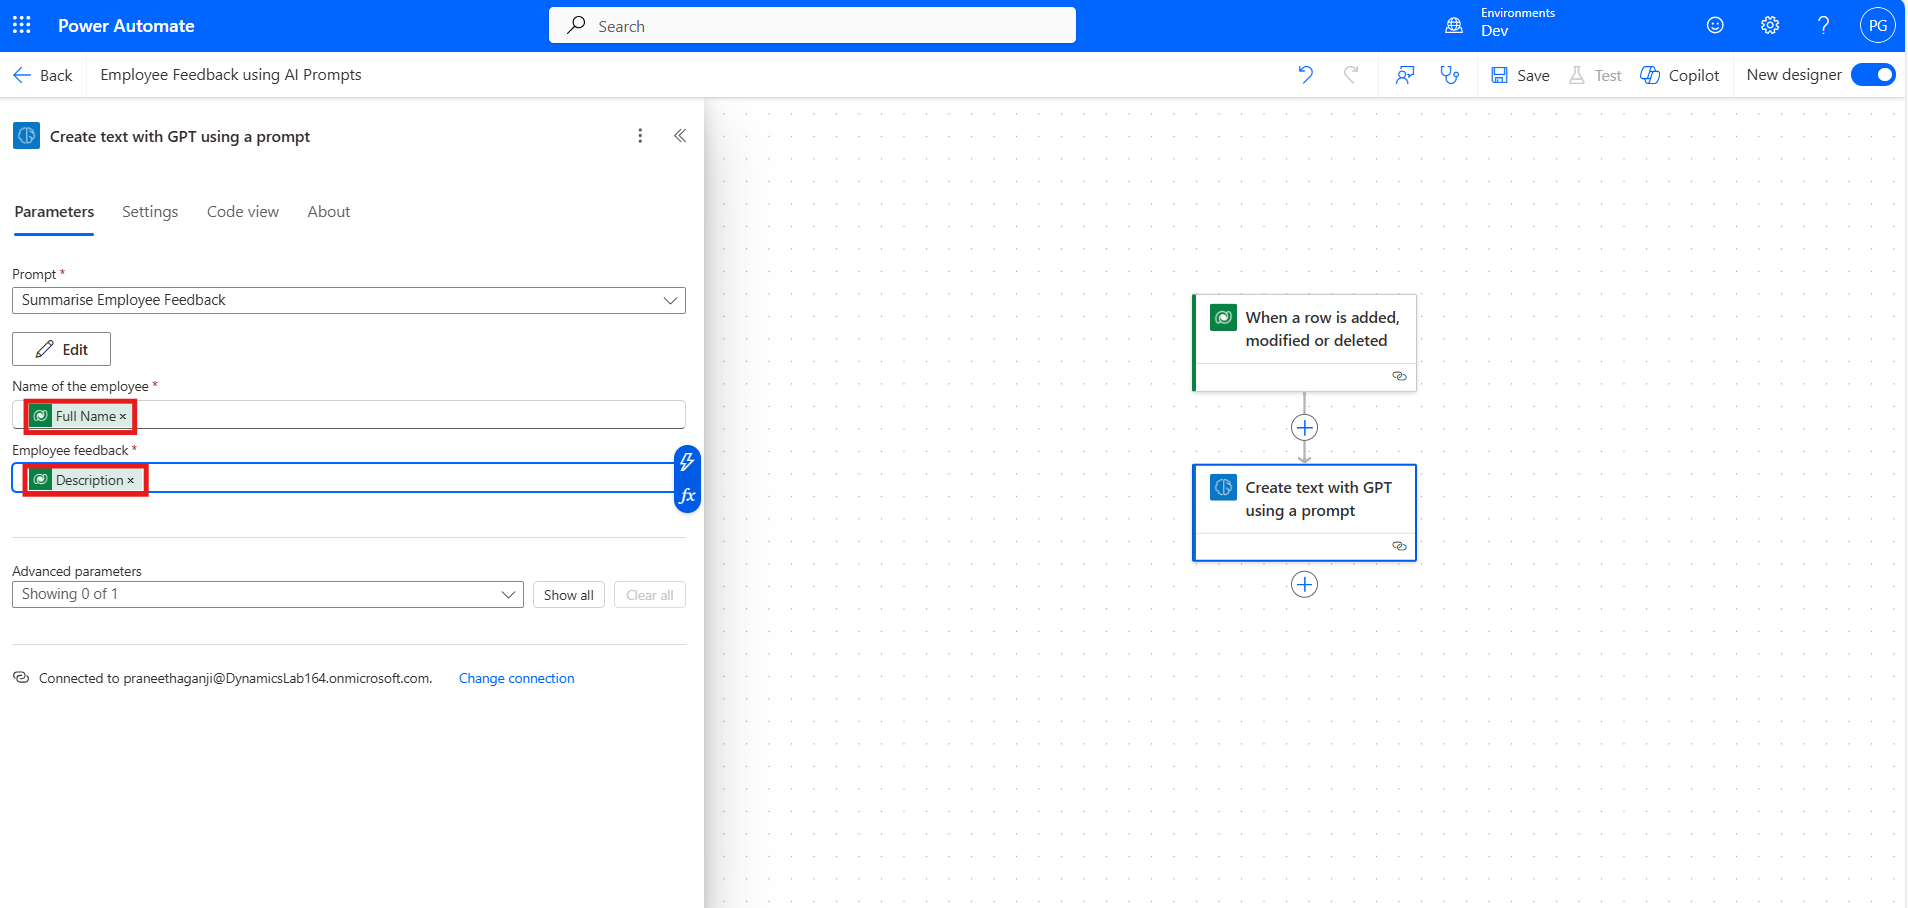
Using dynamic values, select Full Name for Name of Employee from the previous Dataverse step and map Employee Feedback to the Description field, which contains the feedback.
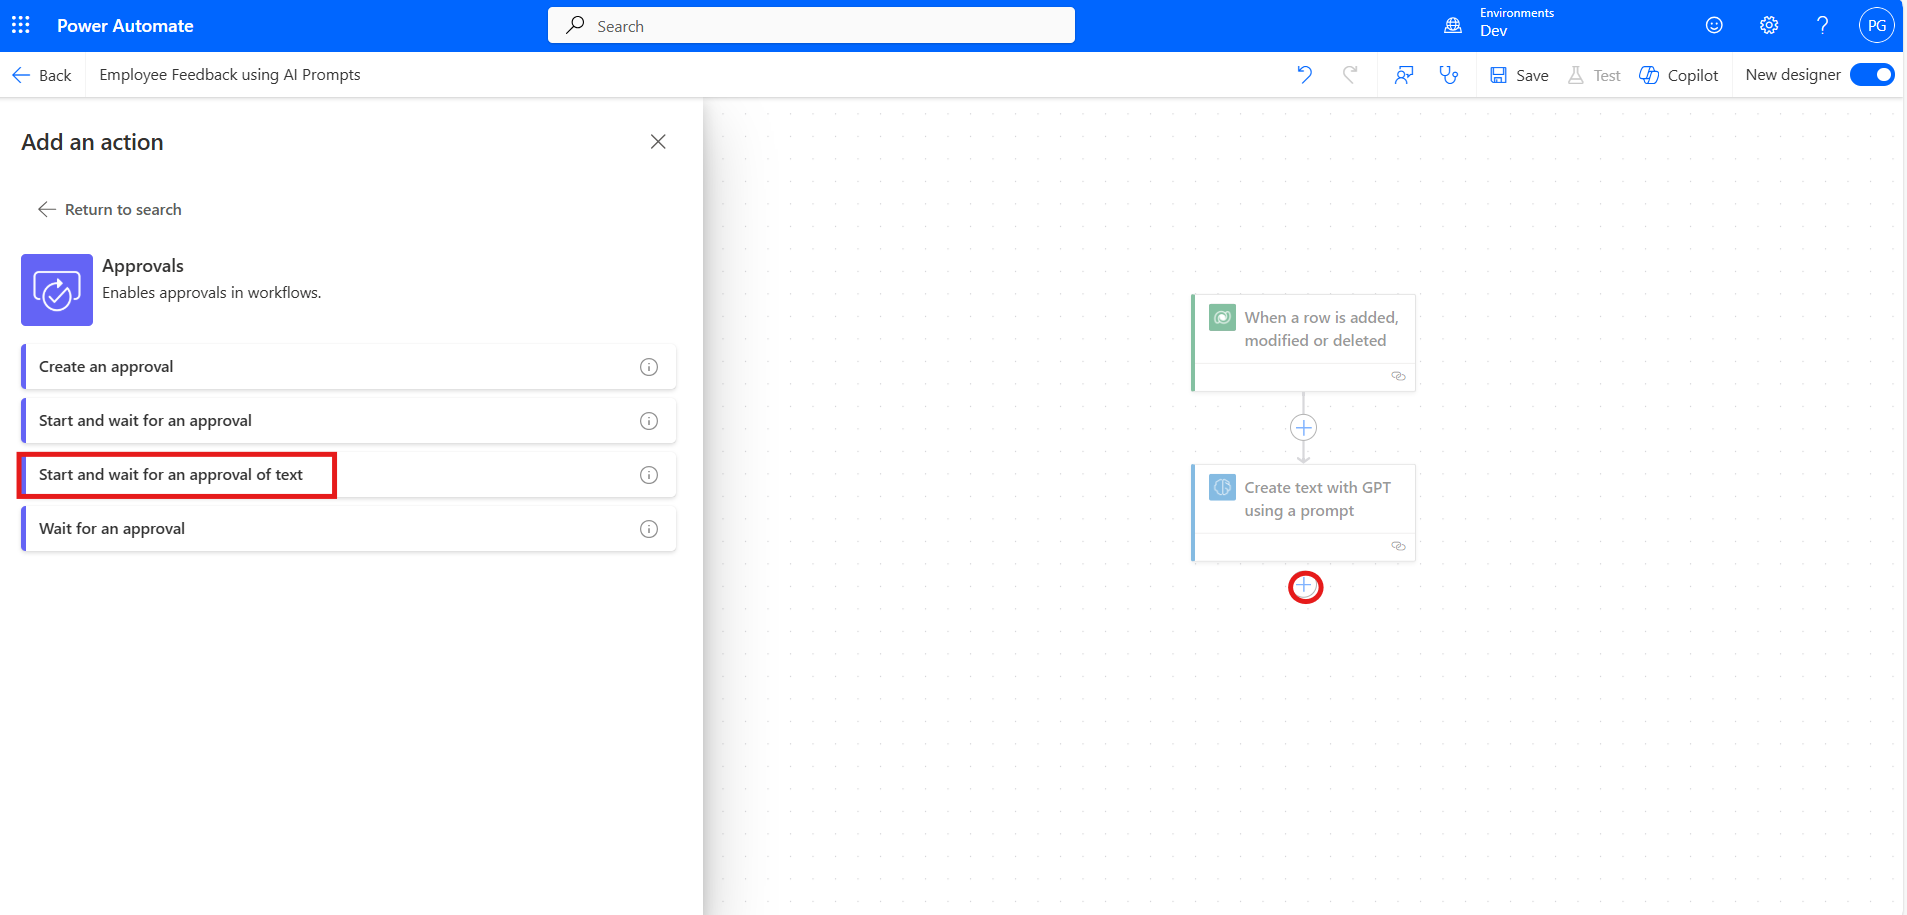
Start and Wait for an Approval:
Click on Add an action, search for "Start and wait for an approval" in Approvals, and click on it to add it to the flow.
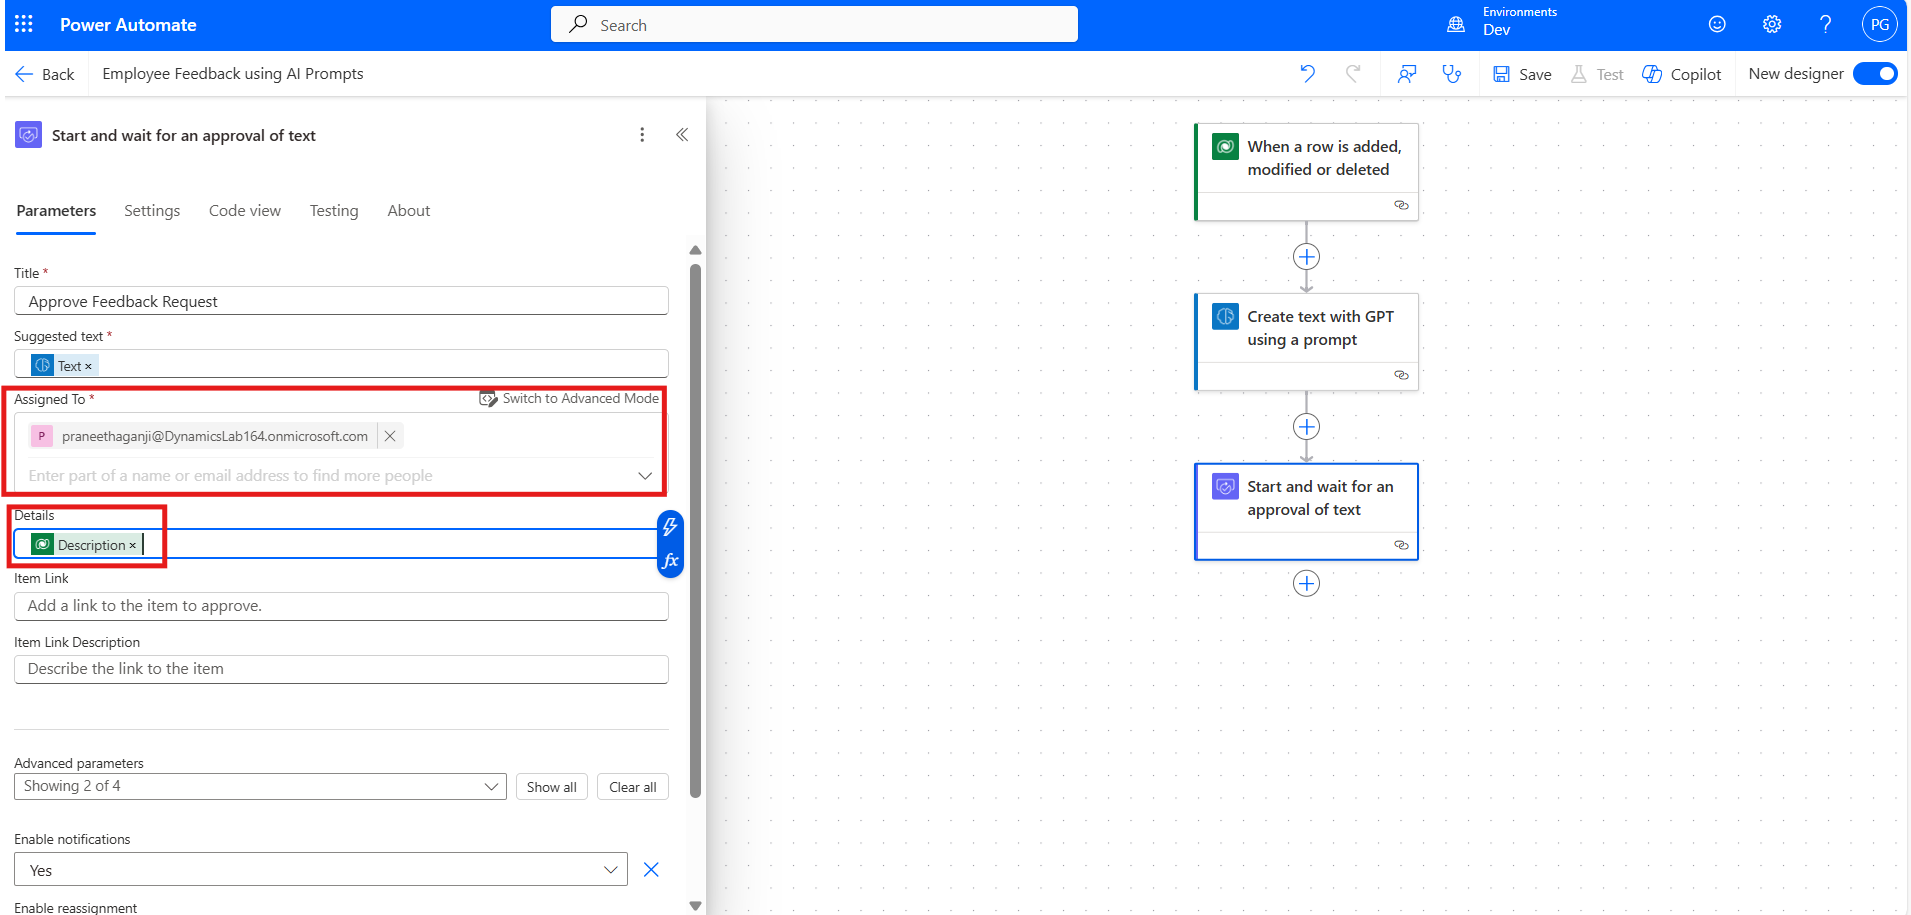
Enter a meaningful title, such as "Approve Feedback Request."
Set the Suggested text field to the output from the Create text with GPT using a prompt step by selecting the dynamic value.
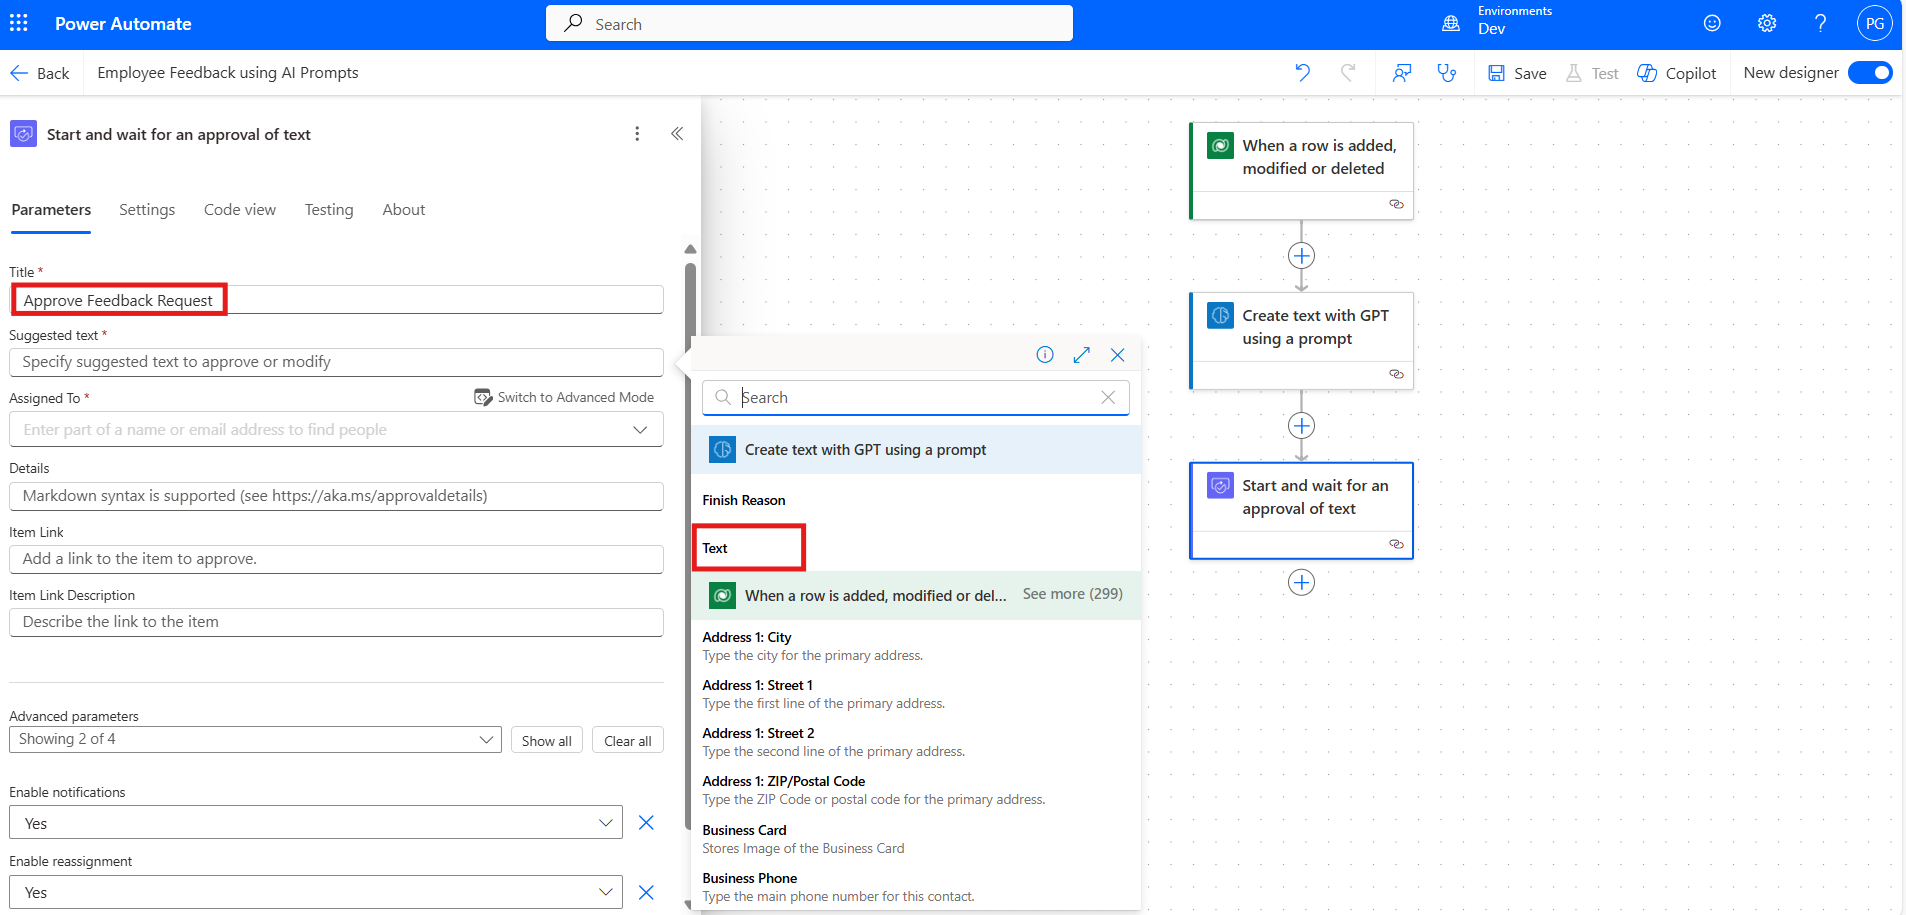
Specify the approver's email (e.g., name@yourcompany.com).
Map the Details field to the Description using a dynamic value, allowing the approver to review the feedback.
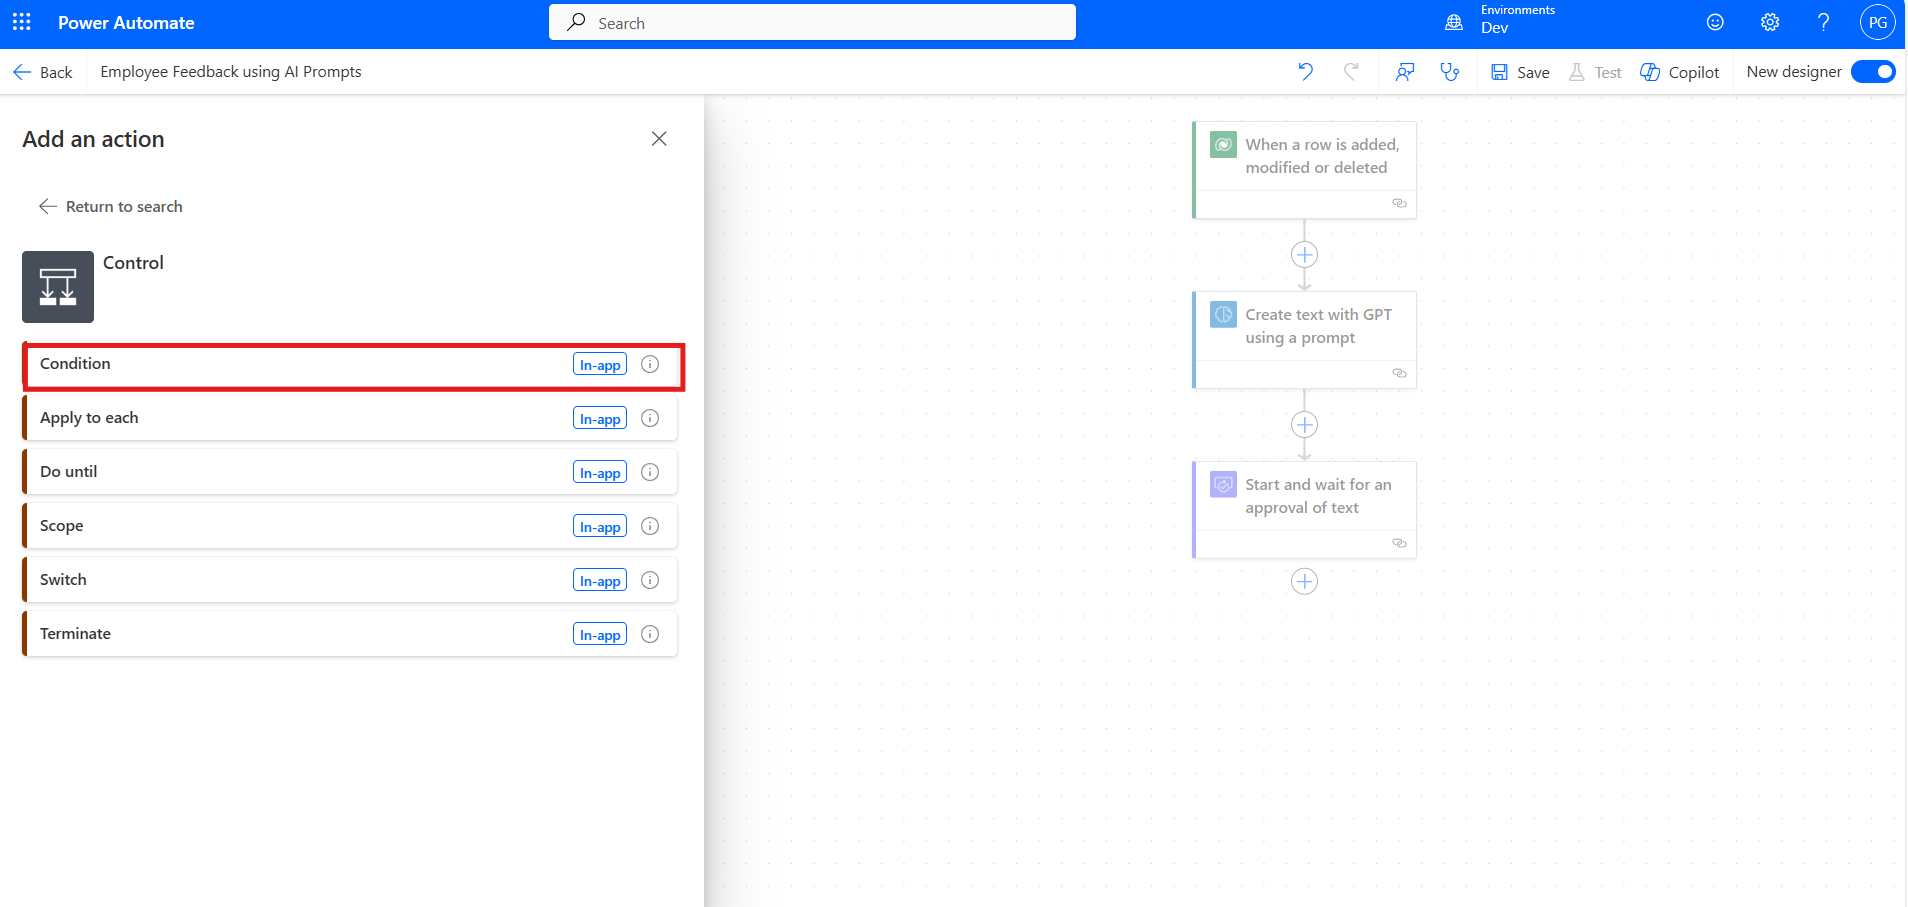
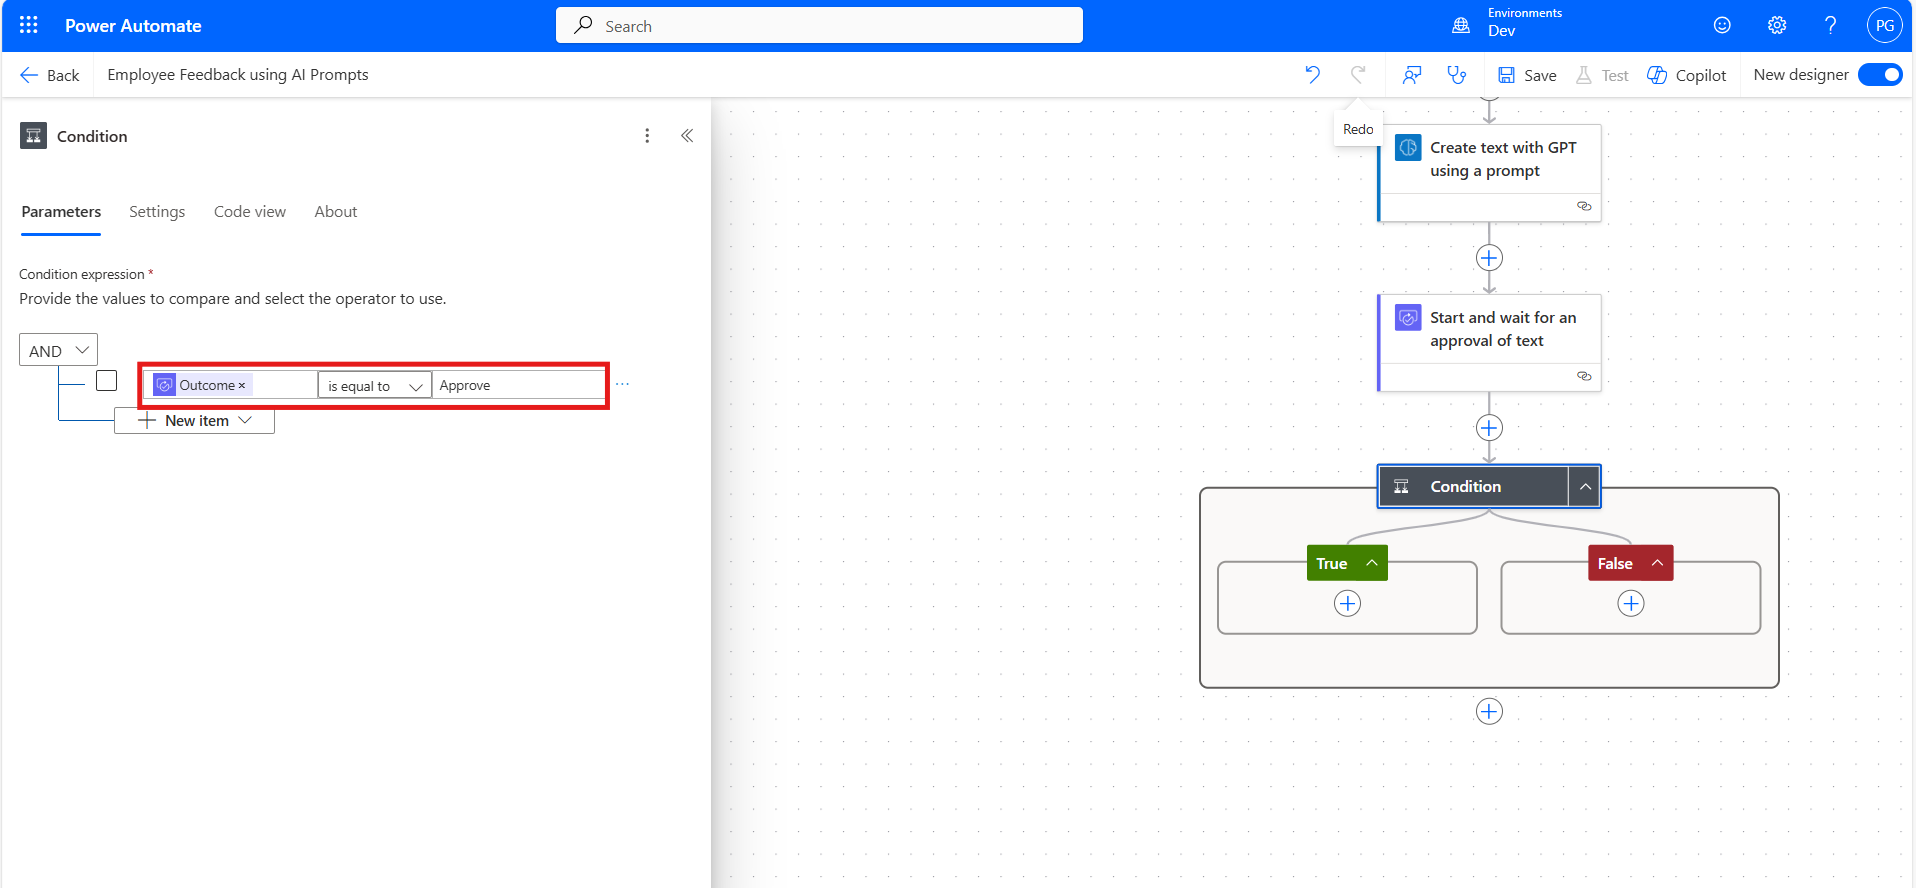
Condition - Checking Approval Status:
Once the approval request is submitted, it is essential to check whether the response is "Approved" or "Rejected." This step determines the next course of action based on the approver’s decision.
To configure this, click on Add an action and select the "Condition" in Control.
Set the condition to check if the Outcome from the approval step is equal to "Approve." If approved, proceed to send an email.
If rejected, no action is taken, but an alternative action, such as notifying the employee, can be added.
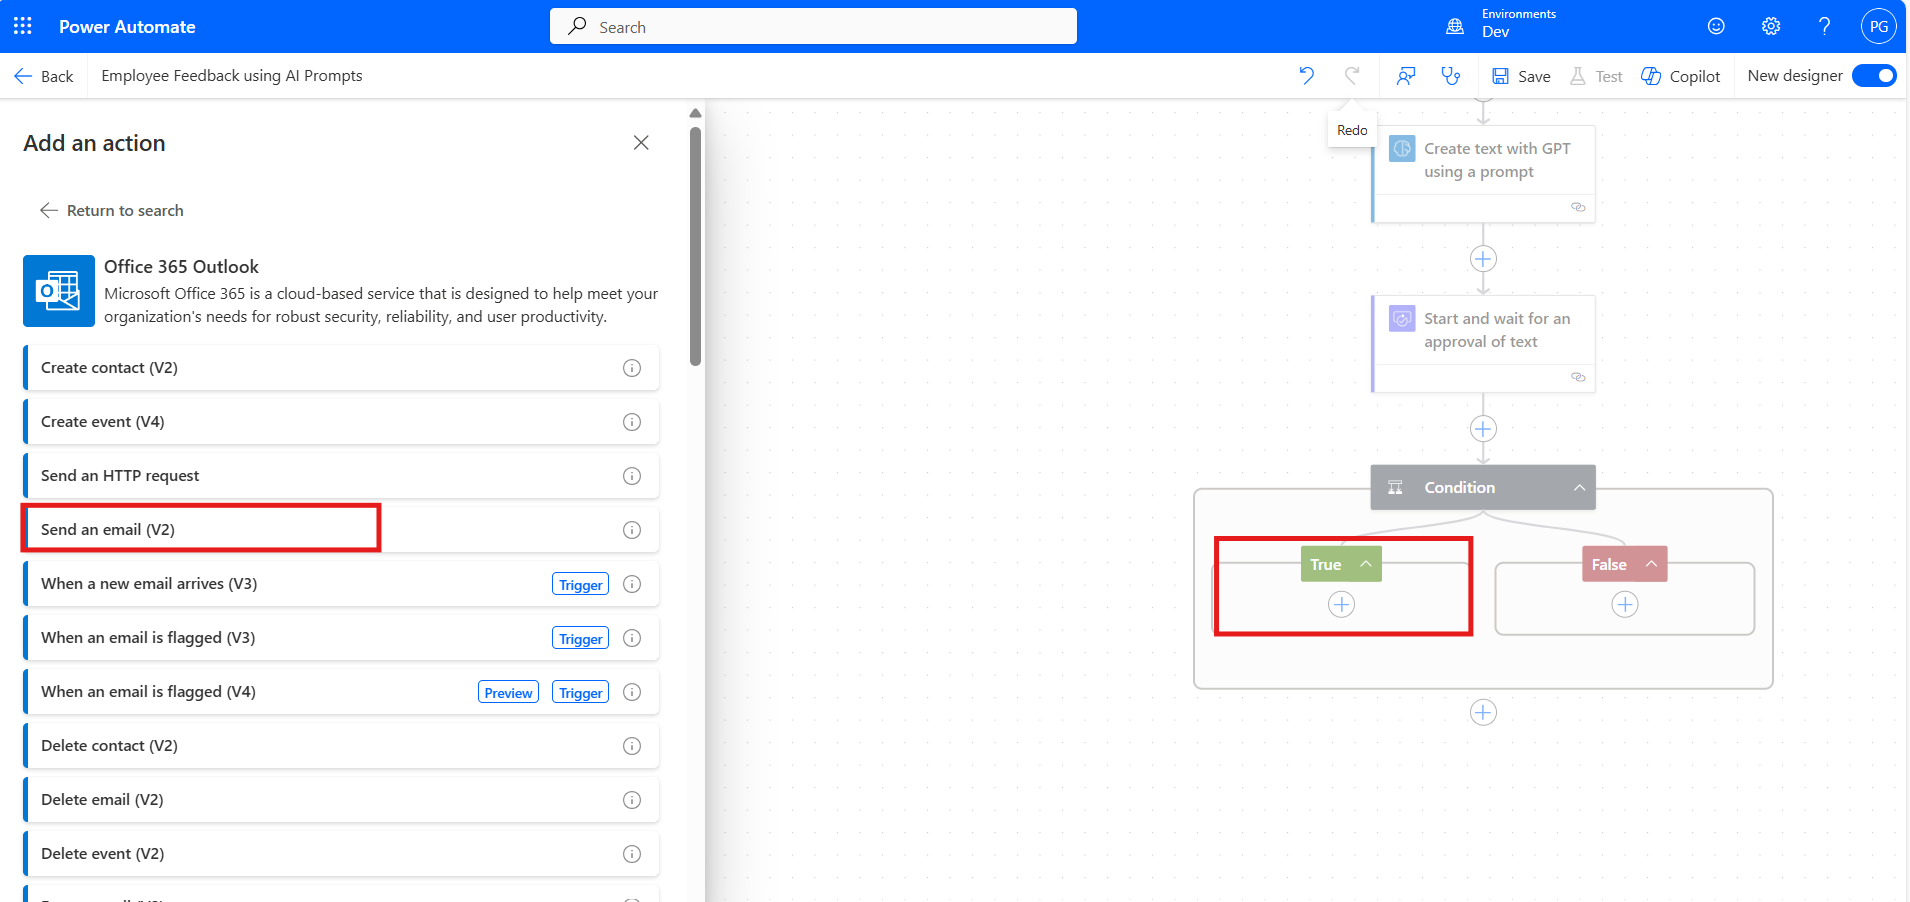
Send an Email Upon Approval:
If the approval is granted, an email is sent to the recipient containing the summarized employee feedback. This ensures that only approved feedback is shared with the intended recipient.
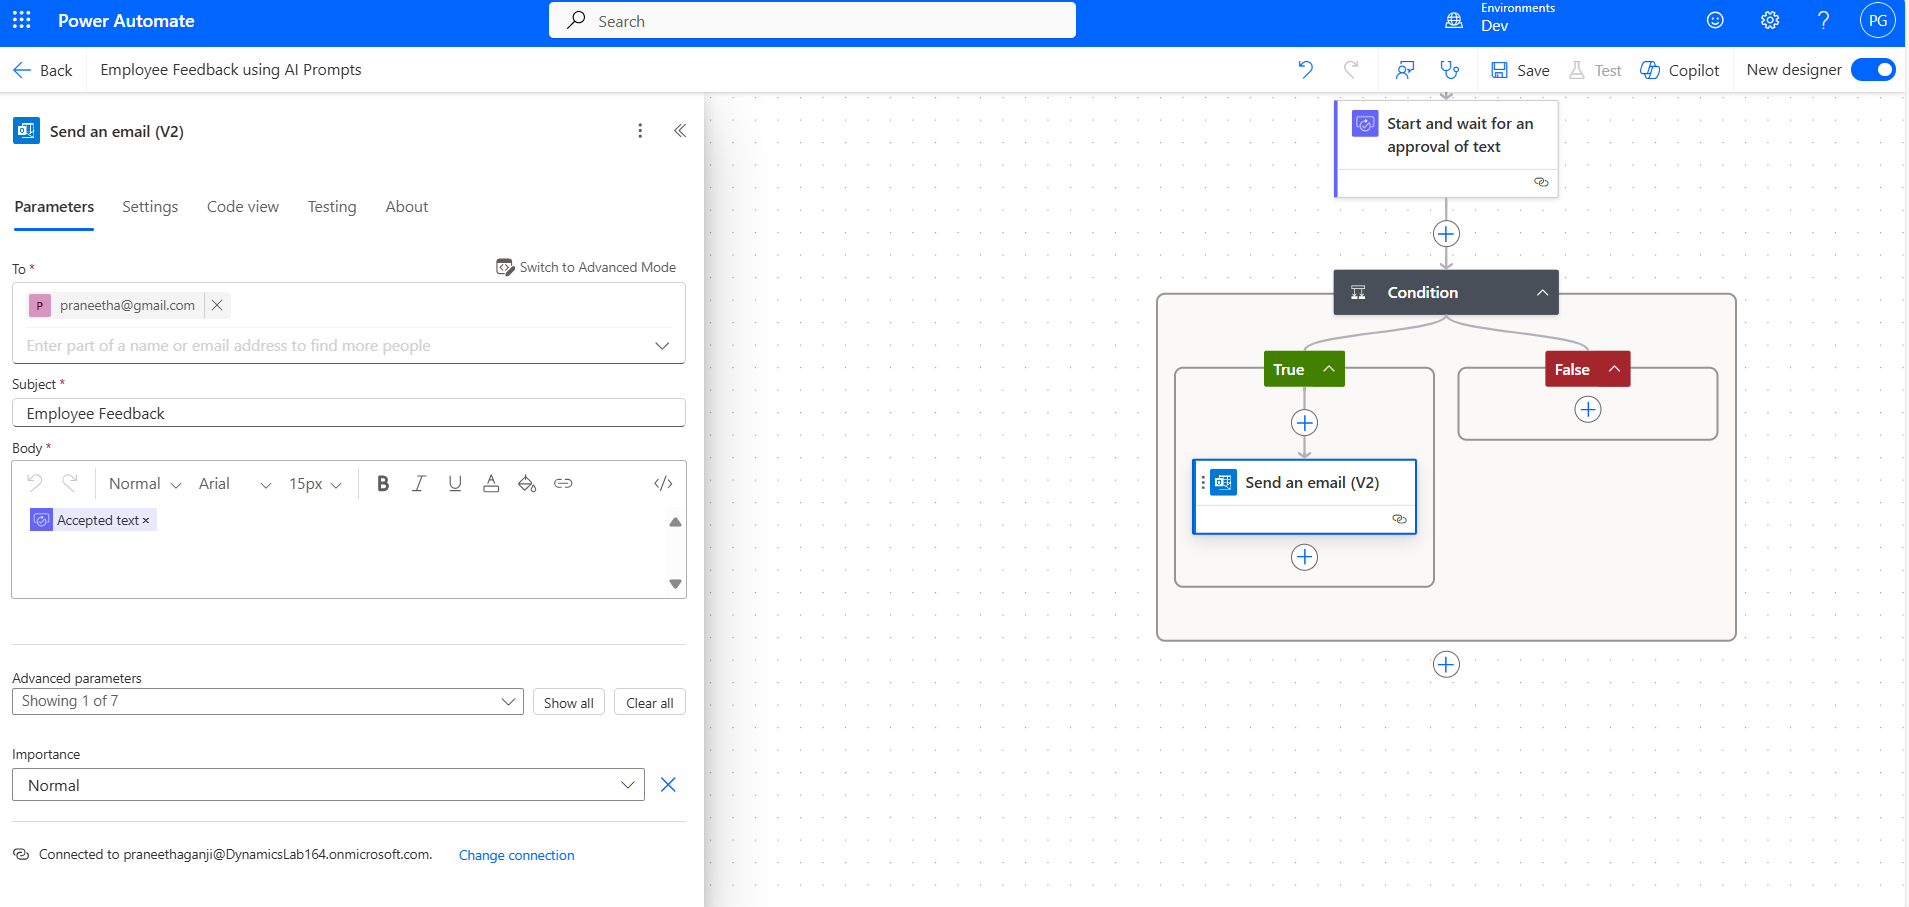
To configure this, in the True section, click on Add an action and choose "Send an email (V2)" from the Outlook connector.
Specify the recipient’s email (e.g., name@gmail.com), set the Subject as "Employee Feedback," and include the approved summarized text in the Body.
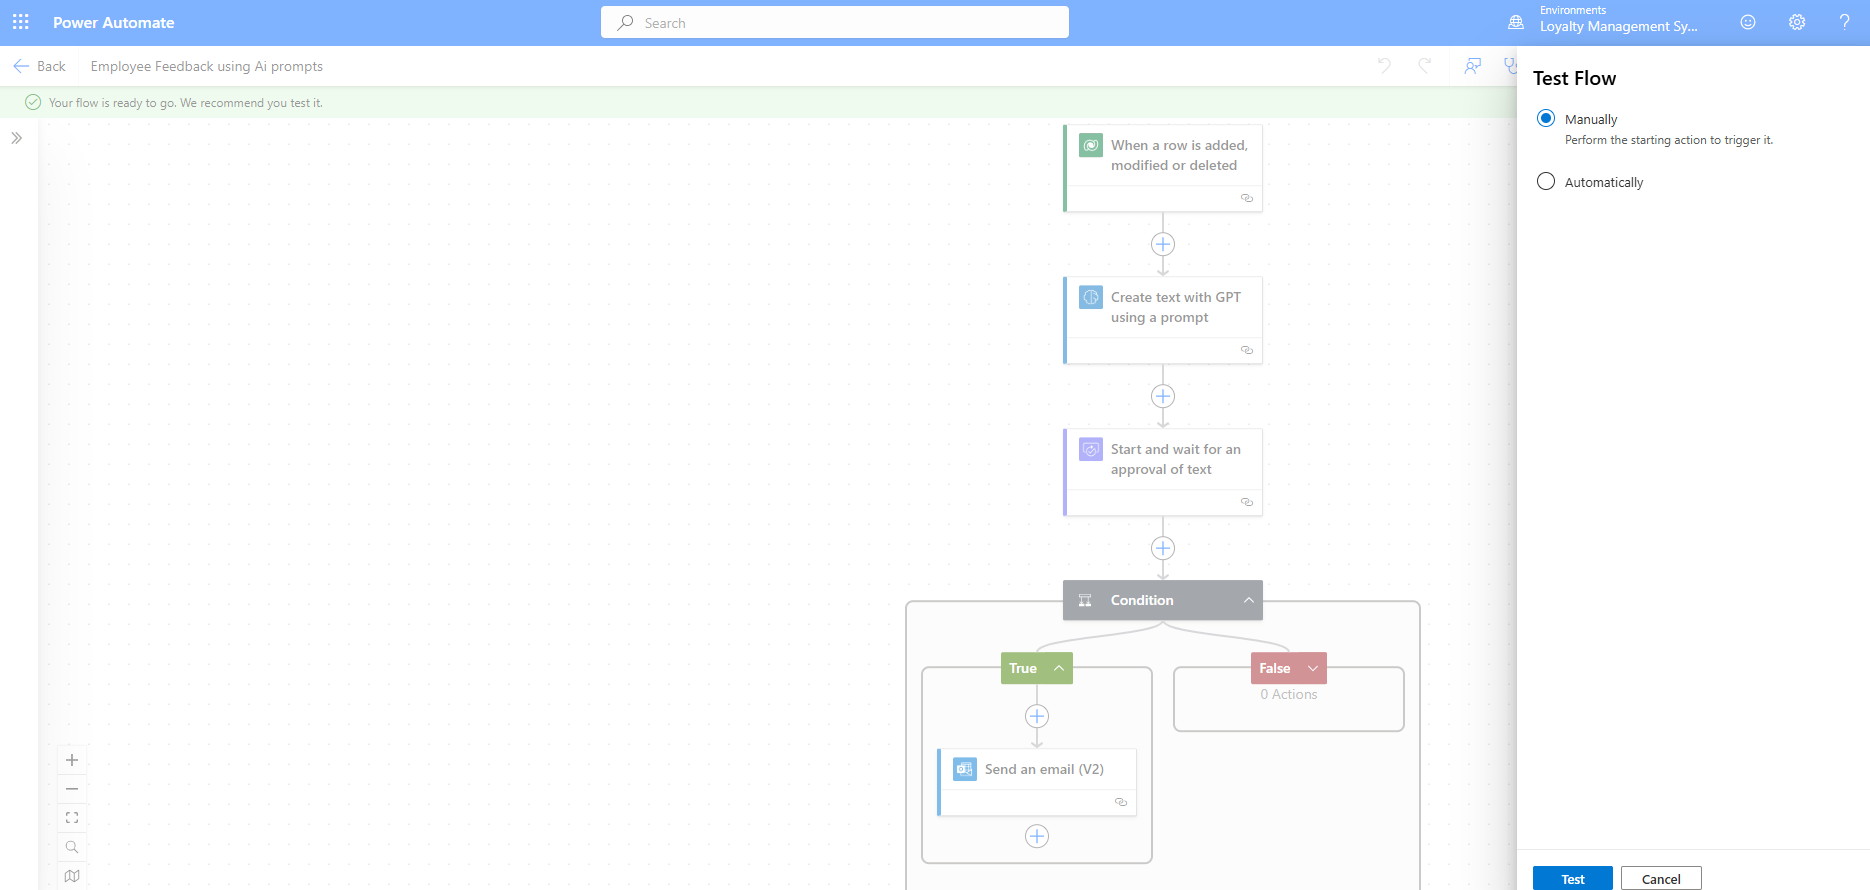
Now that the flow is complete, save the changes and test it manually to ensure everything works as expected.
Now, check the flow by adding a new contact to CRM Dataverse in Power Apps.
Open Power Apps, navigate to the Contacts table, and click on New.
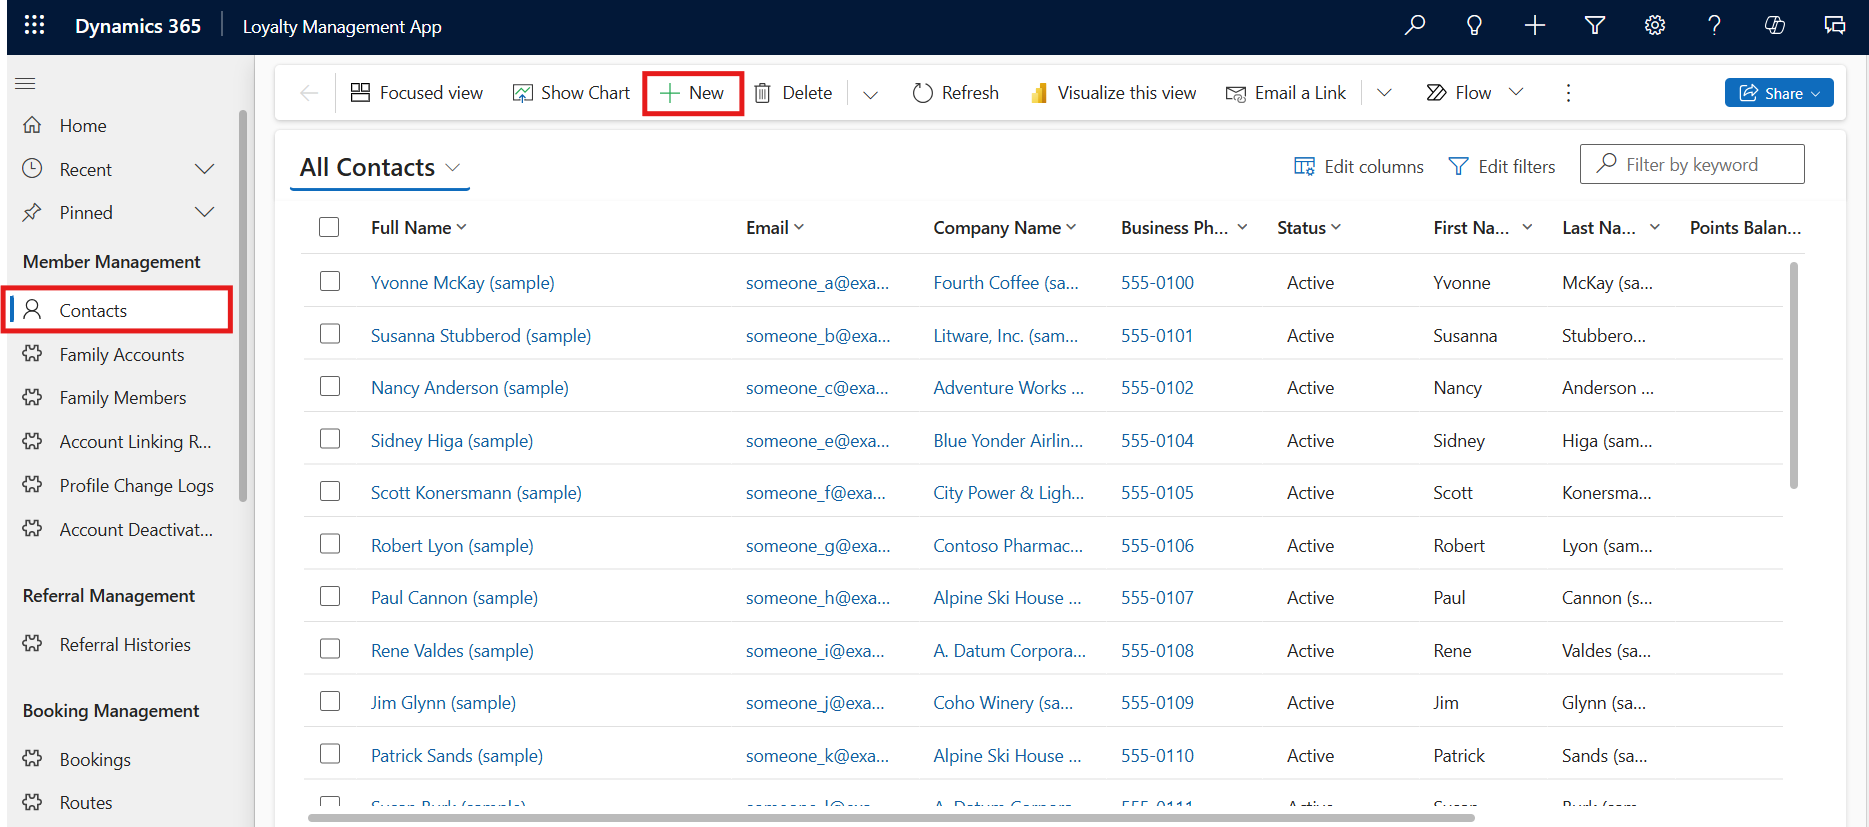
Enter the required contact details, such as Full Name and Description, then save the record.
This action will trigger the Power Automate flow, initiating the approval process.

The flow has triggered successfully.
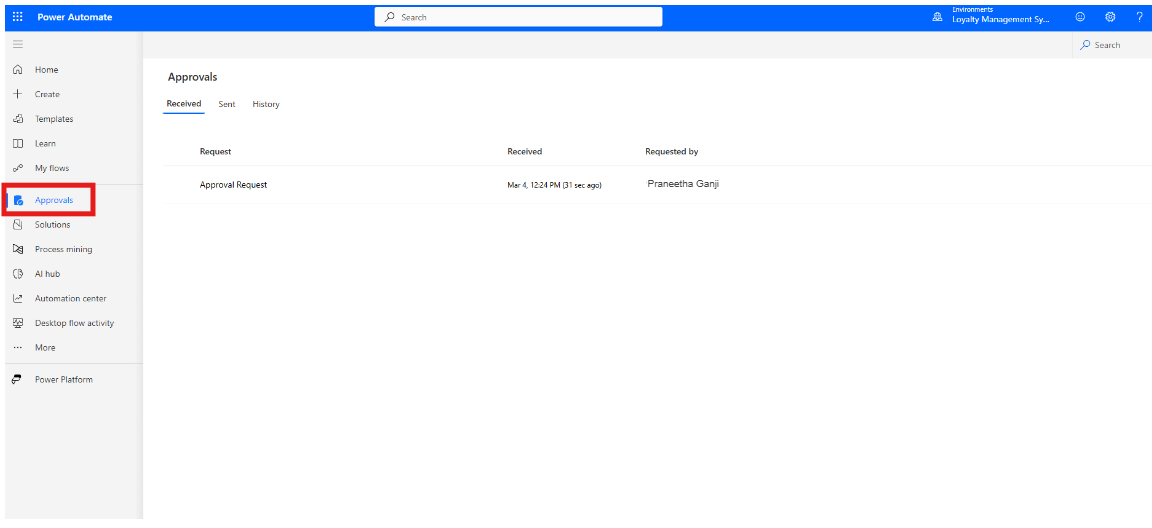
To approve the request, go to Power Automate and navigate to Approvals Section.
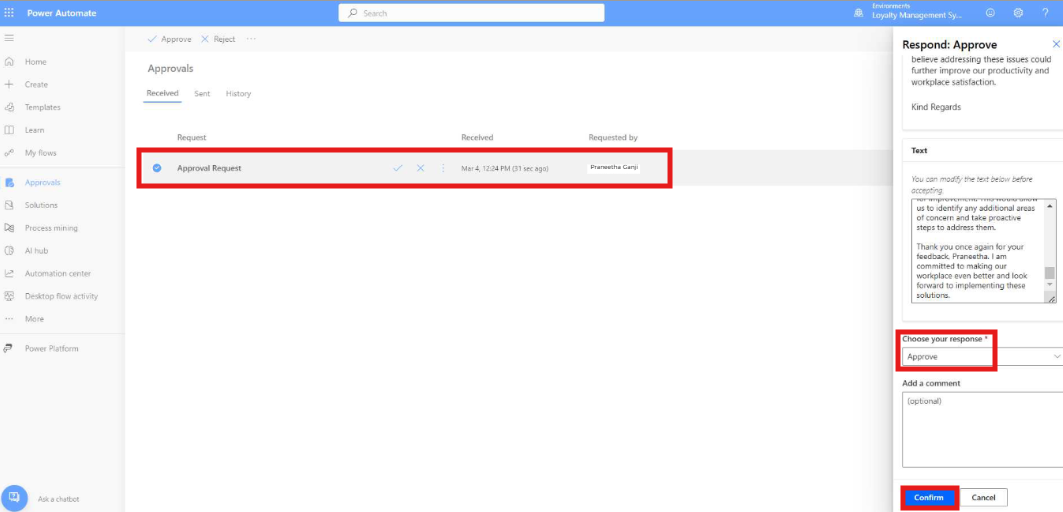
Locate the pending approval request, open it, and check the generated text. If any modifications are needed, update the content. Now, scroll down, choose your response as Approve, and click Confirm.
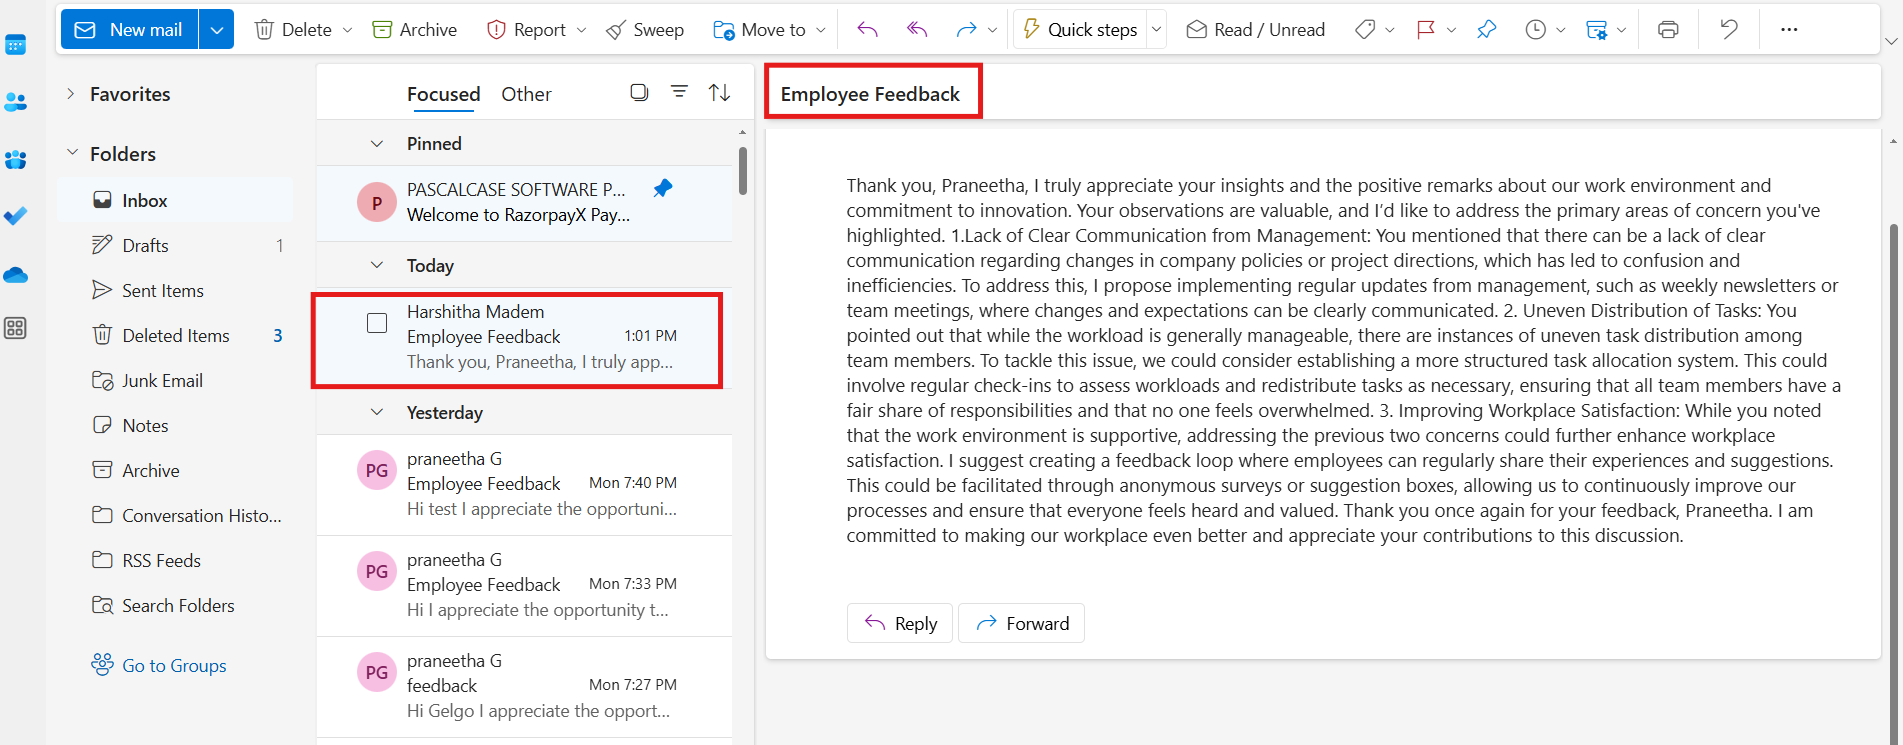
Once the request is approved, the generated text will be sent via email. You can check your inbox to verify that the content matches the AI-generated response from the prompt.
This automated flow simplifies employee feedback management by making sure every response is reviewed and approved before being shared. AI takes care of the heavy lifting, keeping things accurate and efficient. It saves time, reduces manual work, and ensures consistency in the process.
Frequently Asked Questions (FAQ’s):
How can Generative AI help in automating tasks in Cloud Flows?
Generative AI automates repetitive tasks, saves time, and reduces manual effort. It can quickly generate content such as blog posts or reports, provide data insights, and personalize outputs based on user needs, all powered by AI-driven suggestions.
Do I need approval before sending AI-generated content in Cloud Flow?
Yes, you can include an approval step in your Cloud Flow. For example, after generating AI-based content, such as employee feedback summaries, an approval request is sent to the designated approver. The content is only shared once it has been reviewed and approved. If the content is deemed incorrect or needs modification, the approver can request changes before it’s sent out.
Can I use AI prompts in Cloud Flows to create personalized content?
Yes, AI prompts can be used to personalize content in Cloud Flows. You can set up AI to generate tailored responses based on dynamic input, such as user preferences, feedback, or data, ensuring a customized output for each workflow.
How can I integrate AI to summarize large amounts of text in Cloud Flows?
You can use AI prompts to summarize large blocks of text in your Cloud Flows. For example, after receiving a batch of employee feedback or other long-form content, you can create a prompt in Power Automate to automatically summarize the input data. The AI will then provide concise, relevant summaries that can be easily reviewed or acted upon.
Can I use AI to generate reports from data in my Cloud Flows?
Yes, you can use AI to generate reports based on data from your Cloud Flows. For example, by feeding data from a CRM or database into an AI prompt, you can automate the generation of reports, insights, or summaries that are tailored to your needs. These reports can be shared with stakeholders or sent for approval.